 11
11
Glorious Model O- Review
Sensor & Performance »Build Quality
Overall build quality is very solid. There is no rattle when shaking the mouse. When applying lateral pressure, some minor creaking of the shell can be observed. The side buttons can be activated by applying very high force to the left side. Lastly, when slamming the mouse down, no accidental clicks occur.Buttons


Main buttons on the Model O- are very good. There is minor pre-travel and some post-travel, but button firmness and feel result in a satisfying click response notwithstanding. The degree of horizontal button wiggle is as low as it possibly can be for this kind of button design (buttons separated from the main shell). Button stiffness is light. Omron D2FC-F-7N (20M) (OF) switches are used here.

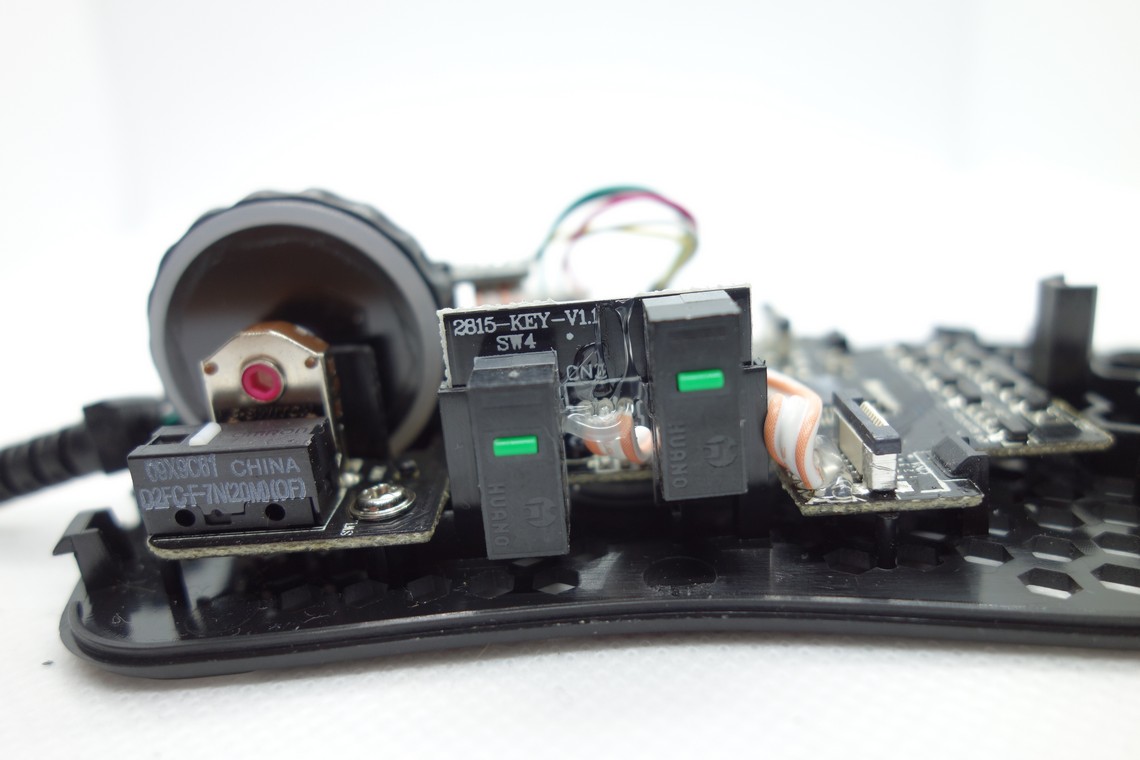
Side buttons are decent. The back button in particular has a good amount of pre and post-travel and feels mushy. Due to the Model O- being such a small low-profile mouse, the side buttons need to be small as well. Keeping this in mind, I consider their size and placement optimal. It's very easy to actuate them just by rolling one's thumb over the side buttons. Huano (green dot) switches are used here.
On the top of the mouse is a button for cycling through the set CPI levels. Its click feel is decent. Another Huano (green dot) switch is used for this one.
Scroll Wheel


The scroll wheel is very good. It's quiet when scrolling, and the steps are fairly tactile and well separated. The middle (scroll wheel) click requires moderate force for actuation. The encoder is a brown F-Switch, while the switch for the middle (scroll wheel) click is yet another Huano (green dot) switch.
Coating
If you know the black matte coating of the Model O then the Model O- coating should be very familiar to you. It's very grippy and doesn't attract fingerprints, dirt or the likes too much. It's easy to clean, and there are no signs of wear left after doing so. All in all, an excellent coating.Button Sound Test
Disassembly

Taking the Model O- apart is quite easy. Remove the two bottom feet and the screws beneath it and the top shell will come off with ease. Some caution ought to be applied though, as the side strip LEDs are connected to the main PCB with very thin ribbon cables. Here's a piece of advice: There's a small lock that needs to be released before the ribbon cable can be removed from the sockets on the PCB. Carefully nudge it open with your fingernails to avoid breaking it. When putting it back together, make sure the ribbon cables are fully clipped into the socket or the LED stripes won't get full power.
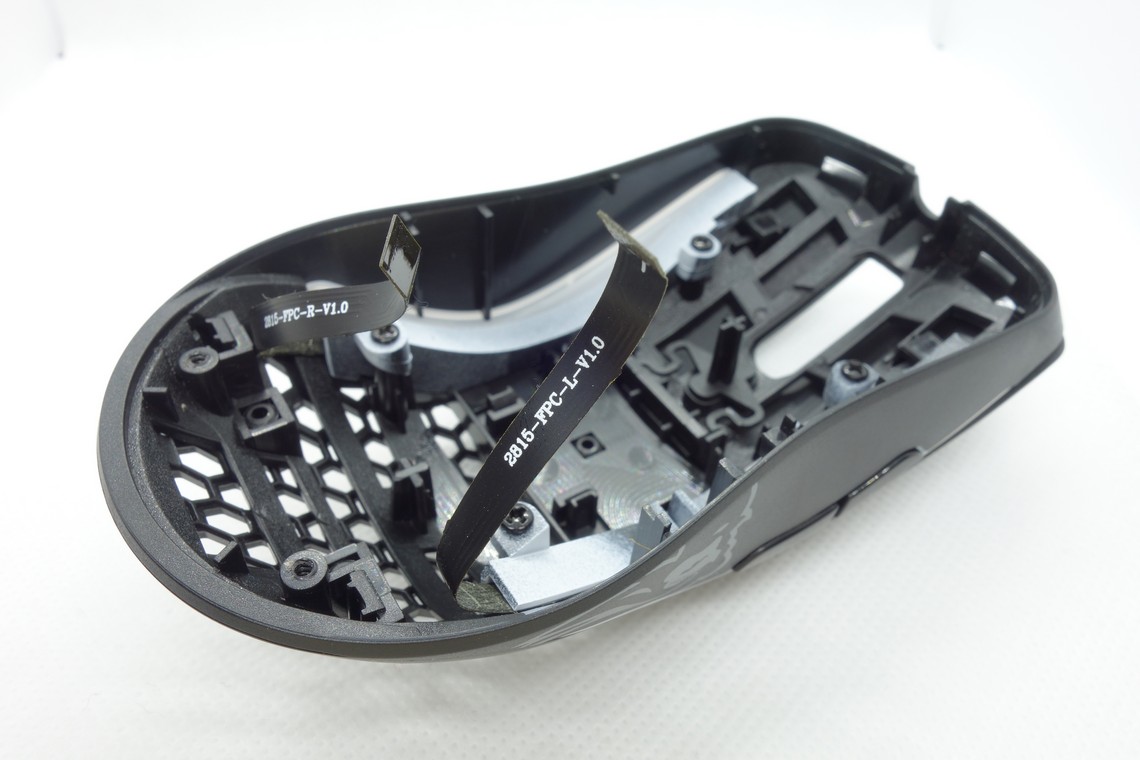
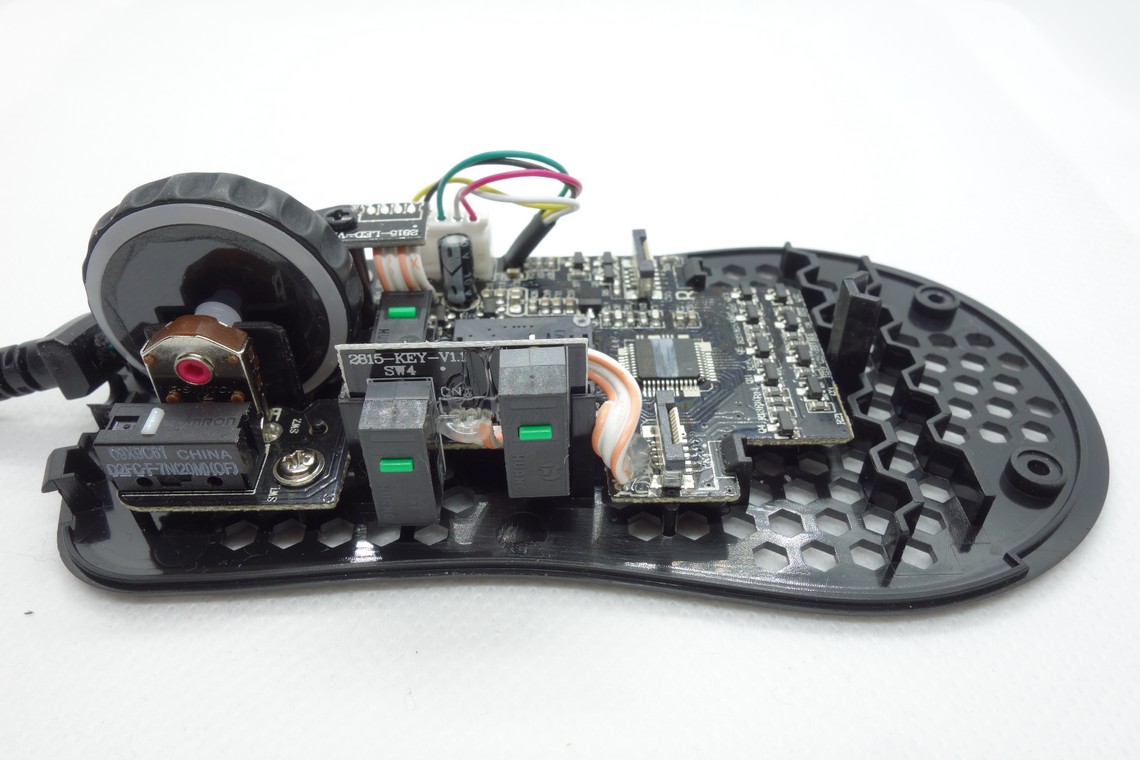
The design is beautifully simple and straightforward. The side LED stripes are screwed into the top shell. The side-button PCB is mounted on to the main PCB, which holds everything else. The main PCB is affixed to the bottom shell by no more than three screws at the front. It is secured, however, by two clips at the bottom end of the PCB. The only thing I'm not exactly a fan of is the excessive amount of glue at the two ends of the cable that connects the side-button and main PCB. The marking on the MCU reads "BY8948-00006," which proved inconclusive in terms of which model it may be.
As for the soldering and general quality of the PCB, I'm unable to find any noteworthy flaws.
Apr 26th, 2024 10:53 EDT
change timezone
Latest GPU Drivers
New Forum Posts
- Meta Horizon OS (21)
- Old high quality PSU, or semi-old mid-quality PSU? (3)
- Secure boot already open help (8)
- What are you playing? (20540)
- Horizontal black lines popping up on my screen? (13)
- Alphacool CORE 1 CPU block - bulging with danger of splitting? (26)
- What's your latest tech purchase? (20351)
- The Official Linux/Unix Desktop Screenshots Megathread (698)
- Which new games will you be buying? (321)
- GoDeal24 Windows 11 Pro 32-bit! (3)
Popular Reviews
- HYTE THICC Q60 240 mm AIO Review
- MOONDROP x Crinacle DUSK In-Ear Monitors Review - The Last 5%
- Alienware Pro Wireless Gaming Keyboard Review
- Upcoming Hardware Launches 2023 (Updated Feb 2024)
- ASUS GeForce RTX 4090 STRIX OC Review
- Thermalright Phantom Spirit 120 EVO Review
- ASUS Radeon RX 7900 GRE TUF OC Review
- FiiO K19 Desktop DAC/Headphone Amplifier Review
- RTX 4090 & 53 Games: Ryzen 7 5800X vs Ryzen 7 5800X3D Review
- NVIDIA RTX 4090: 450 W vs 600 W 12VHPWR - Is there any notable performance difference?
Controversial News Posts
- Windows 11 Now Officially Adware as Microsoft Embeds Ads in the Start Menu (124)
- Sony PlayStation 5 Pro Specifications Confirmed, Console Arrives Before Holidays (117)
- NVIDIA Points Intel Raptor Lake CPU Users to Get Help from Intel Amid System Instability Issues (106)
- AMD "Strix Halo" Zen 5 Mobile Processor Pictured: Chiplet-based, Uses 256-bit LPDDR5X (101)
- US Government Wants Nuclear Plants to Offload AI Data Center Expansion (98)
- AMD's RDNA 4 GPUs Could Stick with 18 Gbps GDDR6 Memory (92)
- Developers of Outpost Infinity Siege Recommend Underclocking i9-13900K and i9-14900K for Stability on Machines with RTX 4090 (85)
- Windows 10 Security Updates to Cost $61 After 2025, $427 by 2028 (84)