 6
6
Ikonik Ra X10 SIM Review
Assembly & Finished Looks »A Closer Look - Inside


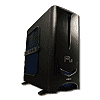
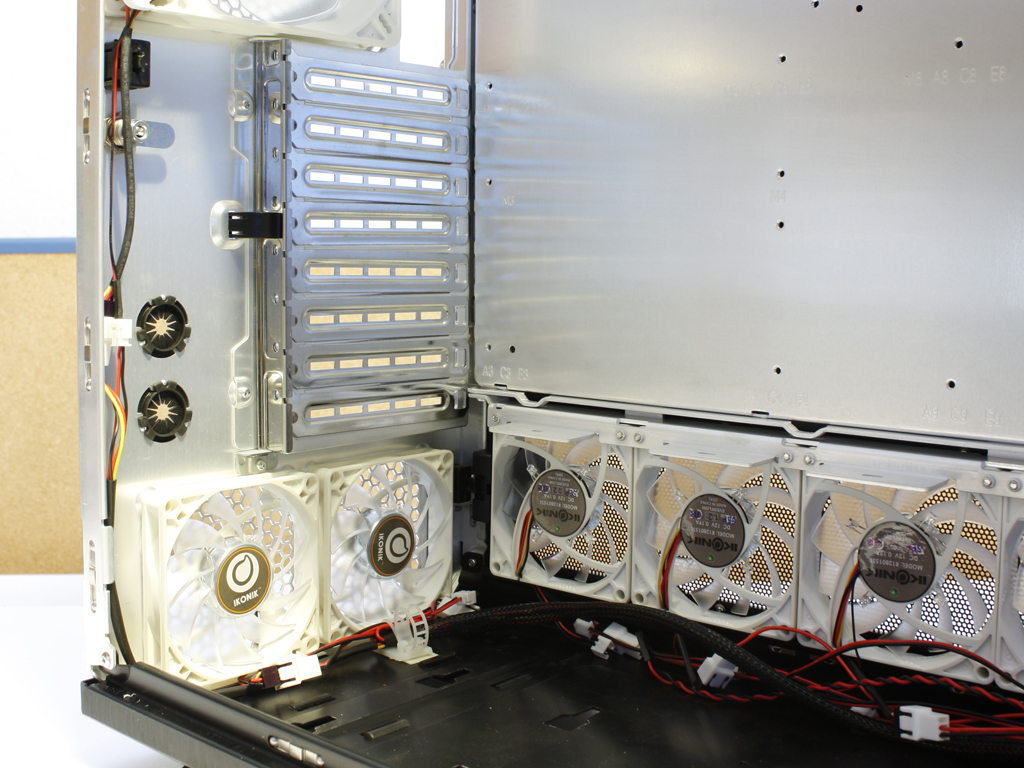
Removing the side panel gives you access to the interior of the chassis. The overall layout does not bear many surprises. The only one being the two additional HDD cages on the bottom of the case. This means that the Ra X10 can hold a total of 10 hard drives. There is plenty of space for large mainboards and graphic cards as the case can take eATX boards. One very positive aspect is the incredibly clean cable routing of all the case fans. Considering there are a 13 cooling fans within the case, the routing of the cables is impressive and takes a big load of your shoulders when installing the parts. This is also due to the fact that this case has a SIM module, as all fans are connected to a PCB and thus require only a single Molex connector for power.

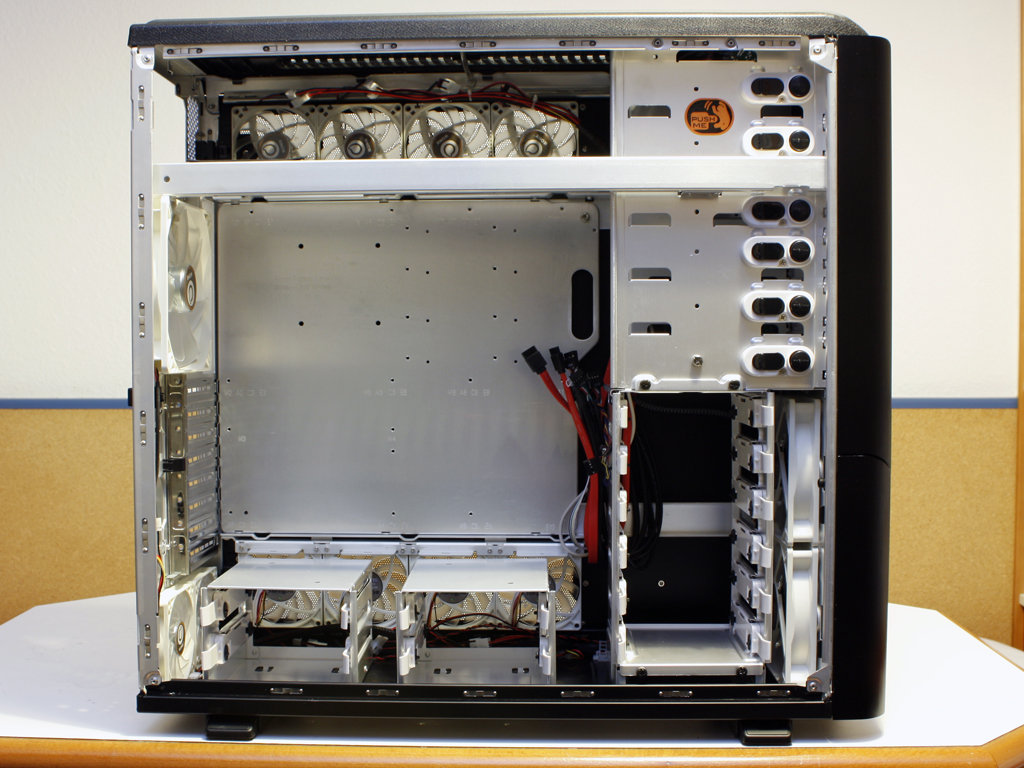
Just as was the case with Zara A20 chassis, which we reviewed here, the hard drive bays employ a rail system which is completely screw-less and also features rubber spacers to stop any vibrations from the drives. The drives can easily be installed while the three cages are left within the chassis, but you may remove the cages if you wish. The external drive bays also features a screw-less system, with a simple lock and release mechanism. It works surprisingly well, but you may want to use a single screw to secure a drive if you plan to move the PC around a lot.


Turning to the rear area of the chassis, starting with the bottom, the two exaust fans can be clearly seen. Above that are the eight expansion slots, which also feature a screw-less clipping system. It is made of metal and plastic, which seems to allow for ease of use and enough force to hold everything in place. You may also secure the expansion cards with traditional screws if required. The large, 140 mm exaust fan features LEDs, just like all the fans within the Ra X10. Ikonik has chosen to limit the way a PSU can be installed to a single possibility and has lined all contact areas to the case with rubber rings or strips to eliminate any vibration in this corner of the chassis as well.


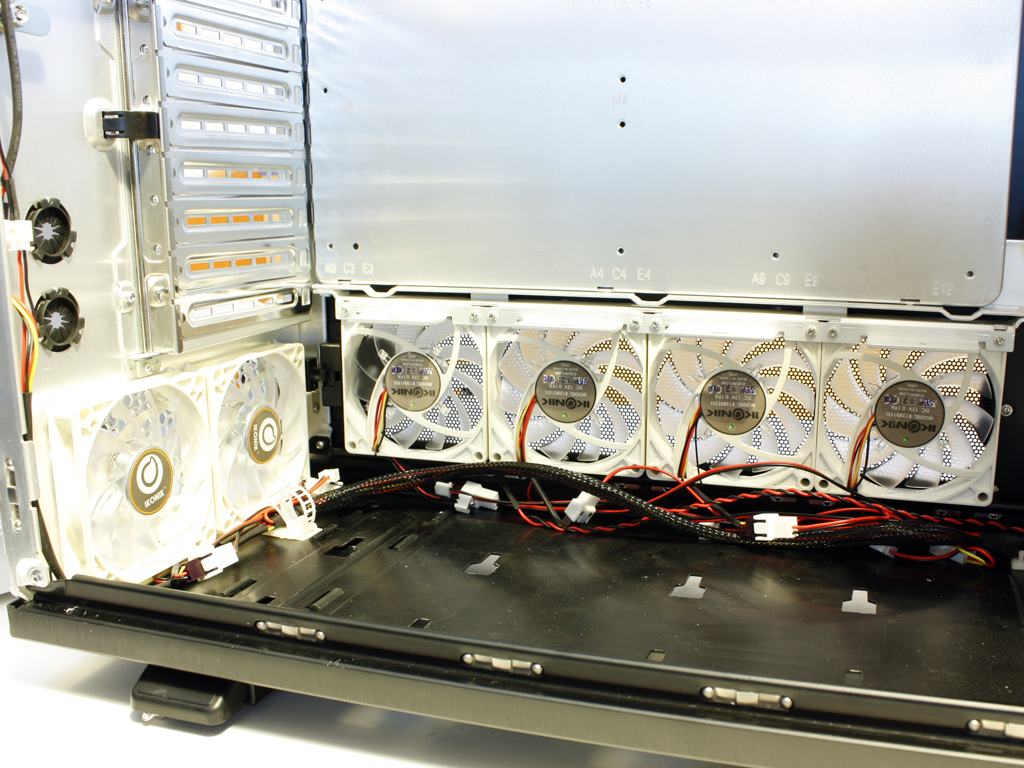

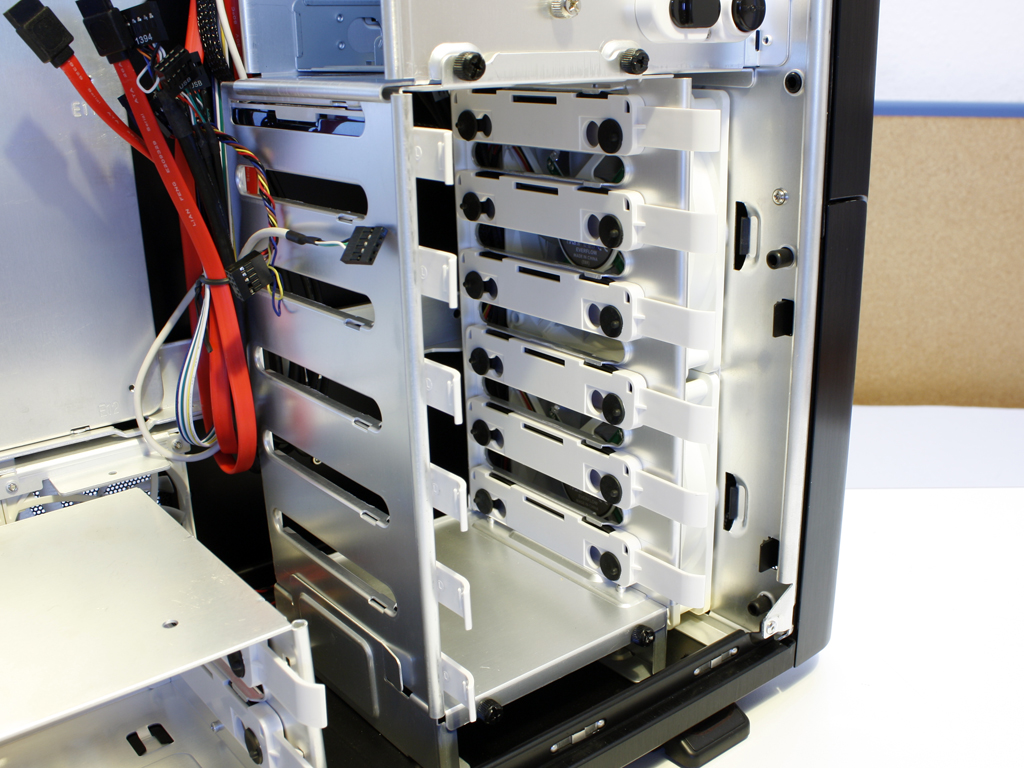
The hard drive cages may be removed by simply unscrewing the thumb screws holding them in place. Doing so reveals the two front intake 120 mm fans and the bottom row of four side fans. The top row can be clearly seen while looking up within the chassis. This brings the total of the cooling fans to 13 - all with separate LED lighting and software controllable in every aspect.

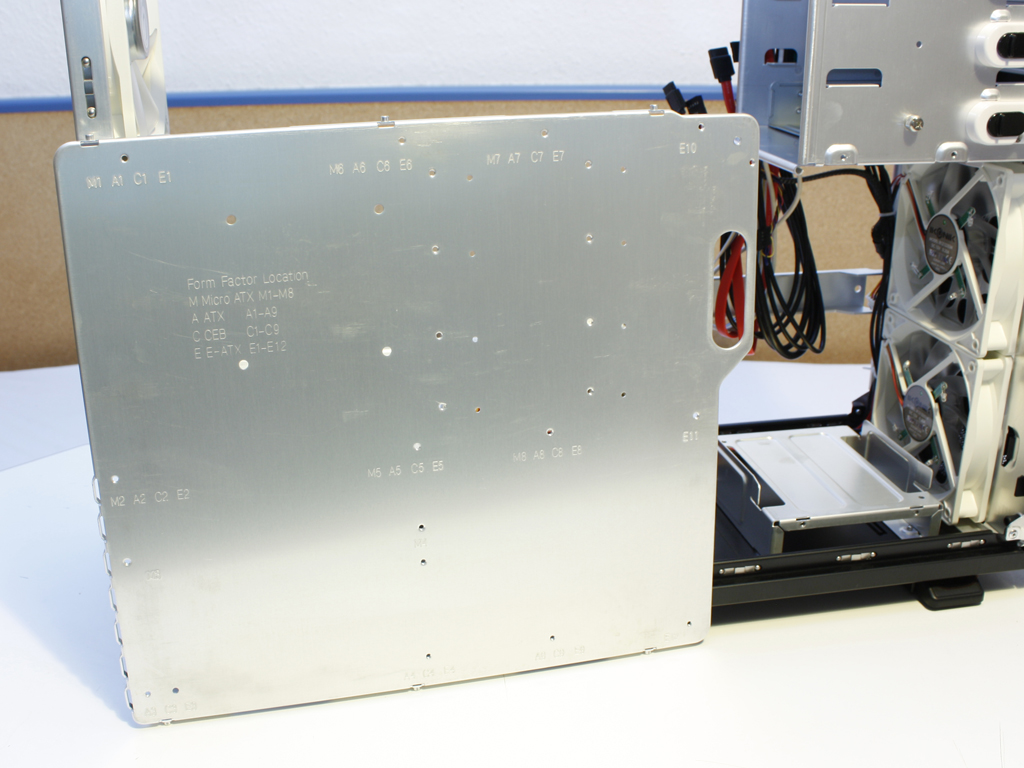
The external drive bay adapter has been placed in the very bottom of the six 5.25 inch expansion slots. This transforms a single such bay for use with an external 3.5 inch device. The mainboard tray may also be pulled out after removing a single thumb screw. This should make it easy to install the mainboard and CPU cooling fan.
May 21st, 2024 06:20 EDT
change timezone
Latest GPU Drivers
New Forum Posts
- 20 Years? (48)
- Would you pay more for hardware with AI capabilities? (47)
- MSI 4070 Ti Super BIOS update? (1)
- What are you playing? (20719)
- TPU's Nostalgic Hardware Club (18522)
- What's your latest tech purchase? (20606)
- SSD-Z doesn't display the core information. (1)
- Why I love Gaming (11)
- Xonotic the-big-keybench demo results (4)
- Ryzen 5 5600x stock overclocked reaching high temps (0)
Popular Reviews
- Ghost of Tsushima Performance Benchmark Review - 35 GPUs Tested
- Ghost of Tsushima: DLSS vs. FSR vs. XeSS Comparison Review
- PNY XLR8 Gaming EPIC-X RGB DDR5-6400 CL32 32 GB Review
- TerraMaster D8 Hybrid Review
- Silverstone Shark Force 120 mm Fan Review
- Homeworld 3 Performance Benchmark Review - 35 GPUs Tested
- Upcoming Hardware Launches 2023 (Updated Feb 2024)
- Lofree Edge Ultra-Low Profile Wireless Mechanical Keyboard Review
- AMD Ryzen 7 7800X3D Review - The Best Gaming CPU
- AMD Ryzen 7 7700 Review - Affordable Zen 4 Powerhouse
Controversial News Posts
- Intel Statement on Stability Issues: "Motherboard Makers to Blame" (269)
- AMD to Redesign Ray Tracing Hardware on RDNA 4 (227)
- Windows 11 Now Officially Adware as Microsoft Embeds Ads in the Start Menu (173)
- NVIDIA to Only Launch the Flagship GeForce RTX 5090 in 2024, Rest of the Series in 2025 (154)
- AMD Hits Highest-Ever x86 CPU Market Share in Q1 2024 Across Desktop and Server (140)
- AMD RDNA 5 a "Clean Sheet" Graphics Architecture, RDNA 4 Merely Corrects a Bug Over RDNA 3 (139)
- AMD's RDNA 4 GPUs Could Stick with 18 Gbps GDDR6 Memory (114)
- AMD Ryzen 9 7900X3D Now at a Mouth-watering $329 (104)