 29
Lian Li Lancool 217 Review
Review System Setup »A Closer Look - Inside

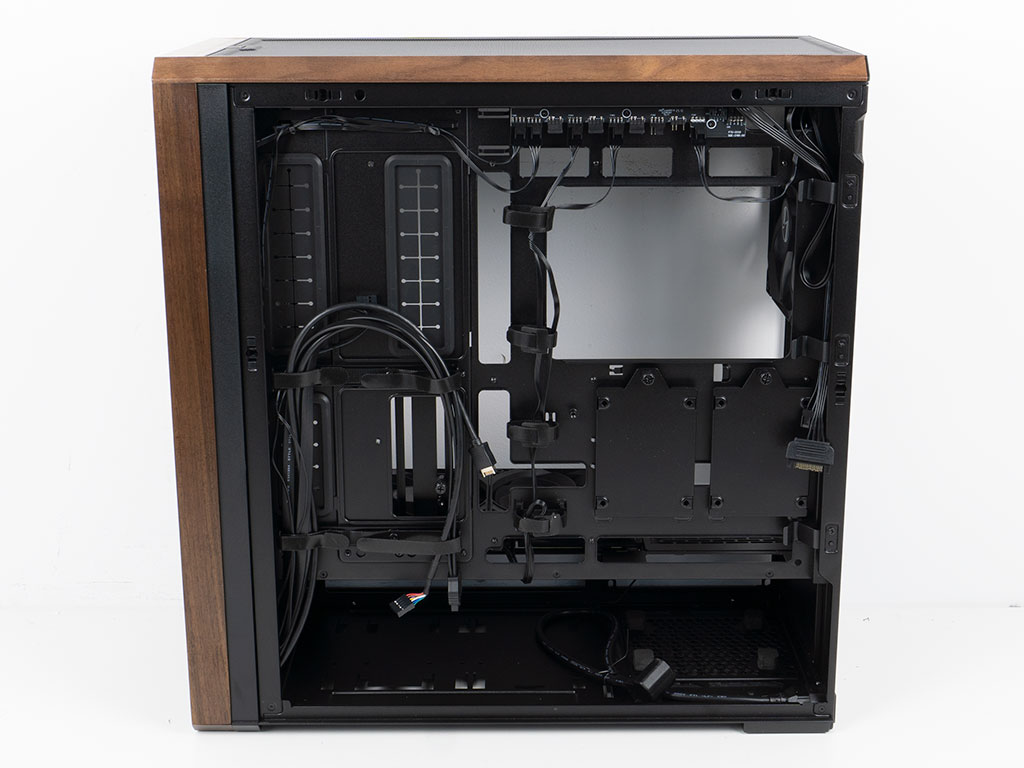
To gain access to the interior of the case, you may simply pull the glass panel off and then unscrew the bottom vented metal cover. On the inside, the layout can be considered traditional in general, but Lian Li has put its own spin on most things. The case is capable of holding BTF based motherboards, so the tray sports all the relevant cutouts.

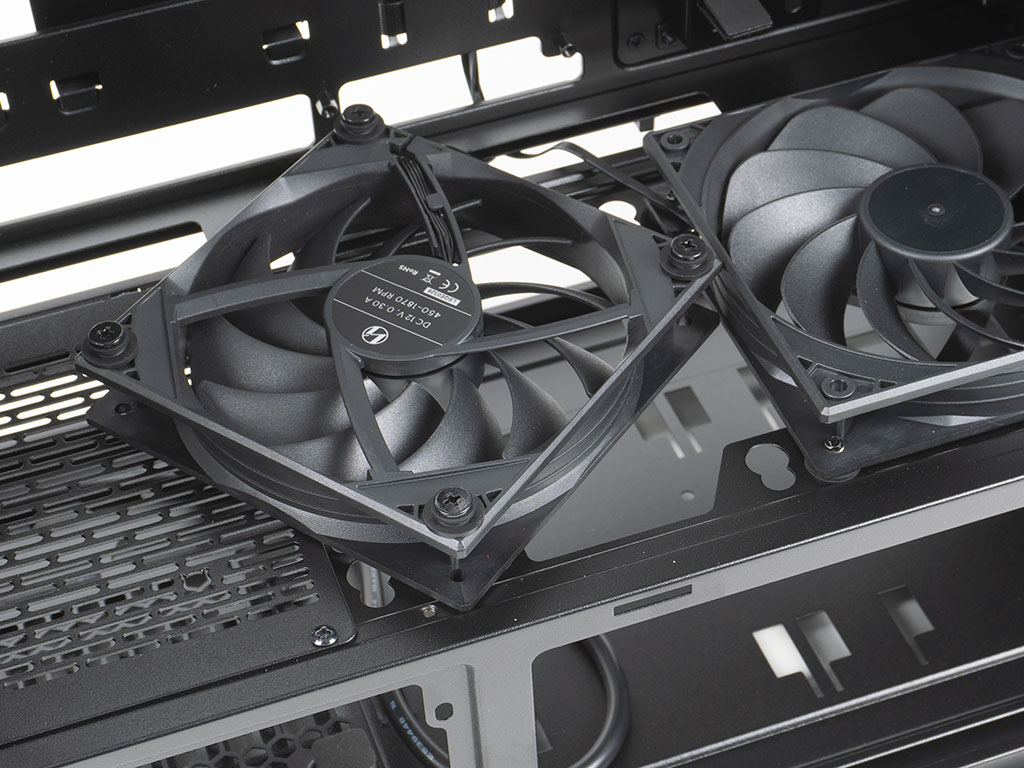
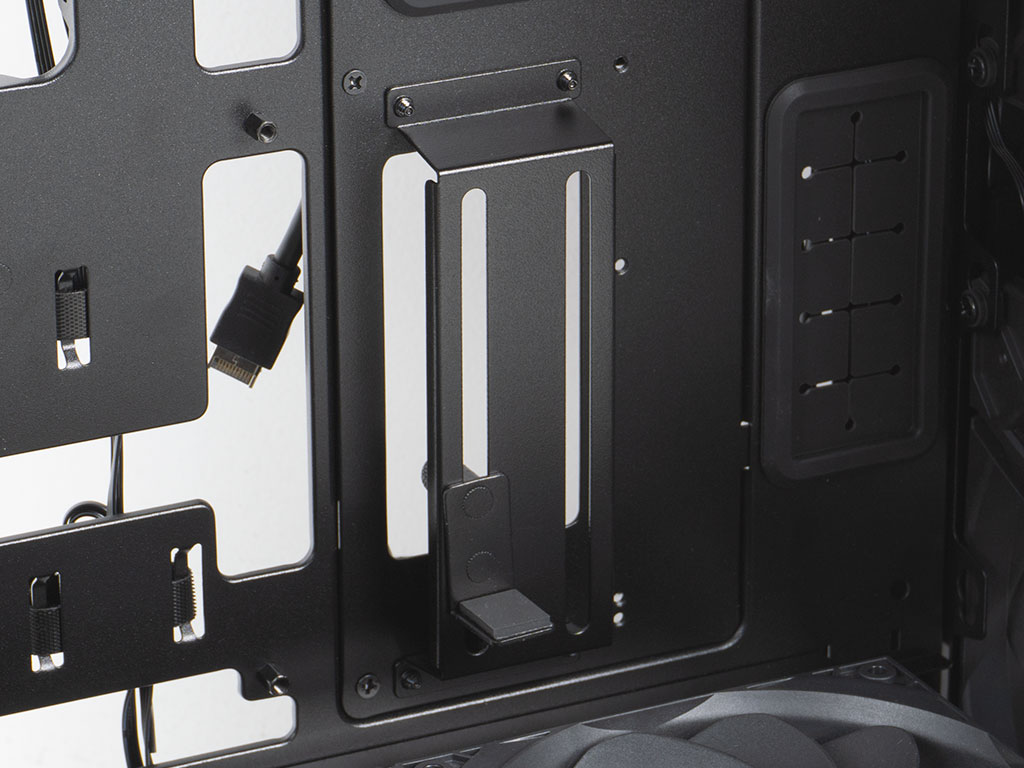
The shroud hides your PSU from view, but also holds two 120 mm fans. These have been strategically placed towards the front of the case, as any fan on top of the PSU would have little to no cooling benefit. By default, that element sports a cover where you may install a 2.5" SSD instead, but you can still opt to plant a third fan here if you like. The units on the shroud as well as the large ones in the front of the Lancool 217 are installed using rubber rings and screws, so that you may easily pop them off and move them around without the need for any tools. If you need the room, you may also flip the screws and rubber rings over and install the fans unto the shroud from below. Above them, there is a GPU support bracket made of metal. It has two possible positions for the rubber lined lip. The whole plate it sits on may also be rotated, so that you can still enjoy cable management when using E-ATX boards.

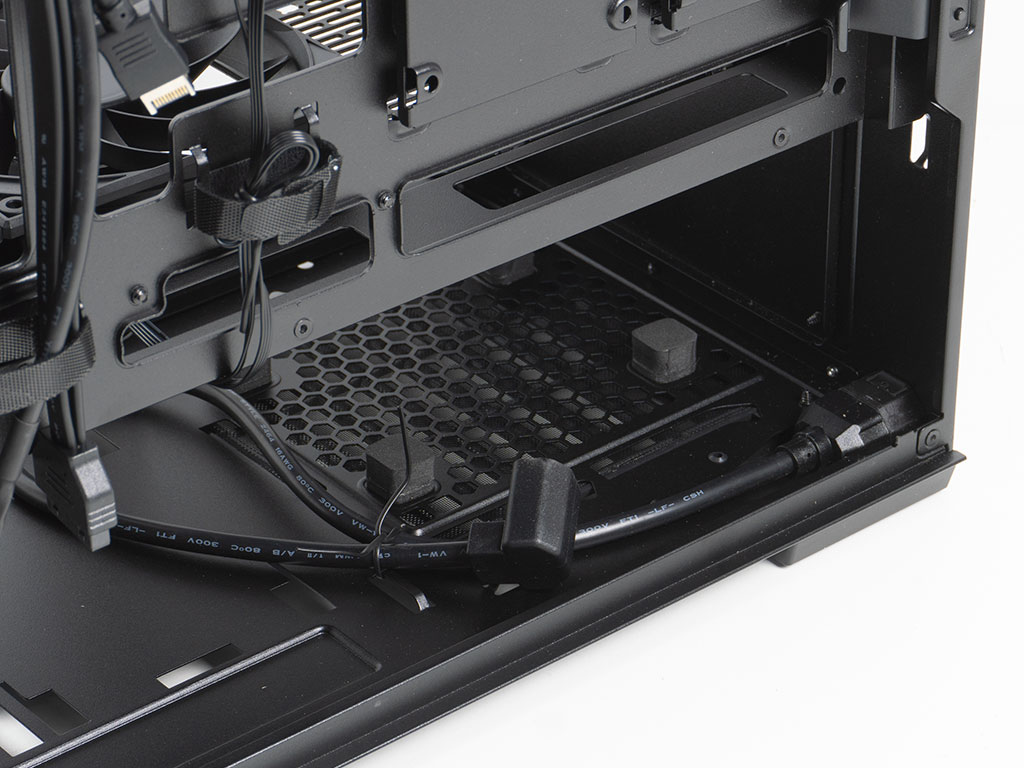
As you can install the PSU rotated inside the Lancool 217, you have mounting holes on the side facing you with the internal power extension essentially pre-routed already and temporarily secured to one of the many hooks for cable management on the floor of the chassis. Four foam tips ensure the power supply is uncoupled from the case frame as much as possible as well. The case is wide enough to allow for a PSU of 180 mm length when rotated, or 220 mm in a traditional configuration.
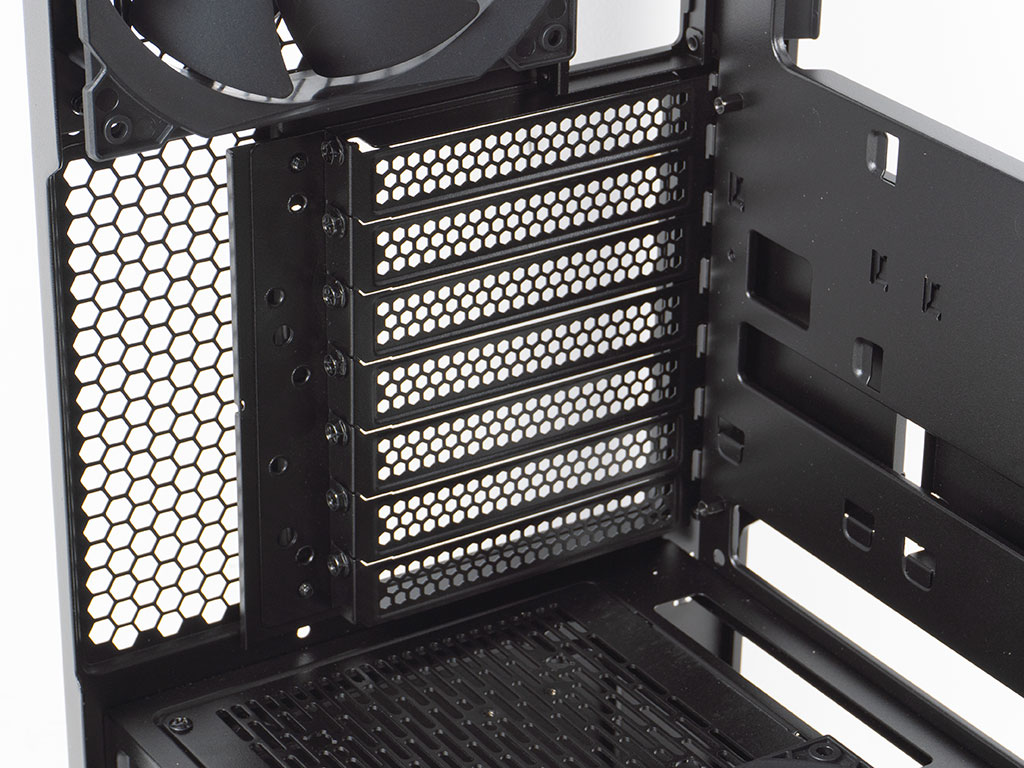
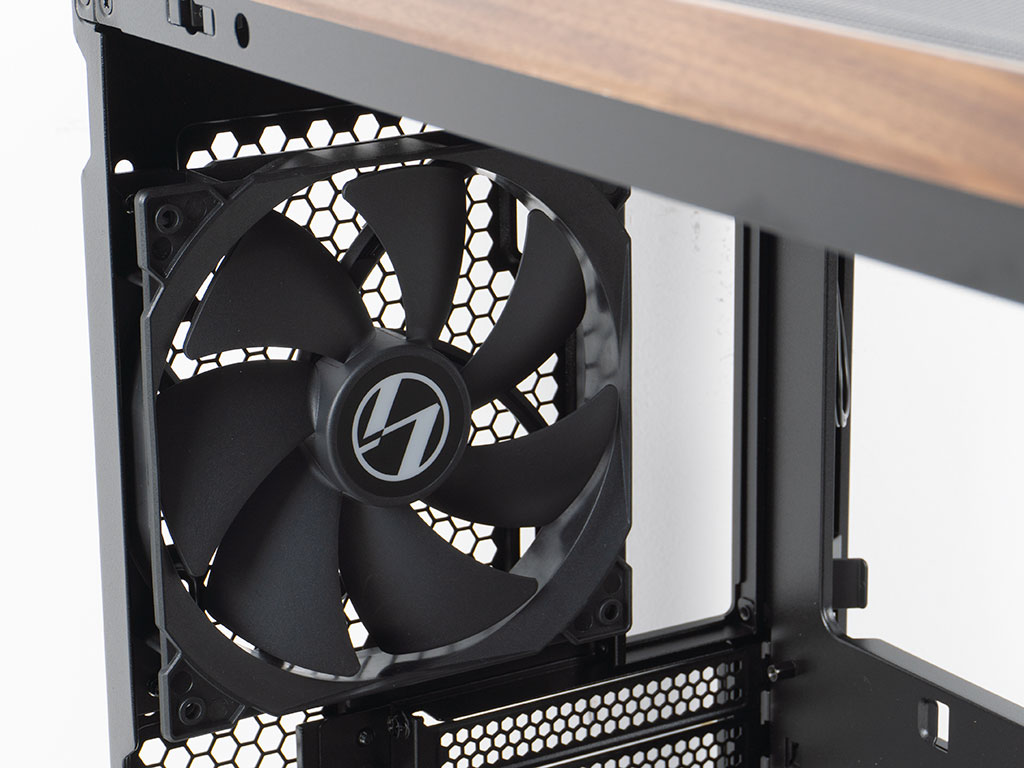
Above that, the seven expansion slots are held in place by easily accessible screws. In the very top, the rear fan is secured using traditional screws, unlike the other units, as that is really the only way to accommodate the elongated mounting holes to allow for vertical adjustment.
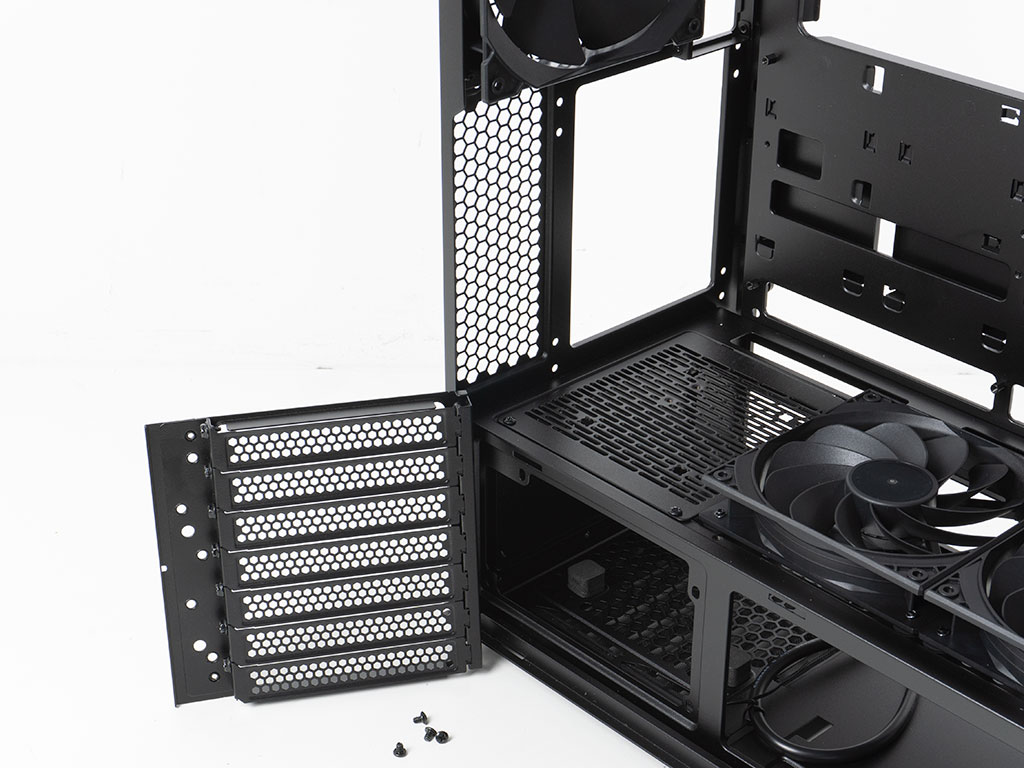
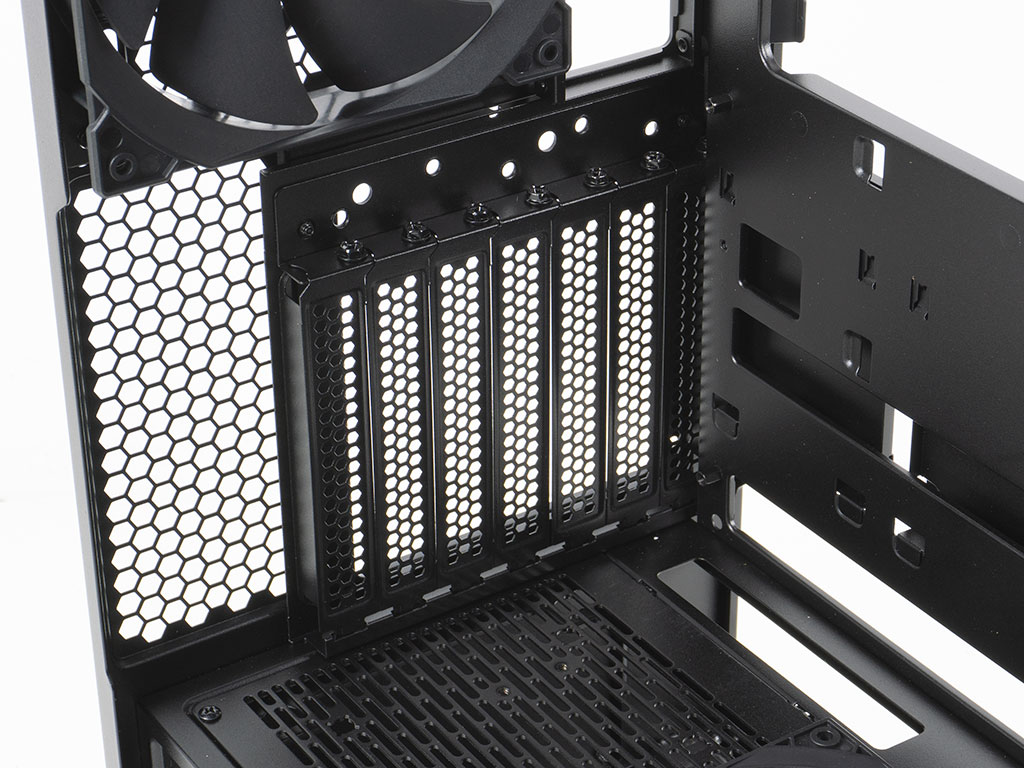
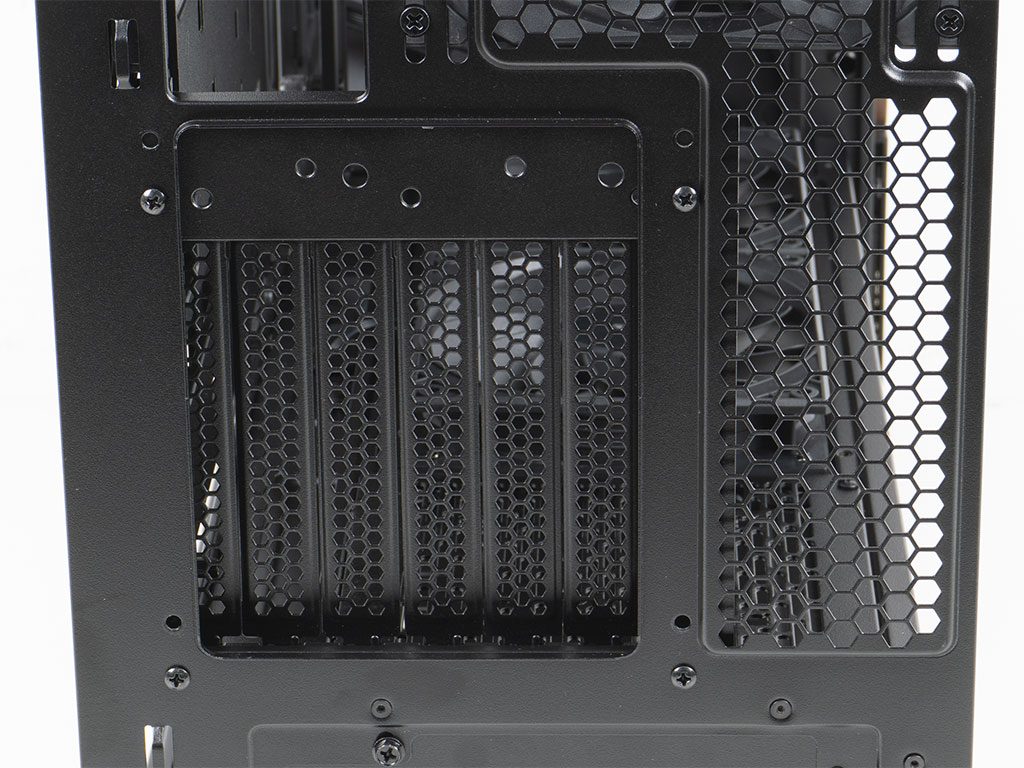
You may easily rotate the expansion slots by detaching the whole expansion frame, then flipping it on its side and using the same screws to securing it back unto the frame of the Lancool 217. By doing so, you have five slots available to you, with the right 3-4 being the ones you would want to use for your GPU.
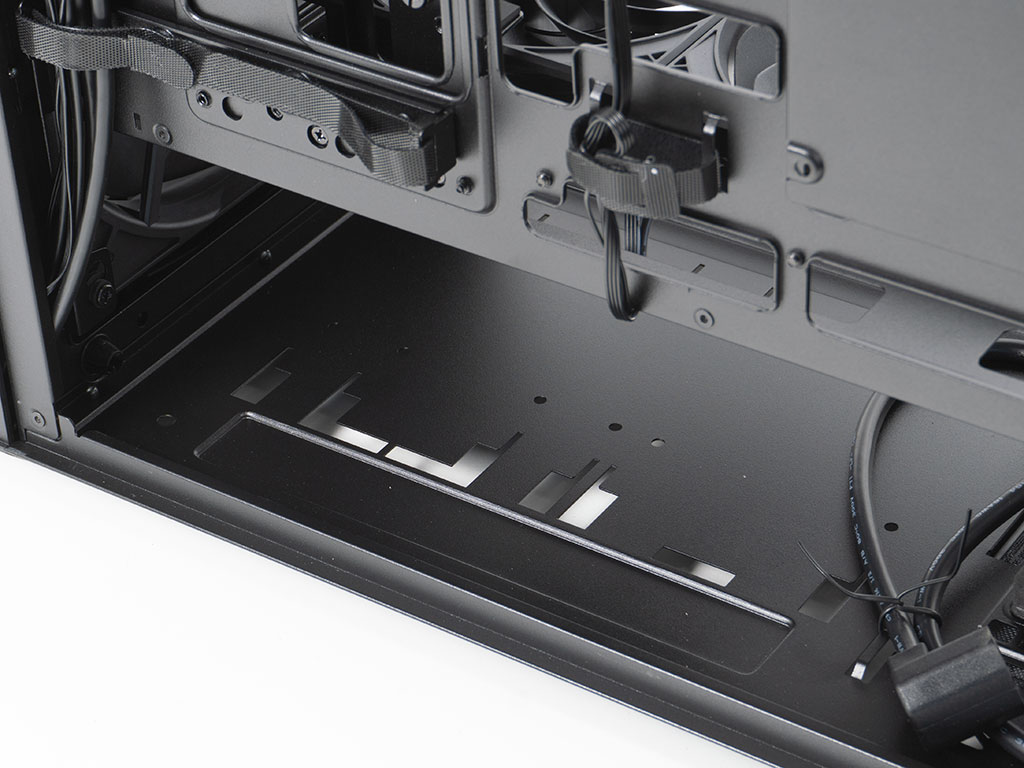
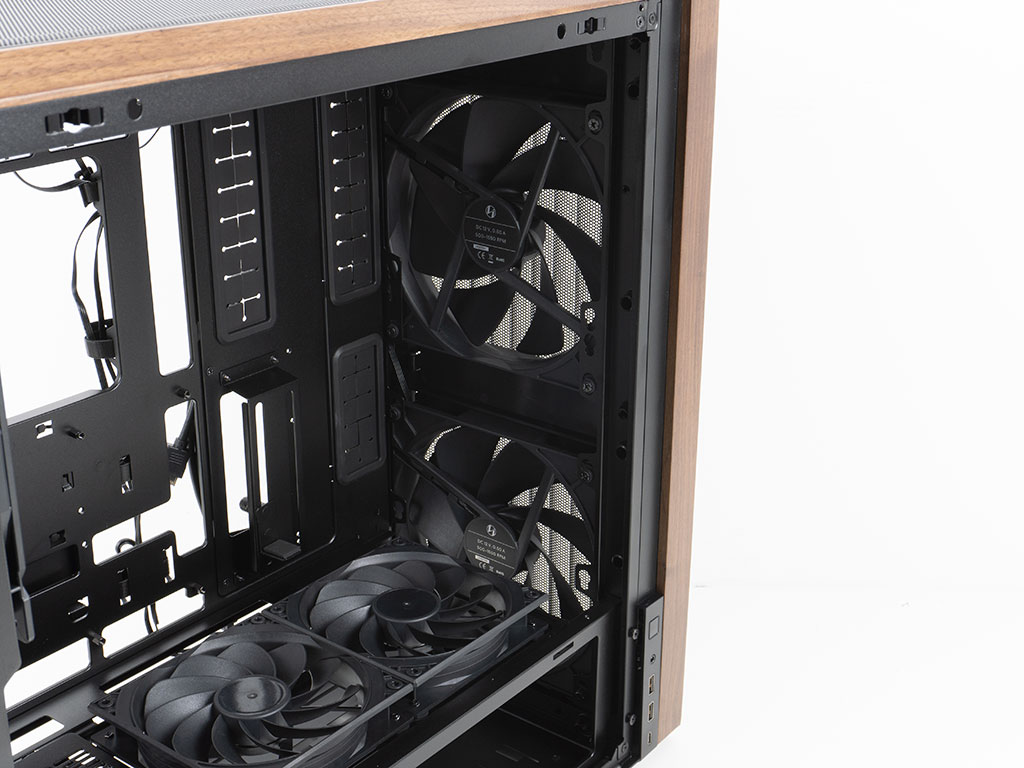
On the floor, the three sets of mounting positions allow for all the flexibility you would need to accommodate your PSU choices, while keeping at least three drives available to you. Looking at the front from within, the two fans are hugged by solid pieces, so airflow is focussed through these large cooling units.


You may pop the two covers off and easily move the two 170 mm units to the very top. This reduces airflow below the shroud and focuses both to push air across the CPU and GPU. While Lian Li advertises this as "Fan CPU Mode" on the box, it will likely not make a massive difference in real world cooling performance.
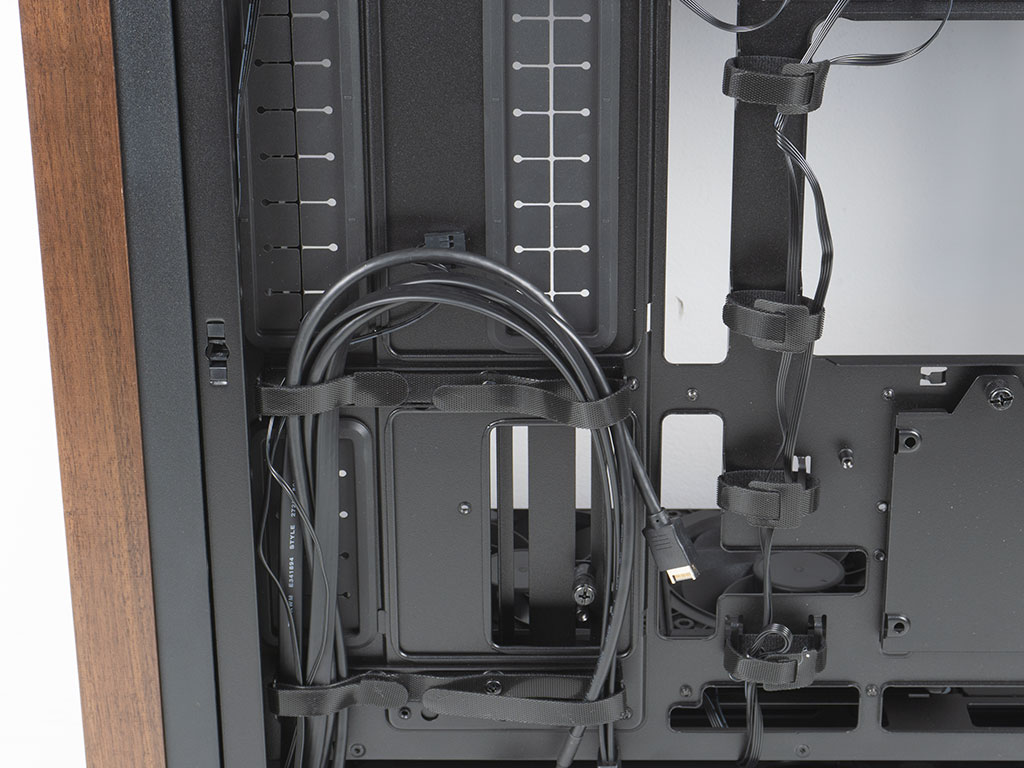
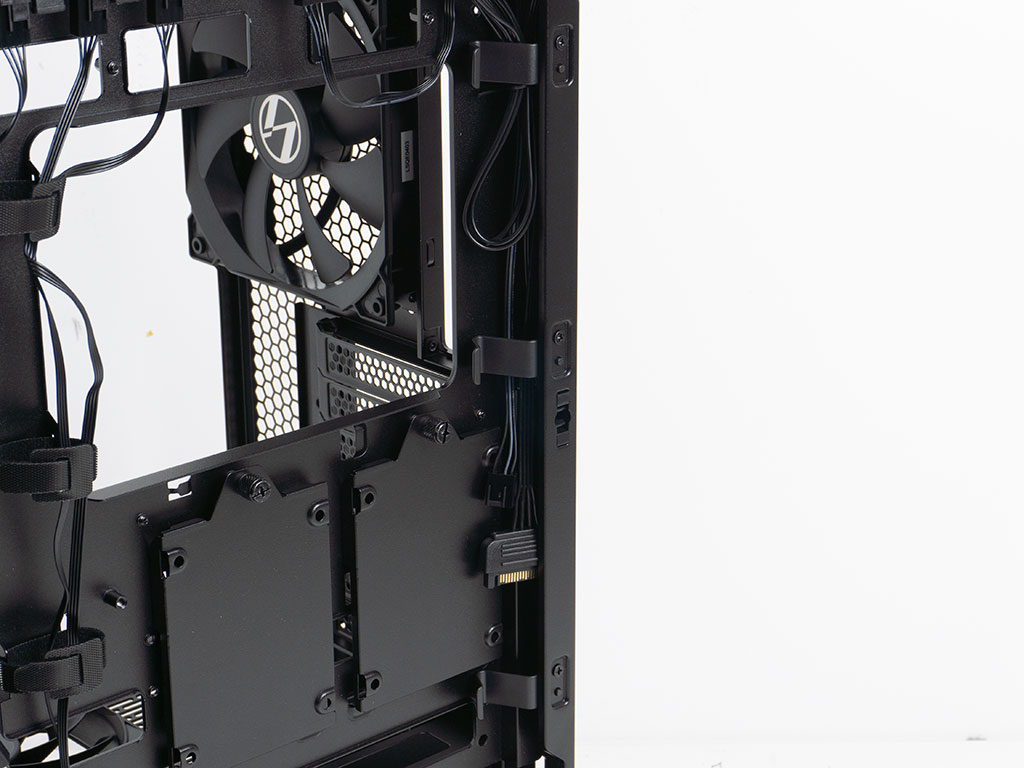
One thing that is really worth noting is the fact that the Lancool 217 cable management is not just organized, but actually pre-routed, which is wonderful to see. On top of that the chassis sports lots of zip tie hooks, grommets and metal backed, Velcro cable channels. On the back edge behind the motherboard tray, you will also find four flexible plastic clips to hold wires as well.
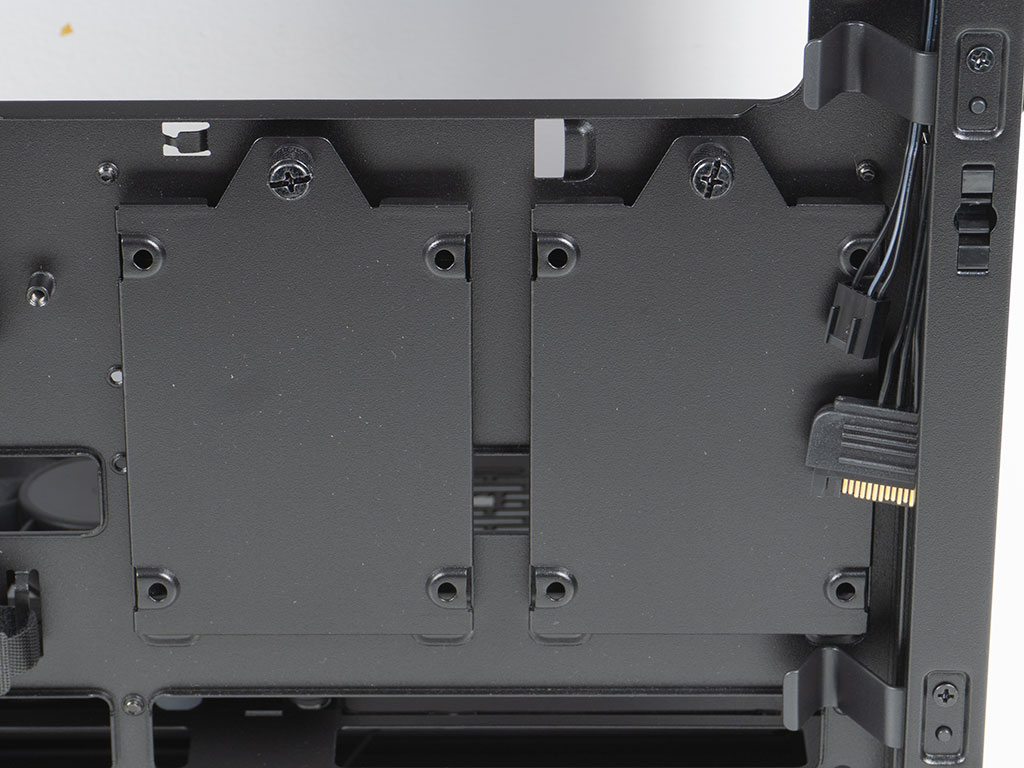
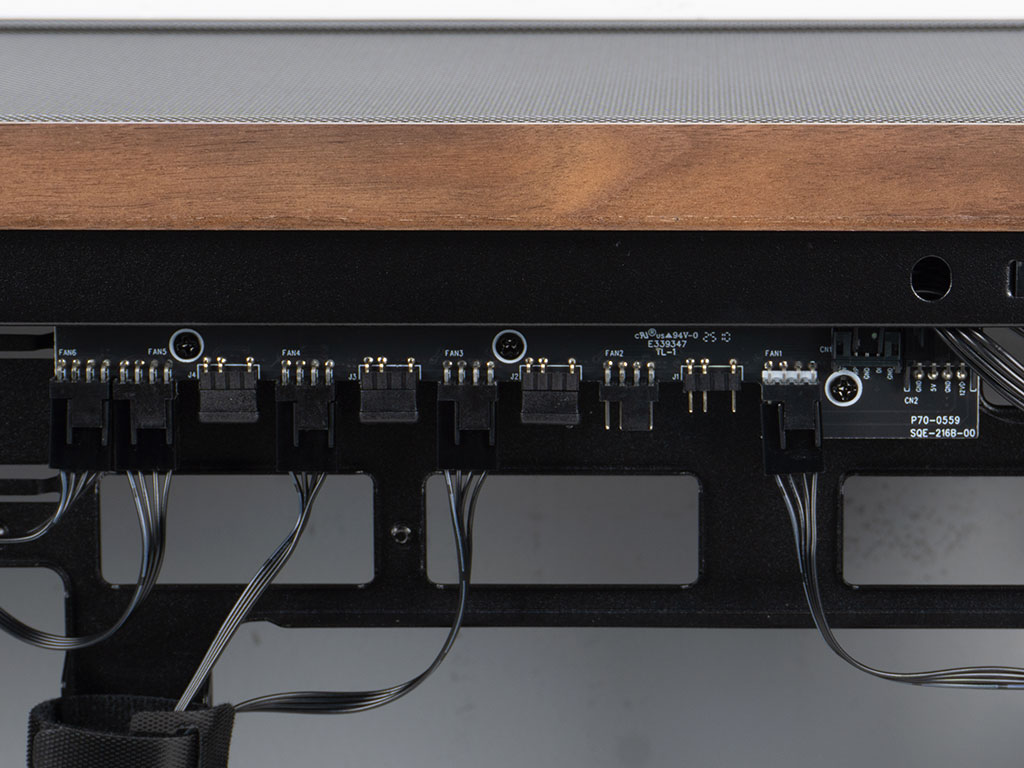
In addition to the two HDD cages, which can hold a maximum of six drives (four 2.5" and two 3.5"), there are also two individual 2.5" trays on the backside of the motherboard tray. Even when opting for an ATX back connect equipped motherboard these will remain available to you. Only if you opt for a microATX back connected board will you have to sacrifice one and rotate the remaining one. At the very top you will find the fan and ARGB hub. All the five pre-installed cooling units are already connected, leaving you with one PWM header. As the Lancool 217 lacks any ARGB elements, you still have all four ports available to you. For some reason, one of them in our sample did not come with a protective cap, but that is not a big deal at all.
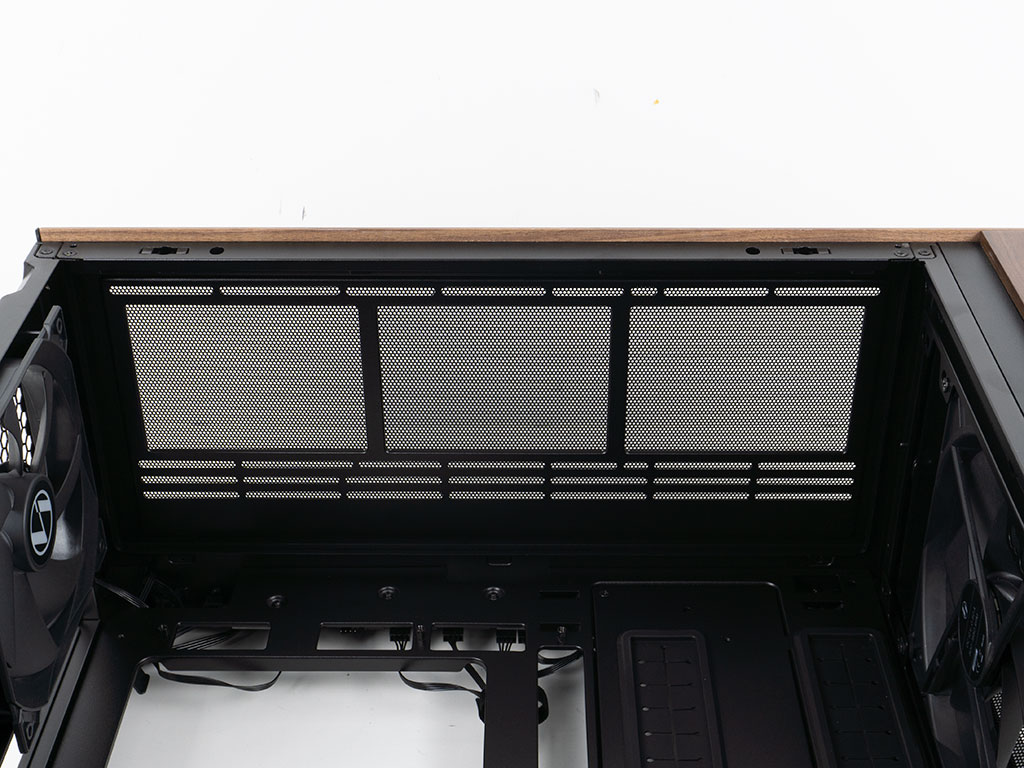
Taking a quick look at the ceiling, it is all about cooling, with plenty of clearance so you won't have to worry about your liquid cooling setup colliding with your system components. In fact, Lian Li goes a step further and clearly communicates that you have to stick to 60 mm or less for 280 mm and a whopping 85 mm for 360 mm setups within the Lancool 217.
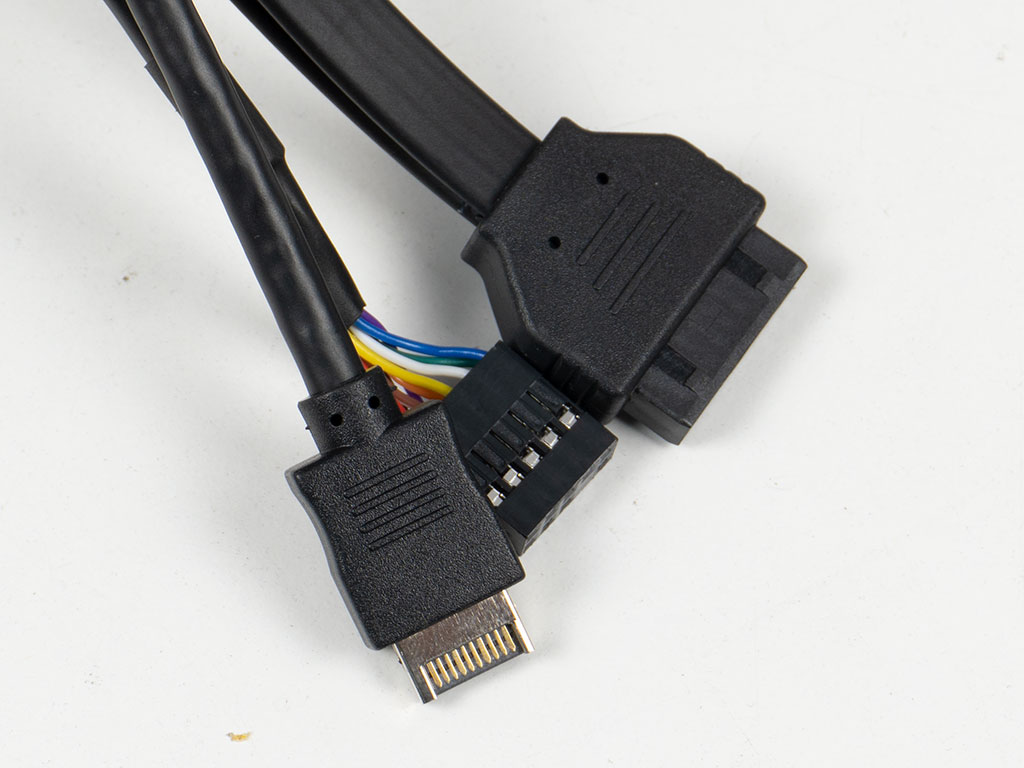
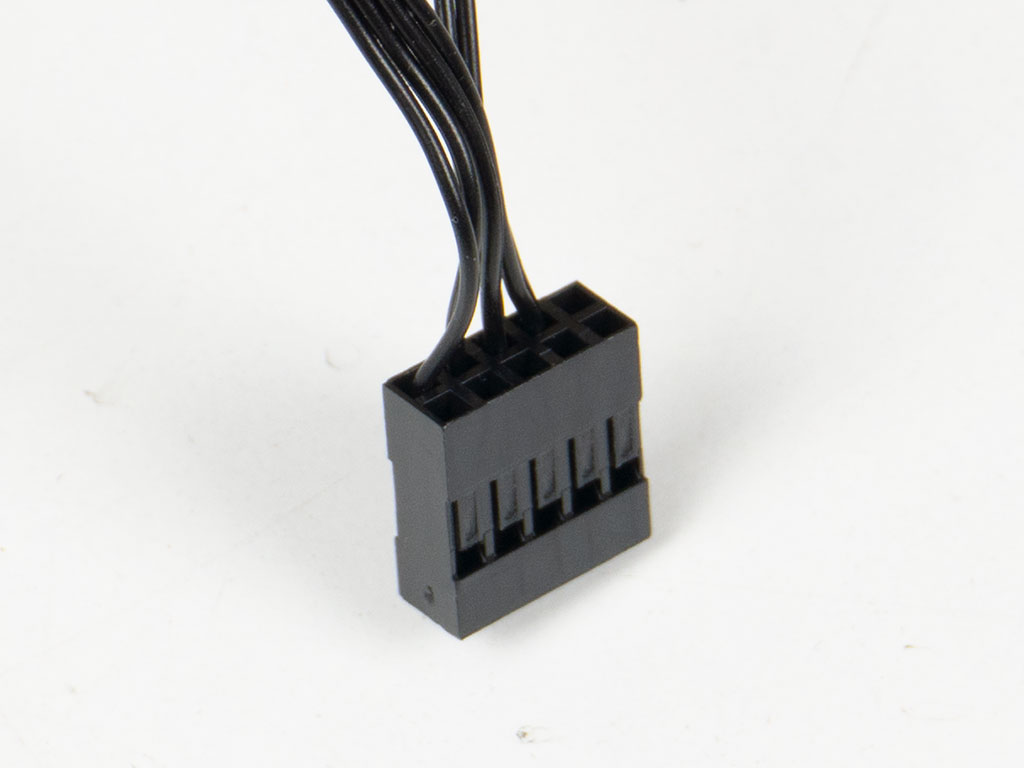
All the I/O wiring inside the Lancool 217 is black but only the USB-C lead employs a flat-band cable for easier cable management and tighter bend radii. On the upside, you will find a unfied motherboard header plug, to make that step of the assembly process as painless as possible.
Nov 19th, 2026 13:05 CST
change timezone
Latest GPU Drivers
New Forum Posts
- How to prevent OLED burn damage due to PC freezes or power outtages? (18)
- My Final Barrier to Exclusively Using Linux has Fallen (Azure Virtual Desktops) (10)
- Anthrophics IPO (5)
- Windows HDR on = Tinted colors (8)
- Dual B70 or Dual R9700 Pro on Linux (10)
- GTA VI (5)
- FINAL FANTASY XIV: Dawntrail Official Benchmark (226)
- Help with fixing Overclock (11)
- Why my RX 6800 XT read that it operate at x8 not x16 ? (47)
- Got the EOL 32GB TridentZ 6000 CL26 1.4V (10)
Popular Reviews
- Acemagic Retro X3 Review
- Ugreen NASync DXP4800 GT Review
- Upcoming Hardware Launches 2027 (Updated Nov 2026)
- Pulsar Office Tour & First Look at P1 Dual-Sensor Mouse
- AMD Zen 6 Technical Deep Dive
- Biwin Black Opal NV7400 2 TB Review
- Sapphire Radeon RX 7700 XT Pure Review
- Sapphire Radeon RX 7700 XT Pulse Review
- AMD Ryzen 7 9800X3D Review - The Best Gaming Processor
- Chieftec Iceberg PRO 360 DARK Review
TPU on YouTube
Controversial News Posts
- NVIDIA Co-Founder and CEO Jensen Huang Officially Resigns (484)
- Report: Jensen Huang Eyes NVIDIA Comeback (221)
- Open Letter Asking NVIDIA to Reinstate Jensen Huang Passes 115,000 Signatures (184)
- OpenAI CEO Argues Home PCs Waste the World's Limited DRAM Supply (152)
- NVIDIA Launches Investigation Into Jensen Huang's Relationship With Suspected Chinese Spy (136)
- Intel "Raptor Lake Next" 16-Core and 20-Core CPUs Surface (130)
- Legendary Game Studio BioWare Shuts Down Following EA Layoffs (104)
- Dell CEO Says the Memory Shortage Will Get Worse in 2027 (95)