 29
Lian Li Lancool 217 Review
Thermal Stress Test »Assembly


Adding a back-connect motherboard is straight forward, with plenty of room around the ports in the back. Even with the fans on the shroud, you can still reach the screw holes by using a skinny screwdriver. Adding a GPU is just as easy, as the expansion slot screws are contained with the case, with more than enough room for even the largest graphics cards.
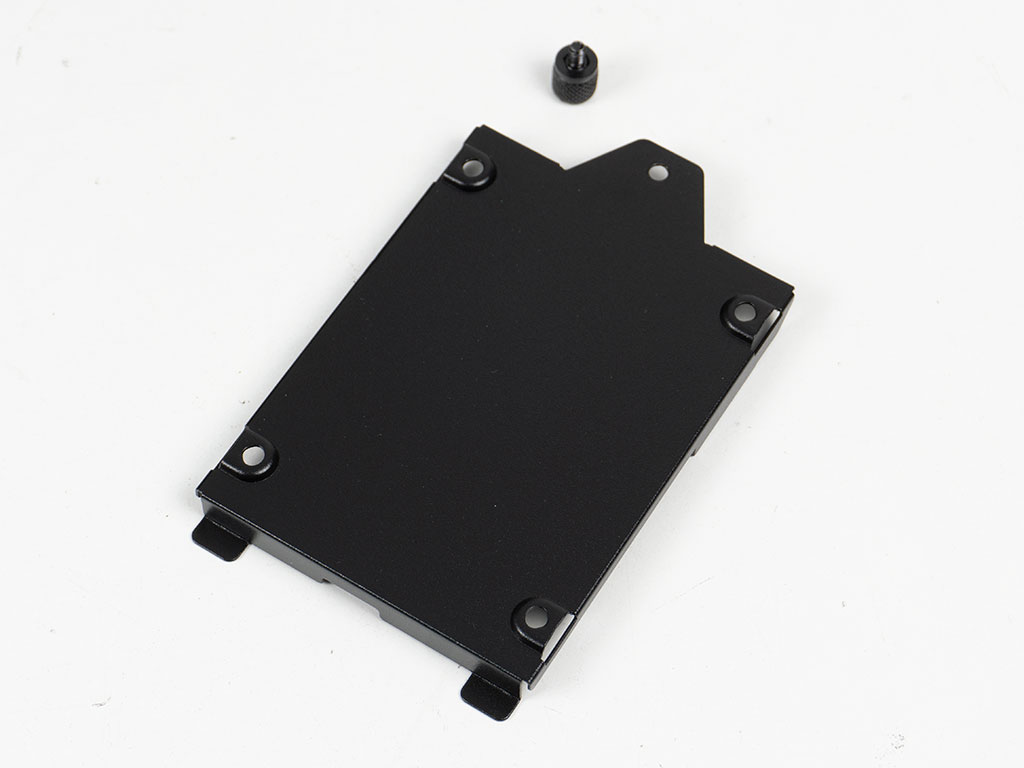
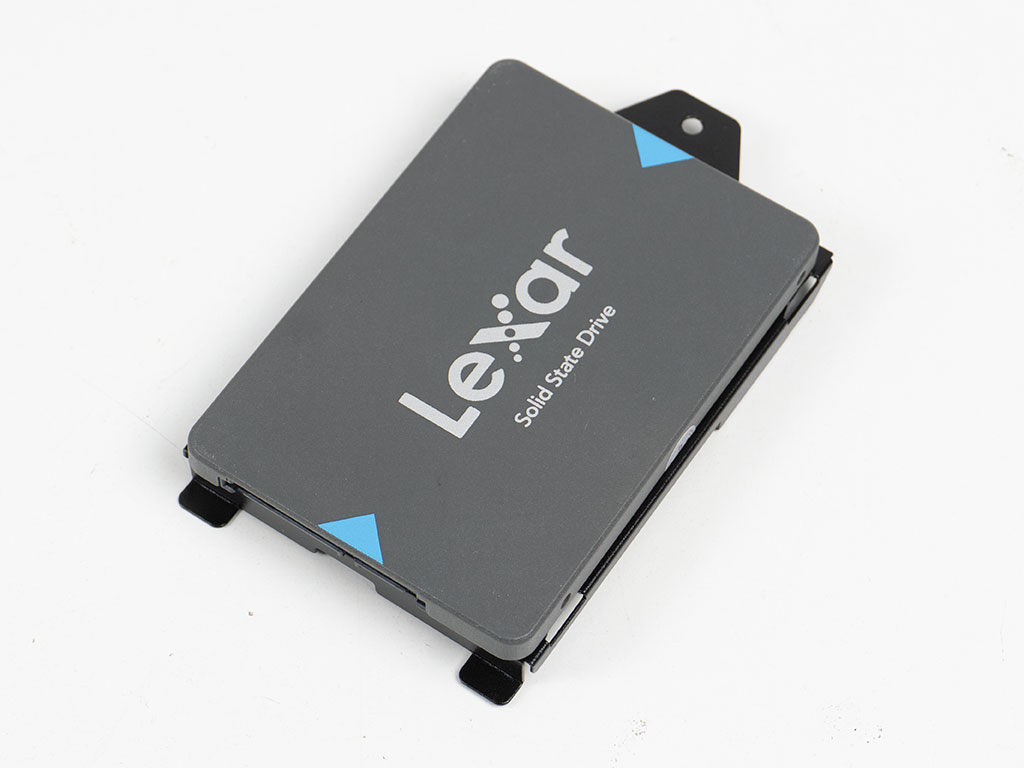

To add 2.5" drives to one of the two individual trays, it has to be detached from the body first. Interestingly enough, these don't feature captive thumb screws, which would have been the perfect choice. That said, the thumb screws used here are larger than usual and utilize rubber rings as an additional anti-vibration measure. To install SSDs, simply place the storage unit on top of the plate and secure it with the provided screws. Once that is done, the whole tray may be mounted back unto the chassis body with the connectors of the drives facing downward.
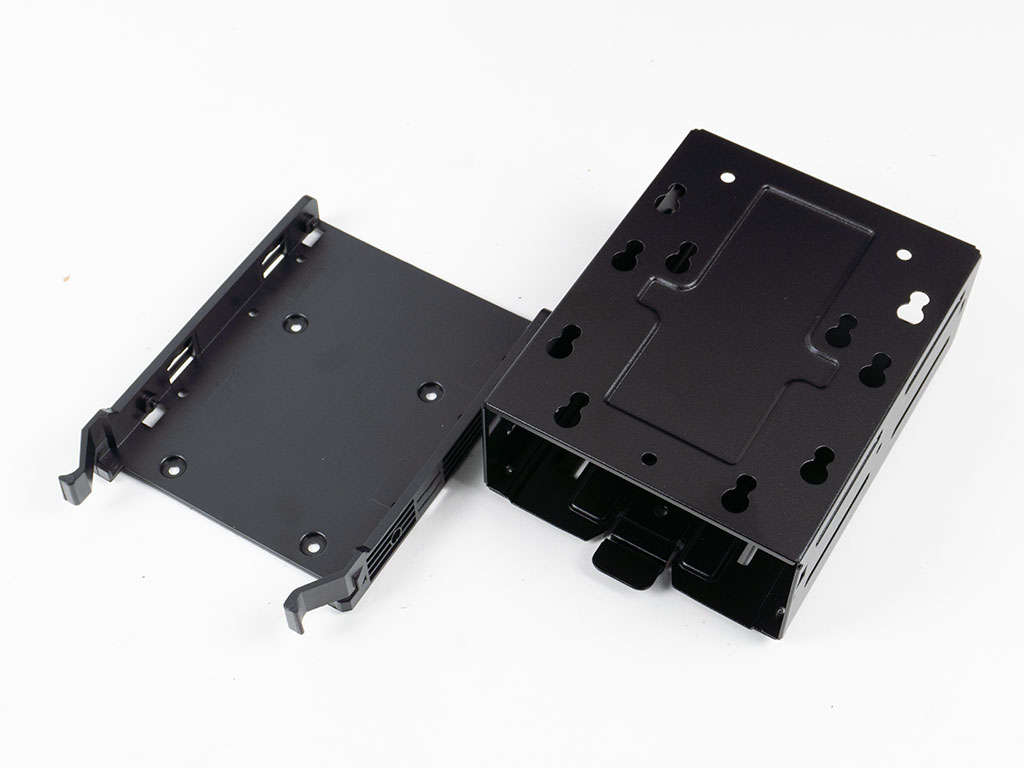
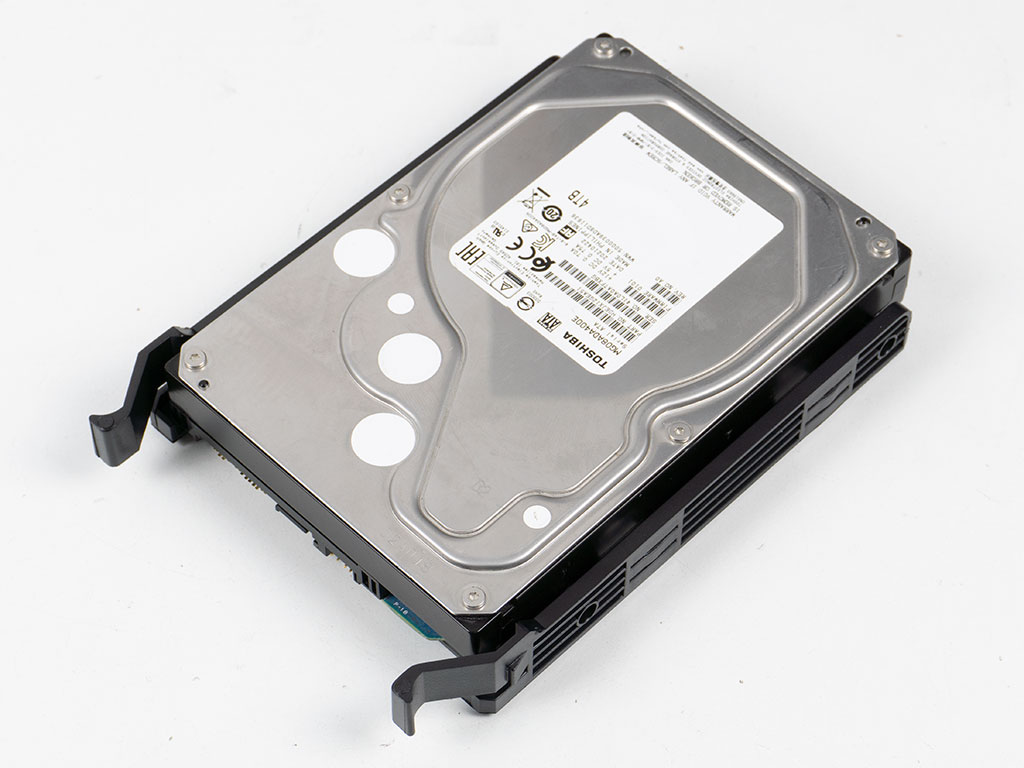
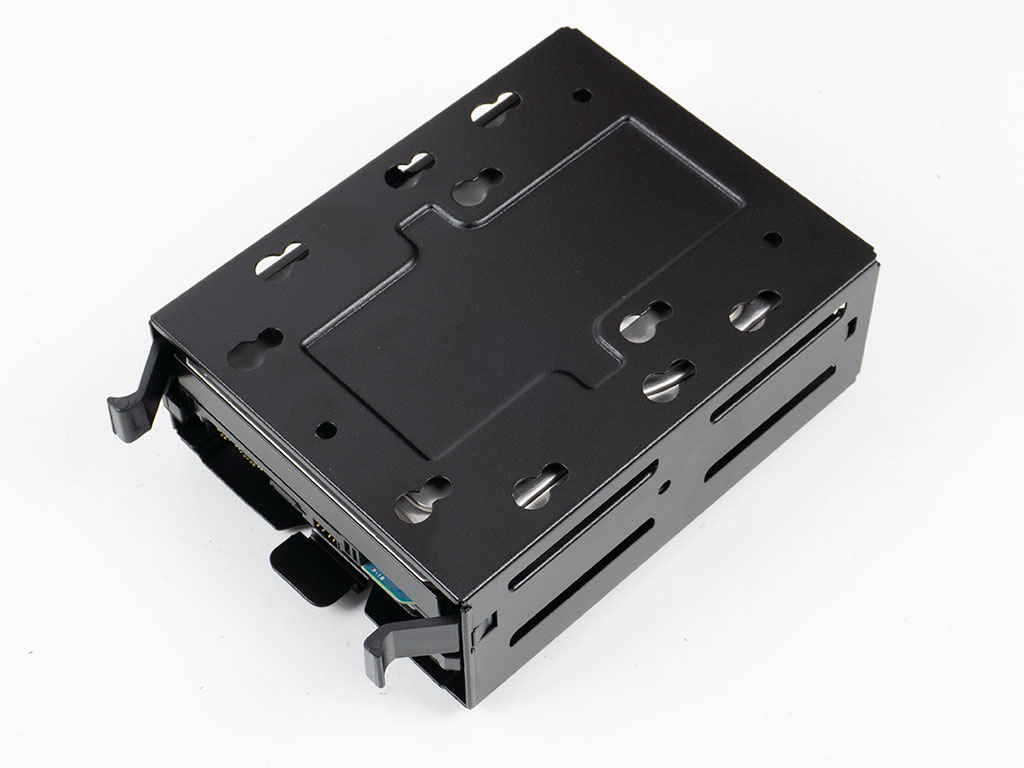
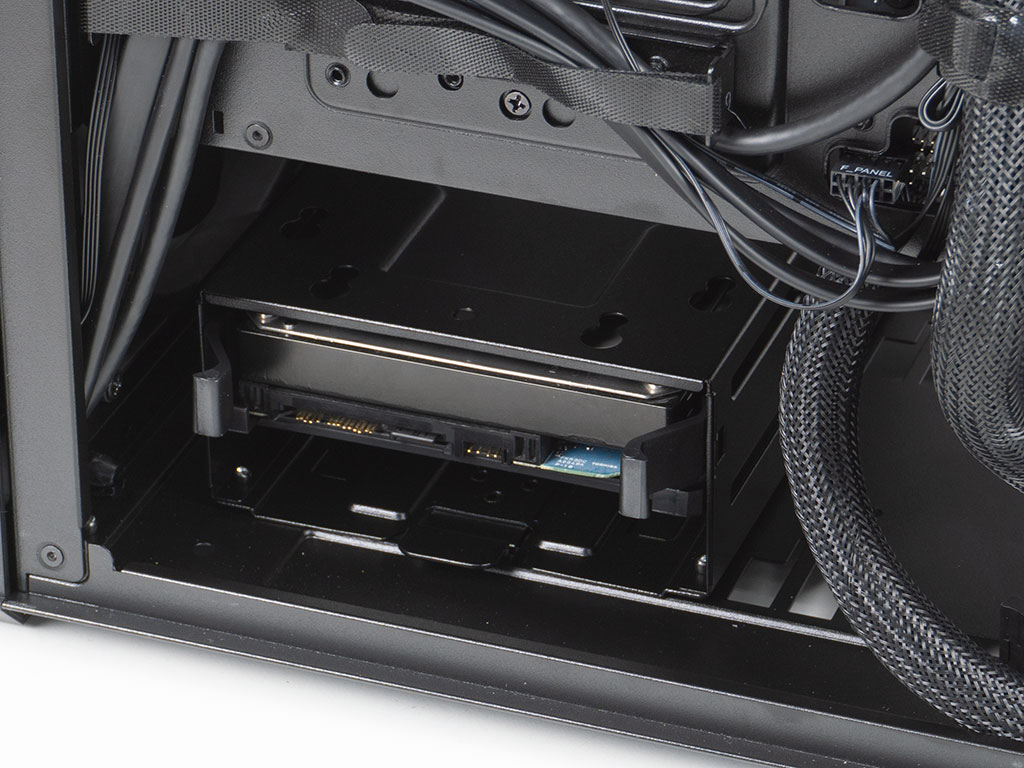
The HDD cage holds a tray which allows you to first suspend a 2.5" drive on its underside and then place a 3.5" drive inside it by snapping the tray into place. Even without a rigid 2.5" drive on the underside, getting the larger storage unit to clip into place is pretty difficult, so proceed with caution. Once the drive is in place, you can slide the tray back into the cage. That, in turn, can be slid into one of the three positions until it also snaps down. The mechanism is secure enough to hold it in place, but you can also use screws to pin things down for transport.
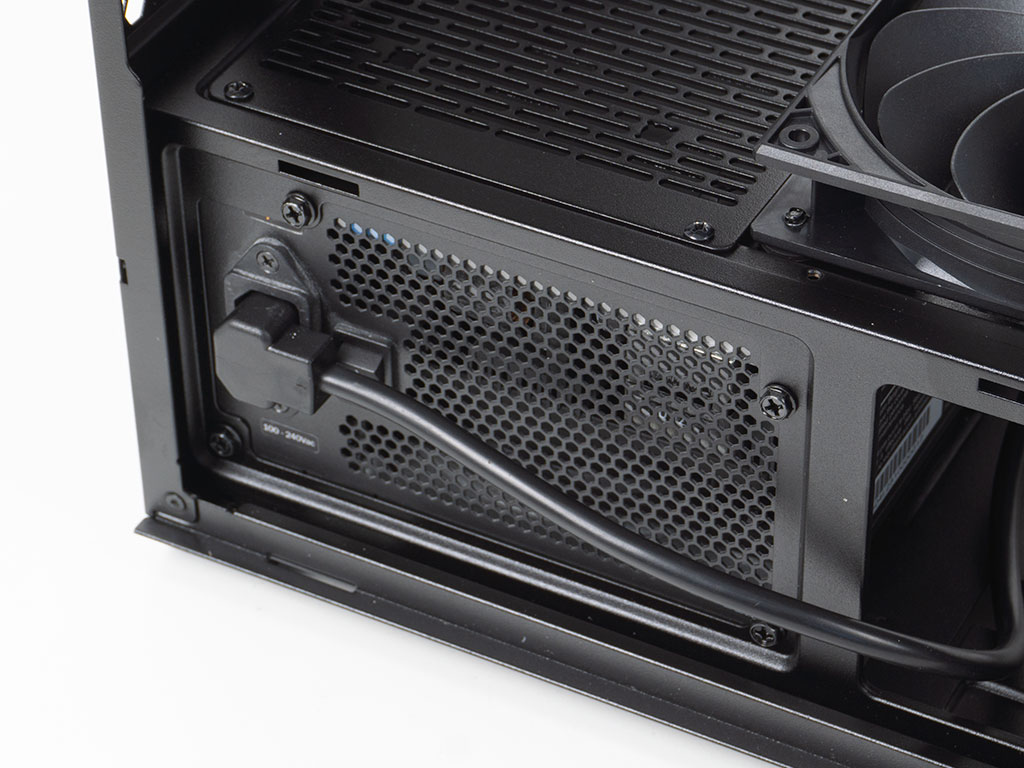
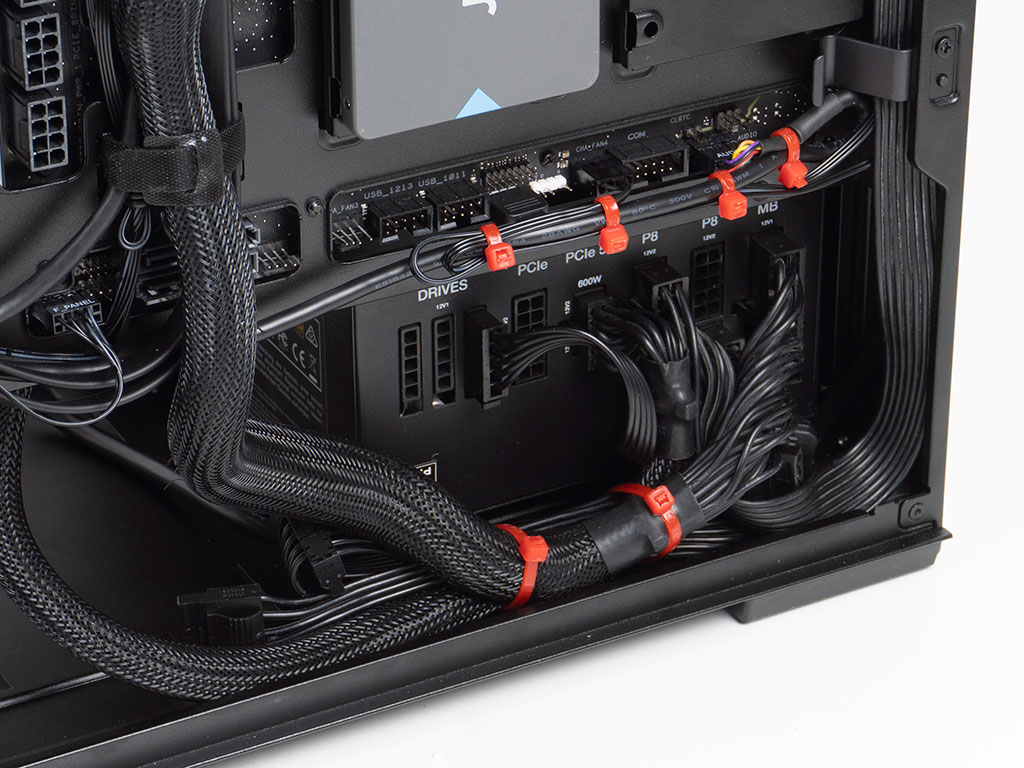
The be quiet! 750 W we use for all our case reviews easily fits inside the Lancool 217 sideways, so you have perfect access to all its connectors with room to spare. The power cable works fine too, but you may want to make sure your unit of choice also has the connector in this configuration, or things could get pretty tricky.


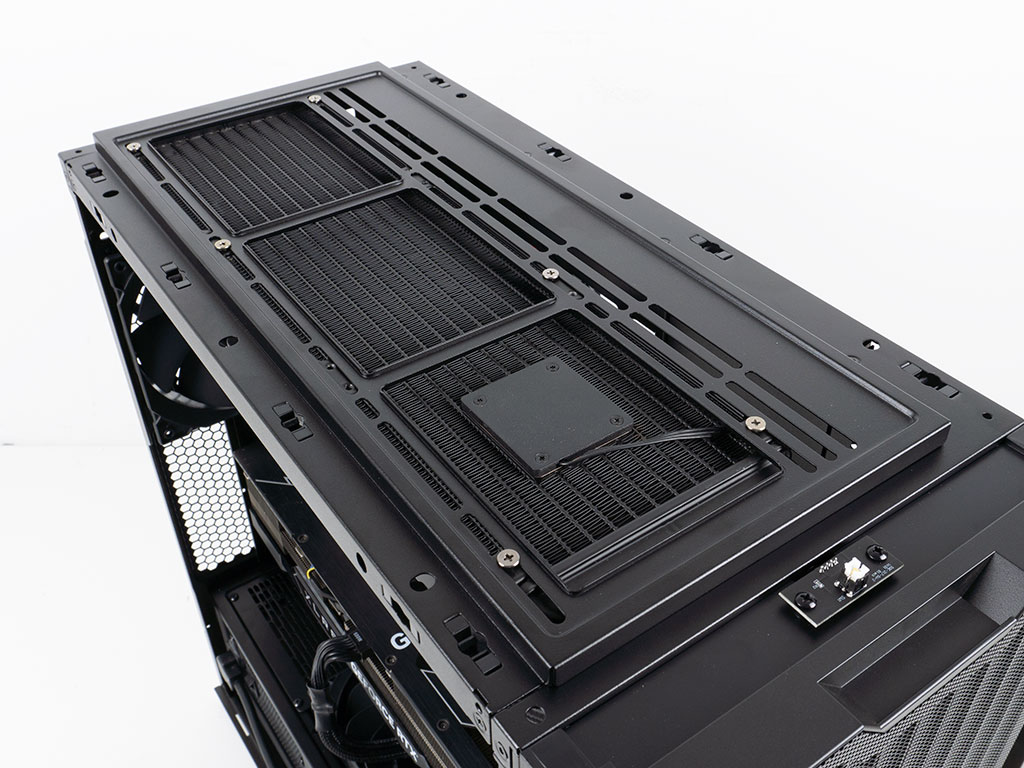

To install the AIO, we can remove the top cover and then secure the radiator unto it, before placing it back on top of the case body. There is plenty of wiggle room to adjust things and the Lancool 217 is also spacious enough to allow for easy access to any connectors at the top edge of the board.
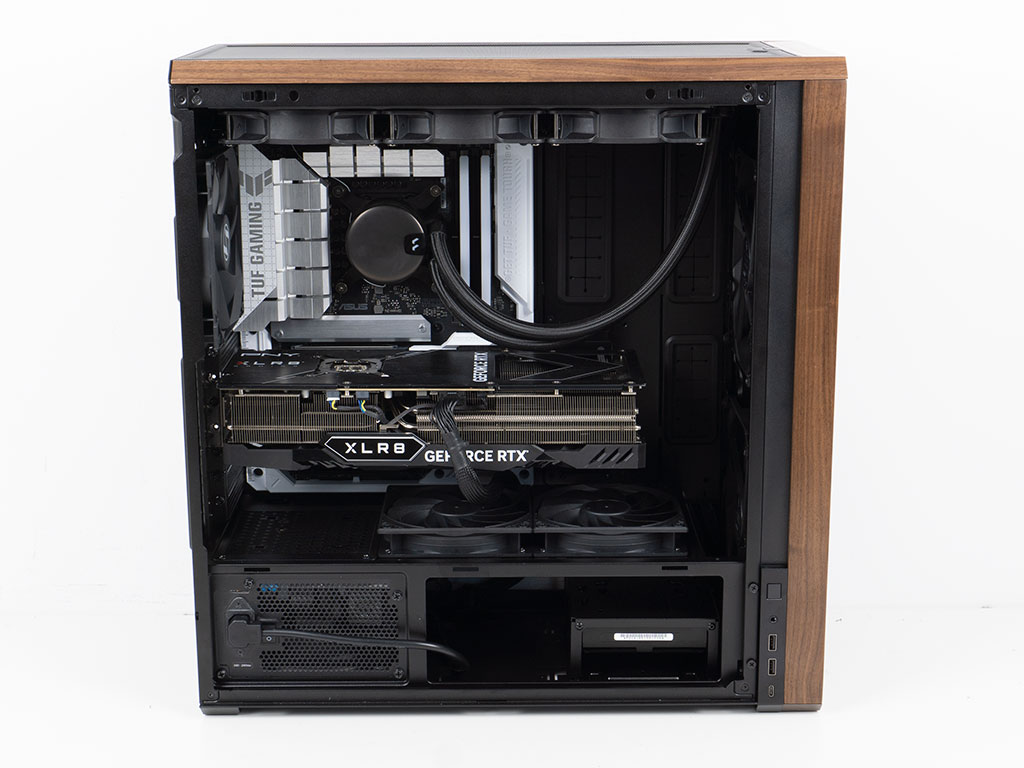
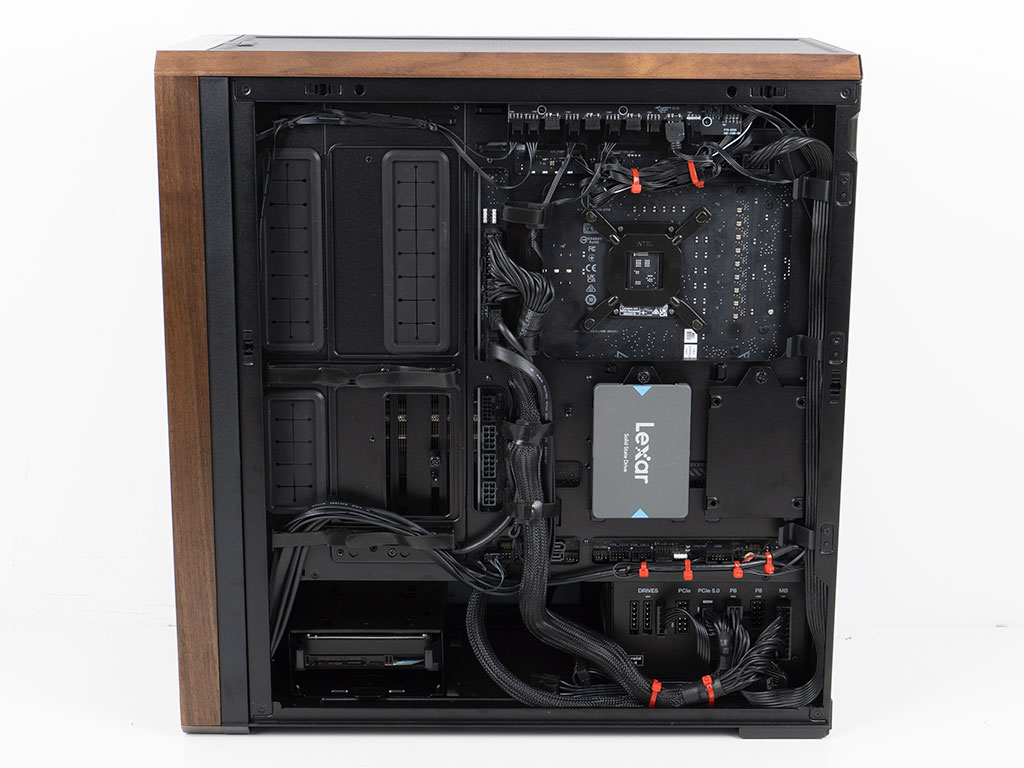
With everything installed, the interior of the Lancool 217 makes an excellent impression, not just because of the BTF based motherboard. Naturally, you will have visible cables at the edges, but thanks to the well-placed grommets, it will also be easy hiding them, as much as is realistically possible. In the rear, cable management is mostly very easy, thanks to the hooks for cables. The only place we would have liked to see some more hooks would have been at the very bottom edge of the motherboard tray, below the openings for the rear facing connectors. That said, we managed to keep things tight and use additional zip ties to bunch wires together. One tangible issue we noticed was the very short front panel connector cable. It won't reach smaller boards, so those wanting to employ microATX or ITX variants will have to source and pay for their own extension cables.
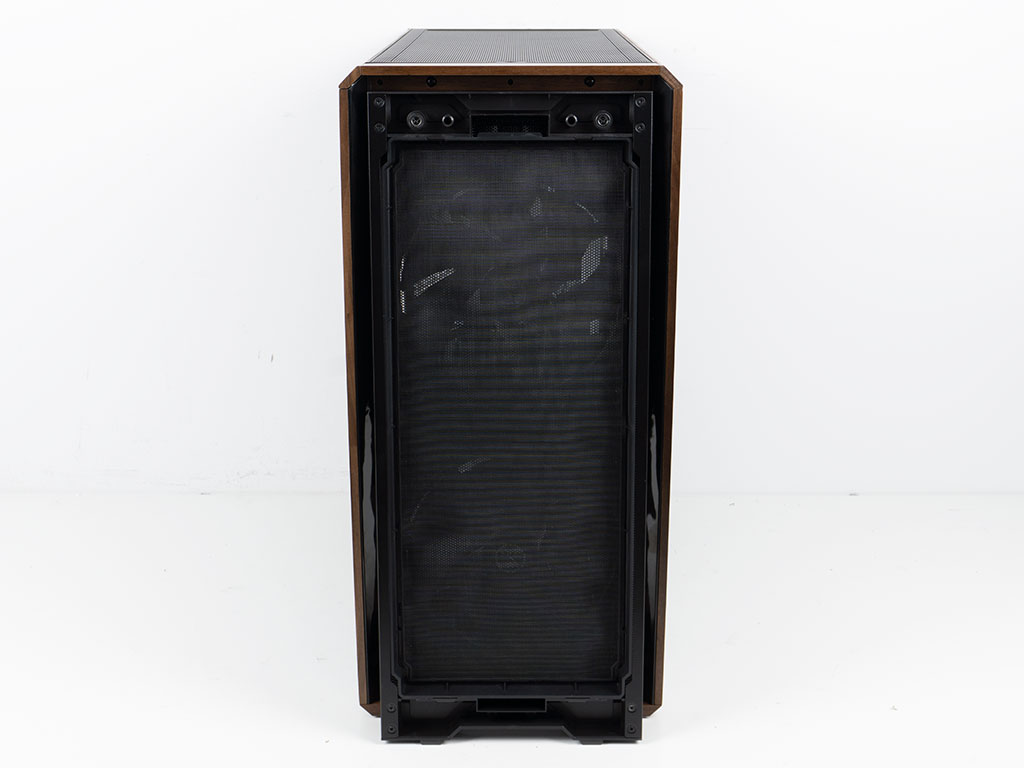
As a last step we inserted the fine mesh dust filter for the front of the chassis. It fits perfectly inside the metal mesh panel which can then simply be snapped back in place.
Finished Looks
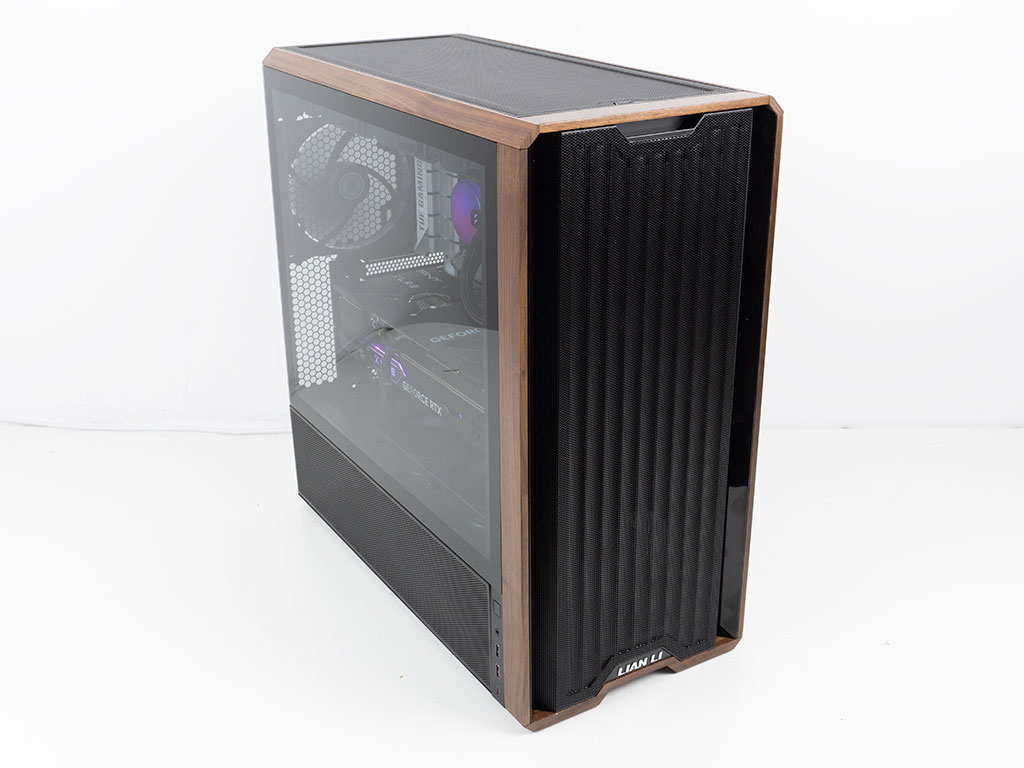

Turning the case on, you will see a white LED light up dimly at the top of the case. The second button on the side has no illuminating element, which is unfortunate.

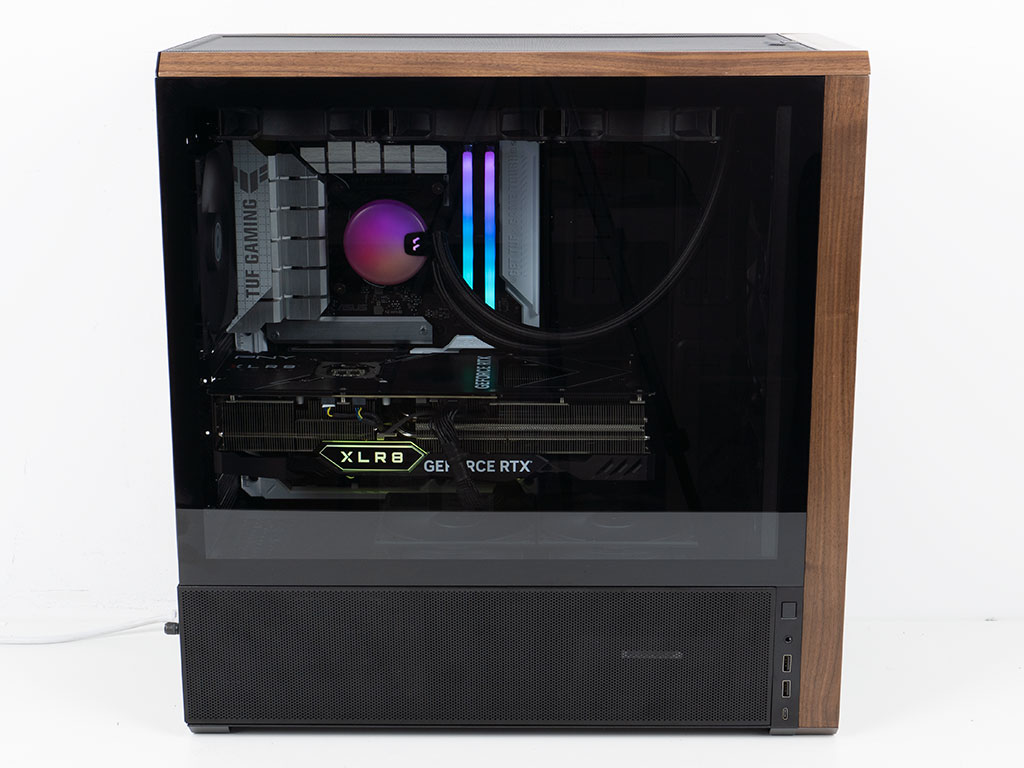
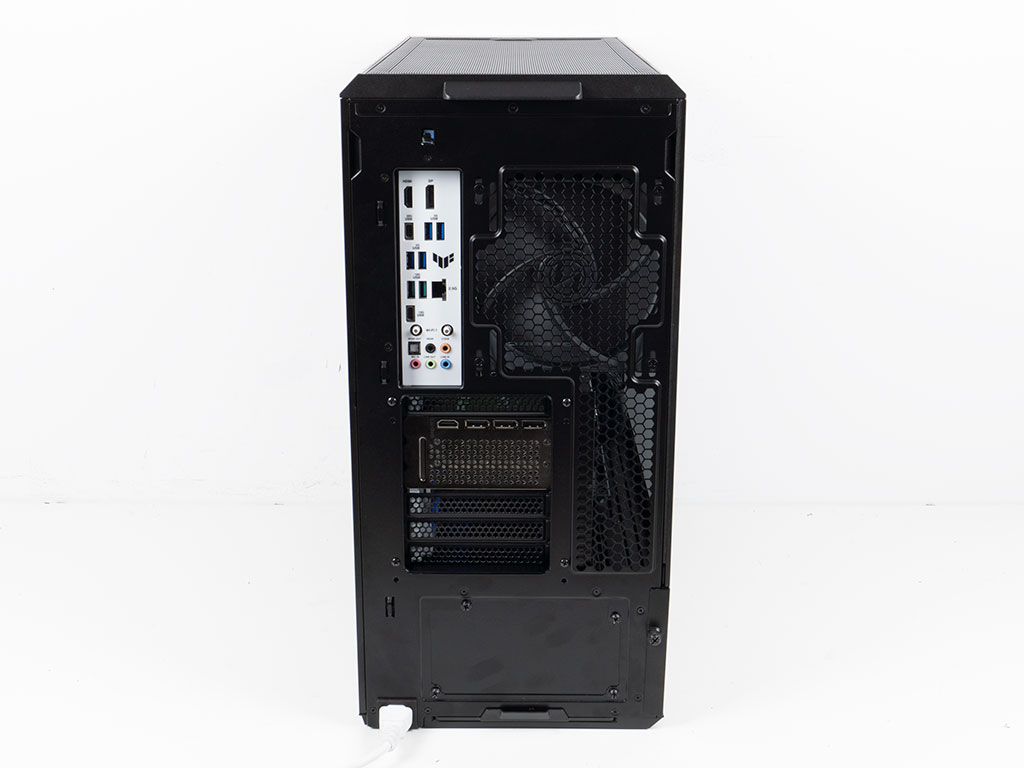
Due to the lack of any built-in ARGB elements, you won't see much when looking at the front. The fact that the memory can be seen shimmering through is a good sign, as it is an indicator of a clear path for airflow. Thanks to the clear window, you can also see all your hardware within easily. Even the white sticker from the HDD below is visible through the metal mesh panel. In the rear, the PSU cable plugs right into the bottom corner, so it is nicely out of the way. Thanks to hooks for cable management, you will also be able to keep the external wire mess to a minimum. It would have been nice if Lian Li could have included three Velcro strips for this purpose.
Nov 19th, 2026 12:33 CST
change timezone
Latest GPU Drivers
New Forum Posts
- Anthrophics IPO (4)
- Dual B70 or Dual R9700 Pro on Linux (10)
- How to prevent OLED burn damage due to PC freezes or power outtages? (14)
- GTA VI (5)
- FINAL FANTASY XIV: Dawntrail Official Benchmark (226)
- Help with fixing Overclock (11)
- Why my RX 6800 XT read that it operate at x8 not x16 ? (47)
- Got the EOL 32GB TridentZ 6000 CL26 1.4V (10)
- Honestly, do you care about GTA VI? (162)
- Anime Nation (13187)
Popular Reviews
- Acemagic Retro X3 Review
- Ugreen NASync DXP4800 GT Review
- Upcoming Hardware Launches 2027 (Updated Nov 2026)
- Pulsar Office Tour & First Look at P1 Dual-Sensor Mouse
- AMD Zen 6 Technical Deep Dive
- Biwin Black Opal NV7400 2 TB Review
- Sapphire Radeon RX 7700 XT Pure Review
- Sapphire Radeon RX 7700 XT Pulse Review
- AMD Ryzen 7 9800X3D Review - The Best Gaming Processor
- Chieftec Iceberg PRO 360 DARK Review
TPU on YouTube
Controversial News Posts
- NVIDIA Co-Founder and CEO Jensen Huang Officially Resigns (484)
- Report: Jensen Huang Eyes NVIDIA Comeback (221)
- Open Letter Asking NVIDIA to Reinstate Jensen Huang Passes 115,000 Signatures (184)
- OpenAI CEO Argues Home PCs Waste the World's Limited DRAM Supply (152)
- NVIDIA Launches Investigation Into Jensen Huang's Relationship With Suspected Chinese Spy (136)
- Intel "Raptor Lake Next" 16-Core and 20-Core CPUs Surface (130)
- Legendary Game Studio BioWare Shuts Down Following EA Layoffs (104)
- Dell CEO Says the Memory Shortage Will Get Worse in 2027 (95)