 14
14
Lian Li Lancool II Mesh Performance Review - Taking It to New Heights
Temperature & Noise Testing »Test System
| System Parts for Case Reviews | |
|---|---|
| Processor: | Intel Core i5-9600K |
| Motherboards: | ATX: MSI Z390 GAMING EDGE AC MATX: Z370M GAMING EDGE AC Mini-ITX: MSI Z370I GAMING EDGE AC Provided by: MSI |
| Graphics Card: | ATX/mATX: Palit GeForce RTX 2080 Gaming Pro OC ITX: EVGA GTX 1650 SC Ultra Black 4 GB |
| Memory: | 16 GB XPG GAMMIX D30 DDR4 2666 MHz CL16-18-18 1.20 V 16 GB XPG SPECTRIX D60G DDR4 3000 MHz CL16-18-18 1.35 V Provided by: ADATA |
| HDD: | Western Digital 320 GB 7200 RPM |
| SSD: | ITX: ADATA SX6000 Pro M.2 256 GB mATX: ADATA GAMMIX S11 Pro M.2 256 GB ATX: ADATA SPECTRIX S40G M.2 256 GB ADATA XPG SX850 256 GB ADATA Ultimate SU630 240 GB ADATA Ultimate SU750 256 GB Provided by: ADATA |
| Power Supply: | Fractal Design ION+ 750W 80 Plus Platinum Provided by: Fractal Design |
| Cooling: | be quiet! Dark Rock 4 be quiet! Dark Rock Slim be quiet! Shadow Rock LP Provided by: be quiet! |
Assembly
Installing the motherboard is done by traditional means, with included screws to secure it to the pre-installed spacers. The board sits right on top of the shroud, and there is a little bit of space along the edge at the top. That having been said, the offset fan-mounting holes in the ceiling will definitely come in handy.


As we have the possibility to show off SSDs so nicely within the Lancool II Mesh Performance, we will use one of two exposed plates. Simply take it off the motherboard tray, screw down a drive, and put it back in place. As you can see, it is positioned well, so you won't see any of the cables with everything closed off.


Adding a 3.5" drive is pretty straightforward as well, but unfortunately requires screws and a screwdriver. It would have been nice if these trays were tool-less, especially as it would make things much easier when utilizing the hot-swap feature. Once filled, simply slide the tray back into place and use the lever to lock it in place. Lian Li now includes a metal plate at the rear of the HDD cage, which you will have to remove should you want to install the optional hot-swap bracket.

Adding the power supply does not bear any surprises, either. Because of the large opening, you won't run into any issues when sliding it into place, and basic case screws hold it in place. There is plenty of space for a potent unit, but you need to watch the overall length if you move the HDD cage towards the back to allow for thick liquid cooling in the very front of the chassis.


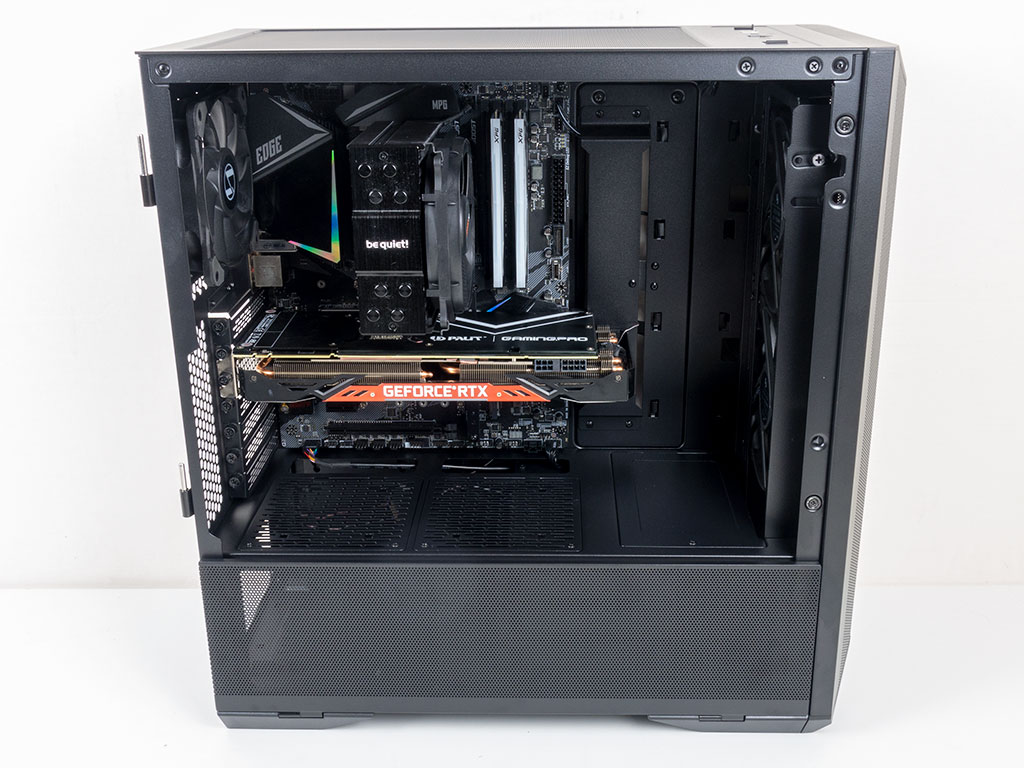
Once everything is installed, the interior of the Lancool II Mesh Performance makes a very clean impression. Only the PCIe power cable is slightly visible since the Palit GPU is just too long to allow for it to be routed differently without going above the metal PCB plate or below, across the cooling fan. I did not really spend a lot of time managing cables on the other side as I was able to use the four Velcro strips to contain most of the leads. After putting the two covers in place and ensuring the cable for CPU power is as far off to the side as possible, everything looked extremely spiffy even before putting the glass panel back in place.
Optional Accessories
GB-001 - GPU Support Bracket


Among other things, we were also provided with the universal GP-001 GPU anti-sag bracket for the two metals parts your GPUs will sit on nicely; it is a simple metal strip that directly mounts to your motherboard. Foam covers on each eliminate any vibrations. The spacers are tall enough for the chipset heatsink not to collide with our MSI board, but that may not hold true for your system, so watch out.
Lancool II-1X - Vertical GPU Mount


The vertical GPU bracket allows you to show off your GPU by installing it with the fans facing the window of the Lancool 2. It may be installed at two different heights to ensure it does not interfere with any fans you happen to have on the shroud.


This is something you may install after assembling the whole system, but once again, for the sake of this review, we have jumped ahead to show you how it looks alongside all the other accessories.
Lancool II-4X - USB 3.1 Gen2 Type-C

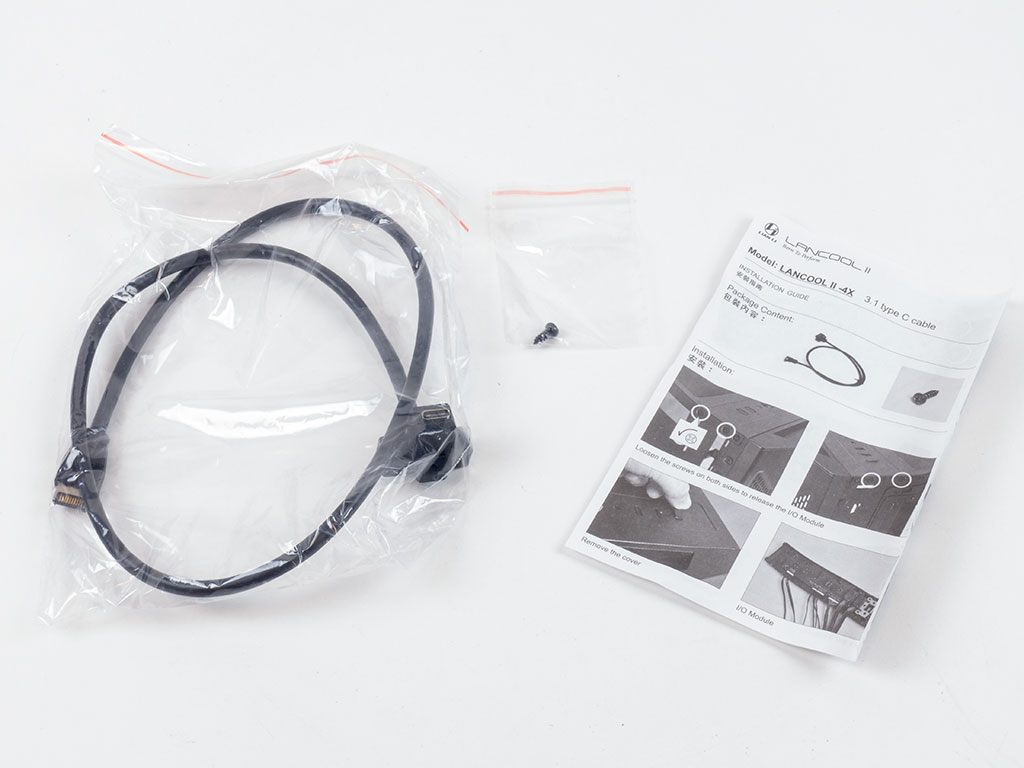
The USB 3.1 Gen2 Type-C add-on ships in the same type of white box with a sticker. You will also receive the required mounting screw and detailed instructions on how to add the connector to your I/O PCB.


That having been said, the cable requires you take out the entire assembly of buttons and I/O to separate the PCB from the plastic frame. This is quite the undertaking, especially if you choose to upgrade after having assembled your system as it forces you to disconnect a whole bunch of wires and destroy cable-routing you have set. All this is due to the mounting screw for the USB Type-C plug going through the top of the PCB.


Once everything is apart, adding the optional plug is quite easy, and putting everything back into place is straightforward as well, with the connector lining up perfectly with the opening in the metal top cover of the enclosure. You just need to make sure the plastic power and reset buttons are aligned properly on the black plastic frame, and don't screw the PCB mounting screw in too tight as you will otherwise no longer be able to press the two buttons.
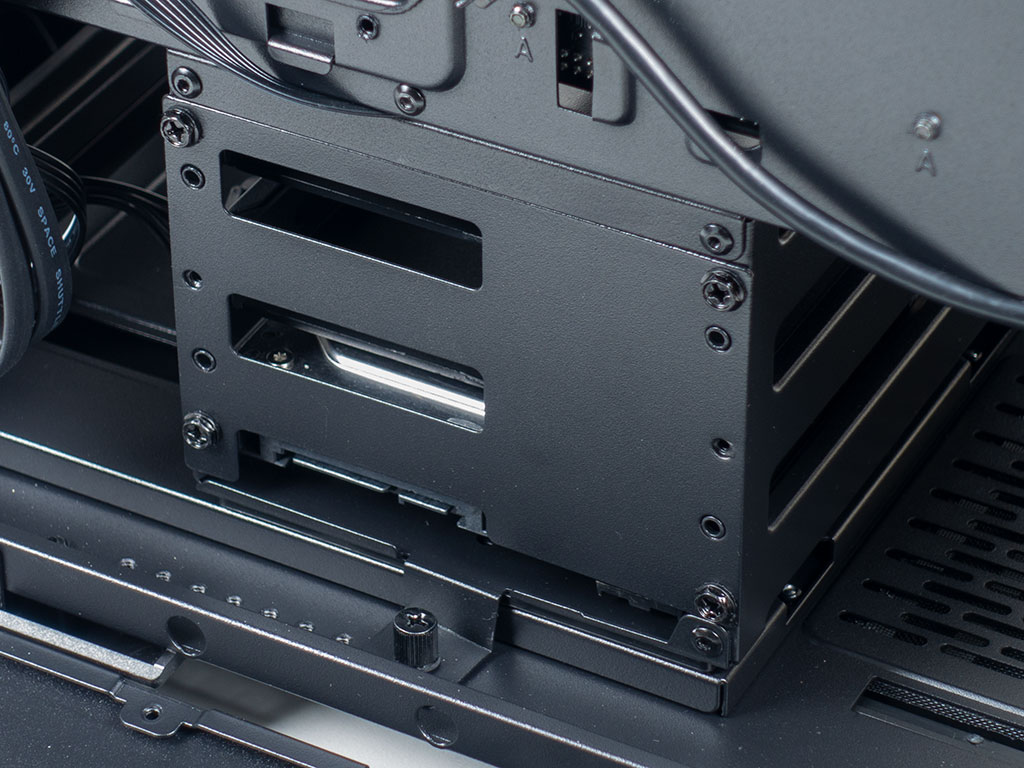
Lancool II-3X - 3.5" Bays Hot-Swap


As the name implies, the hot-swap PCB gives you the ability to swap out any of three 3.5" drives while the PC is up and running. Thanks to the single solid piece, you only need two SATA power plugs as opposed to three, and Lian Li for some reason only includes two angled SATA data cables.


Simply use the six screws to pin the board down with the right side up. As you can see, the SATA data ports will get awfully close to the 2.5" mounting plate on the bottom swing-down cover. Move that plate over towards the front a mounting position if you want keep it. This little but mind-blowing feature consists of the clear plastic elements you stick to the bottom of each drive tray. The PCB comes with power and activity LEDs for each drive. These plastic bits direct those light sources towards the front edge of each tray, which means you can actually see how each drive is being used!
Finished Looks


Once the system is turned on, it is nice to see the clean front and subtly visible fans. Lian Li has done a great job by using the metal mesh dust filters punched straight into the sheet that forms the front. A white LED lights up around the power button to let you know the system is up and running.


Due to the clear glass, you can clearly see all the hardware inside the Lian Li Lancool II Mesh Performance. So even though the RGB elements provide mostly indirect lighting, none of the detail is lost. As you would expect from a modern mid-tower chassis, all the components in the rear are easily accessible. On the other side, the partial glass panel looks just as great, and once again, thanks to the lack of tinting, you can clearly see the SSD, and it all looks extremely clean because of the covers.
Jun 16th, 2024 09:24 EDT
change timezone
Latest GPU Drivers
New Forum Posts
- Should i upgrade my cpu (rtx 4070) ? (51)
- TPU's Nostalgic Hardware Club (18588)
- Alphacool - problem with radiators - bad fin soldering? (29)
- Help - Monitor loses signal randomly while gaming (computer still keeps running) (1)
- First Build. PC not booting from USB (3)
- FINAL FANTASY XIV: Dawntrail Official Benchmark (100)
- GeForce RTX 5000 gaming "Blackwell" power efficiency improvement (1)
- 1000Watt power limit on 4070??? (2)
- Insyde software announces AI BIOS! (44)
- The Official Thermal Interface Material thread (1245)
Popular Reviews
- Pulsar Xlite V3 eS Review
- Aune AR5000 Headphones + S17 Pro Headphones Amplifier Review
- VAXEE Outset AX Wireless (4K) Review
- Upcoming Hardware Launches 2024 (Updated May 2024)
- Team Group T-Force G70 Pro 2 TB Review
- AMD Ryzen 7 7800X3D Review - The Best Gaming CPU
- Intel Lunar Lake Technical Deep Dive - So many Revolutions in One Chip
- NZXT H6 Flow RGB Review
- ASUS Radeon RX 7900 GRE TUF OC Review
- Thermal Grizzly KryoSheet Review - Tested on RX 7900 XTX with 475 W
Controversial News Posts
- Possible Specs of NVIDIA GeForce "Blackwell" GPU Lineup Leaked (132)
- NVIDIA RTX 5090 "Blackwell" Founders Edition to Implement the "RTX 4090 Ti" Cinderblock Design (118)
- AMD Ryzen 9000 Zen 5 Single Thread Performance at 5.80 GHz Found 19% Over Zen 4 (114)
- AMD Outs Ryzen 5000XT Processors for Socket AM4, an 8-year Old Socket (105)
- Nightmare Fuel for Intel: Arm CEO Predicts Arm will Take Over 50% Windows PC Market-share by 2029 (105)
- AMD Says Ryzen 9000 Series Won't Beat 7000X3D Series at Gaming (102)
- AMD Zen 5 Storms into Gaming Desktops with Ryzen 9000 "Granite Ridge" Processors (100)
- Biden Administration to Revive Trump-Era Tariffs on China-made GPUs and Motherboards (95)