 5
Noctua NH-U12F Review
(5 Comments) »Introduction

I would like to thank Noctua for supplying the tested cooler and their patience with the review.
| Socket compatibility | Intel Socket LGA 775, AMD K8 (754, 939, 940) & AM2 |
|---|---|
| Height (without fan) | 155 mm |
| Width (without fan) | 126 mm |
| Depth (without fan) | 70 mm |
| Height (with fan) | 155 mm |
| Width (with fan) | 126 mm |
| Depth (with fan) | 95 mm |
| Weight (without fan) | 640 g |
| Weight (with fan) | 790 g |
| Material | Copper (base and heat-pipes), aluminum (cooling fins), soldered joints |
| Application | Intel all frequencies, AMD all frequencies |
| Fan size | 120x120x25mm / 120x120x38mm (2 fans mountable) |
| Fan | Noctua NF-S12-1200 |
| Bearing | SSO-Bearing |
| Blade Geometry | Straight-Blade-Design |
| Rotational Speed (+/- 10%) | 1200 RPM |
| Rotational Speed with U.L.N.A. (+/- 10%) | 800 RPM |
| Airflow | 81 m³/h |
| Airflow with U.L.N.A. | 59 m³/h |
| Acoustical Noise | 17 dB(A) |
| Acoustical Noise with U.L.N.A. | 8 dB(A) |
| Input Power | 1,44 W |
| Input Current | 0,12 A |
| Voltage Range | 4-13 V |
| MTBF | > 150.000 h |
| Warranty | 6 years |
Nowadays it is very important that a CPU cooler supports installation on multiple sockets, Noctua has them all - and the mounting kits for all of them are included in the package. This means that there will be no additional cost for you if you decide to upgrade sockets.
Packaging


Box contents:
- CPU Cooler Heatsink
- 120 mm fan
- Fan mounting clips
- Several bags with mounting parts for all supported sockets
- Instruction manual


The full color, multi-language manual has to be one of the best manuals I have ever seen.


The fan is made by Noctua too, it has a diameter of 120 mm and is fairly quiet while still moving a good amount of air. The colored fan blades are a nice addition and make the cooler stand out from other completely black fans.


To protect the baseplate from damage during production and shipping, a plastic film is stuck to the bottom of the heatsink. It should be obvious that it has to be removed during installation, the sticker tells you as well.


The surface of the Noctua NH-U12F is very flat, but has very small milling marks. These won't be a problem as they are easily filled with thermal paste when the cooler is installed.
Installation

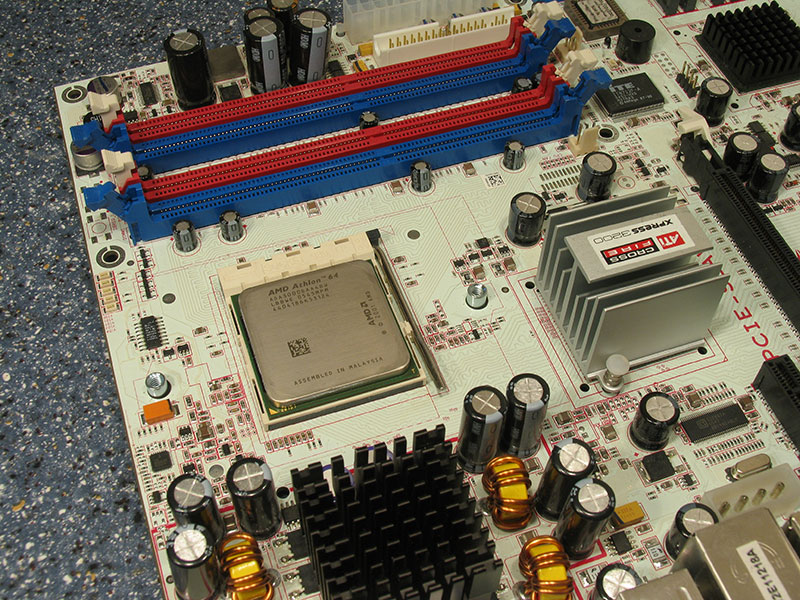
First we had to remove the heatsink retention module of our motherboard.


Depending on the orientation you want to use for the fan you have to use different metal clips here. They are screwed to the back of the bottom of the heatsink base.

Next we put together springs and screws and insert them into the metal clip holes.


Align the cooler over the CPU socket and screw down the two screws. Take a turn each then switch to the other screw. The holes in the cooler clips are a bit bigger so it is easy to screw down the cooler even though it is not 100% perfectly aligned at the start.


The screws have exactly defined points at which they are screwed down tight, this means you can't screw the heatsink down too tight.
Our Patreon Silver Supporters can read articles in single-page format.
Nov 15th, 2026 16:08 CST
change timezone
Latest GPU Drivers
New Forum Posts
- WarpCoreBench scores! (51)
- Asus Rog Maximus Z890 Extreme. (Various questions). (25)
- TPU's Nostalgic Hardware Club (22165)
- HP Office Jet 7740 Pro - Supply system problem with replacement cartridge (3)
- Recommendations Wanted - Affordable Enterprise SSD for Boot (9)
- Folding Pie and Milestones!! (10204)
- What can the FX 8320 do today? Here is the answer. (59)
- Power supply noise stops when I move the mouse (8)
- What are you playing? (26221)
- How do you get games for PC? (59)
Popular Reviews
- AMD Zen 6 Technical Deep Dive
- ASUS ROG Strix B850-I Gaming Wi-Fi7 W Review
- Corsair HX1000i Shift Crystal Review
- Upcoming Hardware Launches 2027 (Updated Nov 2026)
- Montech King 95 3D PRO Review
- NZXT C1200 Platinum Review
- NZXT H7 RGB+ Review
- NZXT H5 Review
- Phantom Blade Zero Performance Benchmark Review - 35 GPUs Tested
- AMD Ryzen 7 9800X3D Review - The Best Gaming Processor
TPU on YouTube
Controversial News Posts
- NVIDIA Co-Founder and CEO Jensen Huang Officially Resigns (420)
- Open Letter Asking NVIDIA to Reinstate Jensen Huang Passes 115,000 Signatures (184)
- OpenAI CEO Argues Home PCs Waste the World's Limited DRAM Supply (152)
- NVIDIA Launches Investigation Into Jensen Huang's Relationship With Suspected Chinese Spy (136)
- Intel "Raptor Lake Next" 16-Core and 20-Core CPUs Surface (130)
- Legendary Game Studio BioWare Shuts Down Following EA Layoffs (104)
- Dell CEO Says the Memory Shortage Will Get Worse in 2027 (95)
- NVIDIA GeForce RTX 50-Series Scheduled for up to $500 Price Hike This Week (89)