 16
16
NVIDIA Reflex Tested with LDAT v2 - Making you a Better Gamer
(16 Comments) »Introduction
A couple of weeks ago, NVIDIA provided us with the second iteration of their Latency Display Analysis Tool (LDAT), a small device that is strapped onto a monitor, measures brightness changes, and provides us with end-to-end system latency data—the so-called mouse to photon latency. This nifty little gadget allows us to put the NVIDIA Reflex technology through its paces, and we intend to integrate it into our monitor-testing methodology as it's an excellent replacement for our existing high-speed camera setup, but more on that later in this article.
For starters, let's focus on NVIDIA Reflex, an interesting latency-reduction technique NVIDIA released with their RTX 30-series "Ampere" graphics cards, but also fully supported in their GeForce RTX 20-series "Turing," as well as older GeForce 9 and 10-series GPUs. In fact, as you'll soon see from my test results, NVIDIA Reflex makes the biggest difference in GPU-bound scenarios, so if you're running a high-end graphics card at non-4K resolution, you're unlikely to reap any benefit from it. At the same time, it will massively improve your gaming experience on mainstream graphics cards if the game in question supports it.

As some of you surely know, NVIDIA collaborated with ASUS and Dell on their 360 Hz Full HD G-Sync monitors, the ROG Swift PG259QN and Alienware AW2521H. Both are equipped with the Reflex Latency Analyzer (RLA), an in-display hardware tool that has to be combined with the GeForce Experience software and a supported mouse. At this time, the following mice are supported: Logitech G Pro Wireless, ASUS ROG Chakram Core, Razer DeathAdder V2 Pro, and SteelSeries Rival 3. All of them have a familiar and low click latency, which is why they were chosen. You can then measure data like mouse latency, PC + display latency, and whole system latency inside of a performance overlay. Even though RLA and the aforementioned monitors are part of the Reflex ecosystem, it is important to point out that I won't be focusing on them in my review. The LDAT v2, a device I've described above, is a reviewer-only tool that works with any monitor. It can be used in many different scenarios and for several different tests, including monitor input lag and potentially even mouse click latency testing. Of course, NVIDIA provided it primarily to show off its Reflex technology, so this is what I'll be discussing going forward.
In essence, NVIDIA Reflex is a driver-driven framerate limiter. When you find yourself in a GPU-bound scenario, a situation in which your graphics card is overwhelmed with incoming data, the incoming frames have to wait in a render queue for GPU resources to become available. This is of course a massive simplification of the rendering process, but it's exact enough to explain why gamers not only have to deal with lower framerates but also increased system latency in GPU-bound scenarios. The idea behind NVIDIA Reflex is to establish a deep level of CPU and GPU synchronization, which would result in the CPU providing the GPU with only as many frames as it can render at any given moment. With no frames stuck in the proverbial waiting line, the maneuvers you do on your mouse pad would find their way to the screen significantly faster.
In their Reflex-related press materials, NVIDIA spends a dubious amount of time pointing out the importance of latency as a key gaming performance metric, up there with frames per second. Their point is valid; I too feel that latency doesn't get enough credit when discussing the performance of a system. We're not talking about network latency, the time it takes data to reach a game server and come back (often referred to as "ping"). Pretty much everyone understands what ping is and how it impacts their multiplayer gaming experience. What NVIDIA is talking about is system latency—the latency introduced by your mouse, USB interface, CPU, game engine, GPU, and display. Here's a nice chart, followed by NVIDIA's detailed explanation of the system latency chain, to which I don't have anything meaningful to add.

Many components contribute to overall system latency, not only physical components, such as the peripheral (mouse), PC (system), and display, but also software components, such as the game running on the OS and the rendering operations of the GPU. Once a user presses the mouse in a game, that event data is sent to the PC, where it is processed by many components and subsystems inside the PC including the CPU, operating system (Windows), game application, render queue, GPU, and then the OS compositor. Next, it goes through scan-out, which technically happens on the GPU, but is initiated by the display before it's finally processed and displayed on screen.
The time it takes for this to happen is called the pixel response time. The preceding diagram shows a high-level and medium-level view of all the various components that contribute to latency in a system. PC gaming includes processing by a complex system of serial and parallel pipes, but we will do our best to break down the basic concepts. If a game feels laggy, it's likely because you are experiencing high system latency due to any of the smaller latency areas shown above, which is exactly what we'll measure with the LDAT. It measures the complete "mouse-to-photon" timing, which includes processing by all of the above hardware and software systems.
LDAT v2
The Latency Display Analysis Tool (LDAT) is a smaller-than-a-matchbox device that might strike you as something that was put together as a school project. Do keep in mind this is a reviewer's tool, not a commercial product; so as long as it does its job properly, it doesn't have to look nice. The LDAT tool can be connected directly to the test system, or may be used on a secondary host PC. If the latter is the case, you have to use a properly modified external mouse to trigger the sensor; otherwise, the test system won't have a way to know when an input (mouse click) occurred. To use the mouse button built into the LDAT itself, which is the most reliable way to use the tool, it has to be connected directly to the test system, which is exactly what I did.
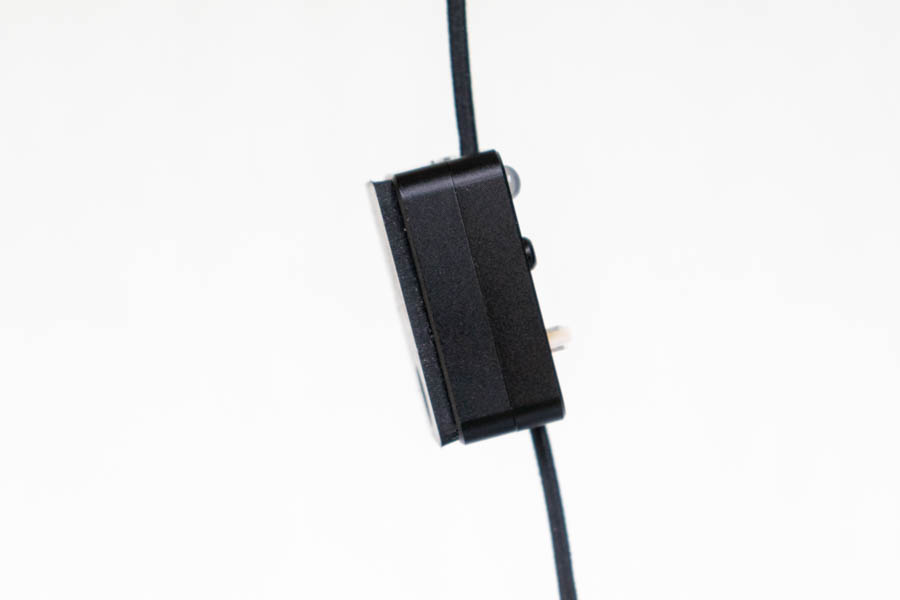
The electronics are placed inside a small metal case. Its external dimensions are a mere 27 x 35 x 17 mm.


The bottom of the device is covered in rubber, which is a wise design choice, as I wouldn't want to put anything else on top of my monitor's panel. There's a single cutout for the integrated light sensor. Attached to the device is an elastic strap, which conveniently affixes it to the monitor.


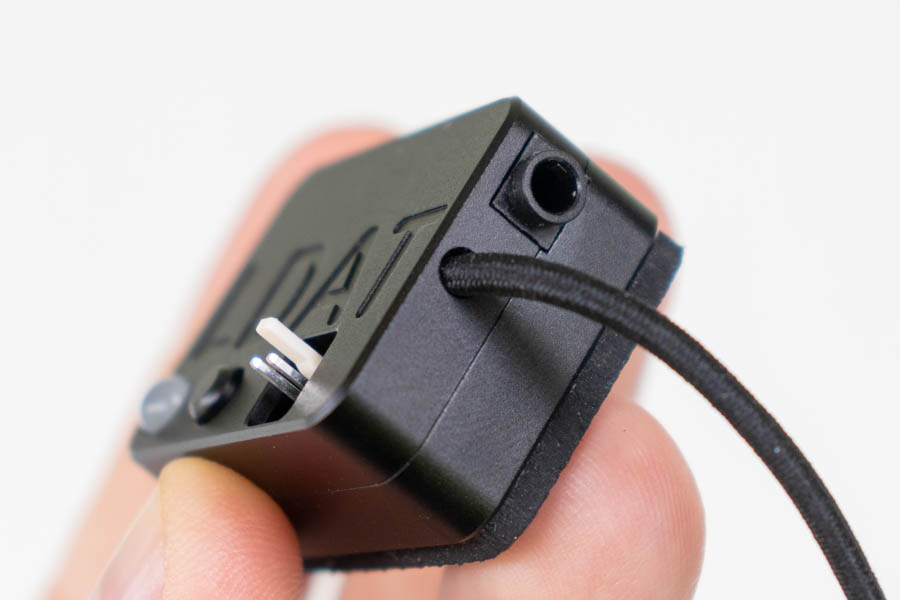
On the top of the LDAT device is where NVIDIA installed the 2-pin external mouse button connector, a status indicator LED, and a standalone mouse button. The latter is only available on the newest iteration of the LDAT tool, simply dubbed the LDAT v2. The aforementioned LED indicates the current mode of LDAT operation (purple is standby, blue is latency mode, green is active luminance monitoring, red is audio monitoring, and so on). The abbreviated device name is etched into its case.
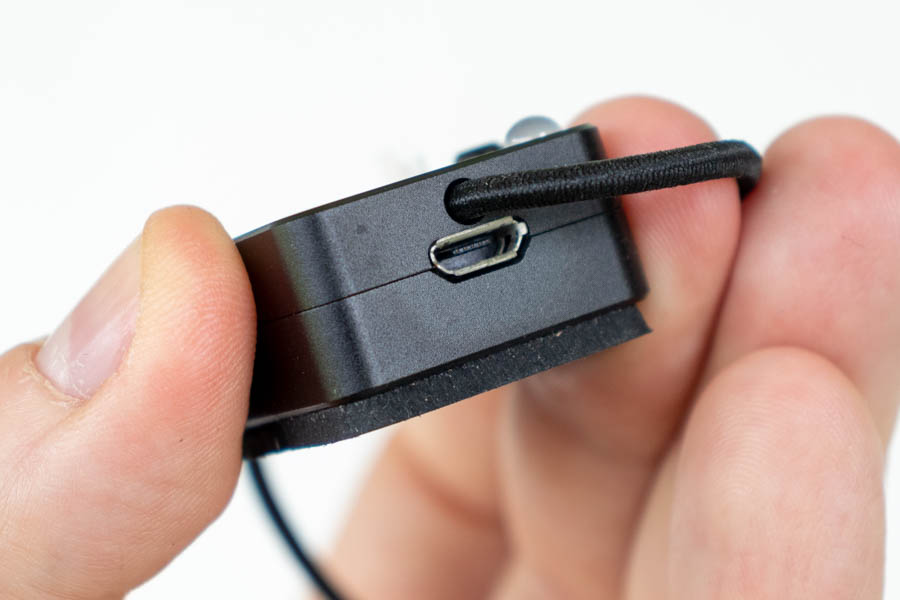
The LDAT has two more ports. The Micro-USB port is used for PC connectivity, while the 3.5-mm audio port accepts headsets and external microphones. This port serves as an audio input, and a connected microphone can be used to listen for mouse clicks, which can then trigger the latency measurement. For this to work, the microphone has to be placed close to the mouse button.
LDAT Software
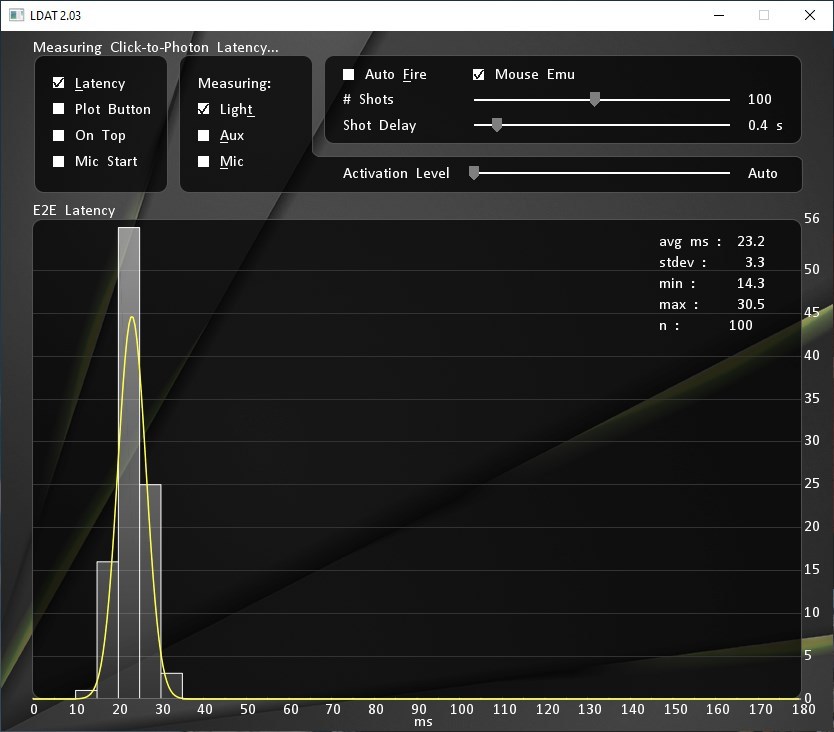
The LDAT software offers a fairly simple interface between the LDAT device and actual end-to-end system latency measurements. It calculates latency measurement statistics (minimum, average, maximum) and the standard deviation, and automatically logs data to a CSV file. Once testing is done, it shows the latency distribution and a Gaussian curve in real time. Arguably the most useful feature of the LDAT software is Auto Fire mode, which allows me to generate a large number of test samples in a short amount of time. Auto Fire mode works together with the built-in mouse button.
The software starts in so-called free-running mode, where the LDAT device watches the monitor's brightness in real time. Preparing it for testing with Auto Fire mode is done by selecting the desired number of samples (# Shots), adjusting the delay between each test (Shot Delay), and checking the Latency, Light, Auto Fire, and Mouse Emu boxes. After that, the only thing left to do is to go into the game and press the mouse button on the LDAT device, which has to be aligned with the flash indicator, or the muzzle flash, if the game in question doesn't have the flash indicator feature integrated.
Our Patreon Silver Supporters can read articles in single-page format.
Jul 19th, 2025 07:55 CDT
change timezone
Latest GPU Drivers
New Forum Posts
- VMware Workstation is now free for everyone (26)
- TPU's Nostalgic Hardware Club (20541)
- Hatsune Miku x ASUS TUF Gaming Build (68)
- RX 9070 XT freezing/locking up only on desktop, anyone else? (54)
- Multiplier limited, trying to achieve max performance (1)
- Gacha Games - Discussions, Pulls, Updates, etc. (11)
- Idle issue since 5060 ti installed (29)
- I'm not sure if the HUB that I found (two USB-C male and one USB-C female) will work on my CyberDeck. (10)
- Swapping existing router w/ a replacement; any issues? (36)
- Silent Hill Series Discussion/Speculation thread (24)
Popular Reviews
- Razer Blade 16 (2025) Review - Thin, Light, Punchy, and Efficient
- MSI GeForce RTX 5060 Gaming OC Review
- Thermal Grizzly WireView Pro Review
- Pulsar X2 Crazylight Review
- SilverStone SETA H2 Review
- AVerMedia Live Gamer Ultra S (GC553Pro) Review
- Upcoming Hardware Launches 2025 (Updated May 2025)
- Sapphire Radeon RX 9060 XT Pulse OC 16 GB Review - An Excellent Choice
- NVIDIA GeForce RTX 5050 8 GB Review
- AMD Ryzen 7 9800X3D Review - The Best Gaming Processor
TPU on YouTube
Controversial News Posts
- Intel's Core Ultra 7 265K and 265KF CPUs Dip Below $250 (288)
- Some Intel Nova Lake CPUs Rumored to Challenge AMD's 3D V-Cache in Desktop Gaming (140)
- AMD Radeon RX 9070 XT Gains 9% Performance at 1440p with Latest Driver, Beats RTX 5070 Ti (131)
- NVIDIA Launches GeForce RTX 5050 for Desktops and Laptops, Starts at $249 (124)
- NVIDIA GeForce RTX 5080 SUPER Could Feature 24 GB Memory, Increased Power Limits (115)
- Microsoft Partners with AMD for Next-gen Xbox Hardware (105)
- NVIDIA DLSS Transformer Cuts VRAM Usage by 20% (99)
- AMD Sampling Next-Gen Ryzen Desktop "Medusa Ridge," Sees Incremental IPC Upgrade, New cIOD (97)