 68
68
NVIDIA RTX Voice: Real-World Testing & Performance Review - It's Like Magic
Real-World Testing & Noise Reduction Performance »Installation and User Interface
RTX Voice comes in form of a free 327 MB download available on NVIDIA's official webpage. As I've already mentioned, the software is in beta, and you don't need to register to try it out (or actively use it if you decide you like it). As long as your PC is equipped with any RTX graphics card and the latest official drivers, you're all set.

After you're done installing it, you'll notice two new "NVIDIA RTX Voice" virtual audio devices in the "Sound" section of your Control Panel—one for playback and another for recording. There's no need to configure anything here. In fact, you can't do anything with those two virtual audio devices at all, not even change the input/output volume. If you want to make your microphone quieter or louder, you'll have to do it the regular way: open its properties and switch to the "Levels" tab to adjust it there, just like you've always done. As far as using RTX Voice goes, it's only important that the NVIDIA RTX Voice devices exist in the Control Panel—if you don't see them, something went wrong with the installation.
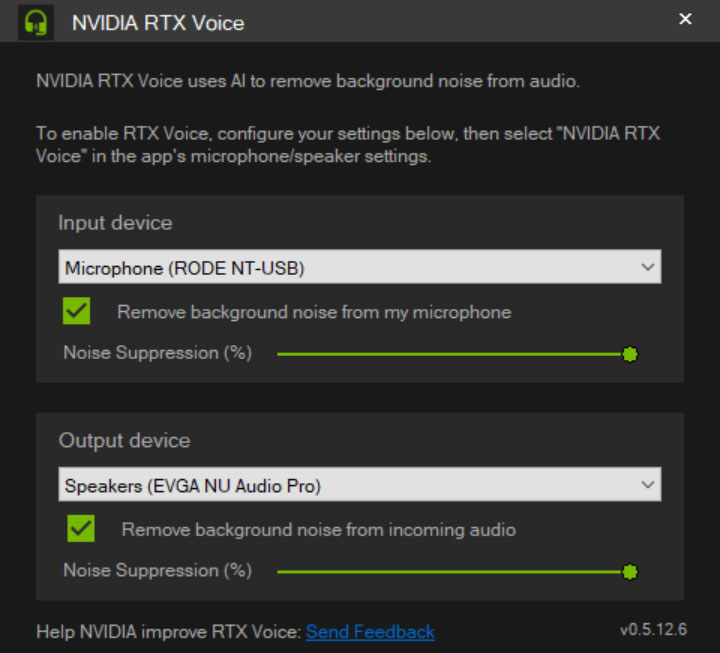
The user interface of the NVIDIA RTX Voice app is very basic. There are two drop-down menus, two accompanying sliders, and a URL you can use to send your feedback. The drop-down menus are used for input and output device selection. Simply put, in the input device menu select your microphone, headset, or sound card to which your microphone is connected. In the output device menu select your headphones or a sound card to which your headphones are connected.
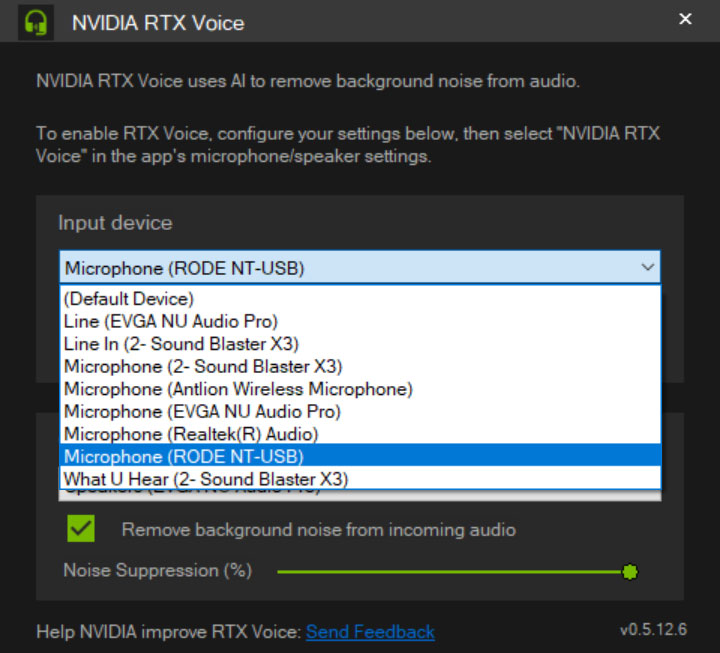
As I have five or more different sound cards and microphones connected to my PC at any given time, my input and output device lists are somewhat crowded, but you shouldn't have much trouble finding your microphone and headphones. After you select them, make sure you check the "Remove background noise from my microphone" option—only then does the RTX Voice technology actually kick in. The "Noise Suppression" slider decides how much of the background noise will get filtered. To hear the technology doing its magic to the fullest, it's best to leave these maxed out. As for the "Remove background noise from incoming audio" option underneath the output device drop-down menu, NVIDIA recommends you keep it off, as activating it can result in some quality loss and increased system load. Just to clarify, if you keep this option off, the RTX Voice technology won't try to reduce the background noise from whoever you're talking to. It will still filter the background noise of your own microphone. That's basically it—you're done configuring the RTX Voice app.

Next, you want to select your default playback device in Windows. From the list of available devices, accessible by left-clicking the speaker icon in the system tray, select the playback device your headset is connected to. DON'T select the "Speakers (NVIDIA RTX Voice)" here. If you do and turned on the background filtering of incoming audio in the previous step, you'll end up with a completely distorted sound of anything you try to listen to, as NVIDIA's technology will try to remove background noise from whatever is playing, be it music, games, movies, or anything else.
To sum it all up, the general idea is to have all Windows sounds (music, games, YouTube videos, movies, etc.) sent to the "physical" playback device, and both incoming and outgoing voice comms sent to the NVIDIA RTX Voice virtual sound device(s).
Setup
After you're done configuring the RTX Voice app and selecting the default playback device in Windows, it's time to move on to your VoIP or video conferencing app of choice. Setup procedures for Discord, OBS Studio, XSplit, Twitch Studio, WebEx, Zoom, Slack, Skype, and Google Chrome are well documented on NVIDIA's RTX Voice website, so there's no point in going over all of them. The technology works in various other apps outside of officially supported ones—for example, I successfully used it in Microsoft Teams and Audacity. The basic setup principle is always the same: find the in-app audio settings, select the "NVIDIA RTX Voice" as the input and output device, and turn off any built-in noise filtering options. Here's what that looks like in Discord.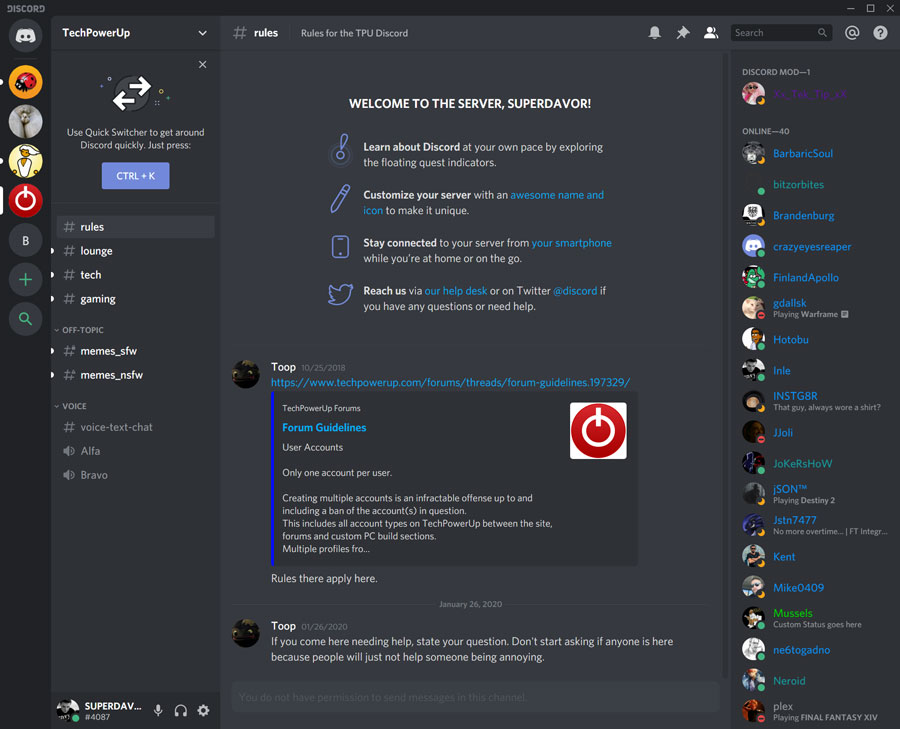
In Discord's main window, click on the cogwheel (User Settings) on the bottom left, next to your profile name.

Go to the "Voice & Video" menu and select "Microphone (NVIDIA RTX Voice)" as your input device. Then select "Speakers (NVIDIA RTX Voice)" in the output device drop-down menu.

Finally, scroll down and uncheck the "Noise Suppression" and "Noise Reduction" options. You can do the same for "Echo Cancellation" and "Automatic Gain Control", which has you get the purest possible sound coming from your microphone.
Apr 26th, 2024 00:51 EDT
change timezone
Latest GPU Drivers
New Forum Posts
- What's your latest tech purchase? (20341)
- Horizontal black lines popping up on my screen? (0)
- Which new games will you be buying? (316)
- Alphacool CORE 1 CPU block - bulging with danger of splitting? (20)
- Black screen after muting (5)
- What phone you use as your daily driver? And, a discussion of them. (1481)
- What are you playing? (20530)
- Secure boot already open help (0)
- TPU's Nostalgic Hardware Club (18465)
- Post your Speedometer 3.0 Score (36)
Popular Reviews
- Fractal Design Terra Review
- Thermalright Phantom Spirit 120 EVO Review
- Corsair 2000D Airflow Review
- ASUS GeForce RTX 4090 STRIX OC Review
- NVIDIA GeForce RTX 4090 Founders Edition Review - Impressive Performance
- ASUS GeForce RTX 4090 Matrix Platinum Review - The RTX 4090 Ti
- MSI GeForce RTX 4090 Suprim X Review
- Gigabyte GeForce RTX 4090 Gaming OC Review
- MSI GeForce RTX 4090 Gaming X Trio Review
- MSI GeForce RTX 4090 Suprim Liquid X Review
Controversial News Posts
- Sony PlayStation 5 Pro Specifications Confirmed, Console Arrives Before Holidays (117)
- Windows 11 Now Officially Adware as Microsoft Embeds Ads in the Start Menu (110)
- NVIDIA Points Intel Raptor Lake CPU Users to Get Help from Intel Amid System Instability Issues (106)
- AMD "Strix Halo" Zen 5 Mobile Processor Pictured: Chiplet-based, Uses 256-bit LPDDR5X (101)
- US Government Wants Nuclear Plants to Offload AI Data Center Expansion (98)
- AMD's RDNA 4 GPUs Could Stick with 18 Gbps GDDR6 Memory (88)
- Developers of Outpost Infinity Siege Recommend Underclocking i9-13900K and i9-14900K for Stability on Machines with RTX 4090 (85)
- Windows 10 Security Updates to Cost $61 After 2025, $427 by 2028 (84)