 34
34
Optimus Foundation CPU Block (Intel) Review
Installation »Closer Examination
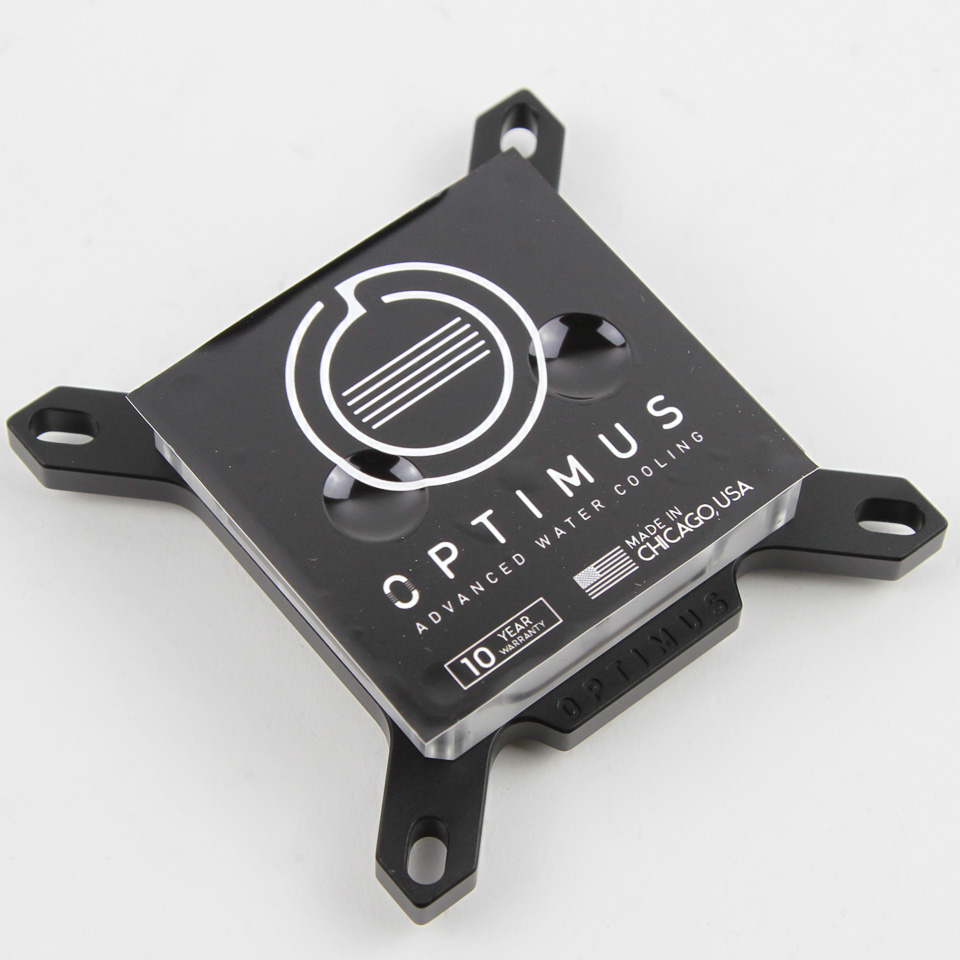


The Optimus Foundation CPU block comes in separate Intel and AMD flavors, so you buy what you want based on the platform of your choice. I have here the Intel version, and even it is available in different combinations of the top and cold plate. My particular sample has an acrylic top paired with a nickel-plated copper cold plate, and we see a protective sticker on the acrylic top, which is somewhat rare. There is a lot to unpack here, and this is again where the company has done a tremendous job of marketing all the small details that have gone into the making of the Optimus Foundation.
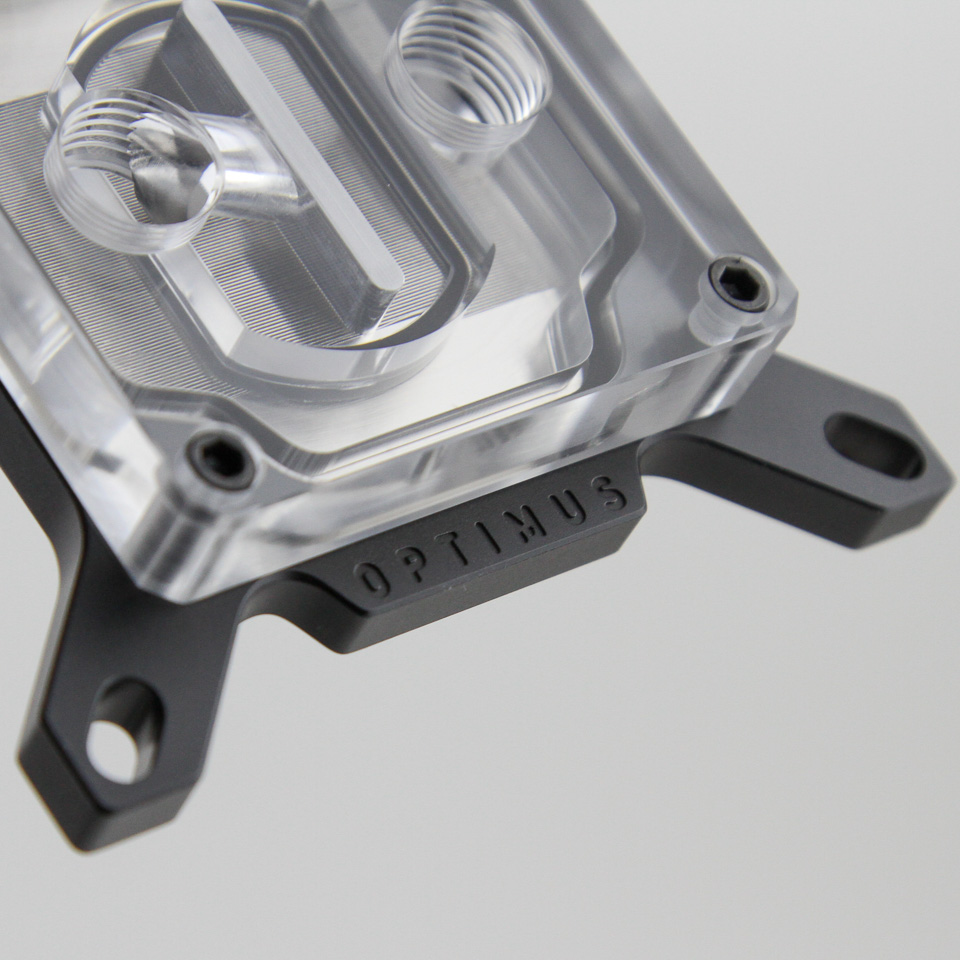
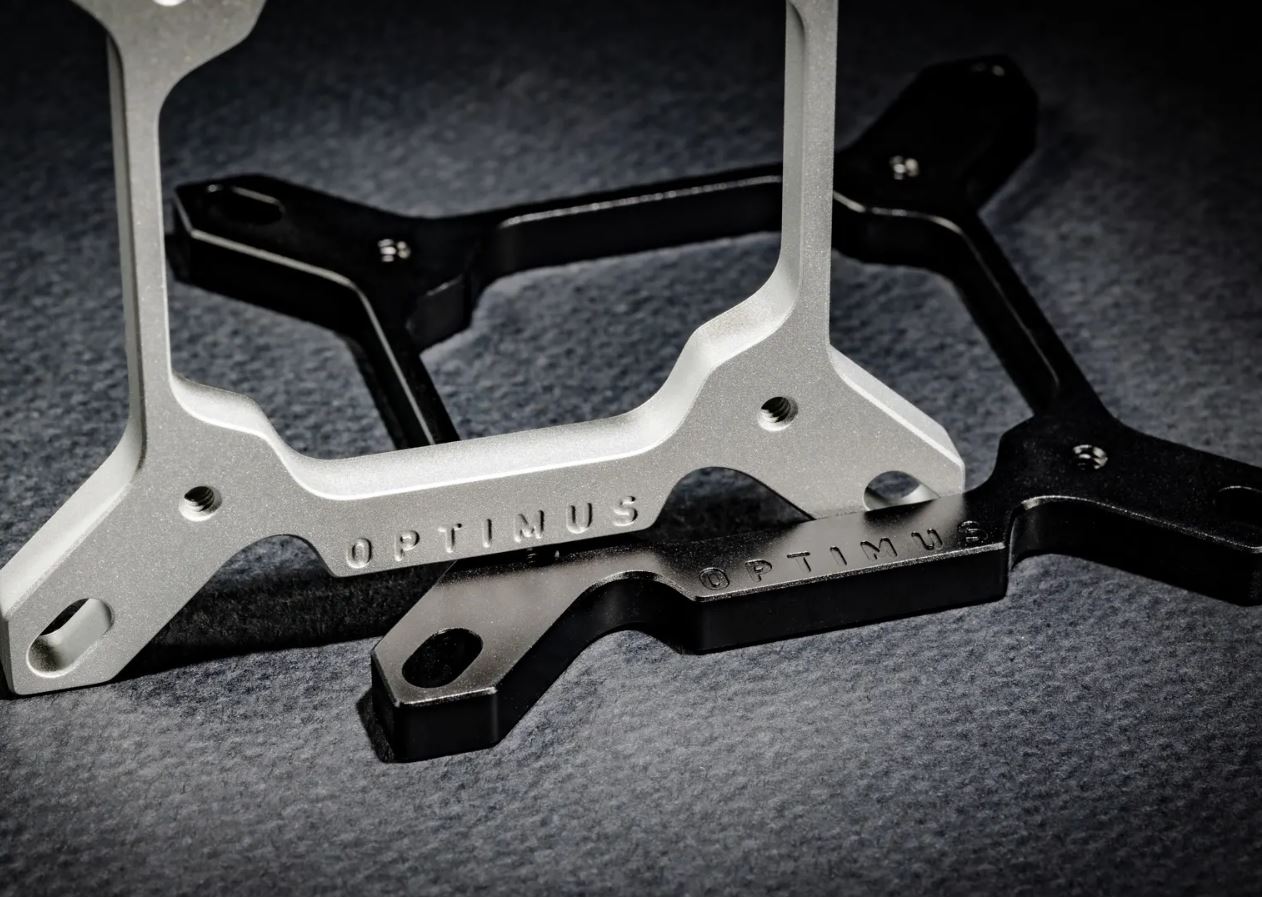
Take the top with an option of acrylic or acetal, for example. The acrylic used is cast and from recognized Plexiglas® and Polycast™ brands as opposed to extruded acrylic, which is far more common in this field and more prone to microfractures. The company is so confident about the strength of this cast acrylic that they invite users to tighten their fittings as far as they can with their hex key, but it is marketing more than practical since all you really need is to finger tighten the fittings for the O-rings to work. The cast acrylic is also CNC machined via diamond acrylic bits to achieve that clarity, as opposed to flame polishing or buffing, which also allows them to incorporate the cooling engine and an integrated jet plate for split central-inlet flow via the acrylic instead of a stainless steel jetplate as with most other companies. This is definitely time consuming, and combined with the different material class does result in a higher cost of production. Note also the four screws that hold the top in place on the thick aluminium bracket, which comes in either a satin silver or satin black anodized finish. This means the screws thread into metal instead of any acrylic or acetal threads for the screws. The bracket extends in one direction to have Optimus written on it, which is also the only visible branding in use.


There are two BSP G1/4" threaded ports in the top, which Optimus again proudly claims are CNC-machined by milling instead of tapped via a bench drill press as with many other companies. This does allow for a higher degree of accuracy and precision combined with fewer side effects, including potential cross-threading, but again, this is not really an issue with reputable brands in the DIY watercooling market today. The ports are spaced far enough apart for large fittings to be easily installed, including the hardline fittings from before. There are no indicators to tell which port is the designated inlet and outlet, but the website does note that the port that has the microfins visible directly underneath is the preferred outlet, and the port with the channel taking the coolant to the middle is the preferred inlet.
Flipping the block around, we see a protective sticker on the cold plate base that touches the CPU IHS, and it has a note to alert the user to remove it prior to installation lest it create a big barrier to heat transfer. Taking it off exposes the cold plate, and here we also see the use of diamond CNC bits to achieve a deliberate extreme smoothness as opposed to the slightly convex bow with most other companies. Optimus Cooling claims under 1 µ-inch (~0.6 µ-inch) with a roughness of 0.000025 mm, and the acrylic/acetal top providing the bow with the integrated jet plate. As with the acrylic top, the diamond tooling also allows for a clean mirror finish without buffing or polishing.


Disassembly was done after all testing had been complete, but the hex screws keeping the acrylic top in place on the aluminium bracket have an SAE imperial 7/64" head because Optimus Cooling uses US-sourced SAE screws. I only have metric hex keys here and have no intentions of purchasing an SAE set just for this, which had me use the stock photos above, combined with mine for the cold plate itself, which thankfully used countersunk Phillips head screws that were easy enough to remove, even if they were tightened well beyond the usual. The two sets of screws mean that the top and cold plate can be rotated around the bracket for your choice of plumbing layout while still having the bracket point the Optimus writing towards the user. The top has deeper grooves for the O-rings relative to some of the recent blocks I have seen, which does make it easier to replace them as necessary.
The cold plate has 57 mm wide sides and is 3 mm thick, which is slightly more than most and decreases the rate of thermal transfer through it as a result. We get a large machined set of ultra-thin microfins which are rated to be 0.1016 mm thick and microchannels that are twice as thick. These are definitely the thinnest CNC-machined microfins I have seen myself, with skiving usually used for such a fin geometry with CPU block cold plates in CLCs. Optimus Cooling says this is a result of a patent-pending process that took over three years to develop, which means they are able to pack more active surface area for heat transfer into the same cooling engine area, all other things being equal. But that was not enough, and even the cold plate area occupied by the microfins is above average at a whopping 45 x 30.75 mm. So liquid flow restriction should be higher here, but the increased surface area should also aid thermal transfer from the cold plate to the coolant. This particular cold plate is also nickel-plated but—in a trend from the company—it too is different because of the use of electro-less plating with mid to high phosphorous nickel instead of the electroplating most companies do. The former is not really a cosmetic process, as I personally know from my own work, but is better for preventing galvanic corrosion and longevity, with the latter more for appearances and requiring a thicker plating to be functionally similar.
May 7th, 2024 04:12 EDT
change timezone
Latest GPU Drivers
New Forum Posts
- What are you playing? (20591)
- Throttle STOP Program Function (0)
- Intel Core "Special Edition" Owners' Club (31)
- What's your latest tech purchase? (20452)
- Only some humans can see refresh rates faster than others, I am one of those humans. (204)
- Overheating/undervolt/setup issues (9)
- Gigabyte Aorus Elite AX V2 rev 1.1 BIOS update "AMD AGESA V2 1.2.0.B" (6)
- The Official Thermal Interface Material thread (1169)
- GPU Hot Spot Temperature 105 Celsius, fans at 3000 RPM, while GPU Temperature is max 70 Celsius (40)
- Cybersecurity - OSINT Software for Linux (3)
Popular Reviews
- Finalmouse UltralightX Review
- Corsair iCUE Link RX120 RGB 120 mm Fan Review
- Cougar Hotrod Royal Gaming Chair Review
- Meze Audio LIRIC 2nd Generation Closed-Back Headphones Review
- Upcoming Hardware Launches 2023 (Updated Feb 2024)
- ASRock NUC BOX-155H (Intel Core Ultra 7 155H) Review
- AMD Ryzen 7 7800X3D Review - The Best Gaming CPU
- ASUS Radeon RX 7900 GRE TUF OC Review
- Montech Sky Two GX Review
- HYTE THICC Q60 240 mm AIO Review
Controversial News Posts
- Intel Statement on Stability Issues: "Motherboard Makers to Blame" (249)
- AMD to Redesign Ray Tracing Hardware on RDNA 4 (172)
- Windows 11 Now Officially Adware as Microsoft Embeds Ads in the Start Menu (167)
- Sony PlayStation 5 Pro Specifications Confirmed, Console Arrives Before Holidays (118)
- AMD's RDNA 4 GPUs Could Stick with 18 Gbps GDDR6 Memory (114)
- NVIDIA to Only Launch the Flagship GeForce RTX 5090 in 2024, Rest of the Series in 2025 (110)
- NVIDIA Points Intel Raptor Lake CPU Users to Get Help from Intel Amid System Instability Issues (106)
- AMD Ryzen 9 7900X3D Now at a Mouth-watering $329 (104)