 10
10
Raidmax Hyperion Review
Assembly & Finished Looks »A Closer Look - Inside


To access the interior, simply remove the thumbscrews holding each panel in place before pulling them off. As expected, the interior is all-black, and there is a dividing wall that acts as a motherboard tray. You will store the motherboard and all its attached components in the main compartment, while the hidden, smaller compartment is for the storage drives and the power supply. Raidmax also included a mounting plate for two 120 mm fans here, but these are actually for liquid-cooling setups.

You may also pull the front off the chassis to reveal two 120 mm mounting positions. You could install liquid cooling there in theory if the 240 mm radiator is compact enough, but doing so would limit your choice of a graphics card as it does take up some the space a long graphics card would otherwise occupy.


You may also pull off the top, which reveals the two LED-equipped 120 mm units there. You may replace these with two 140 mm variants or go all out with a single 180 mm unit instead. Liquid-cooling setups should also find the space they need here, but such a setup would get in the way of the external 5.25" bay. In fact, the fan toward the front is already enough to get in the way of the bay.


Looking at the front in the main compartment, it is free to be used for cooling, while the top holds the aforementioned external drive bay. You may actually remove the metal tray of the bay to allow for much more choice when it comes to the type of 240 mm radiator you would like to use within.


Things look a lot more traditional in the rear of the main compartment, which is due to the standardized layout of mATX boards. There are the expansion slots, each protected by their own cover, and above those is an all-black 120 mm fan, which brings the total count of pre-installed cooling units to three.

You may install two 3.5" or 2.5" drives onto the floor on this side, which is perfect for showing those drives off to onlookers. Raidmax also includes rubber rings as an anti-vibration measure for the larger 2.5'' drives. As you could install fans here, you will also find additional rings for that purpose. Last but not least, a removable dust filter protects the entire underside of the chassis from dust and grime.


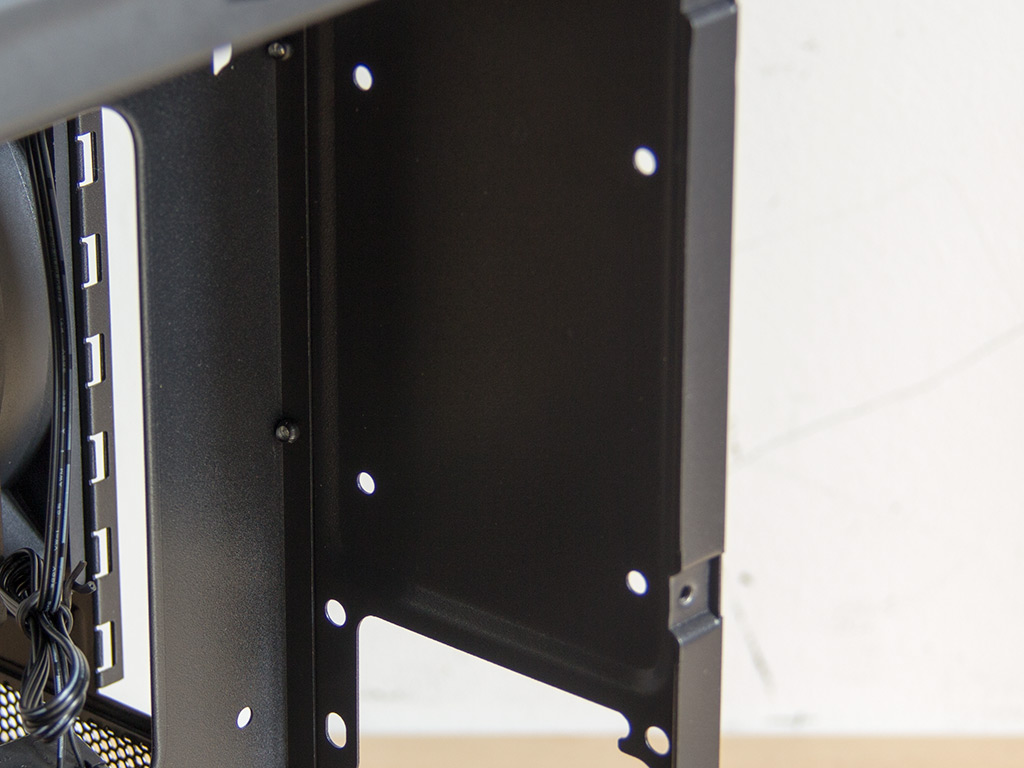
Diving into the other, smaller compartment, there are a HDD cage for two 3.5'' or 2.5" drives, which you have to place onto individual trays, and the simple PSU bay, which comes with four foam bumps to kill any vibration the PSU may cause. Four holes in the rear's top half also allow for a 2.5" hard drive to be installed.


All the cables within the Raidmax Hyperion are of the standard variety. Sleeved black, these go with the rest of the interior paint job. One positive is that single row of USB 2.0 connector, so you will not be wasting any connectivity on the I/O panel's single port on top.
May 6th, 2024 11:54 EDT
change timezone
Latest GPU Drivers
New Forum Posts
- Battery swap for cyberpower UPS (59)
- Only some humans can see refresh rates faster than others, I am one of those humans. (177)
- What is this? (3)
- The Official Thermal Interface Material thread (1163)
- Apparently Valve is giving refunds on Helldivers 2 regardless of hour count. Details inside. (95)
- Strange system crashes out of nowhere, help (29)
- How to check flatness of CPUs and coolers - INK and OPTICAL INTERFERENCE methods (116)
- Envinda RX 580 2048SP 8GB no image (18)
- Is this Sapphire PULSE RX 5600 XT legit or fake? (41)
- Basemark Web 3.0 scores (12)
Popular Reviews
- Finalmouse UltralightX Review
- ASRock NUC BOX-155H (Intel Core Ultra 7 155H) Review
- Meze Audio LIRIC 2nd Generation Closed-Back Headphones Review
- Cougar Hotrod Royal Gaming Chair Review
- Upcoming Hardware Launches 2023 (Updated Feb 2024)
- Montech Sky Two GX Review
- AMD Ryzen 7 7800X3D Review - The Best Gaming CPU
- HYTE THICC Q60 240 mm AIO Review
- ASUS Radeon RX 7900 GRE TUF OC Review
- Logitech G Pro X Superlight 2 Review - Updated with 4000 Hz Tested
Controversial News Posts
- Intel Statement on Stability Issues: "Motherboard Makers to Blame" (248)
- Windows 11 Now Officially Adware as Microsoft Embeds Ads in the Start Menu (167)
- AMD to Redesign Ray Tracing Hardware on RDNA 4 (163)
- Sony PlayStation 5 Pro Specifications Confirmed, Console Arrives Before Holidays (117)
- AMD's RDNA 4 GPUs Could Stick with 18 Gbps GDDR6 Memory (114)
- NVIDIA Points Intel Raptor Lake CPU Users to Get Help from Intel Amid System Instability Issues (106)
- AMD Ryzen 9 7900X3D Now at a Mouth-watering $329 (104)
- AMD "Strix Halo" Zen 5 Mobile Processor Pictured: Chiplet-based, Uses 256-bit LPDDR5X (103)