 5
5
Raijintek Thetis Review
Value & Conclusion »Test System
| System Parts for Case Reviews | |
|---|---|
| Processor: | Intel Core i5-6600K |
| Motherboards: | ATX: MSI Z270 Tomahawk mATX: MSI H270M Mortar Arctic mini-ITX: MSI Z270I Gaming Pro Carbon AC Provided by: MSI |
| Graphic Card: | Long: NVIDIA GeForce GTX 280 OEM Short: HIS Radeon 5350 HD |
| Memory: | 16 GB ADATA XPG Dazzle DDR4 2800 MHz CL17-17-17 1.25V 16 GB ADATA XPG Z1 DDR4 3000 MHz CL18-18-18 1.35V 16 GB ADATA XPG Z1 DDR4 2400 MHz CL16-16-16 1.20V Provided by: ADATA |
| HDD: | Western Digital 320 GB 7200 RPM |
| SSD: | ADATA Premier Pro SP920 MLC 256 GB ADATA Ultimate SU800 3D TLC 256 GB ADATA Premier SP550 TLC 240 GB Provided by: ADATA |
| Power Supply: | Fractal Design Integra 630W Provided by: Fractal Design |
| Cooling: | Air Cooling Mini-ITX: Thermalright AXP-100R Air Cooling mATX: Thermalright Macho 90 Air Cooling ATX: Cooler Master Hyper 212 LED |
Assembly

Installing the motherboard is done by traditional means - you will need to use screws and spacers. As you can see, the graphics card has not yet been placed inside the system as that would make adding a power supply impossible. The 120 mm Thermalright cooler fits within the compact Thetis well; you don't have to make a lot of compromises when it comes to the CPU cooler.


Adding the power supply bears no surprises either. Simply put it into its designated spot and use the included screws to secure it. You should make sure to use a fairly compact PSU if you intend to utilize a long GPU as well, as the two will overlap otherwise.


Once the PSU is in place, you may add a 3.5" drive to the front by placing rubber-ringed mounting screws onto the drive you will then slide it into place. Once inserted, there is no play, and a thumbscrew on the plate keeps it from sliding off, which is simple but effective. As mentioned before, all the cables for the drive are routed behind the motherboard tray for a clean and functional build.


Adding an SSD is done in the same fashion, but there is no additional screw to hold the drive in place. The glass side panel sandwiches it firmly in place and is enough to keep the drive from coming loose.


With everything installed, the Thetis makes quite the clean impression. Those who want to add a second GPU or additional storage need to take a few extra steps, but the result should be quite similar. The biggest issue on the other side is the fact that the opening for the CPU cooler is too small to be practical. The other downside is that I had to get a bit creative with how to keep things clean behind the motherboard tray as the Thetis does not offer a lot of positions for zip ties.
Finished Looks
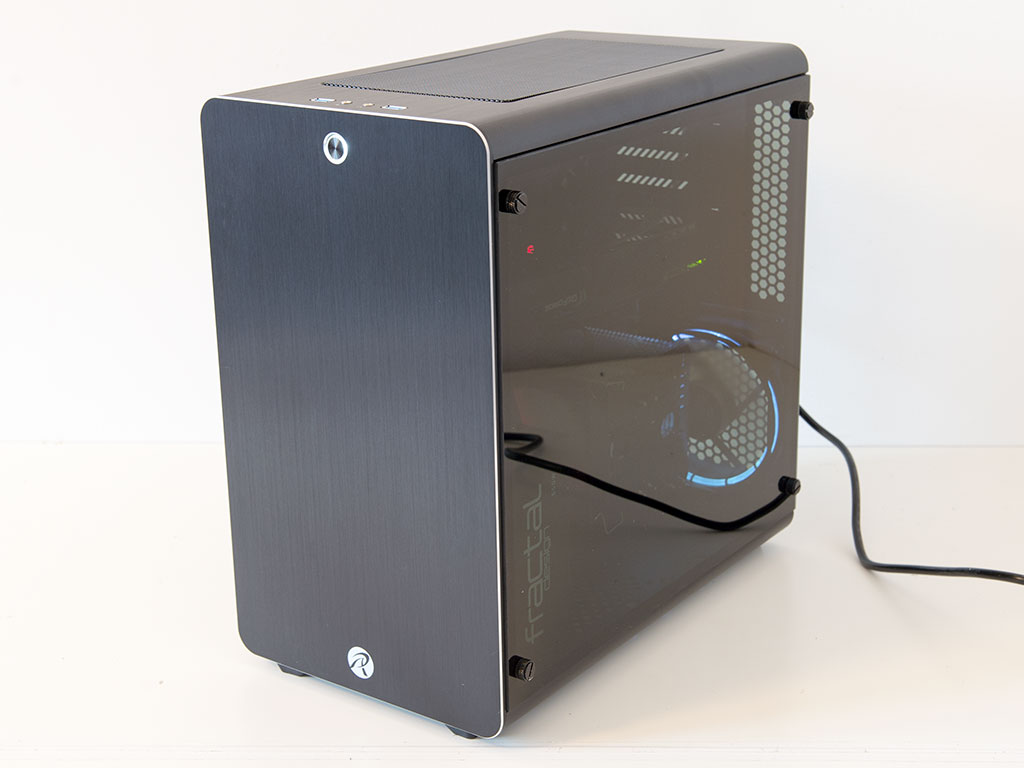

Once everything is in place and the side panels have been put back on the chassis, the Thetis make quite the nice impression. Much like the Styx or Metis, you are greeted by a white LED ring around the power button, but the Thetis also comes with white LED lighting in the fan.

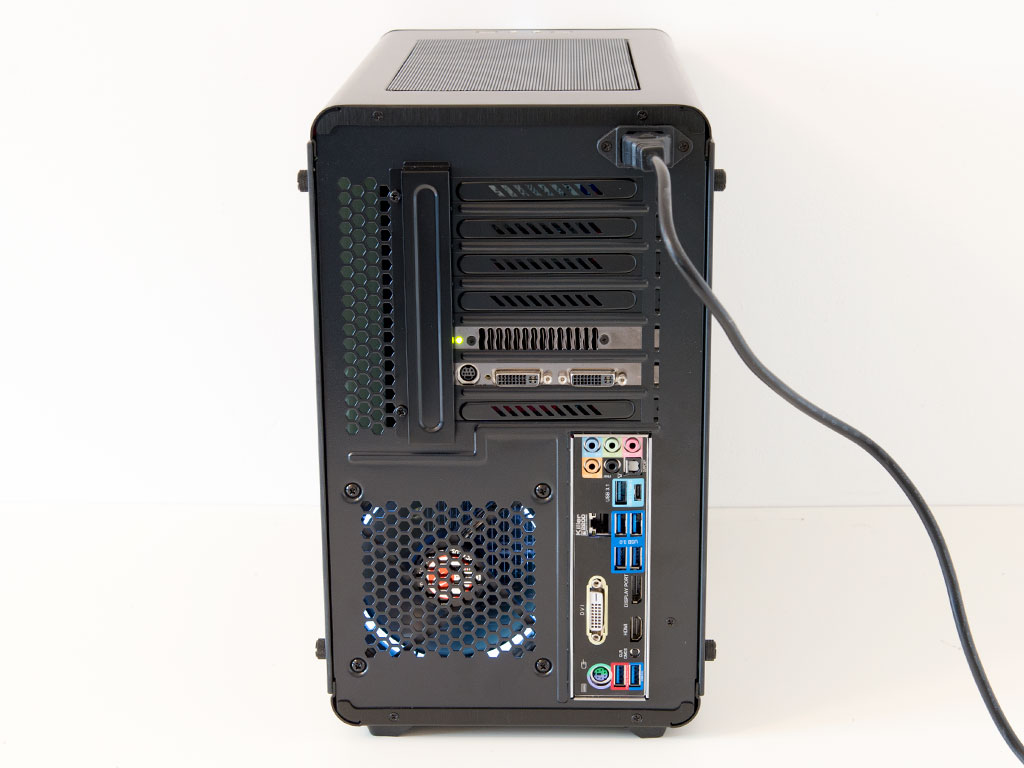
Both of these bright spots can clearly be seen from the front and back, respectively. In the rear, everything is where you would expect it to be for a flipped motherboard layout, with the exception of the missing PSU bay. While the power cable in the top-right corner is not an issue, having the plug on the bottom instead of the rear's top edge would have been nice.


Taking a look at the primary side, you can see the lighting elements of the motherboard, memory, and LED fan, but the tint of the glass side panel does not allow for much more insight than that. That same tint is beneficial when it comes to the other side panel, as you cannot see any of the cable mess either.
Apr 29th, 2024 09:46 EDT
change timezone
Latest GPU Drivers
New Forum Posts
- Is it better for zero RPM PSUs to place the fan on top? (11)
- Does charging protection matter? (31)
- Why MS buying all of these Studios is bad for Gaming (25)
- What's your latest tech purchase? (20388)
- Z790 ACE MAX? (3)
- EK seems to be having major issues (53)
- Graphics cards (6)
- Old high quality PSU, or semi-old mid-quality PSU? (8)
- Dialing in the overlock on my new 12600kf, matured silicon process showing great results... (8)
- Anyone know if Rufus gets around the SSE4.2 issue with Windows 11 24H2? (46)
Popular Reviews
- Ugreen NASync DXP4800 Plus Review
- HYTE THICC Q60 240 mm AIO Review
- Upcoming Hardware Launches 2023 (Updated Feb 2024)
- MOONDROP x Crinacle DUSK In-Ear Monitors Review - The Last 5%
- MSI GeForce RTX 4080 Super Expert Review
- FiiO K19 Desktop DAC/Headphone Amplifier Review
- Thermalright Phantom Spirit 120 EVO Review
- AMD Ryzen 7 7800X3D Review - The Best Gaming CPU
- ASUS Radeon RX 7900 GRE TUF OC Review
- ASUS GeForce RTX 4070 Ti Super TUF Review
Controversial News Posts
- Windows 11 Now Officially Adware as Microsoft Embeds Ads in the Start Menu (146)
- Sony PlayStation 5 Pro Specifications Confirmed, Console Arrives Before Holidays (117)
- Intel Statement on Stability Issues: "Motherboard Makers to Blame" (107)
- NVIDIA Points Intel Raptor Lake CPU Users to Get Help from Intel Amid System Instability Issues (106)
- AMD "Strix Halo" Zen 5 Mobile Processor Pictured: Chiplet-based, Uses 256-bit LPDDR5X (103)
- US Government Wants Nuclear Plants to Offload AI Data Center Expansion (98)
- AMD's RDNA 4 GPUs Could Stick with 18 Gbps GDDR6 Memory (96)
- TechPowerUp Hiring: Reviewers Wanted for Motherboards, Laptops, Gaming Handhelds and Prebuilt Desktops (85)