 0
0
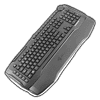
ROCCAT Horde AIMO Keyboard Review
Driver »Disassembly


Disassembly of the ROCCAT Horde AIMO is easier than with most plastic case keyboards so long as you keep in mind a hidden screw under the label sticker on the back. The rest of the 17 Phillips head screws are all easily accessible, and once done, you can use a thin, flat object to quickly pry off the top panel piece. There are no interlocking plastic tabs to worry about here, so I am thankful to ROCCAT for making this easy on me. We can now get a look at the underside of this piece, including the button keycaps alongside the tuning wheel that has a notch cut out to fit the rotating component of the wheel on the PCB.


The rest of the keyboard has the rubber dome sheet on top, which is held in place via multiple holes that go over extending plastic bits from the bottom panel piece. The domes are on the shorter side of average, which, as mentioned before, plays a role in how the keys actuate, and there is another set of membrane switches at the top for the various dedicated buttons that comes with its own smaller rubber dome layer.


This top row of switches is on a rigid PCB that is screwed into place in the bottom case panel, and removing all the screws allows for enough flex to remove the internal USB connector and separate the keyboard cable from the PCB. We can now get a better look at the PCBs, and there are multiples of them—rigid or otherwise. In the top-right corner as seen from the front is the wheel with the specific notch that meets the opening in the top panel piece, so account for this when putting the keyboard back together or it won't fit or work as intended. We also see ribbon connectors galore connecting the contact point and lighting layers to the rigid PCB that also houses the controllers.


There are three layers of contact point PCBs, with patterns laid out similar to other membrane switches. The patterns convey the keystroke to the controller, which transfers the signal via the USB cable to get the input onto your display. There is a fourth layer for the lighting, which has another ribbon cable in the bottom-right corner, and here is where things get limiting. Due to how membrane switches work—and the workaround ROCCAT implemented with these so-called Membranical switches does not matter here—you are limited to having smaller LEDs for backlighting, and we do have a set of tiny LEDs instead of a single, much larger one as is usually the case with mechanical keyboards. We will see how this affects backlighting, if at all. These LEDs are also not present under every switch, so per-key lighting is not an options here. ROCCAT claims multi-zone lighting, and that is an accurate statement based on the hardware here.
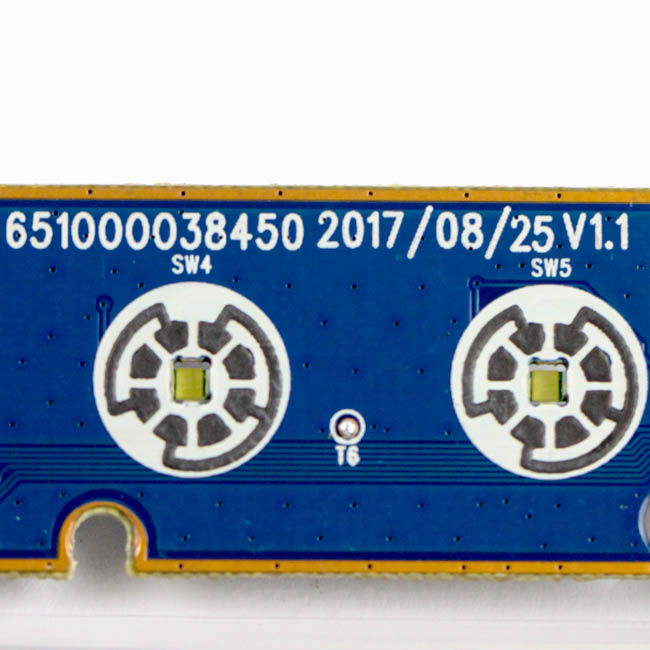


The printing on the rigid PCB tells us that this PCB design was likely finalized in August of 2017, and solder quality is a mix of neat work on the smaller components and messy work on others. Due to the nature of the product, it is likely that some of the former was machined or patterned, while the latter was hand soldered since there is excess flux to be seen. Powering the keyboard is an NXP LPC11U67 series 32-bit ARM Cortex-M0+ microcontroller at 50 MHz, with 512 KB of onboard flash memory to store the various pre-programmed functions and profiles, 36 KB of SRAM, 4 KB EEPROM, and an integrated 12-bit ADC (analog to digital converter). No dedicated LED drivers here, and none are needed with the relatively simple LED hardware present.
Before we move on, be advised that disassembly will void the warranty and that TechPowerUp is not liable for any damages incurred if you decided to go ahead and do so anyway.
May 7th, 2024 02:04 EDT
change timezone
Latest GPU Drivers
New Forum Posts
- What's your latest tech purchase? (20452)
- What are you playing? (20575)
- Intel Core "Special Edition" Owners' Club (30)
- Only some humans can see refresh rates faster than others, I am one of those humans. (204)
- Overheating/undervolt/setup issues (9)
- Gigabyte Aorus Elite AX V2 rev 1.1 BIOS update "AMD AGESA V2 1.2.0.B" (6)
- The Official Thermal Interface Material thread (1169)
- GPU Hot Spot Temperature 105 Celsius, fans at 3000 RPM, while GPU Temperature is max 70 Celsius (40)
- Cybersecurity - OSINT Software for Linux (3)
- nvflashk - Flash any BIOS to NVIDIA GPUs - Safe board ID bypass up to 4xxx series (241)
Popular Reviews
- Finalmouse UltralightX Review
- Cougar Hotrod Royal Gaming Chair Review
- Meze Audio LIRIC 2nd Generation Closed-Back Headphones Review
- Corsair iCUE Link RX120 RGB 120 mm Fan Review
- Upcoming Hardware Launches 2023 (Updated Feb 2024)
- ASRock NUC BOX-155H (Intel Core Ultra 7 155H) Review
- AMD Ryzen 7 7800X3D Review - The Best Gaming CPU
- ASUS Radeon RX 7900 GRE TUF OC Review
- Montech Sky Two GX Review
- HYTE THICC Q60 240 mm AIO Review
Controversial News Posts
- Intel Statement on Stability Issues: "Motherboard Makers to Blame" (249)
- Windows 11 Now Officially Adware as Microsoft Embeds Ads in the Start Menu (167)
- AMD to Redesign Ray Tracing Hardware on RDNA 4 (166)
- Sony PlayStation 5 Pro Specifications Confirmed, Console Arrives Before Holidays (118)
- AMD's RDNA 4 GPUs Could Stick with 18 Gbps GDDR6 Memory (114)
- NVIDIA to Only Launch the Flagship GeForce RTX 5090 in 2024, Rest of the Series in 2025 (108)
- NVIDIA Points Intel Raptor Lake CPU Users to Get Help from Intel Amid System Instability Issues (106)
- AMD Ryzen 9 7900X3D Now at a Mouth-watering $329 (104)