 9
TerraMaster D1 SSD Pro Enclosure Review - Feature Packed and Silent
Performance »Installation


To open the enclosure, use the included screwdriver to open a small Phillips screw located between one of the ridges. The two halves wedge out. You then shear the two halves to separate them. One of the halves has the PCB with the M.2 slot, the other has a preinstalled thermal pad that pulls heat from your SSD.


Use the same screwdriver to unfasten a small Phillips screw on the M.2-2280 standoff, slot in your SSD, hold it down on the standoff, and fasten this screw back. You'll notice how one end of the half with the PCB has stubs that slot into cavities on the other half. Slide this half of the enclosure back in, hold the two halves together, and re-fasten the screw that holds the two halves together.
Teardown and Components

The D1 SSD Pro design is very simple, the PCB is sandwiched between the two metal halves that make up the body. You simply remove the M.2 SSD (if one was installed), and unfasten four Phillips head screws. Then, gently pry the PCB outwards, because it's held in place by the mild adhesion of the thermal pads.

The D1 SSD Pro PCB is a fine piece of engineering. It has a network of four key controllers to ensure compatibility with Thunderbolt 5/4/3, USB4, USB 3.2, and older generations of USB; and an accurate detection of available host interface bandwidth and power delivery, to ensure that your M.2 SSD runs properly within the available bandwidth constraints.
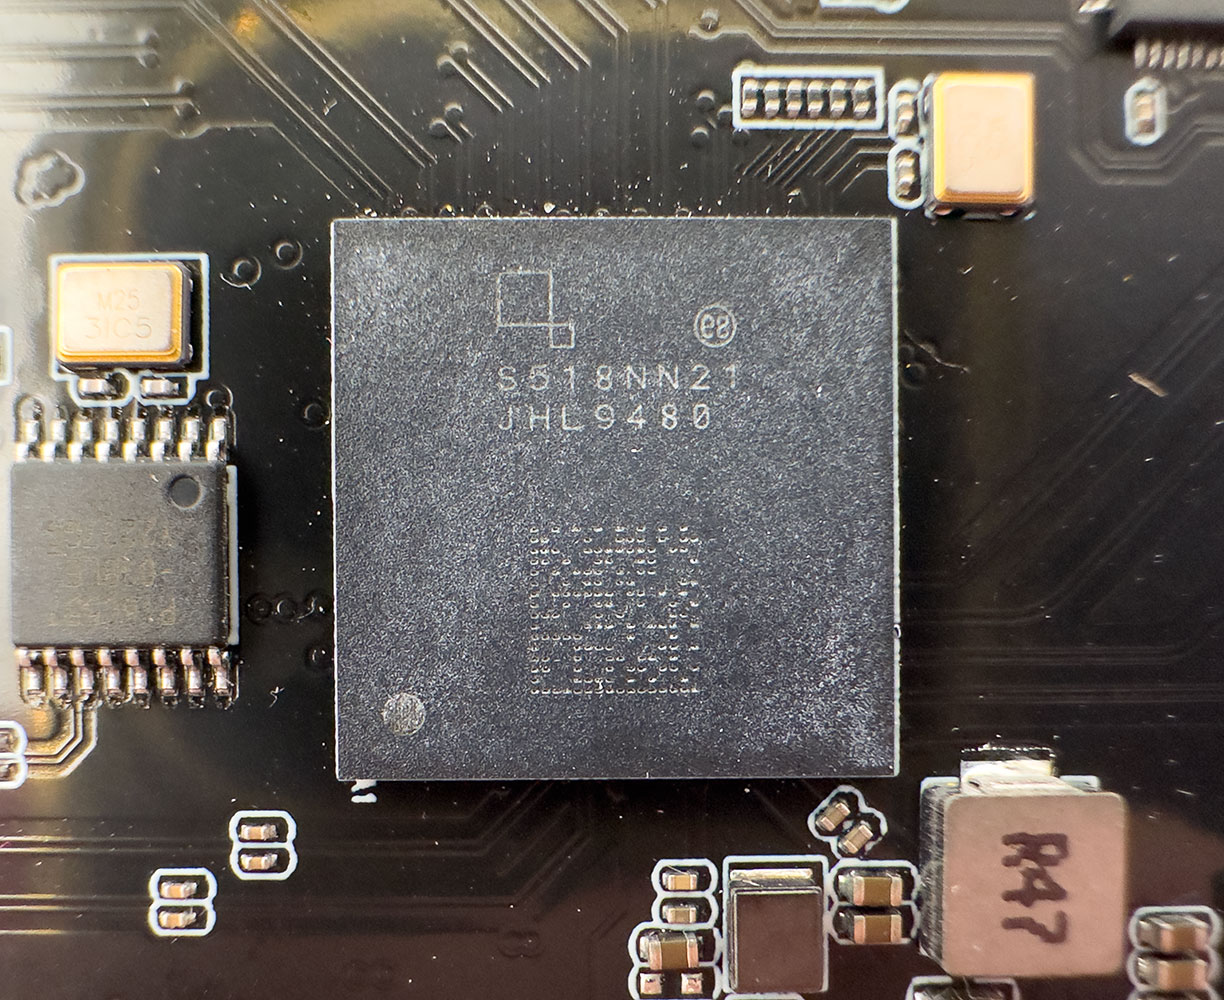
The star attraction on the PCB—and its hottest component—is the Intel JHL9480 "Barlow Ridge" Thunderbolt 5 accessory controller. It takes in an 80 Gbps Thunderbolt 5 or USB4 V2 upstream connection, and puts out a PCI-Express 4.0 x4 downstream connection. Your SSD will be exposed as a proper NVMe device.
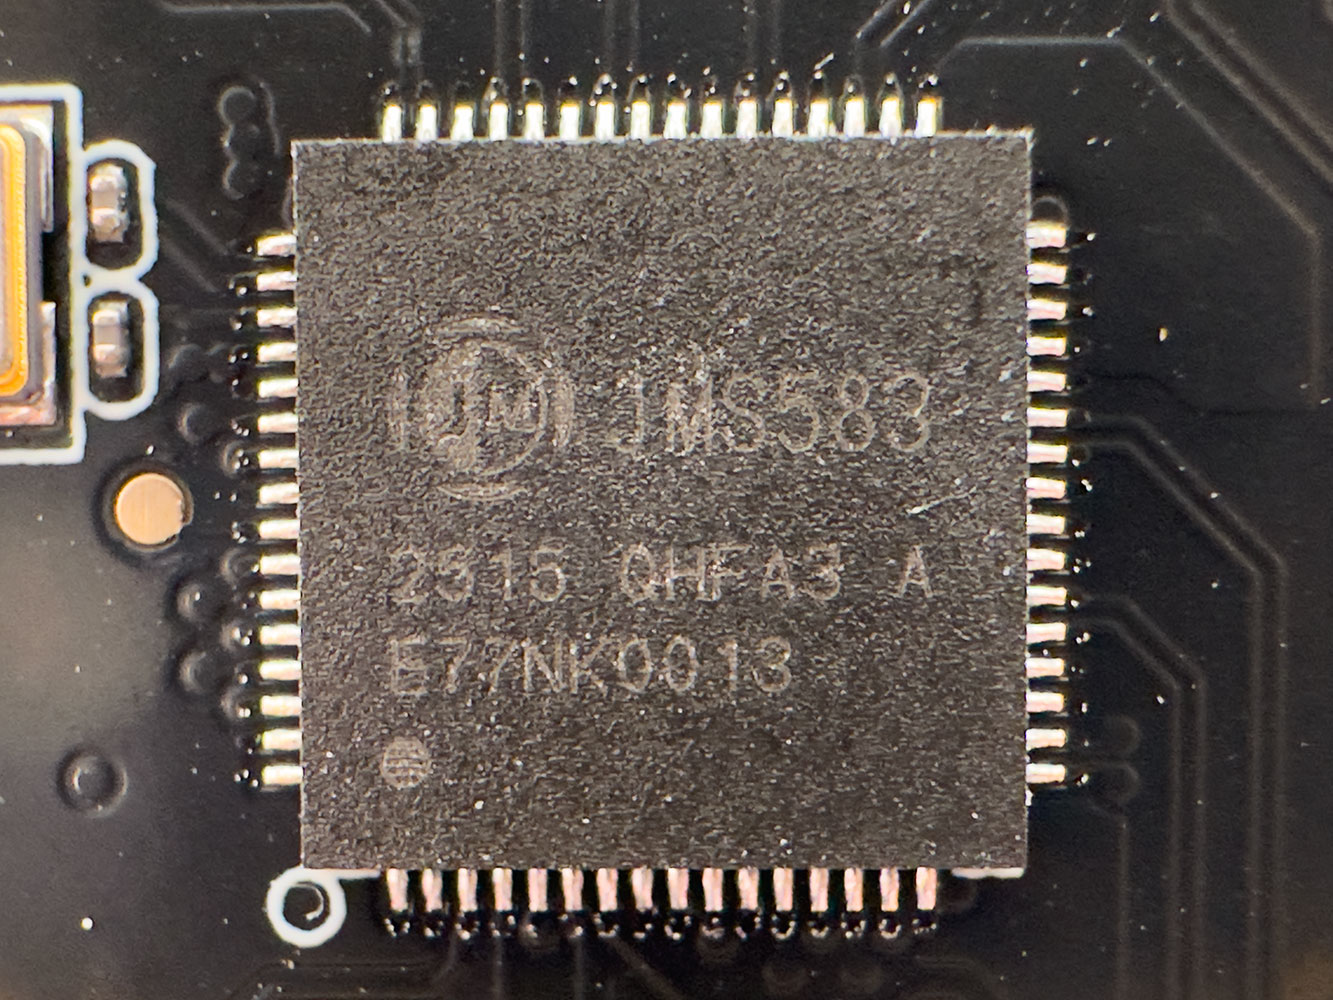
This is the JMicron JMS583 controller. When connected to a legacy interface such as USB 3.1 Gen 2 (10 Gbps) or older, this controller puts out a PCI-Express 3.0 x2 connection to the M.2 slot. Your SSD won't be exposed as an NVMe device, but rather as a USB mass-storage device with USB-attached SCSI (UASP) support.
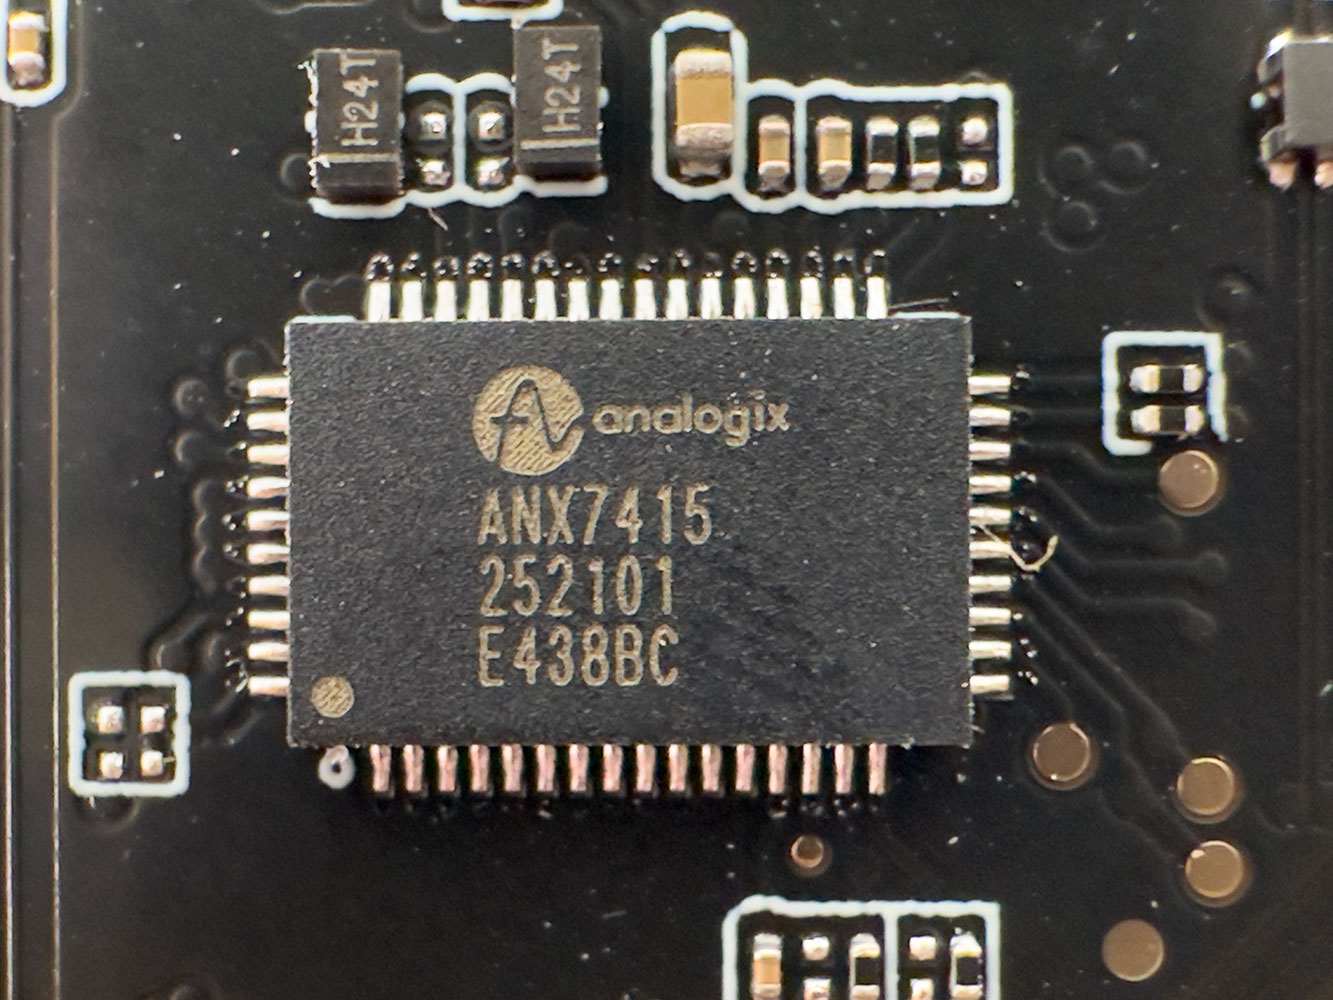
This is the Analogix ANX7415, it is a USB type-C port controller. When the enclosure plugs in, this controller negotiates the USB standard type, available bandwidth, and USB-PD power budget with the host machine, and based on a vendor-defined code, allocates the appropriate controller to handle the session. When it detects a Thunderbolt 5/4/3 or USB4 connection, it invokes the JHL9480 and ANX7406 combination, and when faced with a legacy connection, it invokes the JMS583.

The Analogix ANX7406 is an advanced USB4 and USB-PD 3.1 compliant multifunction controller that handles high-wattage power delivery, along with electrical protections, such as anti-surge. This chip ensures that an M.2 Gen 4 SSD has its maximum power budget to ensure normal operation. It is also responsible for certain vendor support and maintenance functions, such as performing firmware updates.
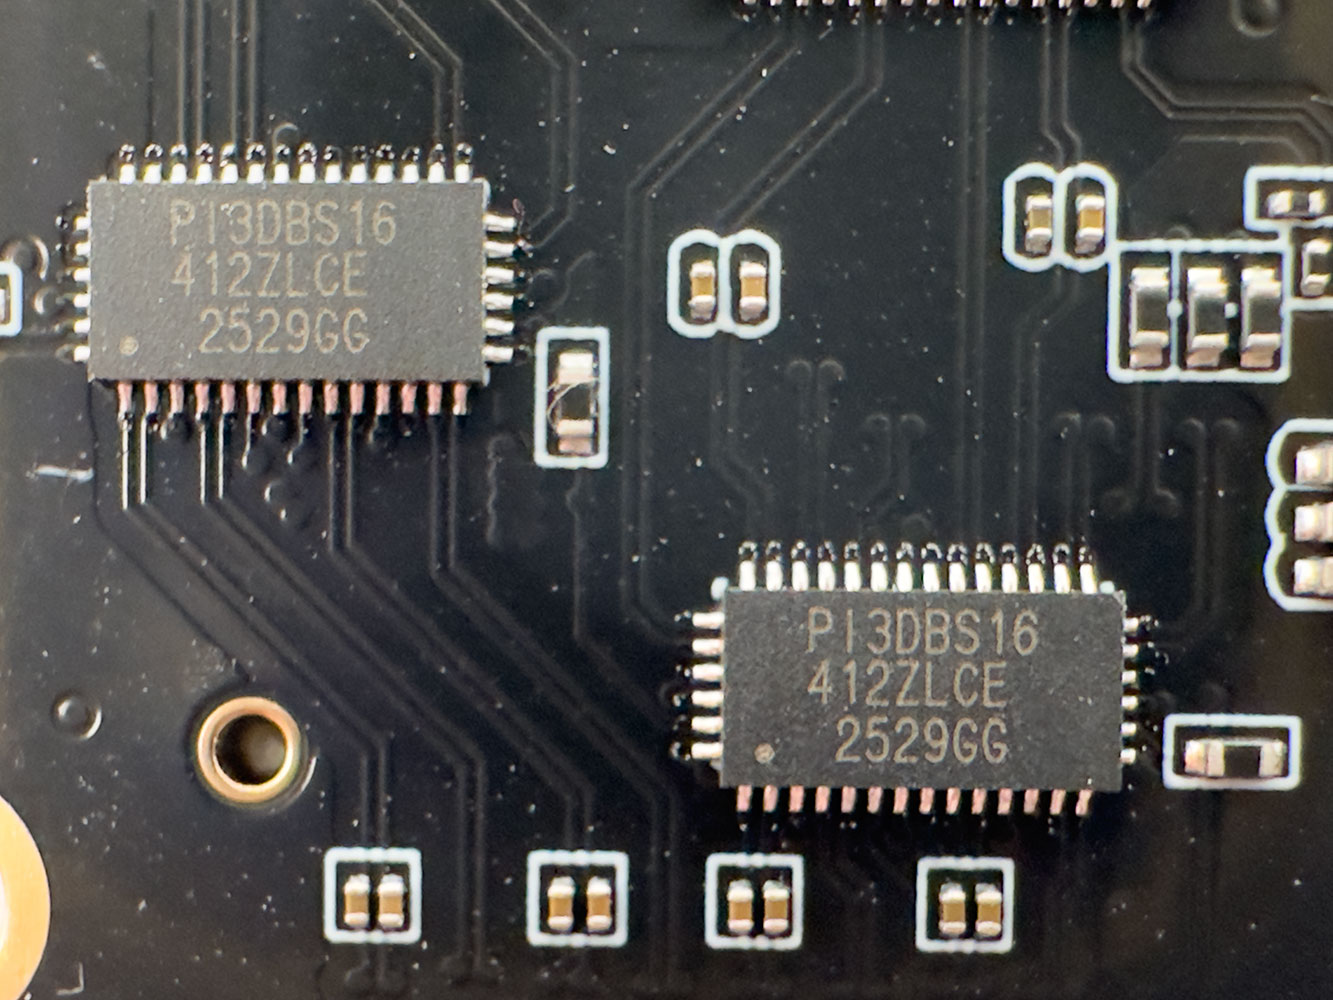
This is a pair of Pericom PI3DBS16 PCIe Gen 4 lane switches. These act like Y-splitters, taking in two separate upstream connections from the Intel JHL9480 and JMicron JMS583, and putting out the last-mile downstream PCIe connection to the M.2 slot.
There is a plethora of tiny ROM chips, buck controllers, and clock crystals scattered all over the PCB for the various controllers.
Nov 20th, 2026 14:03 PST
change timezone
Latest GPU Drivers
New Forum Posts
- Honestly, do you care about GTA VI? (208)
- When you could finally run Crysis maxed out? (63)
- WarpCoreBench scores! (80)
- GTA VI (20)
- Anthrophics IPO (25)
- GeekMagic Ultra Smart WiFi Weather Station (8)
- Very unusual two gaming-pc scenarios. (35)
- Can i play GTA 6 now? (Joke) (14)
- How to prevent OLED burn damage due to PC freezes or power outtages? (47)
- Zen 3 IF/IMC degradation (239)
Popular Reviews
- AMD Zen 6 Technical Deep Dive
- Ugreen NASync DXP4800 GT Review
- Microsoft Surface Laptop Ultra Review - The Next-gen Arm Laptop
- Corsair RM1200e (Second Generation) Review
- Acemagic Retro X3 Review
- Upcoming Hardware Launches 2027 (Updated Nov 2026)
- Pulsar Office Tour & First Look at P1 Dual-Sensor Mouse
- Biwin Black Opal NV7400 2 TB Review
- AMD Ryzen 7 9800X3D Memory Performance Scaling
- AMD Ryzen 7 9800X3D Review - The Best Gaming Processor
TPU on YouTube
Controversial News Posts
- NVIDIA Co-Founder and CEO Jensen Huang Officially Resigns (490)
- Report: Jensen Huang Eyes NVIDIA Comeback (255)
- Open Letter Asking NVIDIA to Reinstate Jensen Huang Passes 115,000 Signatures (184)
- OpenAI CEO Argues Home PCs Waste the World's Limited DRAM Supply (152)
- NVIDIA Launches Investigation Into Jensen Huang's Relationship With Suspected Chinese Spy (136)
- Intel "Raptor Lake Next" 16-Core and 20-Core CPUs Surface (130)
- Legendary Game Studio BioWare Shuts Down Following EA Layoffs (104)
- Dell CEO Says the Memory Shortage Will Get Worse in 2027 (95)