 4
4
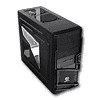
Thermaltake Commander MS-I USB 3.0 Review
Assembly & Finished Looks »A Closer Look - Inside


To gain access to the interior of the chassis, simply remove the two thumb screws holding the windowed side panel in place. You will require tools for the other panel, as it is secured with traditional case screws instead. The insides of the chassis are all black and the drive bays are lined with plastic locks. Besides this, the case is kept quite simple in terms of layout and how drive bays are formed. Multiple openings in the motherboard tray should aid in cable management, while a large one will allow access the the CPU cooler backplate.


To keep the chassis as affordable as possible, the motherbooard spacers have been replaced by arches created from the tray itself. Having worked as a system builder, I strongly suggest you insulate these before installing a board. Simply taping over them should do the trick. There is no usable space behind the mainboard tray, except along the three openings for cable management. Even here you only get around 1 cm to work with. While the side panel is extruded slightly, this accounts for at most 0.5 cm more space.


You may install up to five 3.5 inch drives within the Commander MS-I, but only three of these utilize a black & red, plastic locking mechanism. A single 2.5 inch drive may be installed unto the floor of the chassis on four little bumps. Of the three 5.25 inch bays, only two have the same type of screw-less systems. While these are generally alright to use for a system that is never moved, such locks are also the source of unwanted vibrations in many scenarios, as these do not tend to hold the drives well. Luckily, Thermaltake includes enough screws to secure the devices, which should be an easy fix for such issues.


In the rear, the bottom PSU bay has a dust filter which cannot be removed easily and the power supply will rest on a support bar. This latter part needs to be removed before you may even install a power supply. Above that are the afore mentioned motherboard expansion slots. Even though the bottom and top ones are removable, there are no screws holding these in place. In the very top you will find the 120 mm exhaust fan, which is semi transparent and features two blue LEDs instead of the traditional four. A nice touch is the sleeved cabling of the cooling unit which may be connected directly to the mainboard with a 3-pin connector.


The bottom slot for a fan can hold a 120 mm unit, but does not have a dust filter protecting the intake. Besides the fact, that I think such a slot is rarely used in a system, it may be obstructed when a longer PSU is used within the Commander MS-I. In the top you will find the two, simple 120 mm air vents. These are intended only for fans, if you wish to pull air out the top of the chassis.


Before we dive into the assembly process, let us take a quick look at the case cables. The ones for general functionality are nothing out of the ordinary and are multi-colored and the I/O leads are of the standard variety. Thermaltake has chosen to use an external USB 3.0 connector instead of an internal 20-pin one. Other manufacturers offer similarly priced cases which do offer internal connectivity and I strongly suggest that Thermaltake considers this option as well.
May 3rd, 2024 22:55 EDT
change timezone
Latest GPU Drivers
New Forum Posts
- Only some humans can see refresh rates faster than others, I am one of those humans. (13)
- AMD Radeon Pro v540 Research Thread (252)
- Change GPU or PSU ? Games look cryspy and sharp with microsuttering (4)
- NASA Achieves milestone Solid State Battery (216)
- Should I install Windows 10 or 11 for my new device (67)
- RX 6800 causing stuttering when typing text (Low 2D/IDLE Clocks?) (0)
- Announcement: VPN's no longer work right in Windows 10 or 11 or Servers (33)
- Need advice for UPS that will be use only for bios updates (9)
- Ryzen 7800x3d $196 with bundle at Microcenter (28)
- fastest usb cable /transfer (16)
Popular Reviews
- Finalmouse UltralightX Review
- ASRock NUC BOX-155H (Intel Core Ultra 7 155H) Review
- Meze Audio LIRIC 2nd Generation Closed-Back Headphones Review
- Montech Sky Two GX Review
- Gigabyte GeForce RTX 4070 Ti Super Gaming OC Review
- Upcoming Hardware Launches 2023 (Updated Feb 2024)
- HYTE THICC Q60 240 mm AIO Review
- Alienware Pro Wireless Gaming Keyboard Review
- Ugreen NASync DXP4800 Plus Review
- Team Group T-Force Vulcan ECO DDR5-6000 32 GB CL38 Review
Controversial News Posts
- Intel Statement on Stability Issues: "Motherboard Makers to Blame" (235)
- Windows 11 Now Officially Adware as Microsoft Embeds Ads in the Start Menu (167)
- Sony PlayStation 5 Pro Specifications Confirmed, Console Arrives Before Holidays (117)
- AMD to Redesign Ray Tracing Hardware on RDNA 4 (114)
- AMD's RDNA 4 GPUs Could Stick with 18 Gbps GDDR6 Memory (114)
- NVIDIA Points Intel Raptor Lake CPU Users to Get Help from Intel Amid System Instability Issues (106)
- AMD "Strix Halo" Zen 5 Mobile Processor Pictured: Chiplet-based, Uses 256-bit LPDDR5X (103)
- AMD Ryzen 9 7900X3D Now at a Mouth-watering $329 (103)