 4
4
Wooting One Keyboard Review
Value & Conclusion »Performance

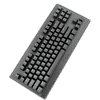
There is the usual N-key rollover USB here out of the box, as Aqua's test confirms. Similarly, no key chatter was detected on all the keys using Switch Hitter. Pause on this keyboard is pre-programmed to Scr Lk as a secondary function, and in place of a dedicated pause/break is the Mode button, which is how you change profiles on the fly. Similarly, there is an Fn key here instead of Menu, and that is the preferred naming regardless. The rest of the 85 keys work as expected in the digital profile.
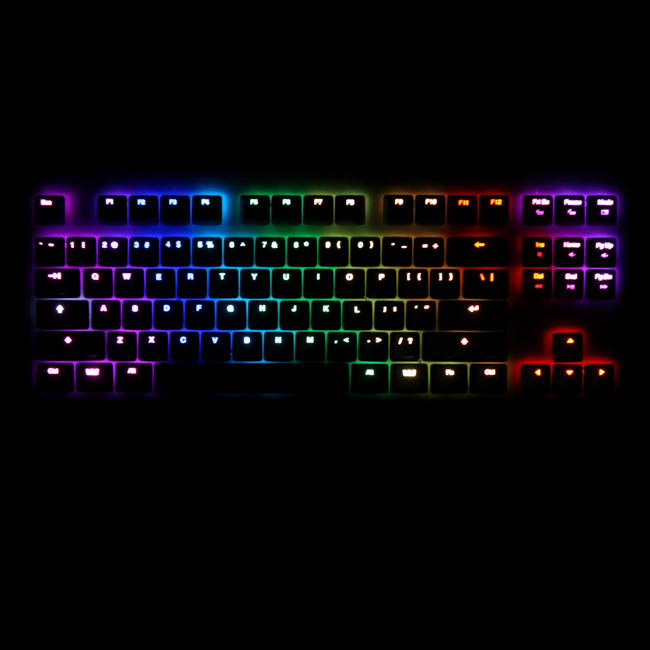
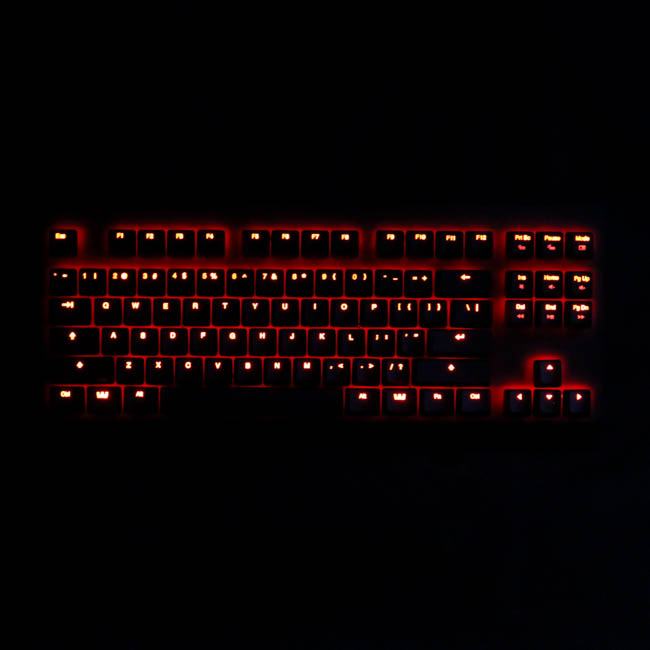

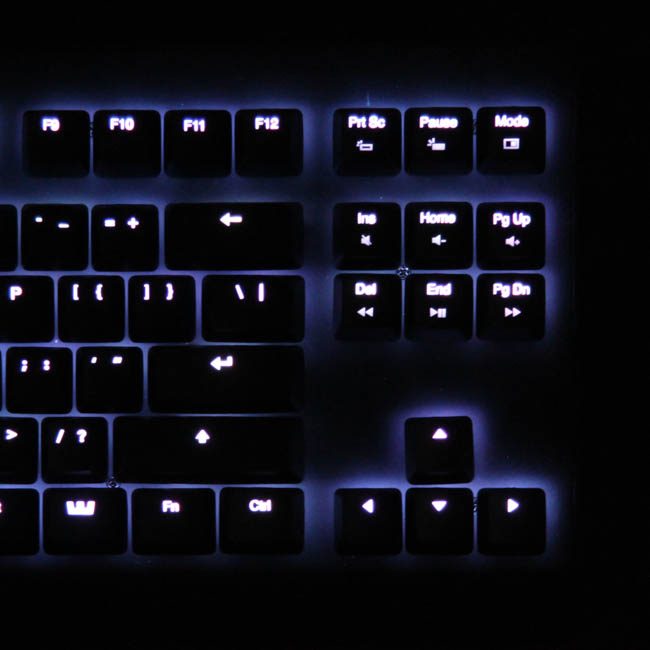
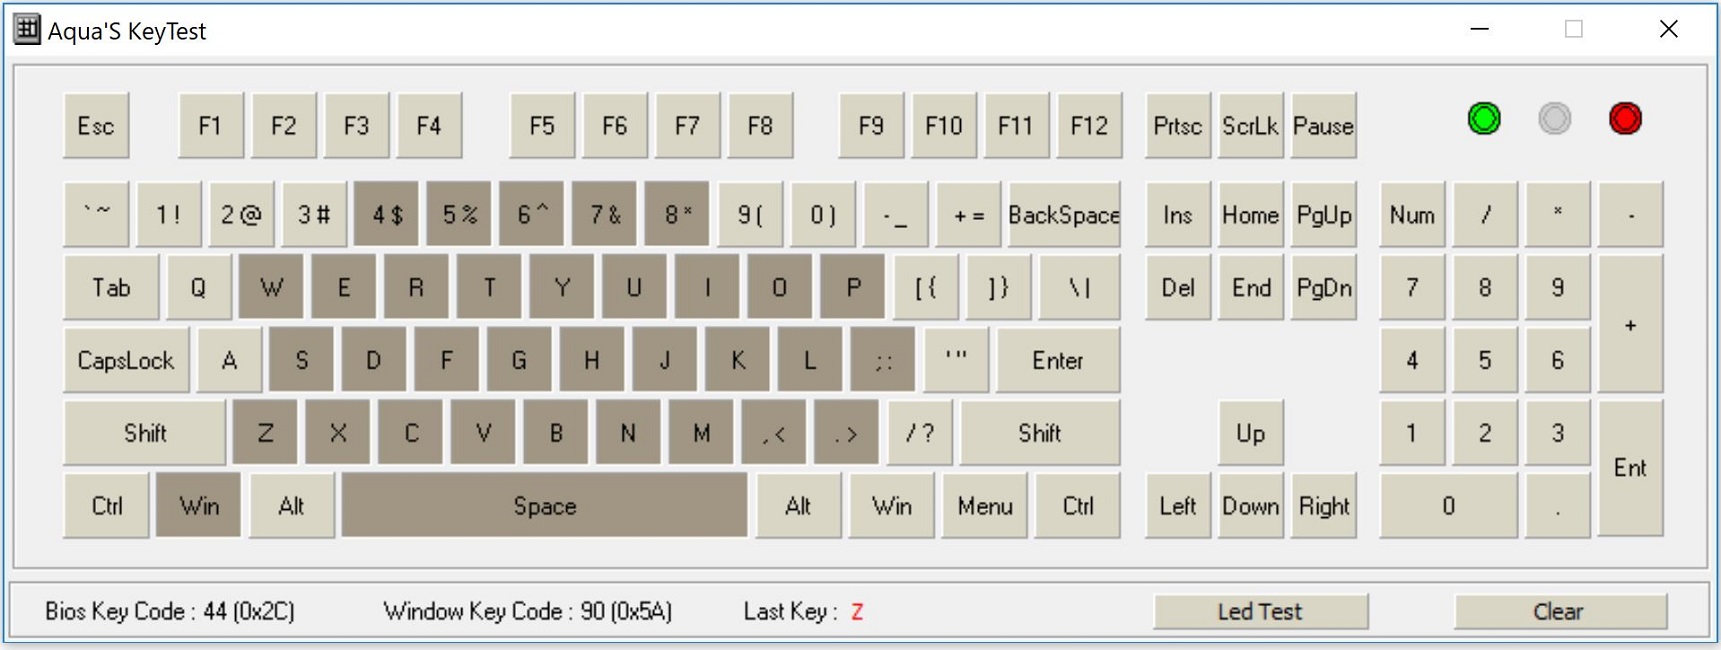
Lighting on the Wooting One is all about the per-key RGB options, with no moving effects at this time. When first connected, it lights up in a static rainbow RGB pattern as seen above, and this is the default lighting scheme for the keyboard in its digital profile (actuation point set to 1.7 mm out of the box). There is minimal light bleed here only even with the floating keys because of the matte finish on the black aluminum alloy plate, so even keys with different colors on the LEDs next to each other look true to color at all but the common edge. Also shown alongside is the keyboard in analog profile 1, where it lights up red. I then manually set all keys to white to test for color fidelity since RGB LEDs have a hard time depicting white as well, and it was more of a cool white with a blue hue to it in this case. For what the lighting does here, with function over form being the priority, it's all good in my books.


In order to test the analog-control implementation, I felt it best to first walk through the technology itself as I always find it fascinating. The two media files above are both from resources available on the Wooting website, so credit goes to them. The GIF does a good job of illustrating how the travel of the keys, say WASD, translates into analog motion to mimic, say, a joystick traveling, moving up, left, down, or right respectively. It still needs four keys to mimic a single joystick thus, but that is no different than using WASD (or any set of four keys) for motion as we usually do.
Getting the switches to not just respond to the analog range (1.5-3.6 mm travel) but to also do so consistently was a big challenge for Wooting and Flaretech, and it contributed to the keyboard's manufacturing delays. The image above is adapted from here and is a good primer on how the switches work. Essentially, there is an infrared LED that sends out an IR signal to be interrupted for the keystroke to be actuated, as with any optical switch today. However, rather than having it perpendicular to the travel path and the interruption be digital (ON/OFF), a set of two lenses help direct light to and from the key. Lens A is on the body and lens B on the stem, so the downward travel of the key affects the amplitude/intensity of the light bounced back to the photo sensor next to the IR LED itself. The amount of light hitting the sensor is higher the lower the key is, with a linear relationship between the two. This linear change is the backbone for the linear analog response as you move the key down. As it is, the design of the switch with the placement of the IR LED, two lenses, and photo sensor dictates the analog range available, and it is very cool to see all this in the small form factor of switches. This is also why the stem and body are translucent in both the Flaretech Red and Blue switches, and the click bar in the latter does not affect the light's path.
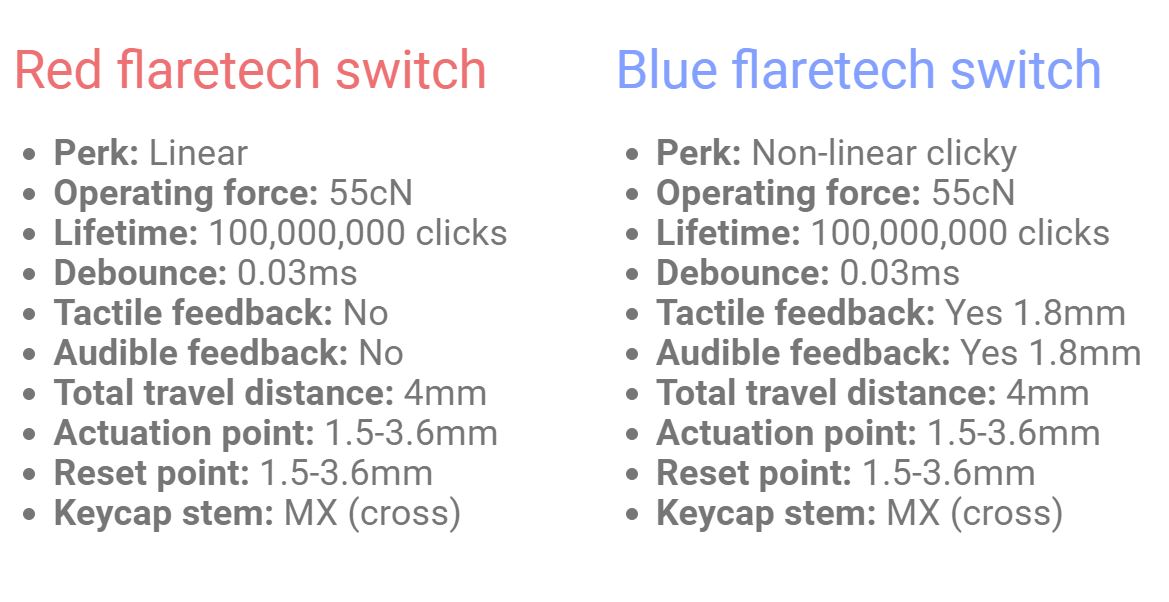
The Flaretech Red and Blue switches used here are analogous to the Cherry MX Red and Blue, with the former being a linear switch and the latter a tactile/clicky switch. This is why they are named as such even though they don't look red or blue. The Flaretech Red is a heavier switch with a rated actuation force of 55 cN, but it is not easy to describe at any single point given the configurable height of actuation. What I can tell you is that at ~1.5-1.6 mm, the keystroke does indeed actuate at around 55 gf. The Flaretech Blue with analog profiles can be good or bad depending on how you program analog curves. You can use the 1.8 mm tactile bump to go along with a DKS keystroke and then have an analog curve set from, say, 2.0-3.6 mm if you are used to touch typing and can break the travel into these two sets. For most, the linear switch would be an easier route to start with.
As always, the sound of a keyboard is based on more than just the switch type. So when comparing sound clips, consider the keyboard as a whole. In this case, I have provided above an example sound clip of me typing on the Wooting One sample at ~85 WPM. You will notice that near the end, I used the provided four Flaretech Blue switches to show how these clicky switches sound as well. For context, you can find sound clips from other keyboards here, including those with linear and clicky switches. I did bottom out here with both switches.
When you are done testing the digital profile and are setting the analog profiles up to your liking, I recommend doing a quick test using a gamepad tester, such as this one here. The video above is me going through the three default analog profiles to see how they fare, and I used the range of control, from 0 to 1 or 0 to -1, to further fine-tune the curves and anti-deadzones before even getting to a game.
Since I still had Watch Dogs installed from when I was testing the Roccat Isku+ Force FX, I decided to try out the default analog profiles with no changes for a point of reference I could build upon. I had digital keys enabled as well here, so you can see both XBOX controller and standard keyboard prompts come in that ended up confusing the game when I was inputting keystrokes. Once I got in a vehicle, things were a lot smoother with the first analog profile doing a fine job of replicating the left joystick to move the vehicle and accelerate as per the key's travel. In a stress-free roam, you can take the time to get used to the full 1.5-3.6 mm analog range and work on the anti-deadzone control in the driver to override quick acceleration/braking or jerky turns. Before DKS moved over to analog profiles, I was also able to test it out here, and that worked fine, with movement and sprint working by adding the Shift+ modifier action to WASD.
This is also the last time I am going to use F1 2012 to test hardware since I just got my hands on F1 2017. But it works fine for the purposes of this review, and a racing simulator with more options for the controller is really where the Wooting One shines. I set up a custom profile here, and I did check out some of the user-uploaded profiles as well as Wooting's own useful tutorial. For the first 35 seconds or so, I was in the standard digital profile, and it works as with any keyboard and gives you all or nothing. This means jerky acceleration and stuttering turns that really don't give you that sense of satisfaction even gamepad controllers do. Switching over to the custom profile based on the default controller's mapping and fine tuning the linear analog curve was enough to make a world of a difference. Turning especially was much improved here, and I was able to take sharp corners at a higher speed to then accelerate more naturally than before.
In order to really test the capabilities of the Wooting One, I went with what is arguably the best racing/driving simulator in the amateur market today (and this means no iRacing because I am not paying a subscription to do a review). Project Cars 2 had just come out a couple of weeks into my review process, and the customization options here are extensive to say the least. It offered in-game deadzone and anti-deadzone controls with fine control over both, so I wanted to see how it would work when I had anti-deadzone and limits set via Wootility. Turns out it works as common sense would dictate since the keyboard driver's settings took priority, but I liked the finer steps available in-game. I ended up creating a custom profile for Project Cars 2, setting up a custom response curve that resembled a sigmoidal growth curve with a Y-axis offset, a slow positive slope followed by a steeper slope that then tapers out. The deadzone controls were mostly left wide on the driver, but were changed in-game. The first lap or so was on the standard digital profile, and I kept hitting the walls of the track when not braking on time or maintaining a high speed in the oval track even with start/stop acceleration. Things were a lot better with the more aggressive turns and my analog profile, but acceleration with my offset ended up giving me a similar experience as before. Per-key analog curve control would have been great here and is something I would want to see sooner rather than later. After recording this session and taking some more time to play around with the game and driver controls, and just getting used to the more realistic driving experience over arcade-style games, I did get a lot better with the analog controls overall, but my point remains.
The rest of the keyboard really does as good a job as you would expect, but I do want to point out the cluster of keys associated with secondary functionality. The Wooting One is a gaming keyboard first and foremost, and with people using their left hand for travel (WASD, for example), having the secondary functions be on the right side of the keyboard means you can use your right hand to quickly change things since these keys and Fn are close to each other. The TKL form factor allows users to have the mouse closer to the keyboard as well, which adds that ergonomic benefit to longer sessions.
May 1st, 2024 23:57 EDT
change timezone
Latest GPU Drivers
New Forum Posts
- Current Sales, Bundles, Giveaways (10216)
- Your PC ATM (34535)
- 7800XT Issue , amdflash bios (8)
- What's your latest tech purchase? (20401)
- Arctic MX-6 shelf life is just a couple months? (71)
- 7900 XTX Seriously lacking (102)
- GTX 1070 Ti - TDP Issues - Always Power Throttling (7)
- problem with my 7900xtx (25)
- TPU's Nostalgic Hardware Club (18485)
- Anime Nation (12778)
Popular Reviews
- Ugreen NASync DXP4800 Plus Review
- HYTE THICC Q60 240 mm AIO Review
- Montech Sky Two GX Review
- Upcoming Hardware Launches 2023 (Updated Feb 2024)
- MOONDROP x Crinacle DUSK In-Ear Monitors Review - The Last 5%
- Team Group T-Force Vulcan ECO DDR5-6000 32 GB CL38 Review
- AMD Ryzen 7 7800X3D Review - The Best Gaming CPU
- Thermalright Phantom Spirit 120 EVO Review
- ASRock NUC BOX-155H (Intel Core Ultra 7 155H) Review
- ASUS Radeon RX 7900 GRE TUF OC Review
Controversial News Posts
- Intel Statement on Stability Issues: "Motherboard Makers to Blame" (213)
- Windows 11 Now Officially Adware as Microsoft Embeds Ads in the Start Menu (159)
- Sony PlayStation 5 Pro Specifications Confirmed, Console Arrives Before Holidays (117)
- AMD's RDNA 4 GPUs Could Stick with 18 Gbps GDDR6 Memory (109)
- NVIDIA Points Intel Raptor Lake CPU Users to Get Help from Intel Amid System Instability Issues (106)
- AMD "Strix Halo" Zen 5 Mobile Processor Pictured: Chiplet-based, Uses 256-bit LPDDR5X (103)
- TechPowerUp Hiring: Reviewers Wanted for Motherboards, Laptops, Gaming Handhelds and Prebuilt Desktops (92)
- AMD Ryzen 9 7900X3D Now at a Mouth-watering $329 (92)