 13
13
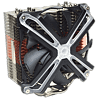
Zalman CNPS17X Review
Finished Looks »Installation


Installing the Zalman CNPS17X is fairly straightforward. You will first need to prepare the backplate, which means you need to position the nuts into the proper track and use the plastic side clips to hold them in place. With the backplate ready, position it on the motherboard. Secure it by putting the red washers on the standoffs between them and the motherboard before screwing them down.


Now, position the mounting arms on the standoffs and secure them in place. With that done, it's time to apply the thermal paste and mount the heatsink. During the mounting process, it is best to lay the case flat as the retention screws are not captive to the mounting plate. Thankfully, unlike the CNPS20X, the CNPS17X is much easier to install because you are not working between two fin stacks.


With the heatsink mounted, it's time to attach the fans and plug everything in. Make sure to connect the ARGB lighting to the proper 3-pin motherboard header, and route those cables or you will have a cable mess starring you in the face.
Overall, installation was alright, and I would rate it an 8 on a scale of 1 (hardest) to 10 (easiest). The mounting hardware is above average in terms of design and could be improved with captive retention screws, but the cooler's smaller size makes this much less of a hassle.
May 8th, 2024 17:14 EDT
change timezone
Latest GPU Drivers
New Forum Posts
- POLL: Can you see the difference past 60fps (gaming/other) (56)
- Your way of cooling your PC? (33)
- im new to throttelstop and i think i messed it up by copying others any hints would be very much aprreciated (14)
- TPU's Nostalgic Hardware Club (18502)
- not impressed - nvme vs ssd (71)
- Current Sales, Bundles, Giveaways (10229)
- Does anyone here overclock their video cards? Is it really worth it? (71)
- What's a good option for a digital touchless thermometer? (1)
- Arkane Austin and Redfall: what happened? (50)
- Urgent: PC wont turn on with PSU connected to MOBO (27)
Popular Reviews
- CHERRY XTRFY M64 Pro Review
- Corsair iCUE Link RX120 RGB 120 mm Fan Review
- Finalmouse UltralightX Review
- Bykski CPU-XPR-C-I CPU Water Block Review - Amazing Value!
- Upcoming Hardware Launches 2023 (Updated Feb 2024)
- Cougar Hotrod Royal Gaming Chair Review
- Meze Audio LIRIC 2nd Generation Closed-Back Headphones Review
- AMD Ryzen 7 7800X3D Review - The Best Gaming CPU
- ASRock NUC BOX-155H (Intel Core Ultra 7 155H) Review
- ASUS Radeon RX 7900 GRE TUF OC Review
Controversial News Posts
- Intel Statement on Stability Issues: "Motherboard Makers to Blame" (261)
- AMD to Redesign Ray Tracing Hardware on RDNA 4 (206)
- Windows 11 Now Officially Adware as Microsoft Embeds Ads in the Start Menu (167)
- NVIDIA to Only Launch the Flagship GeForce RTX 5090 in 2024, Rest of the Series in 2025 (142)
- Sony PlayStation 5 Pro Specifications Confirmed, Console Arrives Before Holidays (119)
- AMD's RDNA 4 GPUs Could Stick with 18 Gbps GDDR6 Memory (114)
- NVIDIA Points Intel Raptor Lake CPU Users to Get Help from Intel Amid System Instability Issues (106)
- AMD Ryzen 9 7900X3D Now at a Mouth-watering $329 (104)