 30
30
Zalman CNPS9900 LED CPU Cooler Review
Performance »Installation


A downfall to the CNPS9900 LED’s installation design is that for all Intel installations, the motherboard must be removed from the case and / or motherboard tray. This is simply due to the fact that a plate must be installed on the back of the motherboard, so the screws on the clip that attaches to the front of the motherboard have something to screw into. The installation of this plate is very easy. The front clip and back clip simply need to be lined up on the standard Intel Socket 775 installation holes and the four included screws need to be screwed into these holes.

The bottle of included thermal paste has a brush head which eases the application of the paste. A thin layer of paste should be applied evenly along the CPU surface.


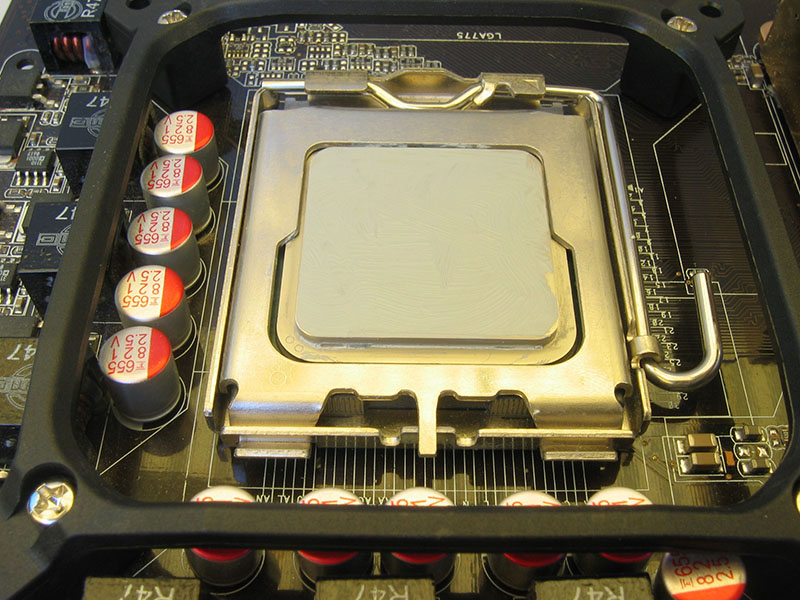
The CNPS9900 LED was mounted onto the motherboard. It was then taken off and the base of the cooler was checked. As the images show, the thermal paste spread evenly amoung the CPU and base of the cooler.

The Intel Socket 775 clip was attached to the base of the cooler. This clip is needed as it screws into the new motherboard retention bracket and holds the cooler down. It was very easy to install as all the user needs to do is angle the cooler into its appropriate position.

The new clip attached to the base of the CNPS9900 LED was then screwed into the retention bracket on the motherboard. Each screw was screwed enough to lightly attach to the bracket and then they were fully tightened. This evens the pressure on the four sides, making installation easier and safer.
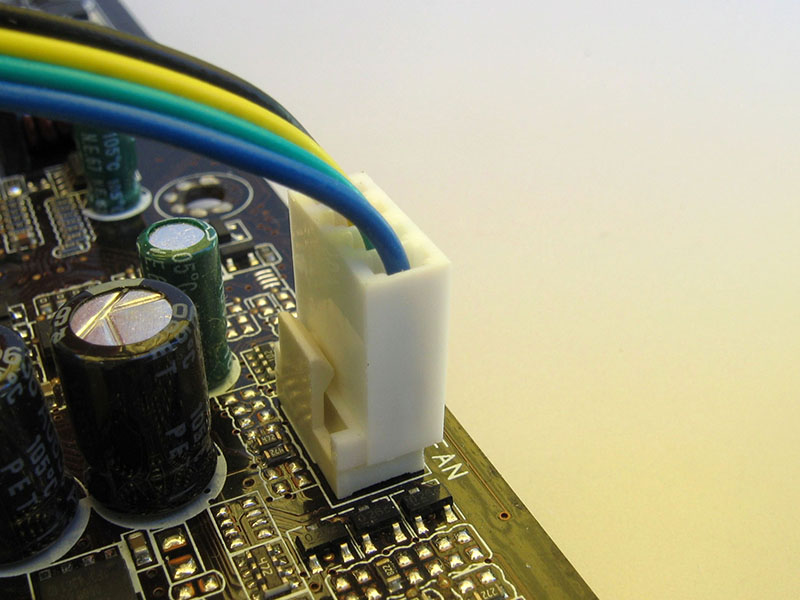
The 4-pin PWM fan connection was plugged into the 4-pin CPU fan slot on the motherboard.


The shroud of the cooler was taken off after it was installed on the motherboard. As stated by Zalman in the manual and on the products webpage, this shroud is only there for the protection of the fins on the cooler when in transit. It can also aid installation as it gives the user something to hold onto when installing the cooler. It can simply be removed by undoing two screws on it and unclipping it. This is highly recommended as tests showed that the shroud added two to four degrees to the CPU temperature.
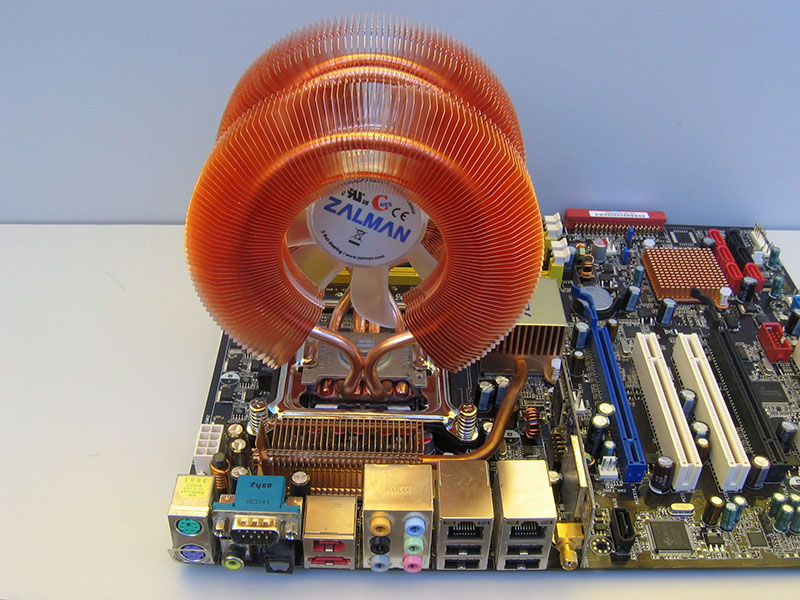


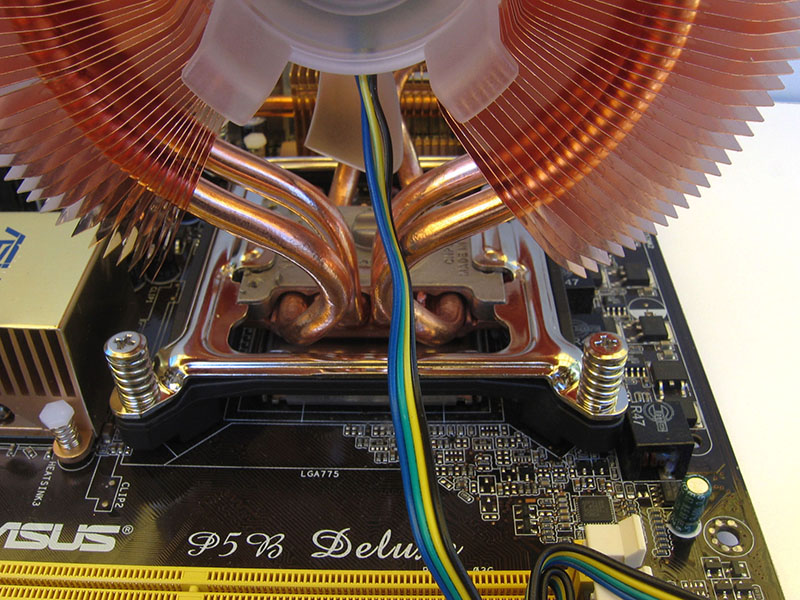
Once all four screws are secure and the shroud is off, the cooler does not move very much and is firmly attached to the motherboard. There were no problems or compatibility issues with the physical size of the cooler when installed on the ASUS P5B Deluxe Wi-Fi.
May 2nd, 2024 13:26 EDT
change timezone
Latest GPU Drivers
New Forum Posts
- Current Sales, Bundles, Giveaways (10226)
- Flashing original BIOS back to 5700 (3)
- Is this Sapphire PULSE RX 5600 XT legit or fake? (25)
- Old high quality PSU, or semi-old mid-quality PSU? (45)
- Recommendation for Android gaming tablet? (8)
- Scuf Envision Pro Contoller (0)
- Technical Issues - TPU Main Site & Forum (2024) (49)
- Would you guys be ok with 70C idle temp on NVME storage. (25)
- The Official Thermal Interface Material thread (1130)
- What's your latest tech purchase? (20411)
Popular Reviews
- Ugreen NASync DXP4800 Plus Review
- ASRock NUC BOX-155H (Intel Core Ultra 7 155H) Review
- Montech Sky Two GX Review
- HYTE THICC Q60 240 mm AIO Review
- Upcoming Hardware Launches 2023 (Updated Feb 2024)
- MOONDROP x Crinacle DUSK In-Ear Monitors Review - The Last 5%
- Team Group T-Force Vulcan ECO DDR5-6000 32 GB CL38 Review
- AMD Ryzen 7 7800X3D Review - The Best Gaming CPU
- Thermalright Phantom Spirit 120 EVO Review
- ASUS Radeon RX 7900 GRE TUF OC Review
Controversial News Posts
- Intel Statement on Stability Issues: "Motherboard Makers to Blame" (227)
- Windows 11 Now Officially Adware as Microsoft Embeds Ads in the Start Menu (159)
- Sony PlayStation 5 Pro Specifications Confirmed, Console Arrives Before Holidays (117)
- AMD's RDNA 4 GPUs Could Stick with 18 Gbps GDDR6 Memory (109)
- NVIDIA Points Intel Raptor Lake CPU Users to Get Help from Intel Amid System Instability Issues (106)
- AMD "Strix Halo" Zen 5 Mobile Processor Pictured: Chiplet-based, Uses 256-bit LPDDR5X (103)
- AMD Ryzen 9 7900X3D Now at a Mouth-watering $329 (99)
- TechPowerUp Hiring: Reviewers Wanted for Motherboards, Laptops, Gaming Handhelds and Prebuilt Desktops (93)