 17
17
Zaward Gyre Review
(17 Comments) »Introduction

I would like to thank Zaward for supplying the review sample.
Features:
- Heat transfer accelerated by exposed and flattened heatpipes in direct touch with CPU surface
- Triple 8mm copper heatpipes rapidly absorb heat from CPU to fins
- Mega aluminum heatsink provides large surface for heat dissipation and light weighted
- Diverting blades, build flowing circle throughout fins and ferry the heat away
- Large heatsink cover, enforce airflow blow through whole heatsink
- Sophsiticated flowing design, maximise airflow and efficiently take away heat
- Down blow turbo blow, cool components surrounded by CPU as well
- PWN FAN maximise cooling performance and minimise noise
- Chic transparent black cover and fan design with blie LED differs from others
- Intel LGA775
- AMD AM2
| Dimensions: | 124mm x 124mm x 145mm (from base) |
|---|---|
| Heatsink Material: | Aluminum Base / Fins and Copper Heat pipes |
| Heatpipe: | 3x 80mm Copper heat pipes |
| Fan Dimension: | 120mm x 120mm x 25mm |
| Fan Speed: | 1000 +/- 300 RPM ~ 2000 +/- 300 RPM (PWM) |
| LED: | 4x Blue LED |
| Maximum Air Flow: | 76.3 CFM |
| Noise: | 19 - 32 dBA |
| Connector: | 4-pin |
| Weight: | 670g +/- 20g |
Packaging and Contents


The Zaward Gyre comes in very colourful packaging. It has a red and brown theme, with a yellow pattern on multiple sides representing an actual Gyre (a swirl or vortex). Zaward’s logo and slogan also appear on the packaging multiple times towards the top of the box. On the front, there is a clear plastic window in which the top of the heatsink (the fan) can be seen, along with “Gyre” in large letters and the yellow pattern. Towards the sides and back of the package are the specifications, features and CPU compatibility/support list of the cooler as well as general innovations which the cooler obtains and some pictures of the cooler and its unique design. The back of the box is identical to the front with the only exception being that the clear plastic window displays the base of the cooler. On the top of the packaging is a simple yet very practical plastic handle, which enhances the portability of the unit.


Included with the Gyre is all necessary equipment, as well as additional tools. The cooler is packaged within a secure plastic shell, held together by standard “pop on/off” clips. The manual is the only item which is placed outside of the plastic shell, sitting under it within the box. In a separate plastic package which is located towards the base of the cooler (within the plastic shell) are the accessories, which includes a plate for Intel Socket 775 based installations and a clip for AMD AM2 based installations. Additional tools provided include an L shaped Phillips head screwdriver (to secure the four screws in) as well as a two way wrench (to tighten the screws once secured). On top of this there is also a small tube of Zaward’s thermal grease, for better heat conductivity.
A closer look


The Gyre is made from a mix of both aluminium and copper. The heat pipes of the cooler are all just pure copper, with no nickel coating. These three copper heat pipes run throughout the heatsink and appear on both sides, giving the impression that there are 6 heat pipes. The heat pipes run throughout a block of aluminium fins. The fins in this block are arranged in such a way that the heat can be dissipated into the area where there are no fins, and the 120mm fan at the top can just blow the heat away. The design of each fin is unique; they each have diverting blades allowing the heat to be centralised into the main area and again, be blown away.


The fins reside behind a transparent, black piece of plastic (known as a “chick” transparent cover) which is not just there for a nice looking finish. This black cover actually allows the heat to be trapped within the centralised area where there are no fins, so that the 120mm fan at the top can blow the heat straight out of the cooler. Towards the top of the cooler resides the black, 120mm blue LED fan. This fan connects straight to the chick cover, so all air it sucks in blows straight through the cooler and through the area where the heat is centralised by the fins, allowing maximum heat dissipation. This fan is attached via four screws, so it can be replaced very easily. Yet, the fan must be removed for the chick cover to be removed.

The cooler has a standard 4 pin power connector which can be plugged straight into the motherboard. This 4 pin connection (over the usual 3 pin connection) allows automatic fan speed control, which improves the performance to silence ratio. When the CPU heats up the fan will spin faster, making more noise but cooling the CPU down. To the reverse of this, when the CPU is only idling the fan will spin at a lower RPM, keeping the CPU cool but also keeping the fan quite.
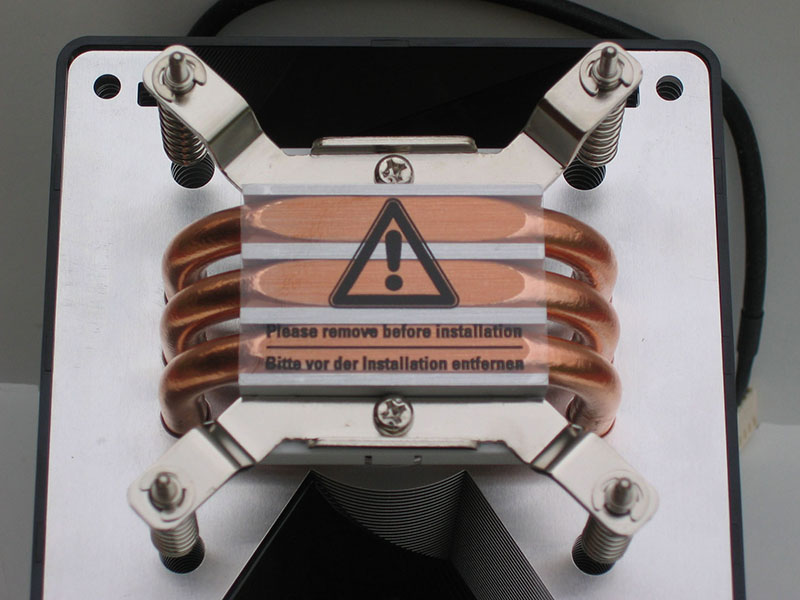


The heat pipes are made of pure copper, and have no nickel plated coating (hence the bronze colour of the pipes). Towards the bottom of the heatsink, these pipes actually form the base of the heatsink, as they are what connects to the CPU. This allows the heat from the CPU to transfer straight into the heat pipes and into the upper end of the heatsink, where the aluminium fins centralise the heat and the 120mm fan blows it all away. Towards the upper end of the cooler where the fins are located, all three pipes run throughout the block twice. They are designed in a U shape; they each run down the block of fins into the base, and then go back up into the block of fins on the other side. Also to note, the pipes run straight through the aluminium block of fins and are capped off on the other side, which again, allows maximum heat transfer as the heat will spread to all fins evenly.

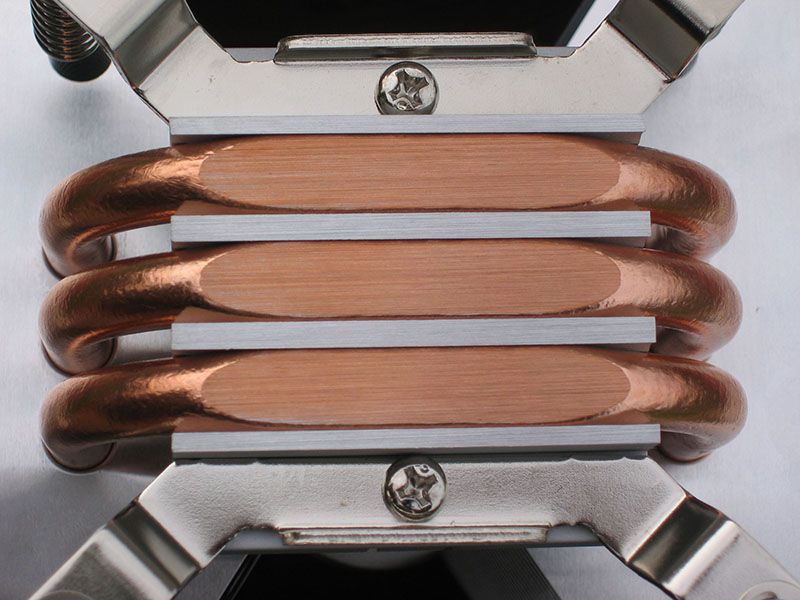
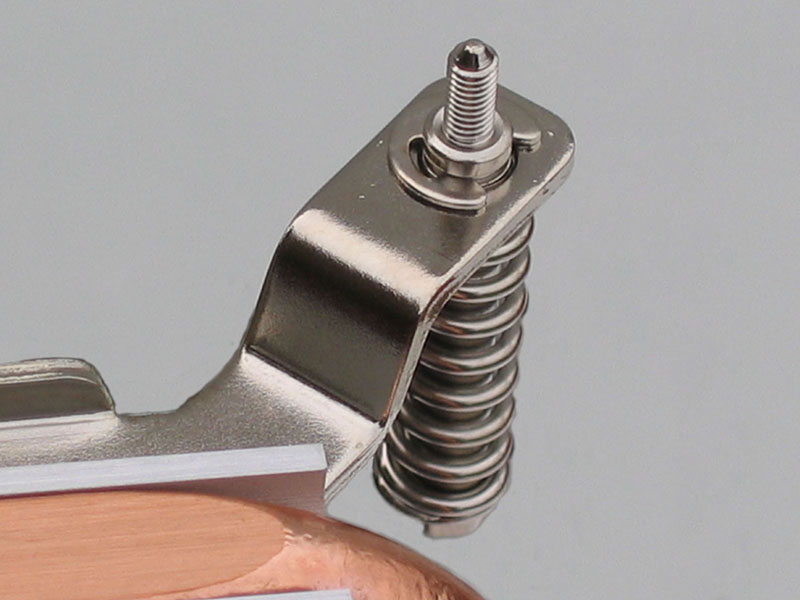
As mentioned, the base is made up of the actual heat pipes. These pipes have been shaved down to create a flat surface, and are wedged between aluminium fins. Zaward have not included a pre-applied thermal compound yet do supply thermal compound in a separate tube. This can have both advantages and disadvantages; it is good as it can be used more than once and the user can choose to use their own thermal compound, yet it is bad as the user actually has to apply the compound themselves, leaving room for error and making installation slightly harder. The cooler also has the spring screws attached to it, so the user does not have to attempt to hold the screw down and screw it in, they just have to align the screws correctly in their corresponding holes on the motherboard. These screws go straight into the supplied base for Intel Socket 775 based installations or into the standard AMD AM2 retention bracket.
Our Patreon Silver Supporters can read articles in single-page format.
May 6th, 2024 00:37 EDT
change timezone
Latest GPU Drivers
New Forum Posts
- Apparently Valve is giving refunds on Helldivers 2 regardless of hour count. Details inside. (78)
- Overheating/undervolt/setup issues (3)
- Only some humans can see refresh rates faster than others, I am one of those humans. (142)
- Free Games Thread (3781)
- TPU's WCG/BOINC Team (34421)
- What software are you using to monitor CPU temps during gaming session? (21)
- Alphacool CORE 1 CPU block - bulging with danger of splitting? (101)
- Current Sales, Bundles, Giveaways (10227)
- FINAL FANTASY XIV: Dawntrail Official Benchmark (84)
- The Official Thermal Interface Material thread (1157)
Popular Reviews
- Finalmouse UltralightX Review
- ASRock NUC BOX-155H (Intel Core Ultra 7 155H) Review
- Meze Audio LIRIC 2nd Generation Closed-Back Headphones Review
- Cougar Hotrod Royal Gaming Chair Review
- Upcoming Hardware Launches 2023 (Updated Feb 2024)
- Montech Sky Two GX Review
- AMD Ryzen 7 7800X3D Review - The Best Gaming CPU
- HYTE THICC Q60 240 mm AIO Review
- ASUS Radeon RX 7900 GRE TUF OC Review
- Logitech G Pro X Superlight 2 Review - Updated with 4000 Hz Tested
Controversial News Posts
- Intel Statement on Stability Issues: "Motherboard Makers to Blame" (240)
- Windows 11 Now Officially Adware as Microsoft Embeds Ads in the Start Menu (167)
- AMD to Redesign Ray Tracing Hardware on RDNA 4 (156)
- Sony PlayStation 5 Pro Specifications Confirmed, Console Arrives Before Holidays (117)
- AMD's RDNA 4 GPUs Could Stick with 18 Gbps GDDR6 Memory (114)
- NVIDIA Points Intel Raptor Lake CPU Users to Get Help from Intel Amid System Instability Issues (106)
- AMD Ryzen 9 7900X3D Now at a Mouth-watering $329 (104)
- AMD "Strix Halo" Zen 5 Mobile Processor Pictured: Chiplet-based, Uses 256-bit LPDDR5X (103)