 30
30
AZZA Hurrican 2000 Review
Assembly & Finished Looks »A Closer Look - Inside


The interior of the case is accessed by removing two small thumb screws at the rear of the case. The inner mainboard panel holds multiple arrangements for board standoffs fitting nearly all form factors. The panel also includes multiple openings for cable routing which are not covered in soft plastic. Easily viewable are the drive bays, right up front and aligned neatly.

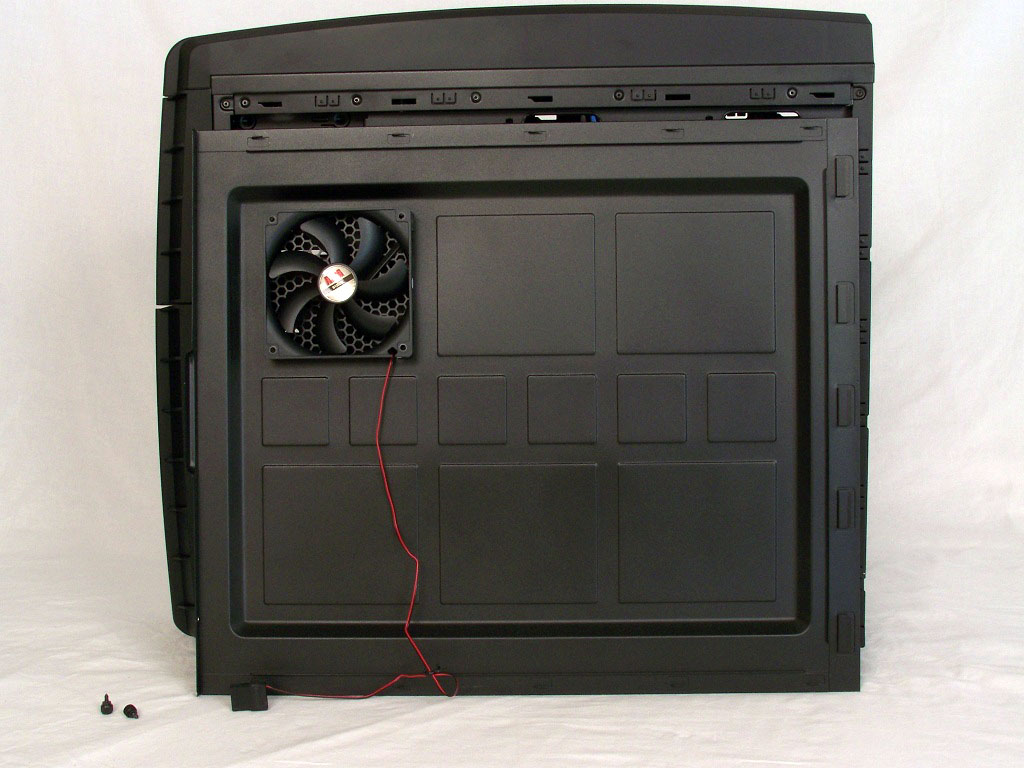
With the panel doors removed the two intake 240 mm fans and rear exhaust 120 mm slim fan are available to view. The 240 mm fans are blue LED lit while the rear 120mm fan is not. Adding an exhaust fan to remove heat directly behind the central processing area is truly an innovative cooling design.


Internally the front carries all the drive bays. Most noticeably are the four hot swap circuit boards which require a SATA connection, a Molex connection, and offer a three pin fan adapter. These hot swap bays account for the top four drive bays, but unfortunately do not support 2.5" SSD drives, leaving only the bottom two bays for dedicated SSD installation. This is a bit of a downside as solid state drives have become more mainstream. The top four bays are dedicated to 5.25" devices. The tool-less locking system for optical devices is not uncommon, but would have been nice to see a hard mounting option included.

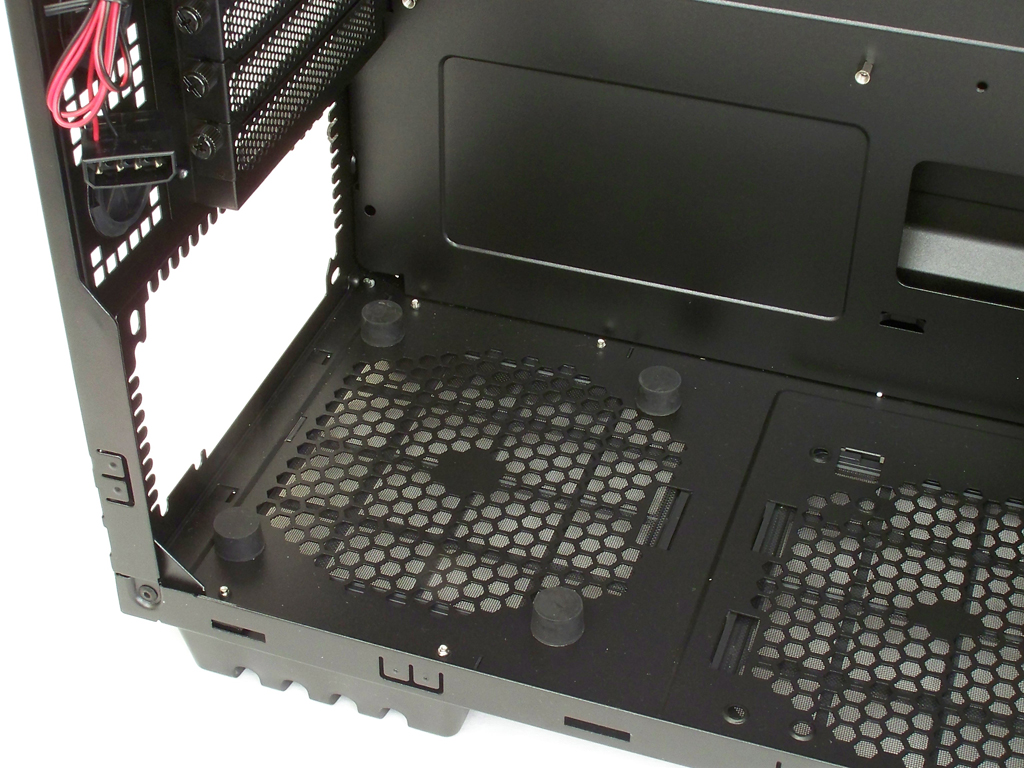
The rear interior is very nicely laid out. The PCI brackets have a great vented look to match the watercooling holes and additional venting. Below that is the power supply mounting area. Nicely added are four rubber standoffs to improve air flow and reduce any sort of noise vibrations.

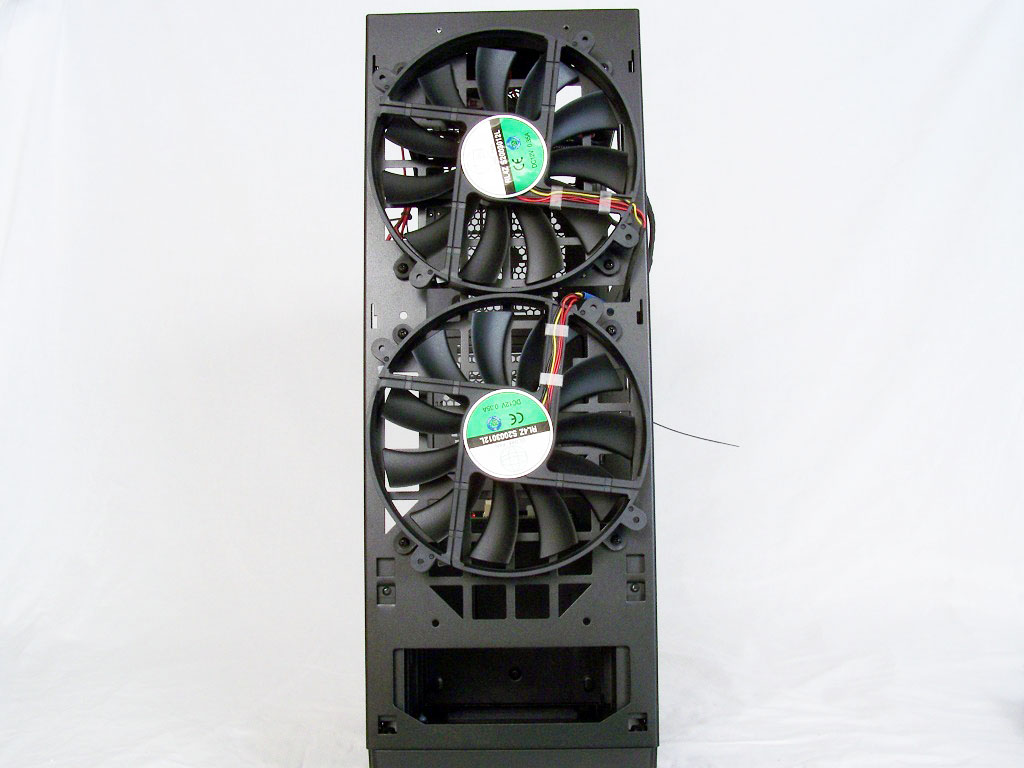

The two 240 mm top exhaust fans are hard to miss here. While wired internally to the external switches the Molex power pins are somewhat short. You can also view the rear exhaust fan and it's Molex power connection as well. While Molex is certainly a fine choice for power connectivity I would have liked to see three pin connectors that could connect to a mainboard. Lastly pictured is the entire chassis disassembled.
Apr 25th, 2024 23:16 EDT
change timezone
Latest GPU Drivers
New Forum Posts
- Black screen after muting (5)
- What phone you use as your daily driver? And, a discussion of them. (1481)
- What are you playing? (20530)
- Secure boot already open help (0)
- TPU's Nostalgic Hardware Club (18465)
- Post your Speedometer 3.0 Score (36)
- Size on Disk Excessively Different than Size (9)
- Dell Workstation Owners Club (3056)
- Core PL1 + GPU PL1 + Ring EDP OTHER (10)
- Best SSD for system drive (80)
Popular Reviews
- Fractal Design Terra Review
- Thermalright Phantom Spirit 120 EVO Review
- Corsair 2000D Airflow Review
- ASUS GeForce RTX 4090 STRIX OC Review
- NVIDIA GeForce RTX 4090 Founders Edition Review - Impressive Performance
- ASUS GeForce RTX 4090 Matrix Platinum Review - The RTX 4090 Ti
- MSI GeForce RTX 4090 Suprim X Review
- Gigabyte GeForce RTX 4090 Gaming OC Review
- MSI GeForce RTX 4090 Gaming X Trio Review
- MSI GeForce RTX 4090 Suprim Liquid X Review
Controversial News Posts
- Sony PlayStation 5 Pro Specifications Confirmed, Console Arrives Before Holidays (117)
- Windows 11 Now Officially Adware as Microsoft Embeds Ads in the Start Menu (110)
- NVIDIA Points Intel Raptor Lake CPU Users to Get Help from Intel Amid System Instability Issues (106)
- AMD "Strix Halo" Zen 5 Mobile Processor Pictured: Chiplet-based, Uses 256-bit LPDDR5X (101)
- US Government Wants Nuclear Plants to Offload AI Data Center Expansion (98)
- AMD's RDNA 4 GPUs Could Stick with 18 Gbps GDDR6 Memory (88)
- Developers of Outpost Infinity Siege Recommend Underclocking i9-13900K and i9-14900K for Stability on Machines with RTX 4090 (85)
- Windows 10 Security Updates to Cost $61 After 2025, $427 by 2028 (84)