 3
3
Apevia X-Jupiter Jr. G Type Review
Installation & Finished Look »A Closer Look - Inside


Taking a closer look at the rear fan, it holds the Apevia logo on the center sticker. The company really loves these semi transparent blue fans, as they can be found in many of their cases. The PCI brackets are covered with removable dust guards and there is a simple screw-less system in place to hold any expansion cards. This system should work well with smaller and lighter graphic cards, but you may want to screw dual slot ones in, as the plastic is not sturdy enough to keep them in place - especially during transportation.

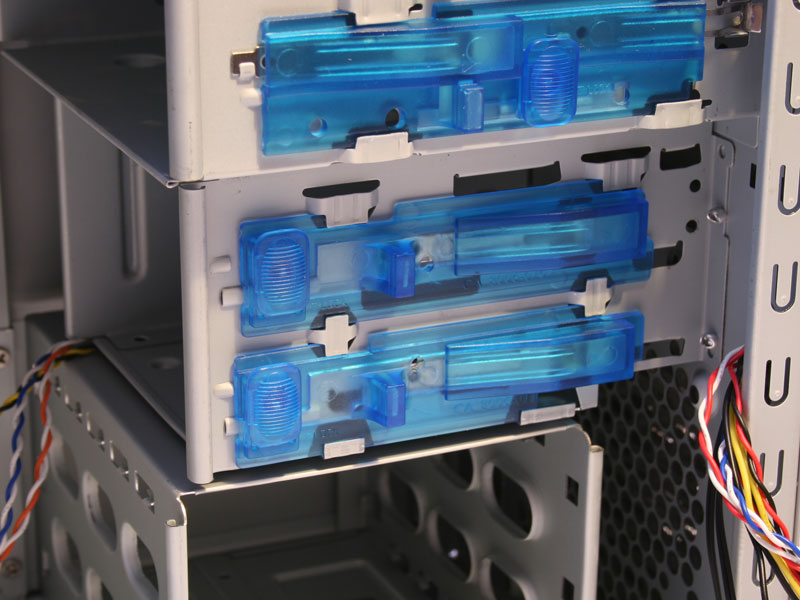

Moving to the front of the case, the drive bays also feature an all plastic screw-less design. The system used is of the "slide and lock" variant. Which means you simply slide in the drive, slide the plastic part back to secure the drive and then lower the lock to keep the plastic in place. This exact system can be found in many different cases from various manufacturers. As mentioned before, the hard drive cage, which can hold three drives uses rails. This makes for a complete screw less installation for expansion cards as well as drives. The drive cage has been turned 90°, leaving more room for large graphic cards. This means that cards like the GeForce 8800 GTX and Ultra should fit perfectly fine.


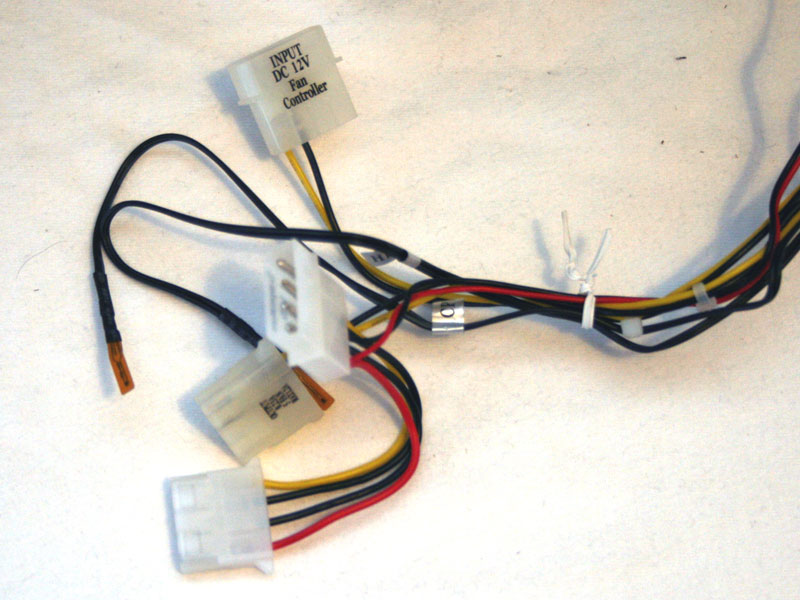

The I/O on top uses the traditional, removable cabling. Apevia has decided to only provide a HD-Audio header, so gamers with budget boards will be out of luck. The fan controller is used by plugging in the fans into the clearly labeled Molex connector. You may daisy chain a maximum of five fans, which will all be controlled by a single knob. This also means that you may not control each fan seperately. The mainboard connectors for power, reset and LEDs are of the normal kind as well.
May 2nd, 2024 03:09 EDT
change timezone
Latest GPU Drivers
New Forum Posts
- What's your latest tech purchase? (20408)
- Current Sales, Bundles, Giveaways (10222)
- The Official Thermal Interface Material thread (1129)
- Are all software/scheduling issues with e-cores fixed on Intel 12th to 14th Gen - Willing to give hybrid ach a chance now (81)
- 14900k - Tuned for efficiency - Gaming power draw (347)
- TPU's Nostalgic Hardware Club (18486)
- Throttlestop stopped working (VBS is disabled) (3)
- 7800XT Issue , amdflash bios (9)
- Arctic MX-6 shelf life is just a couple months? (72)
- AMD RX 7000 series GPU Owners' Club (1092)
Popular Reviews
- Ugreen NASync DXP4800 Plus Review
- Montech Sky Two GX Review
- HYTE THICC Q60 240 mm AIO Review
- Upcoming Hardware Launches 2023 (Updated Feb 2024)
- MOONDROP x Crinacle DUSK In-Ear Monitors Review - The Last 5%
- Team Group T-Force Vulcan ECO DDR5-6000 32 GB CL38 Review
- ASRock NUC BOX-155H (Intel Core Ultra 7 155H) Review
- AMD Ryzen 7 7800X3D Review - The Best Gaming CPU
- Thermalright Phantom Spirit 120 EVO Review
- ASUS Radeon RX 7900 GRE TUF OC Review
Controversial News Posts
- Intel Statement on Stability Issues: "Motherboard Makers to Blame" (219)
- Windows 11 Now Officially Adware as Microsoft Embeds Ads in the Start Menu (159)
- Sony PlayStation 5 Pro Specifications Confirmed, Console Arrives Before Holidays (117)
- AMD's RDNA 4 GPUs Could Stick with 18 Gbps GDDR6 Memory (109)
- NVIDIA Points Intel Raptor Lake CPU Users to Get Help from Intel Amid System Instability Issues (106)
- AMD "Strix Halo" Zen 5 Mobile Processor Pictured: Chiplet-based, Uses 256-bit LPDDR5X (103)
- TechPowerUp Hiring: Reviewers Wanted for Motherboards, Laptops, Gaming Handhelds and Prebuilt Desktops (93)
- AMD Ryzen 9 7900X3D Now at a Mouth-watering $329 (93)