 1
1
Cooler Master Centurion 540 Review
Value & Conclusion »Installation & Finished Look

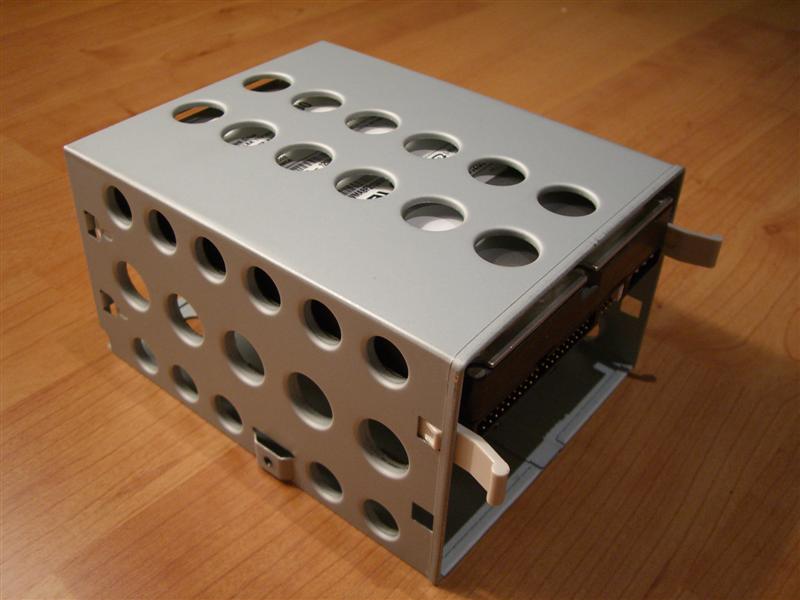
Here you can see the hard drive cage, with all the folded edges. Even the round cut outs are not very sharp. The cage is fixed by one screw on the bottom, shown here. The rails for the hard drive can be installed without any screws as well. This makes the installation of all the drives inside the case completely screwless.


Installing all the other hardware has to be done the old fashioned way. The CPU cooler and memory was mounted on the board and then inserted into the case. The 4 pin CPU power plug was quite hard to reach with the short cable of the OEM power supply, but any brand name PSU should not have such a problem. The front IO cables were very long, actually a bit too long. As you can see I used an Arctic Cooling Silencer, which made the use of the air duct impossible. The case has a lot of space under the mainboard, so even the use of larger "flower" style coolers should not be a problem, and considering that these HSFs are usually not very high, the air duct would come in quite handy. In my case after unmounting the air duct, the side panel fit on perfectly.


I used black drives to illustrate the nice contrast to the silver and the great overall look with the black fan grill. Even the white floppy looks quite good inside this case. The back is now filled as well. The power supply fit perfectly and the case is sturdy enough to hold everything in place. Nothing to complain about here.

After turning on the PC, I was greeted by two bright blue LEDs. The top one is the power LED and the bottom one lights up with hard drive use. Blue LEDs look fabulous with this case.
May 5th, 2024 07:26 EDT
change timezone
Latest GPU Drivers
New Forum Posts
- Browser Bechmark scores (94)
- Only some humans can see refresh rates faster than others, I am one of those humans. (120)
- Arctic MX-6 shelf life is just a couple months? (88)
- Is updating BIOS to beta versions a good idea if you have the most recent version installed but still face issues? (7)
- Apparently Valve is giving refunds on Helldivers 2 regardless of hour count. Details inside. (38)
- Resolution problems in-game with Av receiver (windows 11) (0)
- Unigine Heaven 4.0 Benchmark Scores Part 2 (931)
- AI Benchmark Alpha version 0.1.2 (2)
- Post your Speedometer 3.0 Score (38)
- What's your latest tech purchase? (20439)
Popular Reviews
- Finalmouse UltralightX Review
- Meze Audio LIRIC 2nd Generation Closed-Back Headphones Review
- ASRock NUC BOX-155H (Intel Core Ultra 7 155H) Review
- Montech Sky Two GX Review
- Cougar Hotrod Royal Gaming Chair Review
- Upcoming Hardware Launches 2023 (Updated Feb 2024)
- Alienware Pro Wireless Gaming Keyboard Review
- HYTE THICC Q60 240 mm AIO Review
- AMD Ryzen 7 7800X3D Review - The Best Gaming CPU
- Logitech G Pro X Superlight 2 Review - Updated with 4000 Hz Tested
Controversial News Posts
- Intel Statement on Stability Issues: "Motherboard Makers to Blame" (240)
- Windows 11 Now Officially Adware as Microsoft Embeds Ads in the Start Menu (167)
- AMD to Redesign Ray Tracing Hardware on RDNA 4 (140)
- Sony PlayStation 5 Pro Specifications Confirmed, Console Arrives Before Holidays (117)
- AMD's RDNA 4 GPUs Could Stick with 18 Gbps GDDR6 Memory (114)
- NVIDIA Points Intel Raptor Lake CPU Users to Get Help from Intel Amid System Instability Issues (106)
- AMD Ryzen 9 7900X3D Now at a Mouth-watering $329 (104)
- AMD "Strix Halo" Zen 5 Mobile Processor Pictured: Chiplet-based, Uses 256-bit LPDDR5X (103)