 14
14
CM Storm Enforcer Review
Assembly & Finished Looks »A Closer Look - Inside
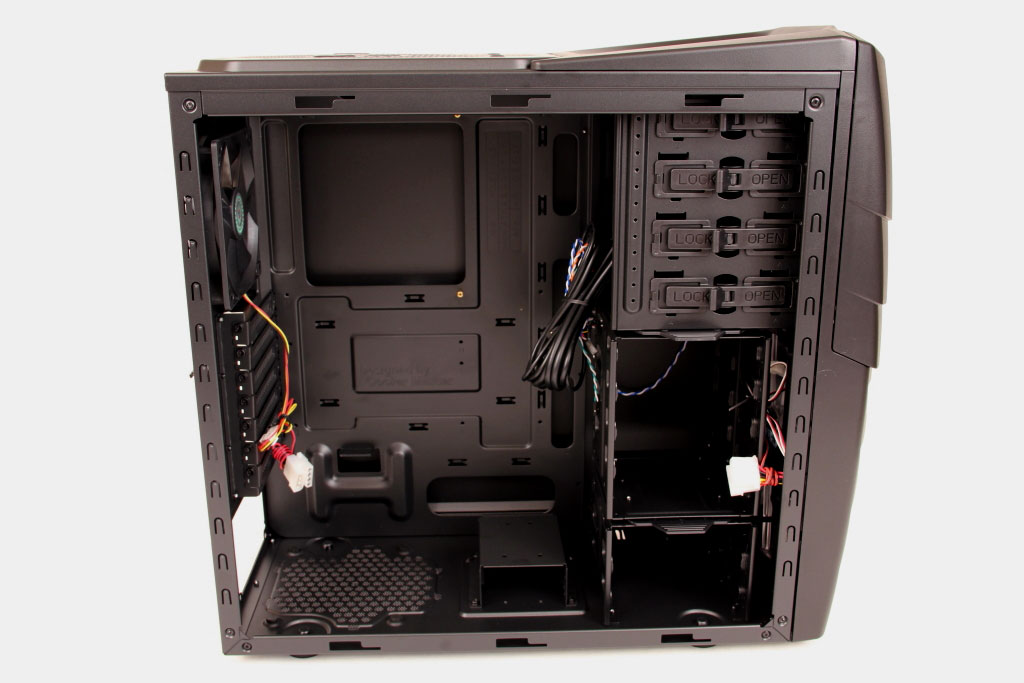

Opening the panel doors reveals the all black interior with plenty of cut outs and gromets for cable routing. There is a large opening in the mainboard tray to allow for easy access to CPU backplates without having to remove a mounted board. There is a small amount of depth for wiring to hide in the rear panel, but not much.

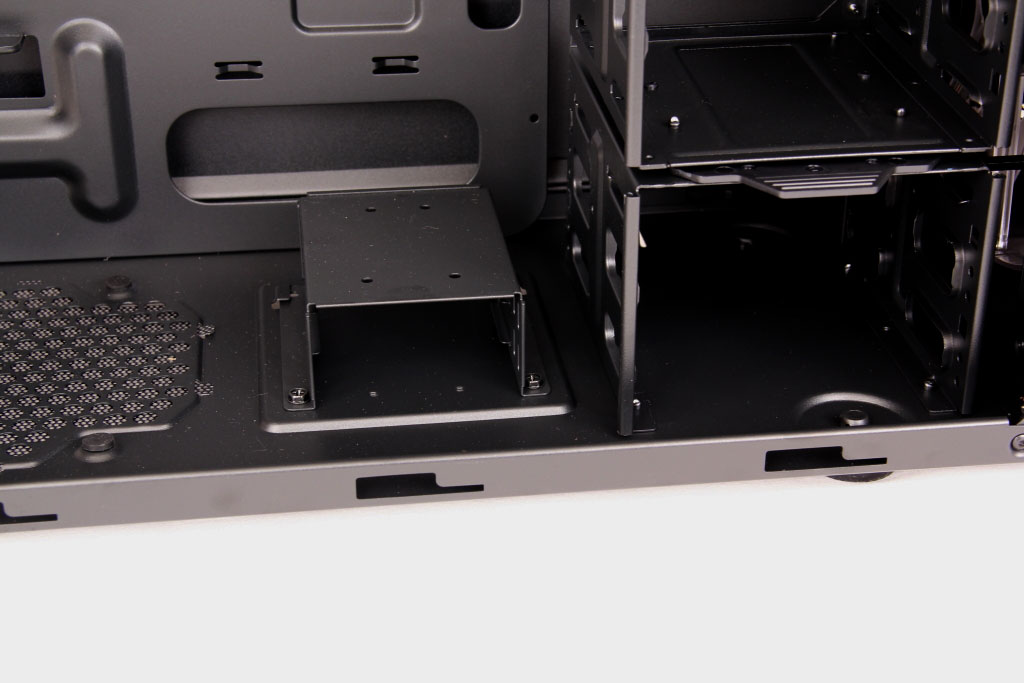
With plenty of hard drive installation options, the Enforcer allows for up to six 3.5" drives and two 2.5" drives. Interestingly the hard drive bay stacked on top of the other can be removed and even rotated 90 degrees. Removing this bay will free up space for installing the largest graphics cards or simply increasing air flow within the case.

With room to hold four 5.25" optical devices the Enforcer is well suited to handle multiple devices. Locking the devices in place is tool-less, and employes a simple turn based locking mechanism.


Looking closer from the inside the bottom rear is clearly dedicated for a power supply. Where the power supply would sit, you find small holes to help airflow, as well as a removable air filter on the underside. Just above the power supply bay are the seven PCI brackets. One vertical bracket is available and a special bracket can be used to lock your mouse and keyboard wires by routing them through. At the top is an included 120 mm exhaust fan to help draw air outside.

Peeking in at the top of the inside of the case is a large space for either fans or an internal water cooling system. Surprising Cooler Master did not include a large silent 200 mm fan at the top, but rather left all available mounting holes for multiple configurations.
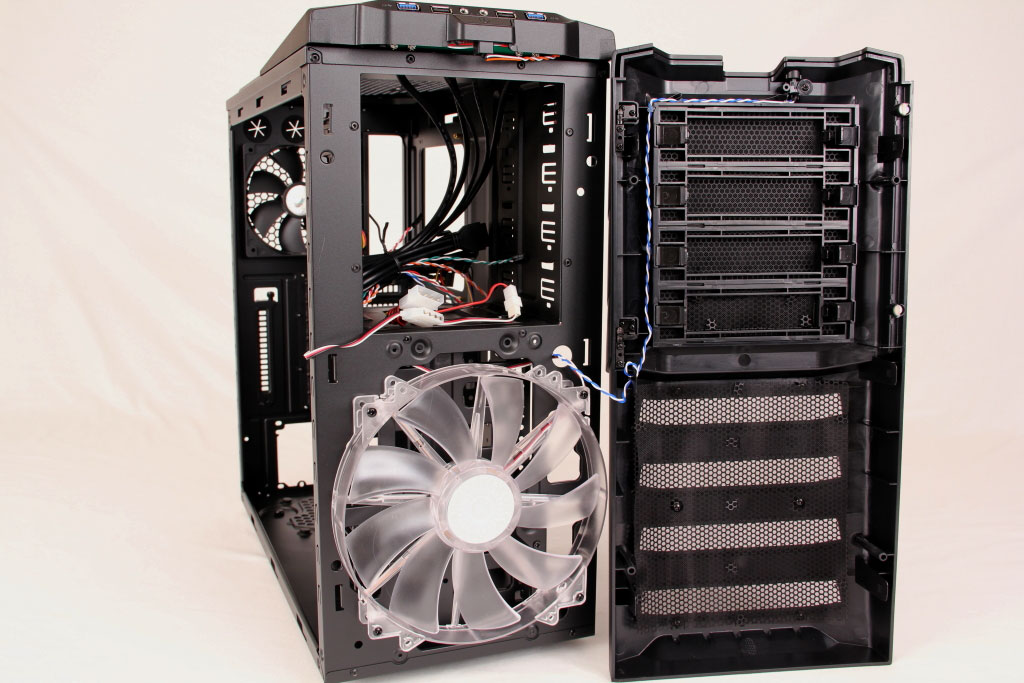
Lastly the front is pulled off for two reasons, first it was easy to remove (not so easy for other cases) and second to display the large intake 200 mm fan. This large fan pulls all the cases cool air in directly over the hard drive bays. The large fan is equipped with red LEDs to enhance the Storm Enforcer's appearance.
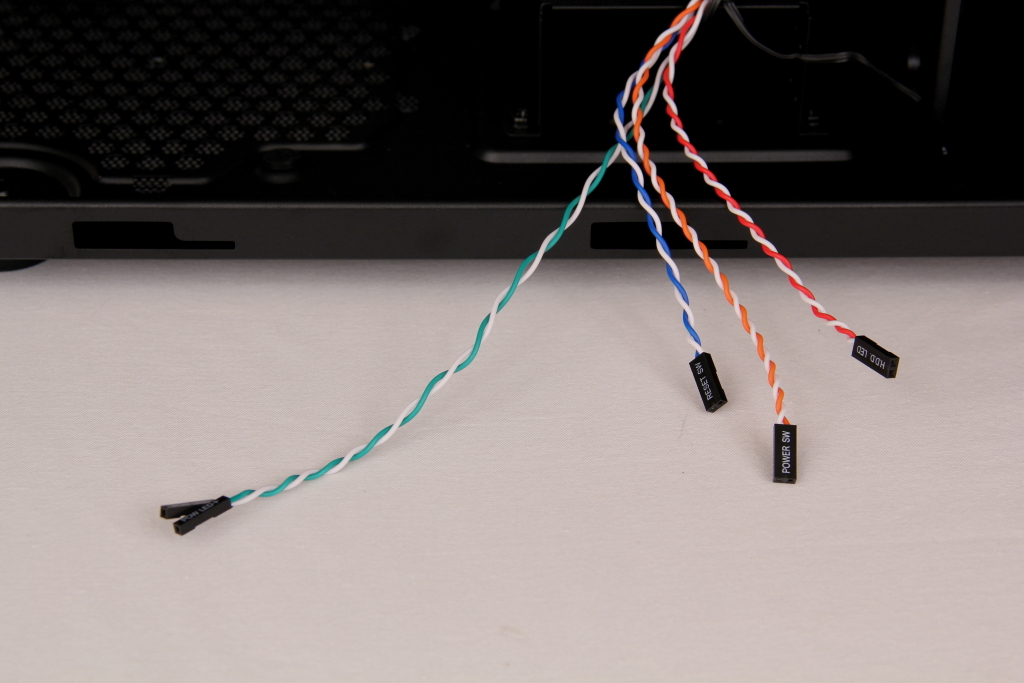

Pictured here are the included cabling for the front panel. The standard power, reset, and HDD activity wires are left vibrant and will connect the front switches to the mainboard. Additionally included is a USB 3.0 header to be connected directly to a mainboard, a USB 2.0 header, and audio connection. It's nice to have the option to connect the USB 3.0 header directly to the mainboard with this connection.
Apr 26th, 2024 06:08 EDT
change timezone
Latest GPU Drivers
New Forum Posts
- What's your latest tech purchase? (20345)
- Share your AIDA 64 cache and memory benchmark here (2918)
- Secure boot already open help (1)
- What are you playing? (20535)
- Best SSD for system drive (83)
- TPU's Nostalgic Hardware Club (18472)
- Last game you purchased? (258)
- Alphacool CORE 1 CPU block - bulging with danger of splitting? (22)
- Nvidia CMP 100-210 or 100HX (GV100 GPU) (9)
- Horizontal black lines popping up on my screen? (7)
Popular Reviews
- HYTE THICC Q60 240 mm AIO Review
- Alienware Pro Wireless Gaming Keyboard Review
- MOONDROP x Crinacle DUSK In-Ear Monitors Review - The Last 5%
- Upcoming Hardware Launches 2023 (Updated Feb 2024)
- Thermalright Phantom Spirit 120 EVO Review
- ASUS Radeon RX 7900 GRE TUF OC Review
- RTX 4090 & 53 Games: Ryzen 7 5800X vs Ryzen 7 5800X3D Review
- NVIDIA RTX 4090: 450 W vs 600 W 12VHPWR - Is there any notable performance difference?
- RTX 4090 & 53 Games: Core i9-13900K vs Ryzen 7 5800X3D Review
- FiiO K19 Desktop DAC/Headphone Amplifier Review
Controversial News Posts
- Windows 11 Now Officially Adware as Microsoft Embeds Ads in the Start Menu (122)
- Sony PlayStation 5 Pro Specifications Confirmed, Console Arrives Before Holidays (117)
- NVIDIA Points Intel Raptor Lake CPU Users to Get Help from Intel Amid System Instability Issues (106)
- AMD "Strix Halo" Zen 5 Mobile Processor Pictured: Chiplet-based, Uses 256-bit LPDDR5X (101)
- US Government Wants Nuclear Plants to Offload AI Data Center Expansion (98)
- AMD's RDNA 4 GPUs Could Stick with 18 Gbps GDDR6 Memory (89)
- Developers of Outpost Infinity Siege Recommend Underclocking i9-13900K and i9-14900K for Stability on Machines with RTX 4090 (85)
- Windows 10 Security Updates to Cost $61 After 2025, $427 by 2028 (84)