 15
15
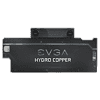
EVGA Hydro Copper GTX 1080 Waterblock Review
Installation »Closer Examination


The waterblock comes in a bubble wrap and also has a plastic wrap on the aluminum cover plate to keep it smudge-proof out of the box. Once both are removed, we get our first good look at the block from the front. EVGA has done a decent job of making the ID similar to their ACX coolers, with a cutout grill on either side and a bigger one in the middle spelling out EVGA. The center cutout is large enough to where you can get a peek at the coolant underneath, but not to the point where it is going to influence the coolant's color by itself, for example. I am not a fan of the giant HYDRO COPPER being spelled out as it takes away from the waterblock's otherwise clean look.
As with any nickel- or chrome-plated cold plate, it is difficult to photograph the front without losing some details, and so I took one from an angle as well. EVGA has gone the extra mile and has pre-cut and pre-assembled all the thermal pads already with a plastic cover on each that simply needs to be peeled off prior to installation - major props for making installation all the easier here. There is contact with the VRAM and power delivery VRMs here, which really is all you need. The cold plate also has a mirror finish with a flat surface.

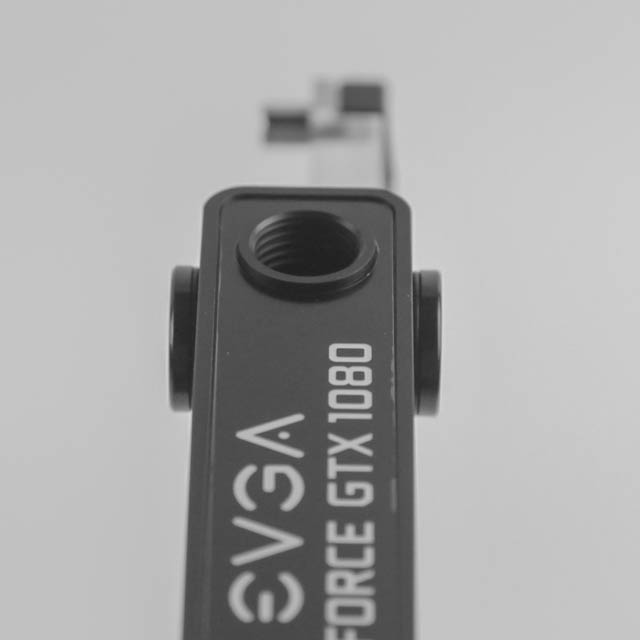
The I/O port manifold was a bit of a revelation to me. From pictures I had seen online, I was skeptical about the functionality at the cost of aesthetics and the inlet and outlet ports being so far spread out. However, with it in practice, I am a changed man. The manifold is shorter in reality than I expected it to be, and the spare ports come with low-profile stop plugs to where they do not extend much past the width of the block on either side. You will need to use the provided Allen key to remove the spare plugs if need be, but that aside, I like what they did here. Another thing to note here is that cable coming out the side from the back, and this is the LED cable that connects to the header on the reference PCB itself, there to help power and control the integrated lighting in the block. The GTX 1080 Hydro Copper has white LEDs strategically placed to ensure the EVGA logo on the front and side and the cutouts in the front get backlit illuminated, and using the PCB header means one less cable to worry about. Lighting control is done via their PrecisionX 16 driver, and as with anything else connected to the reference PCB's LED header, all you get is a single color. EVGA has thus gone with white here, and I think that was the right way to go as well.


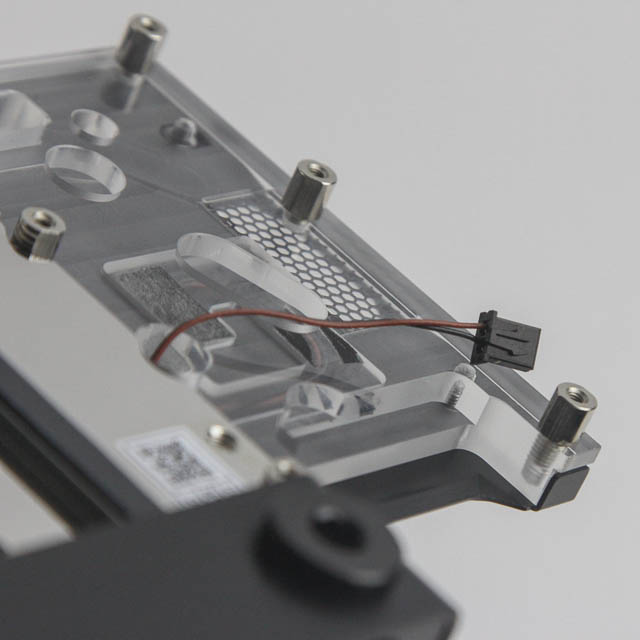
Disassembly of the block is not trivial to fully complete, although removing the front aluminum cover is very simple - a few hex screws are all that keep it in place. It is fairly thick at an average of 0.88 mm, and removing it, we get a good look at the business end of the lighting incorporated into the block. There are LEDs on either side and the middle, and as we will see next, there is one more set in the manifold area.


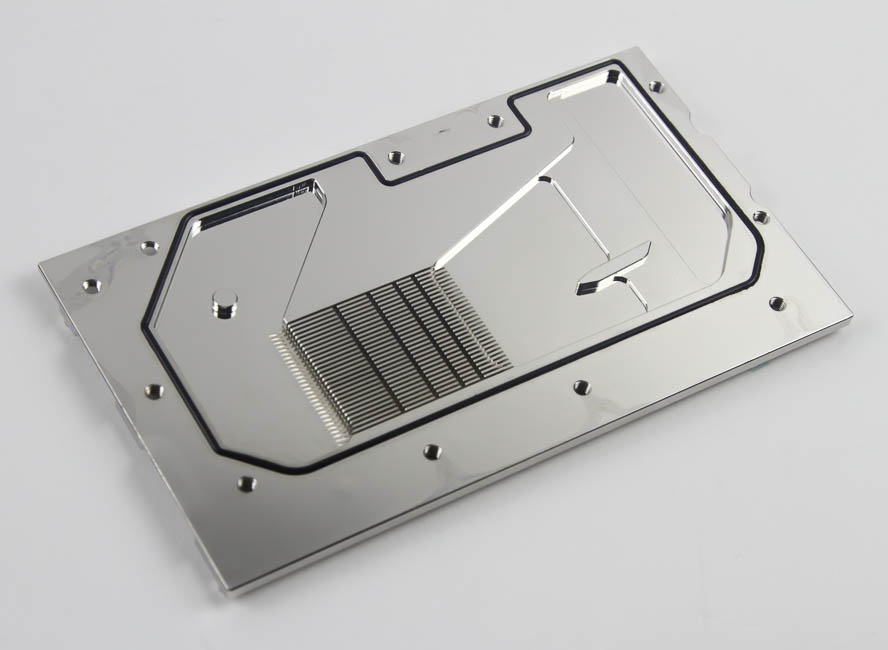

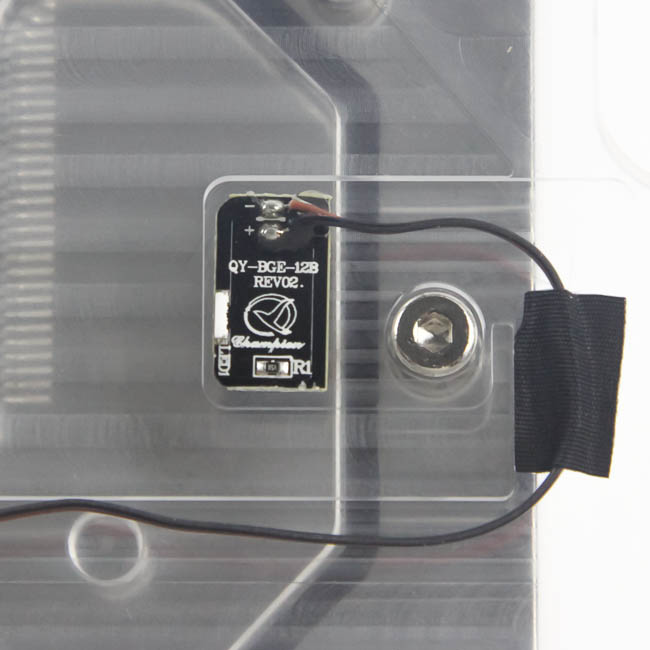
To fully remove the top from the cold plate, you have to pry out the label on the manifold and the lighting PCB behind it to expose more screws. A lot of thought has gone into the integrated lighting here, and I applaud EVGA for it. But that is also where I got my first look at the cold plate and realized they are using a now older design for coolant flow with a series heat generation model. The coolant enters through one of three possible inlet ports, cools some of the VRAM modules, goes through the microchannels over the GPU core, and cools the remaining VRAM modules and VRMs before exiting through one of three possible outlet ports. As such, the coolant gets hotter and hotter as it spends time in the block, and also has to fully go through the restrictive microchannels as opposed to, say, a split central inlet style model newer block designs have adopted. The microchannels and microfins are arranged in a separate row x column matrix, which also does not do as good a job as a continuous, single column of rows owing to multiple points of intersection between the smaller, parallel streams that may or may not cause turbulence - it is not a controlled process here. Overall, I feel this will hurt the waterblock's flow restriction and thermal performance, but we will get to that in due time with actual numbers to look at.
When re-assembling, just remember to put the O-ring back in place if it got dislodged and reverse these steps accordingly. As always, TechPowerUp is not liable for any issues that arise from your disassembly of the waterblock.
Apr 28th, 2024 06:27 EDT
change timezone
Latest GPU Drivers
New Forum Posts
- Does a faster NVMe make any difference? (8)
- Which PSU to take? (9)
- Does charging protection matter? (7)
- On ACER V3-772G GDDR5 laptop no display (8)
- Core PL1 + GPU PL1 + Ring EDP OTHER (14)
- Would I be able to put that rx 6600 in my build? (1)
- Arctic P14 MAX fans (4)
- Which air cooler for a ryzen 9 5900x (174)
- Asus NODE replaces ROG_EXT (36)
- Whats the difference between TUF gaming 4070 ti super oc and non oc? (24)
Popular Reviews
- Ugreen NASync DXP4800 Plus Review
- HYTE THICC Q60 240 mm AIO Review
- Upcoming Hardware Launches 2023 (Updated Feb 2024)
- MOONDROP x Crinacle DUSK In-Ear Monitors Review - The Last 5%
- Thermalright Phantom Spirit 120 EVO Review
- AMD Ryzen 7 7800X3D Review - The Best Gaming CPU
- FiiO K19 Desktop DAC/Headphone Amplifier Review
- ASUS Radeon RX 7900 GRE TUF OC Review
- Intel Core i9-14900KS Review - The Last of its Kind
- Alienware Pro Wireless Gaming Keyboard Review
Controversial News Posts
- Windows 11 Now Officially Adware as Microsoft Embeds Ads in the Start Menu (139)
- Sony PlayStation 5 Pro Specifications Confirmed, Console Arrives Before Holidays (117)
- NVIDIA Points Intel Raptor Lake CPU Users to Get Help from Intel Amid System Instability Issues (106)
- AMD "Strix Halo" Zen 5 Mobile Processor Pictured: Chiplet-based, Uses 256-bit LPDDR5X (103)
- US Government Wants Nuclear Plants to Offload AI Data Center Expansion (98)
- AMD's RDNA 4 GPUs Could Stick with 18 Gbps GDDR6 Memory (95)
- Developers of Outpost Infinity Siege Recommend Underclocking i9-13900K and i9-14900K for Stability on Machines with RTX 4090 (85)
- Windows 10 Security Updates to Cost $61 After 2025, $427 by 2028 (84)