 52
52
Fractal Design Define R6 Review
Assembly & Finished Looks »A Closer Look - Inside


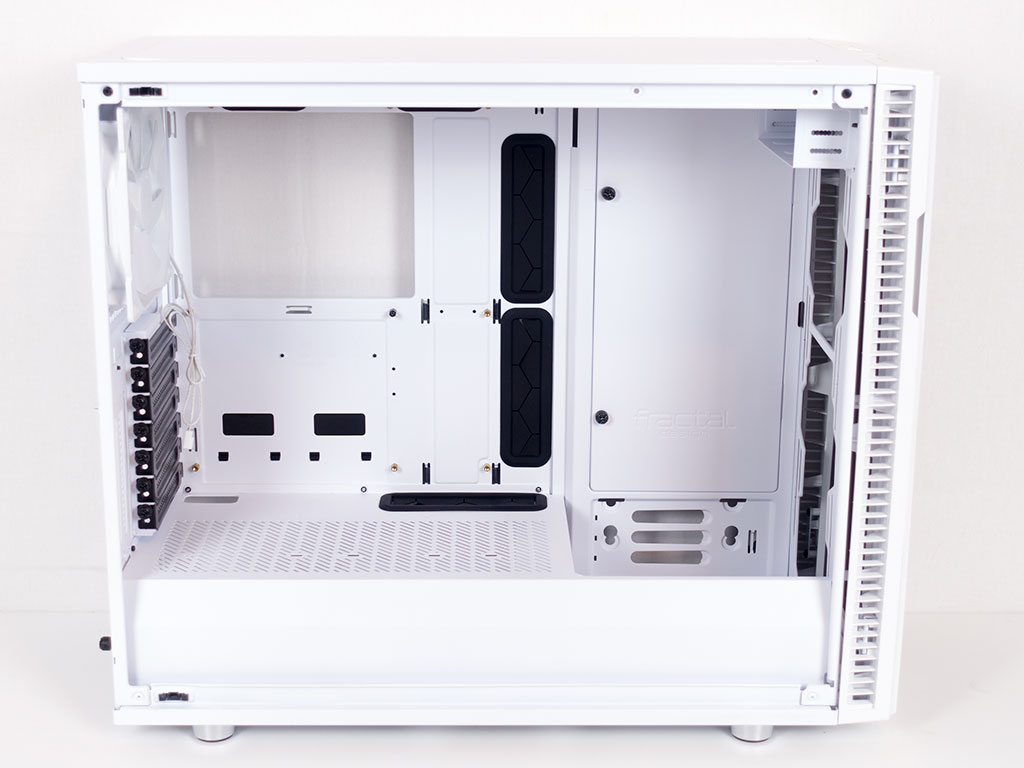
To gain access to the interior, simply remove the four thumb screws holding each side panel in place. The interior, while arranged in a traditional fashion, is not ordinary at all. All the elements within the R6 look to be custom tooled and designed, as is customary for the Define series. There is a large shroud and metal panel combination to keep the cable mess hidden away from view. You may take the two SSD brackets on the rear off the motherboard tray and place them on the shroud if you like, but if you place your GPU here at least the left one will no longer be usable due to the PCIe slot bracket taking up the space. Fractal Design could have just moved both SSD mounting locations further to the right to solve this issue.


Behind the motherboard tray, you will find a fan PCB, which is powered by a SATA connector. It can handle six 3-pin and three PWM based fans, with the respective signal taken from a header on the motherboard. Such a PCB will certainly come in extremely handy when utilizing larger radiators and, thus, multiple fans. You will find the two aforementioned SSD mounting brackets here as well. Fractal Design has also included two of their signature Velcro strips for easy cable management.
There is only about 20 mm of space between the motherboard tray and side panel. However, thanks to ample routing room and the wide cable channel created by the zip ties, I ran into no issue when closing the side panel once the system was fully assembled.

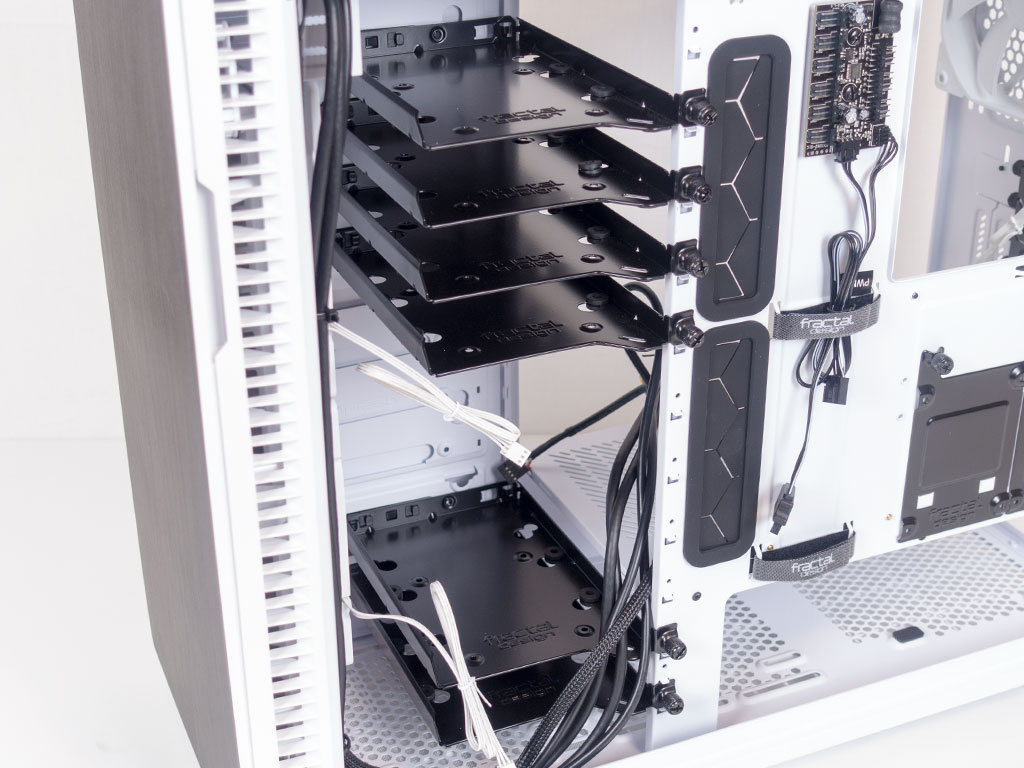
In the front, the two 140 mm fans are set to blow across the main hard drives. These sit on individual trays of which Fractal Design has included six. You may move them around freely, as there are five open positions along the entire front of the chassis. I am sure Fractal Design could end up selling extra ones for those who need them.


The cover that hides the hard-drive trays from view is made of metal as well and may be removed to reveal mounting possibilities for 3.5" drives when the alternative configuration is used.


In the rear, the PSU bay comes with four rubber bits on which the power supply will sit once installed. Above that are the expansion slots, with the vertical ones being black and the two horizontal variants white. The former are secured with thumbscrews inside the chassis, while the latter utilize traditional ones and can be accessed from outside of the chassis. In the very top, you will see the 120 mm exhaust fan with its all-white cables and plug.

In the ceiling, you can clearly make out the mounting possibilities for fans or a radiator. Thanks to being off-center, you should not have to worry about such a unit interfering with your motherboard's components under normal circumstances.


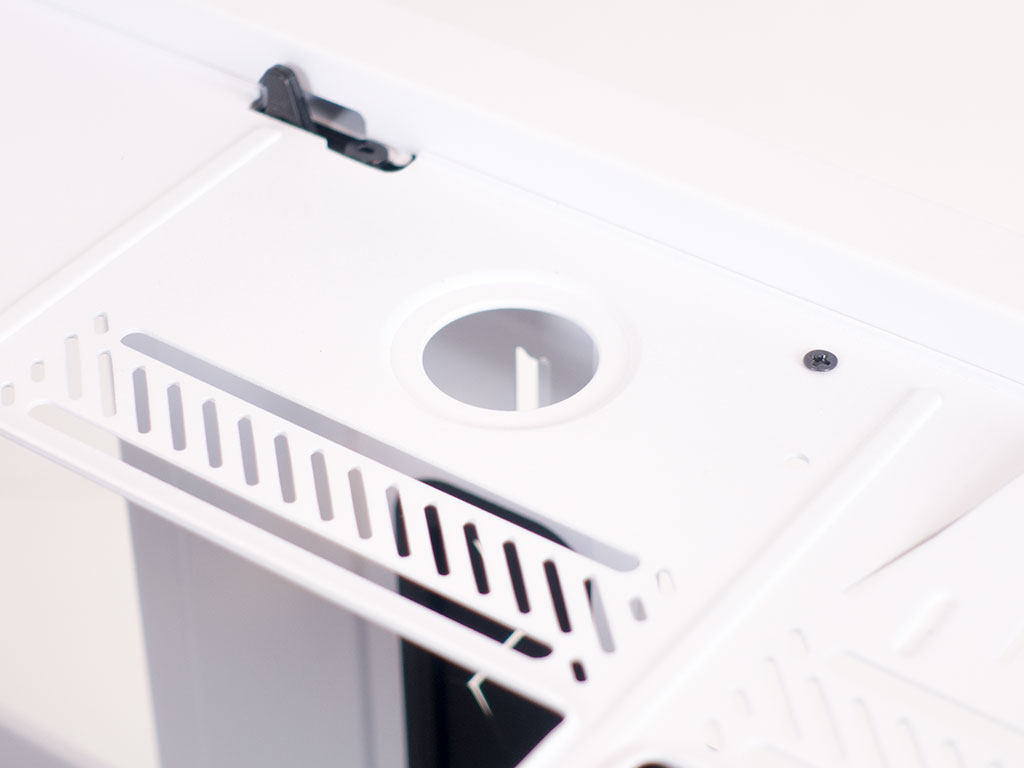
You may access the metal panel by popping off the top cover. Fractal Design has made the mounting plate completely removable so that you may easily install a radiator of up to 420 mm in size outside of the confines of the case. There is also a round opening, which is there to allow you to fill the reservoir/loop without taking everything apart.


All the cables within the Fractal Design R6 are sleeved black and of the standard variety, so they will most certainly fit any modern motherboard without issue.
Alternative Layout


As previously mentioned, the Fractal Design Define R6 has one big ace up its sleeve: you are able to move the front plate to the other side of the chassis by taking it apart partially. This gives you an open design, which is perfect for those requiring the space for larger liquid-cooling setups which include reservoirs and pumps. By doing so, you can use two of the 3.5" trays and attach them to the rear of the motherboard tray, which has the R6 offer up a total of four hard drive bays in this configuration.
Apr 25th, 2024 02:23 EDT
change timezone
Latest GPU Drivers
New Forum Posts
- The TPU UK Clubhouse (24784)
- (Anti) SFF fun house (349)
- Github comments used to push malware via Microsoft repo urls (1)
- What's your latest tech purchase? (20337)
- The Official Linux/Unix Desktop Screenshots Megathread (694)
- XFX RX470 8GB no video and error 43 (27)
- Cinebench crashed my PC. My Wi-Fi stopped working, and I keep getting a "Please wait" screen when I boot up my PC. (31)
- im new to throttelstop and i think i messed it up by copying others any hints would be very much aprreciated (1)
- Aida64 cache mem OC (7)
- I am getting artifacting when I change Windows security settings. Is my GPU failing, or is this just a Windows issue? (10)
Popular Reviews
- Fractal Design Terra Review
- Thermalright Phantom Spirit 120 EVO Review
- Corsair 2000D Airflow Review
- Minisforum EliteMini UM780 XTX (AMD Ryzen 7 7840HS) Review
- ASUS GeForce RTX 4090 STRIX OC Review
- NVIDIA GeForce RTX 4090 Founders Edition Review - Impressive Performance
- ASUS GeForce RTX 4090 Matrix Platinum Review - The RTX 4090 Ti
- MSI GeForce RTX 4090 Suprim X Review
- MSI GeForce RTX 4090 Gaming X Trio Review
- Gigabyte GeForce RTX 4090 Gaming OC Review
Controversial News Posts
- Sony PlayStation 5 Pro Specifications Confirmed, Console Arrives Before Holidays (116)
- NVIDIA Points Intel Raptor Lake CPU Users to Get Help from Intel Amid System Instability Issues (106)
- AMD "Strix Halo" Zen 5 Mobile Processor Pictured: Chiplet-based, Uses 256-bit LPDDR5X (101)
- US Government Wants Nuclear Plants to Offload AI Data Center Expansion (98)
- Windows 10 Security Updates to Cost $61 After 2025, $427 by 2028 (84)
- Developers of Outpost Infinity Siege Recommend Underclocking i9-13900K and i9-14900K for Stability on Machines with RTX 4090 (84)
- TechPowerUp Hiring: Reviewers Wanted for Motherboards, Laptops, Gaming Handhelds and Prebuilt Desktops (78)
- AMD's RDNA 4 GPUs Could Stick with 18 Gbps GDDR6 Memory (74)