 16
16
Lancool Metal Boned K7 Review
Installation & Finished Look »A Closer Look - Inside

Moving right along to the inside of the K7, let's start with the rear. While the power supply bay may not look out of the ordinary on the outside it is certainly a bit different when compared to OEM cases. There is a little "step" in the design of the bay, which moves the bottom plate away from the fan of the power supply and also has holes, so that air may pass through.
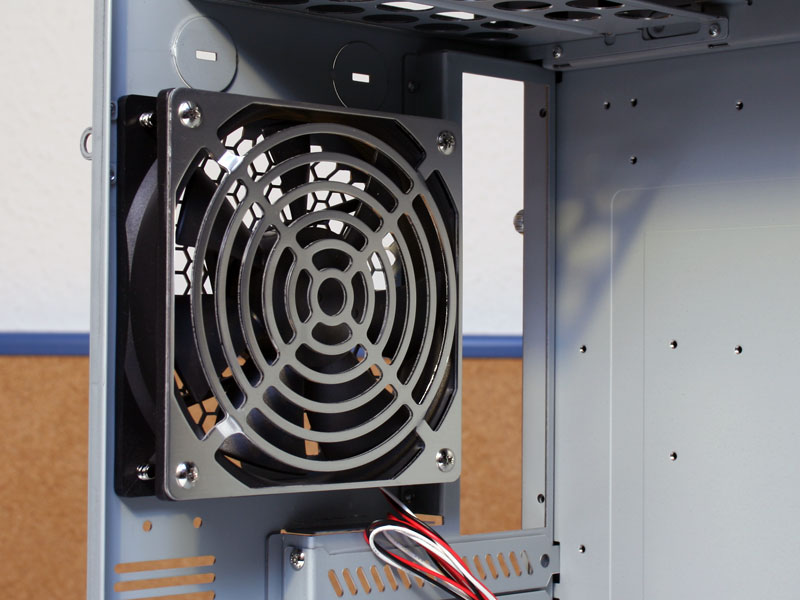
The rear fan is covered by a guard, which has been created out of a single sheet of aluminum. There are circular cuts to allow air to be pulled out the rear of the case. It may have been cheaper and better to use a traditional steel fan grill instead, but Lian-Li uses its own version on all their cases. Another highlight is the user choice of either the mainboard header or PSU to supply the cooling devices with power. This is something sorely missed in so many cases these days.
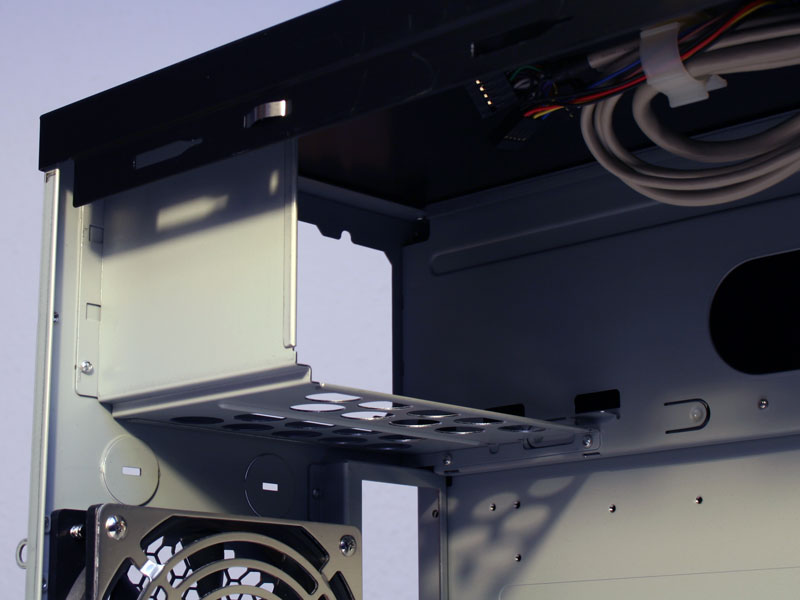
The PCI brackets are held in place by simple screws. There is a fine air grill next to these expansion slots, which can hold an additional side fan, sold seperately. Once again, this is a feature which has been passed on from the more expensive Lian-Li enclosures.


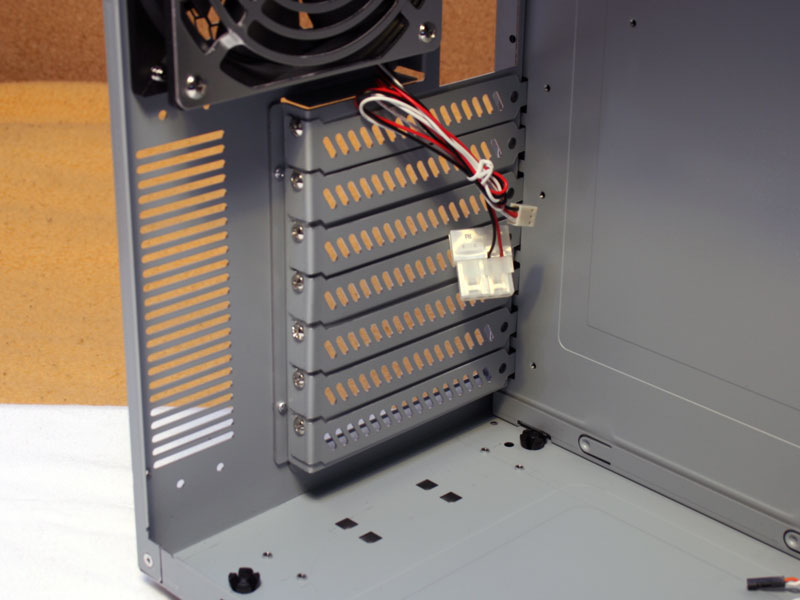
The optical bay uses a simple locking mechanism, which snaps into the screw holes in the rear of the drive. This means that it is sufficient to use a single screw to secure the drives and that you do not need to line up drives with the front of the case manually. The hard drive cage features a completely new design. While it is not screw-less, it does use rubber rings to disconnect the hard drives from the chassis and thus reduces nois and vibrations. You have to slide them in backward from the other side of the case. At this point it also becomes apparent why the K7 only has three 5.25 inch drive bays and a single 3.5 inch one. The space is used by the hard drive cage, which can hold a total of five hard drives.
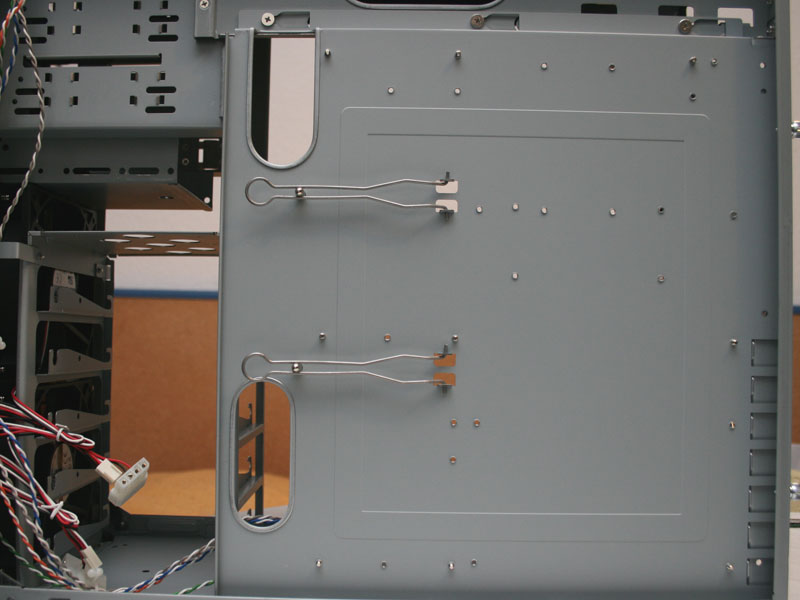

The mainboard tray can also be removed by unscrewing two thumb screws. The rear holds two large metal clips and the tray has two large holes. You can route cables behind the tray to the drives and toward the bottom of the mainboard. As you will see when the system is put together, it makes cable management very easy.
Apr 26th, 2024 09:41 EDT
change timezone
Latest GPU Drivers
New Forum Posts
- Secure boot already open help (5)
- Alphacool CORE 1 CPU block - bulging with danger of splitting? (25)
- What are you playing? (20539)
- What's your latest tech purchase? (20351)
- The Official Linux/Unix Desktop Screenshots Megathread (698)
- Horizontal black lines popping up on my screen? (12)
- Which new games will you be buying? (321)
- GoDeal24 Windows 11 Pro 32-bit! (3)
- Old high quality PSU, or semi-old mid-quality PSU? (1)
- Best SSD for system drive (86)
Popular Reviews
- HYTE THICC Q60 240 mm AIO Review
- MOONDROP x Crinacle DUSK In-Ear Monitors Review - The Last 5%
- Alienware Pro Wireless Gaming Keyboard Review
- Upcoming Hardware Launches 2023 (Updated Feb 2024)
- Thermalright Phantom Spirit 120 EVO Review
- ASUS Radeon RX 7900 GRE TUF OC Review
- FiiO K19 Desktop DAC/Headphone Amplifier Review
- NVIDIA RTX 4090: 450 W vs 600 W 12VHPWR - Is there any notable performance difference?
- RTX 4090 & 53 Games: Ryzen 7 5800X vs Ryzen 7 5800X3D Review
- RTX 4090 & 53 Games: Core i9-13900K vs Ryzen 7 5800X3D Review
Controversial News Posts
- Windows 11 Now Officially Adware as Microsoft Embeds Ads in the Start Menu (123)
- Sony PlayStation 5 Pro Specifications Confirmed, Console Arrives Before Holidays (117)
- NVIDIA Points Intel Raptor Lake CPU Users to Get Help from Intel Amid System Instability Issues (106)
- AMD "Strix Halo" Zen 5 Mobile Processor Pictured: Chiplet-based, Uses 256-bit LPDDR5X (101)
- US Government Wants Nuclear Plants to Offload AI Data Center Expansion (98)
- AMD's RDNA 4 GPUs Could Stick with 18 Gbps GDDR6 Memory (89)
- Developers of Outpost Infinity Siege Recommend Underclocking i9-13900K and i9-14900K for Stability on Machines with RTX 4090 (85)
- Windows 10 Security Updates to Cost $61 After 2025, $427 by 2028 (84)