 40
40
NCASE M1 Review
Assembly & Finished Looks »A Closer Look - Inside

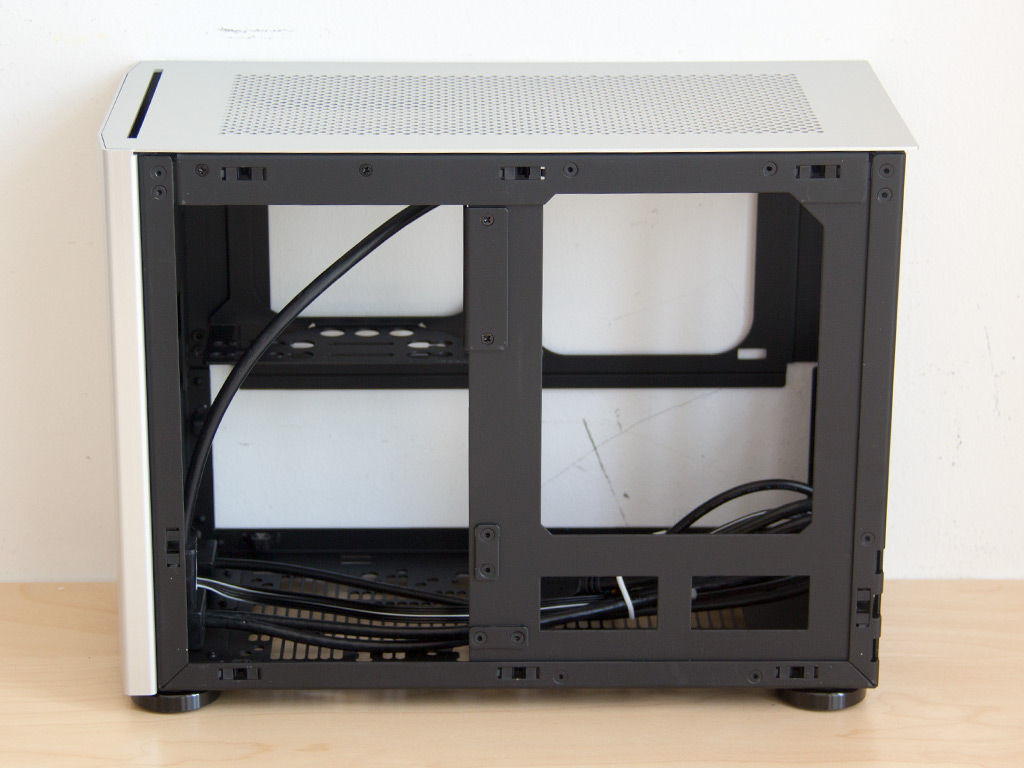

To gain access to the interior, simply pull the side panels off. All of them are in fact held in place by push pins, which is great for ease of assembly and applying an upgrade, though it also means that strangers will easily be able to pull things apart at a LAN Party, for example. Looked at from the side, the interior actually looks very simple, but do not let it fool you as a peek at the bare top already hints at the efficient use of space.


The M1 is meant to be used with a compact SFX PSU to allow for the biggest possible hardware to be installed. Next to it, in the front, is a HDD bracket for two 3.5'' drives. It occupies one of two 120mm mounting positions along the side.

Taking a look at the front's interior, you may place a 2.5" storage drive there as well thanks to the little pre-installed plate. NCASE again ensures that every square inch is used in a meaningful manner.

You may install a 3.5" hard drive toward the front or back on the floor, or combine one 2.5" drive in the rear with a 3.5" drive in the front. With no storage options in those spots, there are mounting holes for a 80mm or 92mm fan toward the front of the chassis, or a single 120mm unit in the middle.

You may detach all major elements to give you unobstructed access to the interior, or as a means to make assembly easier as it allows you to prep various elements outside the confines of the M1's walls.
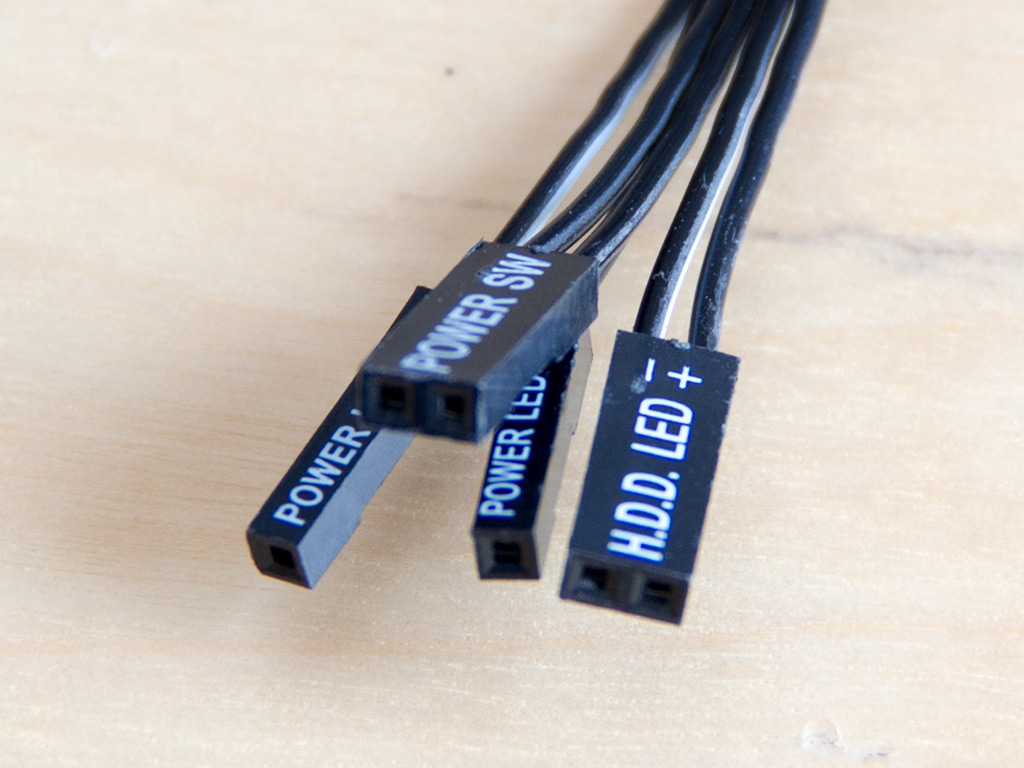

All the cables within the NCASE M1 are sleeved black and of the usual variety, so you should run into no issues while attaching these to a modern motherboard.
Given the chassis only comes with USB 3.0 connectivity, it would have been nice of NCASE to include a USB 2.0 adapter inside the box for those looking to use an older board without the required header.
Apr 26th, 2024 11:35 EDT
change timezone
Latest GPU Drivers
New Forum Posts
- im new to throttelstop and i think i messed it up by copying others any hints would be very much aprreciated (4)
- The TPU UK Clubhouse (24787)
- Cs2 Freezing in Rx 580 (5)
- Ghost of Tsushima PC Port !!!! (15)
- The Official Linux/Unix Desktop Screenshots Megathread (699)
- Red Dead Redemption using emu (4)
- Meta Horizon OS (21)
- Old high quality PSU, or semi-old mid-quality PSU? (3)
- Secure boot already open help (8)
- What are you playing? (20540)
Popular Reviews
- HYTE THICC Q60 240 mm AIO Review
- MOONDROP x Crinacle DUSK In-Ear Monitors Review - The Last 5%
- Alienware Pro Wireless Gaming Keyboard Review
- Upcoming Hardware Launches 2023 (Updated Feb 2024)
- Thermalright Phantom Spirit 120 EVO Review
- ASUS Radeon RX 7900 GRE TUF OC Review
- FiiO K19 Desktop DAC/Headphone Amplifier Review
- RTX 4090 & 53 Games: Ryzen 7 5800X vs Ryzen 7 5800X3D Review
- NVIDIA RTX 4090: 450 W vs 600 W 12VHPWR - Is there any notable performance difference?
- RTX 4090 & 53 Games: Core i9-13900K vs Ryzen 7 5800X3D Review
Controversial News Posts
- Windows 11 Now Officially Adware as Microsoft Embeds Ads in the Start Menu (125)
- Sony PlayStation 5 Pro Specifications Confirmed, Console Arrives Before Holidays (117)
- NVIDIA Points Intel Raptor Lake CPU Users to Get Help from Intel Amid System Instability Issues (106)
- AMD "Strix Halo" Zen 5 Mobile Processor Pictured: Chiplet-based, Uses 256-bit LPDDR5X (101)
- US Government Wants Nuclear Plants to Offload AI Data Center Expansion (98)
- AMD's RDNA 4 GPUs Could Stick with 18 Gbps GDDR6 Memory (92)
- Developers of Outpost Infinity Siege Recommend Underclocking i9-13900K and i9-14900K for Stability on Machines with RTX 4090 (85)
- Windows 10 Security Updates to Cost $61 After 2025, $427 by 2028 (84)