 6
6
Silverstone Precision PS06 Review
Assembly & Finished Looks »A Closer Look - Inside
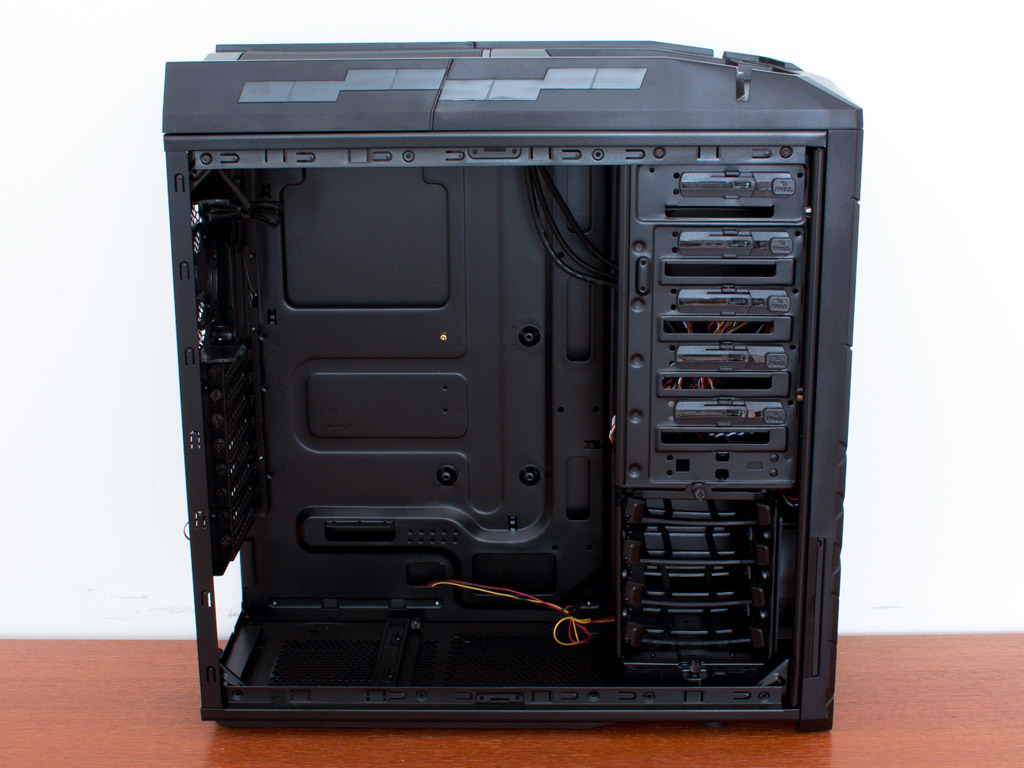
Gaining access to the interior is easily achieved by removing the pair of thumb screws holding each panel in place. Upon first sight there is plenty of space to hide and route cables - just as advertised. On top of that many aspects seem to be tool-less, which should make the assembly process much easier.
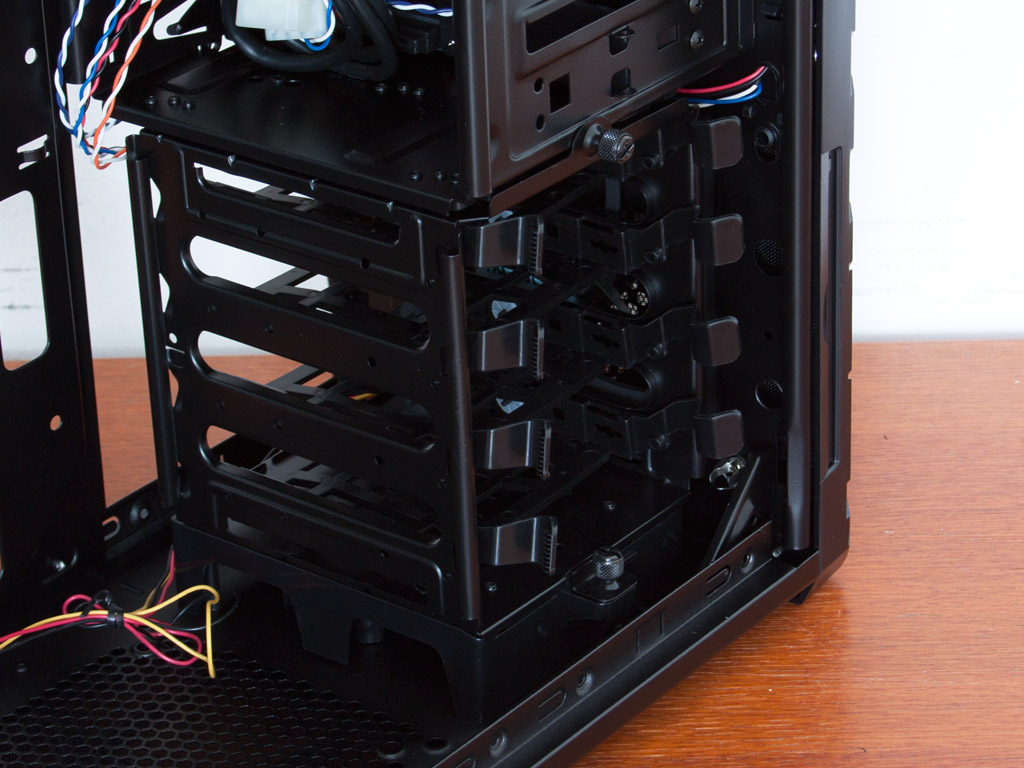


In the front there are four hard drive bays. While this may suffice for a vast number of people, some may find this to be too few a number as most cases of this size can hold between six and eight 3.5 inch drives. Above that are the external drive bays. If you look closely, Silverstone has taken the bottom 5.25 inch bay and made it a 3.5/2.5 SATA hot-swap with the use of a plastic tray and some clever design of the front panel. The traditional 5.25 inch bays above come equipped with plastic levers which automatically snap into place. It will be interesting to see how well these can hold a drive.


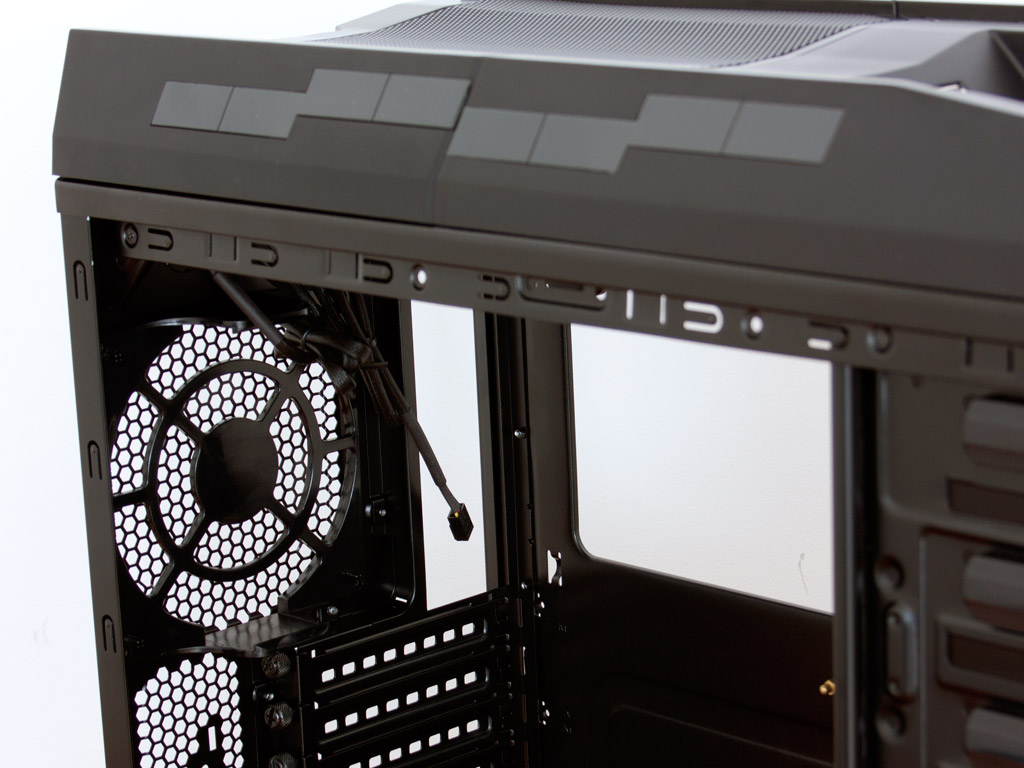
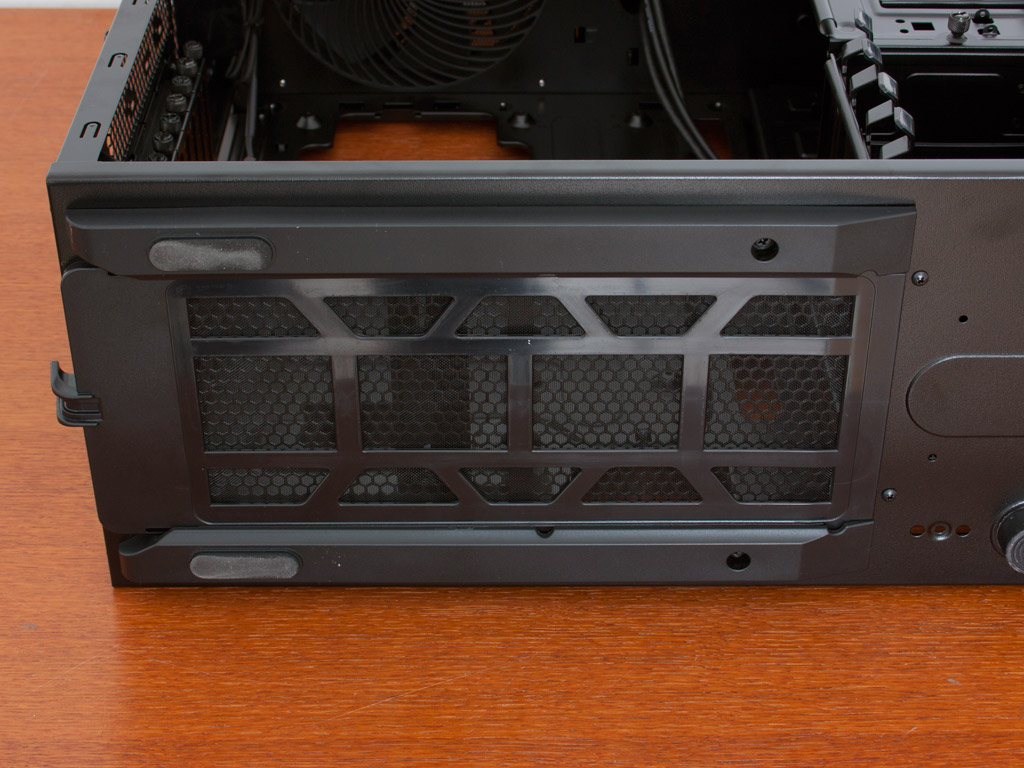
Turning our focus to the rear of the case, the PSU bay utilizes a cross beam much like the one found in many Thermaltake cases. I am not a fan of such devices as it just complicates the PSU installation process and I believe that other approaches are easier, cheaper and work just as well. Above that are the eight expansion slots, each removable cover held in place by a thumb screw. In the very top you have a plastic frame which allows you to easily install a 120 mm fan without having to use any tools.

The magic of the Air Penetrator fan lies in the unique twister shaped like grill. It creates a forceful and focused air twirl instead of just pushing air from one side to another. This should help in keeping things cool around the CPU - especially since it is pulling cold air and pushing it down into the case.
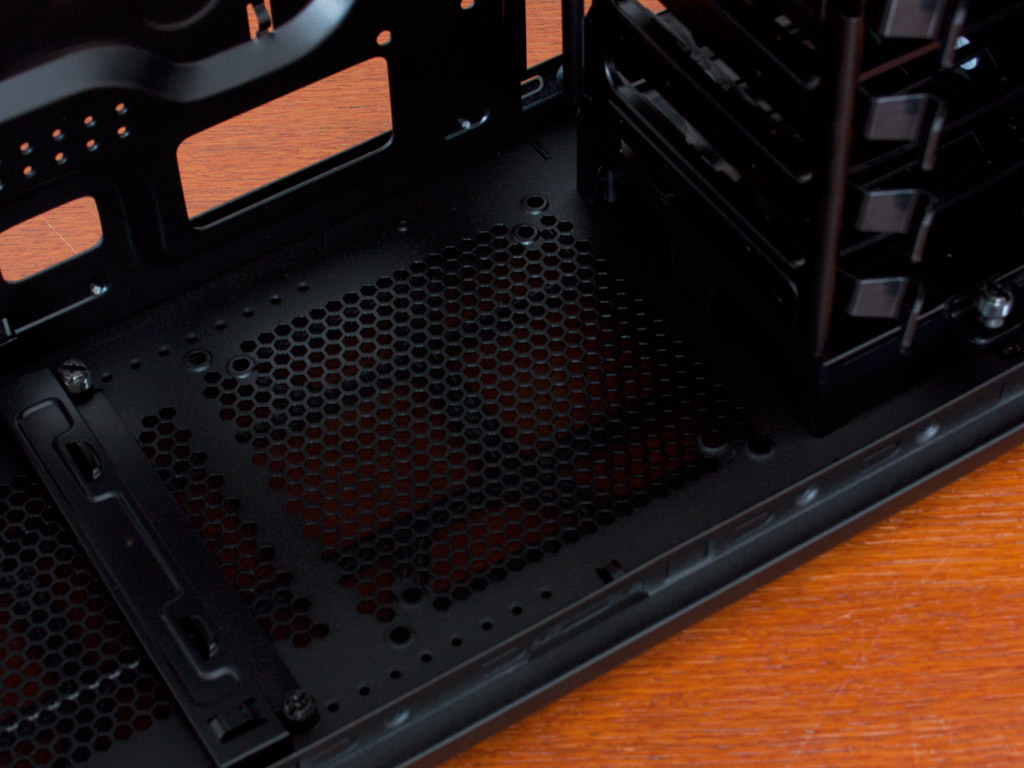
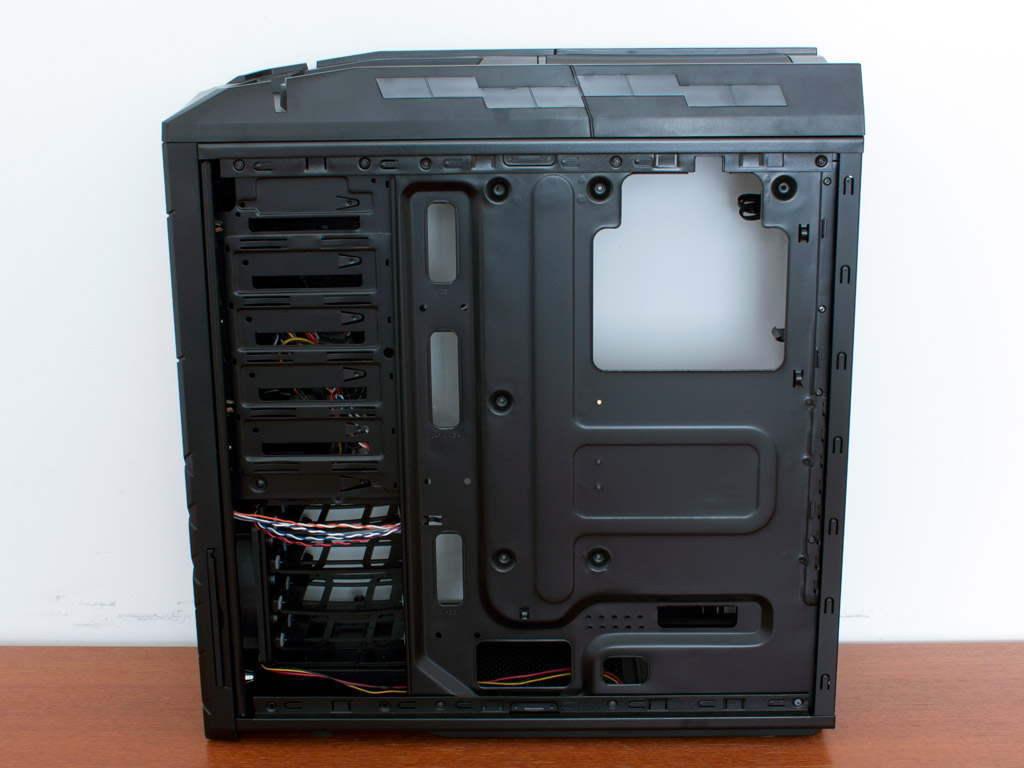
You may install an additional fan on the floor of the PS06. Looking at the dust filter here, it seems to span across both the PSU bay and this intake location so that you won't have to worry about dust entering the case through this area.

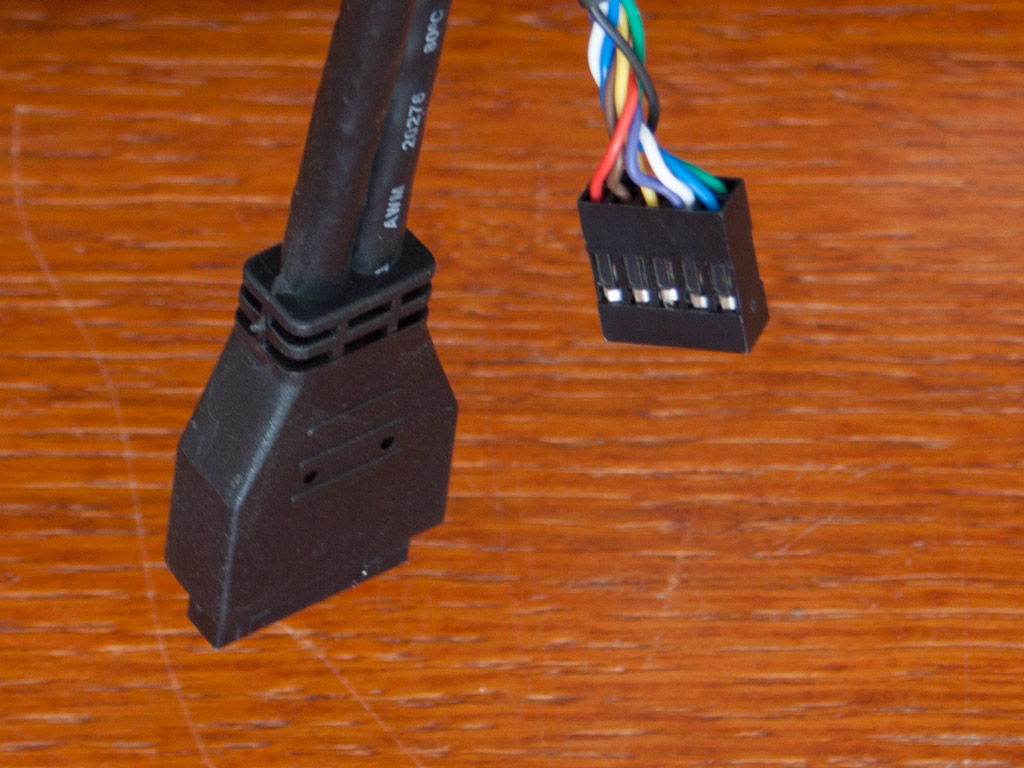
Both cable sets are nothing out of the ordinary. The case connectors for power, reset and LEDs are of the colorful variety, while the USB 3.0 and audio cables are all black. These two cables seem to be rather short and it will be interesting to see if I can reach all the proper locations on a full ATX motherboard.


Before diving into the assembly process, there are two more numbers to check out. The PS06 offers two different depth of spaces behind the motherboard tray. The first is a mere 12 mm behind the majority of the metal sheet, while the other is a full 20 mm in the trench that runs down the left side of the tray. The latter should suffice in allowing to hide and route most the cables within the case.
Apr 26th, 2024 11:41 EDT
change timezone
Latest GPU Drivers
New Forum Posts
- im new to throttelstop and i think i messed it up by copying others any hints would be very much aprreciated (4)
- The TPU UK Clubhouse (24787)
- Cs2 Freezing in Rx 580 (5)
- Ghost of Tsushima PC Port !!!! (15)
- The Official Linux/Unix Desktop Screenshots Megathread (699)
- Red Dead Redemption using emu (4)
- Meta Horizon OS (21)
- Old high quality PSU, or semi-old mid-quality PSU? (3)
- Secure boot already open help (8)
- What are you playing? (20540)
Popular Reviews
- HYTE THICC Q60 240 mm AIO Review
- MOONDROP x Crinacle DUSK In-Ear Monitors Review - The Last 5%
- Alienware Pro Wireless Gaming Keyboard Review
- Upcoming Hardware Launches 2023 (Updated Feb 2024)
- Thermalright Phantom Spirit 120 EVO Review
- ASUS Radeon RX 7900 GRE TUF OC Review
- FiiO K19 Desktop DAC/Headphone Amplifier Review
- RTX 4090 & 53 Games: Ryzen 7 5800X vs Ryzen 7 5800X3D Review
- NVIDIA RTX 4090: 450 W vs 600 W 12VHPWR - Is there any notable performance difference?
- Sapphire Radeon RX 7900 GRE Pulse Review
Controversial News Posts
- Windows 11 Now Officially Adware as Microsoft Embeds Ads in the Start Menu (125)
- Sony PlayStation 5 Pro Specifications Confirmed, Console Arrives Before Holidays (117)
- NVIDIA Points Intel Raptor Lake CPU Users to Get Help from Intel Amid System Instability Issues (106)
- AMD "Strix Halo" Zen 5 Mobile Processor Pictured: Chiplet-based, Uses 256-bit LPDDR5X (101)
- US Government Wants Nuclear Plants to Offload AI Data Center Expansion (98)
- AMD's RDNA 4 GPUs Could Stick with 18 Gbps GDDR6 Memory (92)
- Developers of Outpost Infinity Siege Recommend Underclocking i9-13900K and i9-14900K for Stability on Machines with RTX 4090 (85)
- Windows 10 Security Updates to Cost $61 After 2025, $427 by 2028 (84)