 8
8
Thermaltake Element V Review
Value & Conclusion »Assembly


Installing the mainboard is done with the use of the silver spacers. Simply screw them into the appropriate location and place your board on top of them. Thermaltake has supplied plenty of screws for both the board and all the other parts of the computer. Turning the chassis around, it becomes obvious that the hole in the tray does not align well with the Foxconn board.


Installing the hard drives is quite easy, as you simply fill the tray up outside the chassis and slide it into the case. The downside of such a system is the fact that adding or swapping drives will force you to unplug all three units from the cage in question to remove it completely. Thermaltake has spaced the drives apart so that the air can move easily between them, while other companies opt for a capacity of four drives for each cage. Such capacity comes at the sacrifice of unrestricted air flow.


Placing the ODD inside the case requires you to remove the entire front to pull off the single drive bay cover. Once the slot is free, simply unlock the plastic part on the side, slide the drive into place and snap the plastic contraption into place. It actually holds quite nicely with just a bit of play. If you are using the computer at home the plastic lock should suffice, but I still suggest using at least a single screw on the opposite side, just to avoid any vibrations.

Installing the PSU is actually quite frustrating. Thermaltake has placed a support beam on the floor of the chassis, which is supposed to give the case power supply some additional support. Thermaltake has chosen to add two ledges on this cross beam. These ledges in combination with the metal cross bar of the chassis itself and the mainboard tray, make it impossible to install the PSU without removing that bar completely first. There is no reason whatsoever to use such ledges.

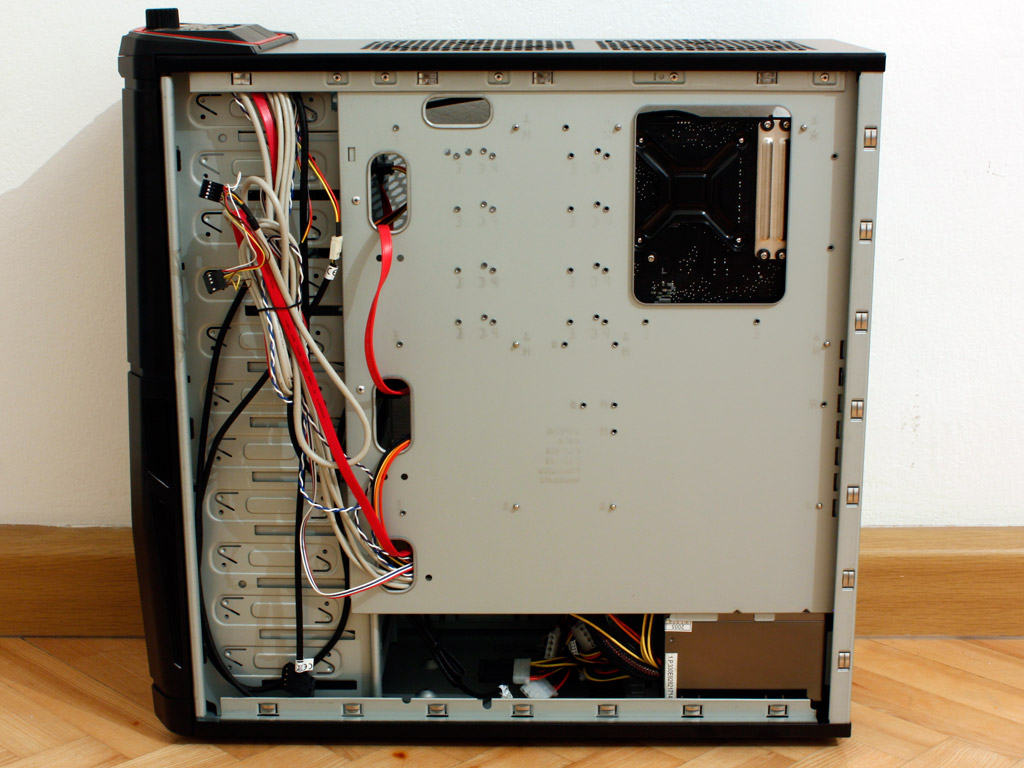
There is plenty of space when everything is installed and the cable routing and hiding possibilities are quite good. There are plenty of areas to hide excess cables as well as unwanted ones. The only cables which you cannot hide are the ones from the PSU. Thermaltake has pre-routed all the fan cables, which makes the task much easier as well.
Finished Looks

Upon placing both sides back on the case, the Element V makes a good impression. Even though the assembly process has a few annoyances, the overall result is quite alright. The drive looks good in the chassis and there is plenty of space for the large Noctua cooler next to the 230 mm side fan.


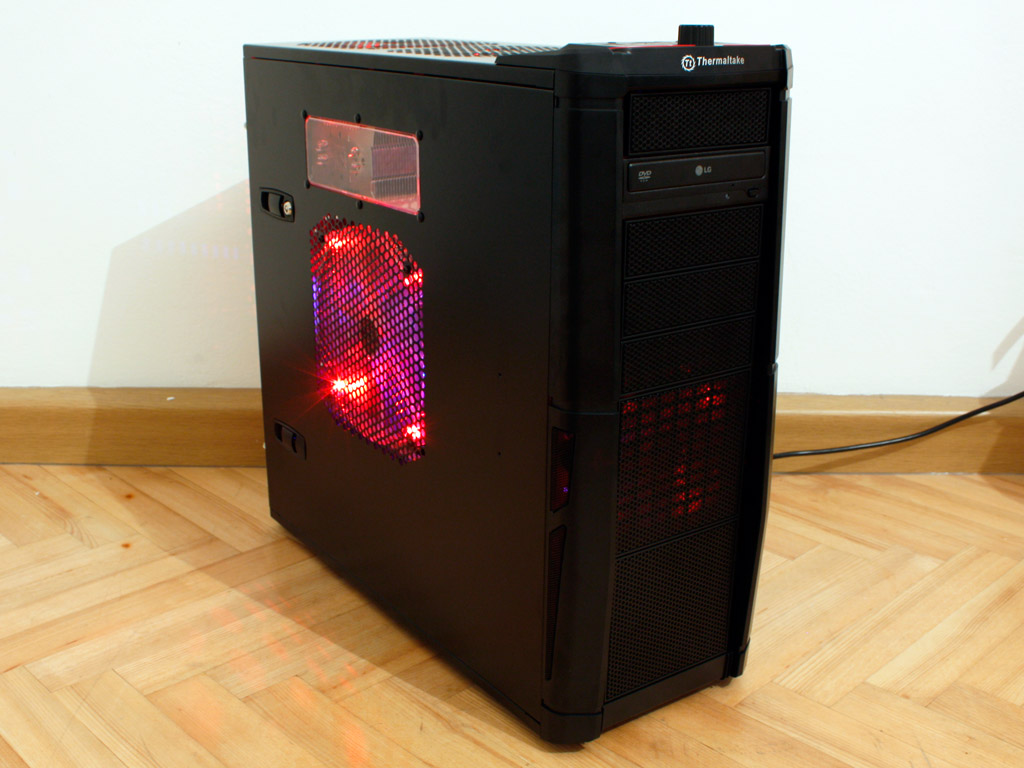
Thermaltake offers six different lighting modes. The first is with all the LEDs turned off, or you may use either red, blue, green colors. The last mode is a crazy one which cycles through all types of colors endlessly. These can be set by pressing the dial on top of the case. Turning the fans all the way up is certainly not recommended, as the noise level is only bearable at a LAN party for example. Overall the case seems a bit too bulky to be taken to a LAN party, but I have seen people carry bigger and heavier units to such events.
May 4th, 2024 14:39 EDT
change timezone
Latest GPU Drivers
New Forum Posts
- Everytime i plug something into my wall, it stutters, and it never goes away (2)
- RX 6800 causing stuttering when typing text (Low 2D/IDLE Clocks?) (16)
- Only some humans can see refresh rates faster than others, I am one of those humans. (96)
- SSD RAM CACHING (Especially Writing) (6)
- X670 owners, what kind of PCH temps do you you see? (7)
- i9-12900K 16 Running Hot (3)
- Want to upgrade the network at home but need some advice/suggestions (0)
- Alphacool CORE 1 CPU block - bulging with danger of splitting? (93)
- Free Games Thread (3776)
- Why does my PC shut down even though it's connected to a UPS? (81)
Popular Reviews
- Finalmouse UltralightX Review
- Meze Audio LIRIC 2nd Generation Closed-Back Headphones Review
- ASRock NUC BOX-155H (Intel Core Ultra 7 155H) Review
- Montech Sky Two GX Review
- Gigabyte GeForce RTX 4070 Ti Super Gaming OC Review
- Upcoming Hardware Launches 2023 (Updated Feb 2024)
- HYTE THICC Q60 240 mm AIO Review
- Cougar Hotrod Royal Gaming Chair Review
- Alienware Pro Wireless Gaming Keyboard Review
- Ugreen NASync DXP4800 Plus Review
Controversial News Posts
- Intel Statement on Stability Issues: "Motherboard Makers to Blame" (236)
- Windows 11 Now Officially Adware as Microsoft Embeds Ads in the Start Menu (167)
- AMD to Redesign Ray Tracing Hardware on RDNA 4 (128)
- Sony PlayStation 5 Pro Specifications Confirmed, Console Arrives Before Holidays (117)
- AMD's RDNA 4 GPUs Could Stick with 18 Gbps GDDR6 Memory (114)
- NVIDIA Points Intel Raptor Lake CPU Users to Get Help from Intel Amid System Instability Issues (106)
- AMD "Strix Halo" Zen 5 Mobile Processor Pictured: Chiplet-based, Uses 256-bit LPDDR5X (103)
- AMD Ryzen 9 7900X3D Now at a Mouth-watering $329 (103)