 13
13
XSPC Neo Memory Water Block Review
Installation & Lighting »Closer Examination


For those wondering why I went with dark chrome, these were the best shots I could get without reflections muddling everything, and even this would have been near-impossible with the regular shiny chrome finish. We see the side plates in particular have received a good surface finishing even though they will not be seen easily under the water block itself, and I appreciate this detail. The side plates measure 125 x 36 x 7.1 mm and are large enough to fit nearly every DDR memory PCB manufactured. On one side is the XSPC logo, and the other has the countersunk screws that hold the two pieces per plate together. These screws have a large Phillips head, and you will need a Phillips screwdriver to use these accordingly.


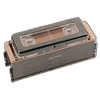
XSPC has added a protective plastic wrap on the water block in addition to the bubble wrap to keep it pristine and free of oxidation out of the box. Taking it out, the first thing I noticed is how substantial it really is, measuring 127 x 40 x 3 mm on the base and with a matching dark chrome frame on the outside of its acrylic top. The XSPC logo is etched into the top, though it really is only visible at a pretty steep angle, and the two BSP G1/4" ports are threaded well and spaced far enough apart to where any fitting you can think of here will work without issue. Taking a look at the side, we see the three-piece construction with the metal frame, acrylic top, and copper cold plate multiple screws hold together.


There is a hole on either end where the provided RGB LEDs go, and this makes use of the longer cables on each of the two LEDs better than the CPU block to where it is easier to cable manage, and even hiding them between the occupied RAM slots is possible. Turning the block over, we get a better look at the extensions with the slotted hole where the side plates screw into on each end, and the eight screws that need to be removed to disassemble the block. The cold plate does not have a mirror finish here, although XSPC has applied a clear coat to dampen the effects of oxidation (which, to be fair, is aesthetically damaging at worst).

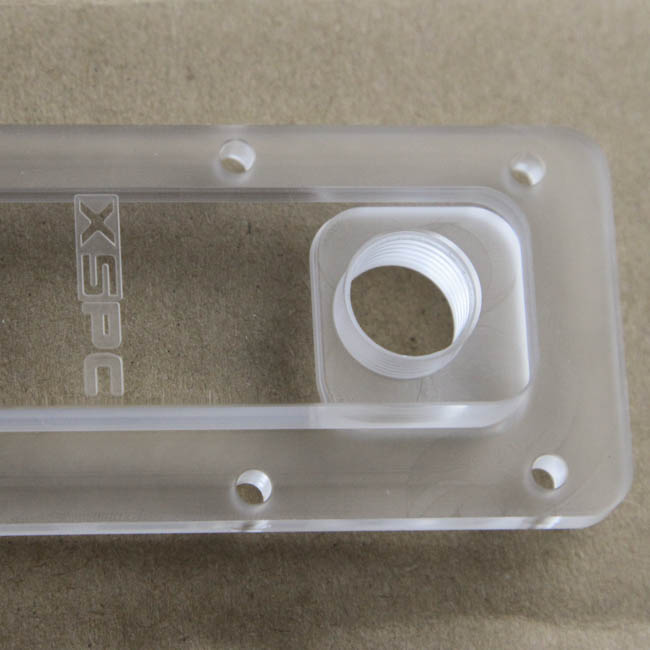

As always, full disassembly was done post-testing. The provided Allen key does not fit the eight screws seen, so XSPC would rather you not take it apart unless absolutely necessary. The acrylic top has been given a polish only where it is seen, which is fine in my books and saves some manpower that hopefully has also resulted in savings that are passed on to the buyer. The copper cold plate has a single gasket around the cooling engine to prevent coolant from going where it should not, and there are ten thick, long fins for a bigger heat-transfer area. In practice, a standard flat channel should be plenty enough if current-generation VRM blocks are anything to go by, but I still appreciate XSPC doing this and going for added performance and aesthetics alike.
When re-assembling, just remember to put the O-ring back in place if it got dislodged before reversing these steps accordingly. As always, TechPowerUp is not liable for any issues that arise from your disassembly of the water block.
May 8th, 2024 06:11 EDT
change timezone
Latest GPU Drivers
New Forum Posts
- TPU's Nostalgic Hardware Club (18500)
- not impressed - nvme vs ssd (42)
- POLL: Can you see the difference past 60fps (gaming/other) (24)
- Does anyone here overclock their video cards? Is it really worth it? (37)
- Urgent: PC wont turn on with PSU connected to MOBO (12)
- Your way of cooling your PC? (6)
- I think my PC is underperforming (4)
- High c0% and system idle process (1)
- Free Games Thread (3787)
- Nerdy year long streaming saga [ XD probably] (2)
Popular Reviews
- CHERRY XTRFY M64 Pro Review
- Corsair iCUE Link RX120 RGB 120 mm Fan Review
- Finalmouse UltralightX Review
- Upcoming Hardware Launches 2023 (Updated Feb 2024)
- Cougar Hotrod Royal Gaming Chair Review
- Meze Audio LIRIC 2nd Generation Closed-Back Headphones Review
- AMD Ryzen 7 7800X3D Review - The Best Gaming CPU
- ASRock NUC BOX-155H (Intel Core Ultra 7 155H) Review
- ASUS Radeon RX 7900 GRE TUF OC Review
- Sapphire Radeon RX 7900 GRE Pulse Review
Controversial News Posts
- Intel Statement on Stability Issues: "Motherboard Makers to Blame" (259)
- AMD to Redesign Ray Tracing Hardware on RDNA 4 (203)
- Windows 11 Now Officially Adware as Microsoft Embeds Ads in the Start Menu (167)
- NVIDIA to Only Launch the Flagship GeForce RTX 5090 in 2024, Rest of the Series in 2025 (138)
- Sony PlayStation 5 Pro Specifications Confirmed, Console Arrives Before Holidays (119)
- AMD's RDNA 4 GPUs Could Stick with 18 Gbps GDDR6 Memory (114)
- NVIDIA Points Intel Raptor Lake CPU Users to Get Help from Intel Amid System Instability Issues (106)
- AMD Ryzen 9 7900X3D Now at a Mouth-watering $329 (104)