 15
15
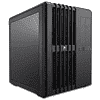
Corsair Carbide Air 540 Review
Value & Conclusion »Assembly

Installing the motherboard within the Carbide Air 540 is done by traditional means, with the use of spacers and screws. There are cable-routing holes on the top and side of the board, which easily allows you to connect everything without revealing too much cabling.


Installing the 3.5" hard drives does not require any tools or screws. Simply insert the drive into the tray before sliding it into place. While these may primarily be for traditional drives, the holes in the tray also allow for the installation of 2.5" units.


Placing SSDs within the special cage is done without any additional tools or parts. Just push the drive past the plastic clip and let it snap into place. While this works flawlessly for drives of a traditional height, those using a thinner SSD should actually resort to screwing it down with a single screw.


The tool-less party continues with the optical drive bays--the covers can easily be pushed out from within the chassis to free the bay up. Once open, slide the drive in and let the lock do its job. The unit actually holds in place quite well.

The only other part that really requires tools besides the motherboard is the PSU. You need to use four screws to secure it in place.


With everything in place, the main side looks flawless without having invested a lot of work into cable management at all, as the other side holds all the nasty cables and unused PSU leads. The Corsair Carbide Air 540 is incredibly simple to use and assemble, consuming less time and effort than other traditional units out there.
Finished Looks


Once everything is in place and the unit is turned on, the Air makes a great impression. The white power LED embedded into the power button is a nice touch, and I made sure the optical drive is installed with the tray facing to the left as one will most likely place the case to the right of the working area for a look at its internals.


The window gives you an unobstructed view of all the parts that really count. Imagine having some LEDs in there with a multi-GPU configuration and two water-cooling loops--that would look pretty spiffy. The other side only gives way to the PSU behind the air vent.
Jun 4th, 2024 01:30 EDT
change timezone
Latest GPU Drivers
New Forum Posts
- 5700x at 100% on cyberpunk 2077 (6)
- 114 celsius on VRMs, is that fine? (28)
- Anyone born in the 70s? Remember how good the 90s games were? (89)
- PC Build for customer arrived damage (35)
- Your PC ATM (34601)
- RX 580 8GB 2048SP problem, I need help, please. (8)
- Windows 7 and Gigabyte 299x wu8 (11)
- Can I move Windows 11 pro licence into virtual machine? (17)
- Fun times with the NR200P, Dual Rad (no special mods needed) (8)
- Free Games Thread (3855)
Popular Reviews
- Kioxia Exceria Plus G3 2 TB Review
- SilverStone KL07E Review
- Corsair iCUE XC7 RGB Elite LCD CPU Water Block Review
- Upcoming Hardware Launches 2024 (Updated May 2024)
- Elysian Acoustic Labs Pilgrim In-Ear Monitors Review
- NuPhy Air96 V2 Low Profile Wireless Mechanical Keyboard Review
- AMD Ryzen 7 7800X3D Review - The Best Gaming CPU
- Intel Lunar Lake Technical Deep Dive - So many Revolutions in One Chip
- Ghost of Tsushima Performance Benchmark Review - 35 GPUs Tested
- ID-Cooling FX360 PRO Review - Shots Fired @ Arctic
Controversial News Posts
- NVIDIA to Only Launch the Flagship GeForce RTX 5090 in 2024, Rest of the Series in 2025 (154)
- AMD Hits Highest-Ever x86 CPU Market Share in Q1 2024 Across Desktop and Server (140)
- AMD RDNA 5 a "Clean Sheet" Graphics Architecture, RDNA 4 Merely Corrects a Bug Over RDNA 3 (139)
- NVIDIA RTX 5090 "Blackwell" Founders Edition to Implement the "RTX 4090 Ti" Cinderblock Design (118)
- Core Configurations of Intel Core Ultra 200 "Arrow Lake-S" Desktop Processors Surface (101)
- Biden Administration to Revive Trump-Era Tariffs on China-made GPUs and Motherboards (95)
- AMD Ryzen 9000 Zen 5 Single Thread Performance at 5.80 GHz Found 19% Over Zen 4 (88)
- ASRock Innovates First AMD Radeon RX 7000 Graphics Card with 12V-2x6 Power Connector (88)