 20
20
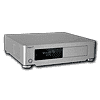
Origen AE S10V HTPC Case Review
Assembly »A Closer Look - Inside

Just as is the case with the S21T, the insides of the S10V can be accessed by removing two thumb screws and pulling off the top cover. There is a foam lining on the ledge to eliminate any vibrations of the chassis.


Taking a look at the rear from the inside of the enclosure, it becomes apparent that Origen AE has chosen to use trusted and true screws to hold each expansion slot cover. The PSU bay features a large air vent which has been cut out of the aluminum underside so that a PSU with 120 or 140 mm fan has access to outside air. This means that you should install these type of power supplies with the fan facing downward, while you have free choice if the unit utilizes a 80 mm fan in the rear.
Each of the sides holds a pair of 60 mm fans, which are powered by mainboard headers. Most mATX boards do not have four such headers onboard, this is why Origen AE has included two Y spitters. With the help of that cable you can use all four fans on boards with just two fan headers - a great addition!


The slim line optical drive bay can be removed by loosening four small screws. Once it is taken out, the PCB, which supplies the front connectivity is revealed. As you can see, it is one custom made piece which holds the card reader and the I/O.


The two hard drives bays, if you can call them such, are located right behind the VFD. These are cooled by one pair of the afore mentioned fans. The VFD itself is not an OEM product, but Origen AE's own creation. The green PCB even sports the company name. The installation system of the hard drives is quite similar to that of the S21T. Simply remove one side is to enable placement of the drive and then replace and secure it with the thumb screw.
May 23rd, 2024 02:24 EDT
change timezone
Latest GPU Drivers
New Forum Posts
- Post Your TIMESPY, PCMARK10 & FIRESTRIKE SCORES! (2019) (237)
- Are all software/scheduling issues with e-cores fixed on Intel 12th to 14th Gen - Willing to give hybrid ach a chance now (102)
- BSOD and Memory Errors (4)
- 95 cpu temp on idle and bios (5)
- xfx rx480 p/n error (1)
- PC likes to stutter a lot for no reason (4)
- Apple Vision Pro seems very dissapointing (43)
- Ryzen 5 5600x stock overclocked reaching high temps (29)
- Does ThrottleStop supports old Haswell (4th Gen.) CPUs? (16)
- Ubuntu 24.04 LTS released (45)
Popular Reviews
- Ghost of Tsushima Performance Benchmark Review - 35 GPUs Tested
- Senua's Saga: Hellblade II Performance Benchmark Review
- Ghost of Tsushima: DLSS vs. FSR vs. XeSS Comparison Review
- PNY XLR8 Gaming EPIC-X RGB DDR5-6400 CL32 32 GB Review
- CHERRY XTRFY M68 Pro Review
- Upcoming Hardware Launches 2023 (Updated Feb 2024)
- TerraMaster D8 Hybrid Review
- Homeworld 3 Performance Benchmark Review - 35 GPUs Tested
- PMG Audio Apx In-Ear Monitors Review - $6500 Flagship!
- Silverstone Shark Force 120 mm Fan Review
Controversial News Posts
- Intel Statement on Stability Issues: "Motherboard Makers to Blame" (272)
- AMD to Redesign Ray Tracing Hardware on RDNA 4 (227)
- Windows 11 Now Officially Adware as Microsoft Embeds Ads in the Start Menu (173)
- NVIDIA to Only Launch the Flagship GeForce RTX 5090 in 2024, Rest of the Series in 2025 (154)
- AMD Hits Highest-Ever x86 CPU Market Share in Q1 2024 Across Desktop and Server (140)
- AMD RDNA 5 a "Clean Sheet" Graphics Architecture, RDNA 4 Merely Corrects a Bug Over RDNA 3 (139)
- AMD's RDNA 4 GPUs Could Stick with 18 Gbps GDDR6 Memory (114)
- AMD Ryzen 9 7900X3D Now at a Mouth-watering $329 (104)