 26
26
Raijintek Themis Review
Finished Looks »Installation


First, line the backplate up with the holes on the motherboard. Now, drop the four long screws through the holes. Make sure they sit flat on the backplate, not the lip of it. With that done, screw the plastic nuts into place to secure the backplate and platform on which the mounting arms will rest.


Line the mounting arms up and slide them down over the screws and onto the plastic nuts. Next, tighten the mounting arms down with the four metal nuts and apply some thermal paste to the IHS. The heatsink can now be mounted.
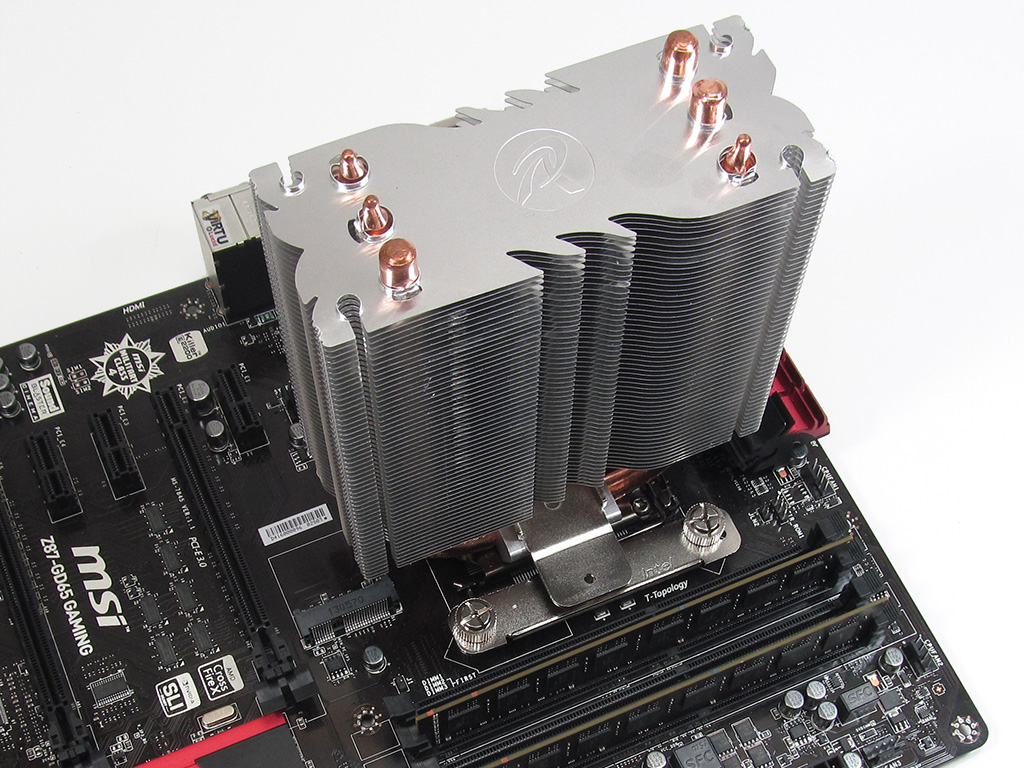

Put the crossbar in place on the heatsink and line the holes on it up with both posts on the mounting arms. Now, secure the cooler in place by using the M3 screws, but make sure to alternate between them as you fasten them down to evenly spread the thermal paste.


Attach the anti-vibration fan mounts to the fan before sliding it into place on the cooler. Once the fan is securely attached, plug the fan into the CPU fan header to complete the installation process.
The mounting hardware Raijintek has provided with the Themis CPU cooler could use some improvement, but it is still fairly easy to use. Having spring screws on the crossbar instead would be more intuitive, but the Themis being smaller than the Ereboss also results in it being easier to install.
Overall, I would rate the installation process for the Raijintek Themis an 8 on a scale of 1 (hardest) to 10 (easiest).
May 4th, 2024 09:29 EDT
change timezone
Latest GPU Drivers
New Forum Posts
- Only some humans can see refresh rates faster than others, I am one of those humans. (42)
- NASA Achieves milestone Solid State Battery (224)
- Alphacool CORE 1 CPU block - bulging with danger of splitting? (82)
- What's your latest tech purchase? (20430)
- X670 owners, what kind of PCH temps do you you see? (4)
- Keysfan (15)
- RX 6800 causing stuttering when typing text (Low 2D/IDLE Clocks?) (7)
- Announcement: VPN's no longer work right in Windows 10 or 11 or Servers (34)
- My Laptop is having issues with PL2 and EDP OTHER (8)
- Why does my PC shut down even though it's connected to a UPS? (77)
Popular Reviews
- Finalmouse UltralightX Review
- Meze Audio LIRIC 2nd Generation Closed-Back Headphones Review
- ASRock NUC BOX-155H (Intel Core Ultra 7 155H) Review
- Montech Sky Two GX Review
- Gigabyte GeForce RTX 4070 Ti Super Gaming OC Review
- Upcoming Hardware Launches 2023 (Updated Feb 2024)
- HYTE THICC Q60 240 mm AIO Review
- Alienware Pro Wireless Gaming Keyboard Review
- Ugreen NASync DXP4800 Plus Review
- Cougar Hotrod Royal Gaming Chair Review
Controversial News Posts
- Intel Statement on Stability Issues: "Motherboard Makers to Blame" (236)
- Windows 11 Now Officially Adware as Microsoft Embeds Ads in the Start Menu (167)
- AMD to Redesign Ray Tracing Hardware on RDNA 4 (119)
- Sony PlayStation 5 Pro Specifications Confirmed, Console Arrives Before Holidays (117)
- AMD's RDNA 4 GPUs Could Stick with 18 Gbps GDDR6 Memory (114)
- NVIDIA Points Intel Raptor Lake CPU Users to Get Help from Intel Amid System Instability Issues (106)
- AMD "Strix Halo" Zen 5 Mobile Processor Pictured: Chiplet-based, Uses 256-bit LPDDR5X (103)
- AMD Ryzen 9 7900X3D Now at a Mouth-watering $329 (103)