 1
1
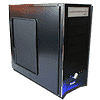
Gigabyte iSOLO 210 Review
Installation & Finished Looks »The Insides
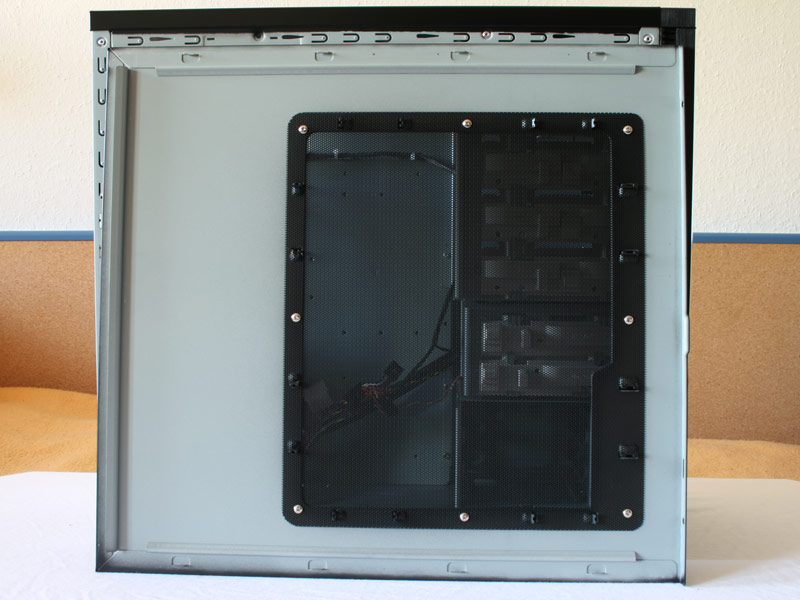
The side panel is made of 0.7 mm SECC, just like the rest of the case, excluding the front. The steel mesh is secured by screws, so you will not have to worry about it giving way or reducing the overal structural integrity of the side panel. Once the panel is removed, the case inside can be inspected. The general layout is nothing out of the ordinary and can be found in many other mainstream cases. The notable addition is the clean routing of the fan power cable. It runs along the top of the mainboard area towards the lower front of the case.


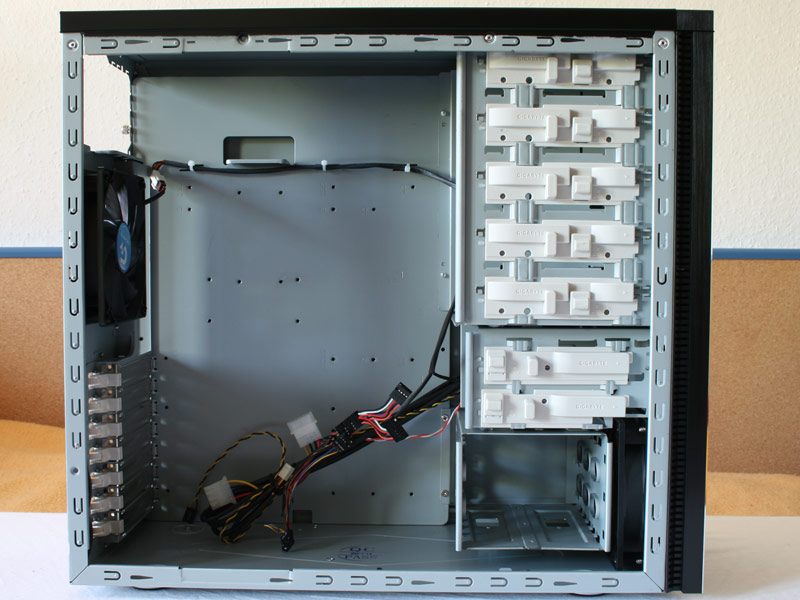
Opening the other side yields no real surprises, but upon closer inspection an additional connector for the front 120 mm fan can be seen. Gigabyte is routing this cable towards the lower mainboard area as well.
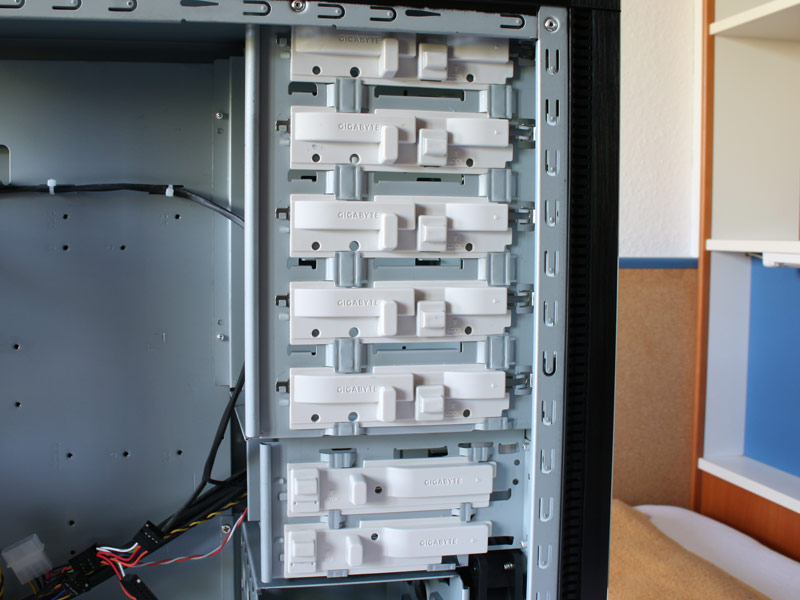

All external drive bays feature a plastic locking mechanism. This is the same type of "semi" screw-less system used by a lot of other manufacturers. Even though you should be fine with these clips, inserted drives should still be secured by screws on the other side, as Gigabyte has not included these there.

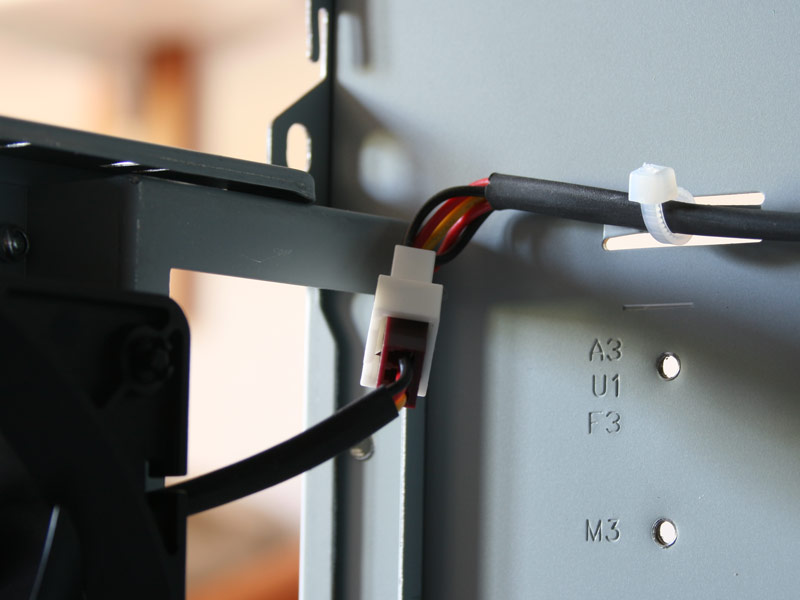

Turns out that the rear fan has the same connector as the front fan. Following the routed cables yields another surprise. Gigabyte has combined both cables at the end, which means that you will only need to use a single mainboard header to power both of them. The PCI brackets also feature a screw-less system which uses the same principle as the Cooler Master RC-690. It utilizes the case structure to excert pressure on the inserted cards, but also allows the user to install a screw instead. This is something not possible with the RC-690.
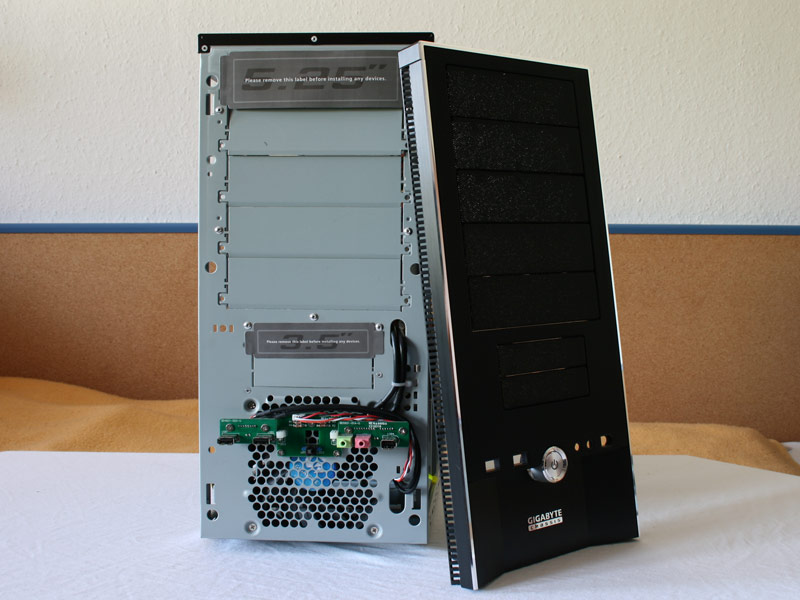

You will need to take the front of the iSOLO 210 to install any external drives or devices. The covers cannot be removed otherwise. Gigabyte has also placed two stickers on the open 5.25 and 3.25 inch bays, which need to be removed. These have one simple purpose - to keep the user from trying to push out the drive bay covers without removing the entire front. These stickers can only be removed, once the front has been seperated from the rest of the case.

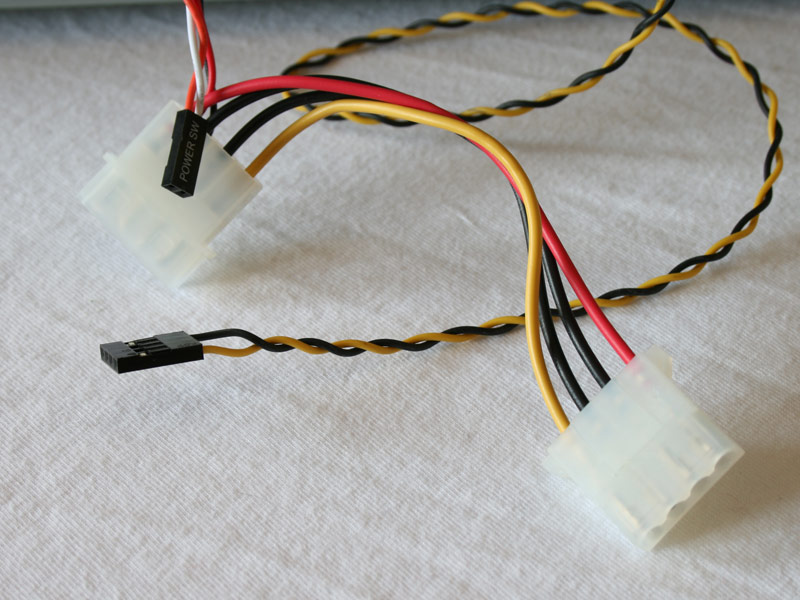
The I/O mainboard connectors are nothing special - except the Firewire connector. Gigabyte included two headers, one is the usual kind, found on other cases, while the second one is something I have never seen before. There are only two mainboard connectors, one for the power switch, the other for the speaker. There is no connector for a reset button or for any LEDs. Turns out that the Molex connector powers the blue front LEDs which also double as the power lights.
Aug 1st, 2025 20:54 CDT
change timezone
Latest GPU Drivers
New Forum Posts
- ASUS SBW-06D2X-U BR Drive not being detected in Linux (0)
- 9800x3d apart from gaming (14)
- Technical Issues - TPU Main Site & Forum (2025) (295)
- The Official Thermal Interface Material thread (1814)
- Free Games Thread (4834)
- What's your latest tech purchase? (24425)
- Ubiquiti Networks users!!! (1)
- memory used for store firmware in adapters wifi usb (1)
- My UPS keep sending alarm when I game (37)
- Lexar NM790 (4TB) made my PC go back to Windows XP days, since it caused my PC to be SO slow and laggy! (30)
Popular Reviews
- ASUS ROG Crosshair X870E Apex Review
- MSI Claw 8 AI+ A2VM Review
- Montech X5 Review
- Orbital Pathfinder Review
- Herman Miller Logitech G Embody Review - No Pain, No Gain
- Lenovo Legion 5i (15IRX10) Review - Feature-Rich and Wallet Friendly
- Upcoming Hardware Launches 2025 (Updated May 2025)
- Lian Li HydroShift II LCD-C 360TL Review
- Noctua NF-A12x25 G2 PWM Fan Review
- Lian Li O11 Dynamic Mini V2 Review
TPU on YouTube
Controversial News Posts
- AMD's Upcoming UDNA / RDNA 5 GPU Could Feature 96 CUs and 384-bit Memory Bus (137)
- AMD Radeon RX 9070 XT Gains 9% Performance at 1440p with Latest Driver, Beats RTX 5070 Ti (131)
- Intel "Nova Lake-S" Core Ultra 3, Ultra 5, Ultra 7, and Ultra 9 Core Configurations Surface (110)
- DDR6 Memory Arrives in 2027 with 8,800-17,600 MT/s Speeds (102)
- NVIDIA to Debut GeForce RTX 50-series SUPER GPUs by Christmas (101)
- AMD Sampling Next-Gen Ryzen Desktop "Medusa Ridge," Sees Incremental IPC Upgrade, New cIOD (97)
- Intel CEO Confirms SMT To Return to Future CPUs (95)
- NVIDIA Becomes First Company Ever to Hit $4 Trillion Market-Cap (94)