 5
5
Synology DS207 Review
Installation & Software »Contents
Once you crack open the box there is the unit itself in its protective end caps, and then the accessories box as well. Unpacking the unit and lying it down to have a look at it I was surprised about the material it seemed to be made out of. A very smooth plastic with a glossy finish, the odd thing was that the unit was almost "sticky" which a plus as it just makes it easier to hold onto.

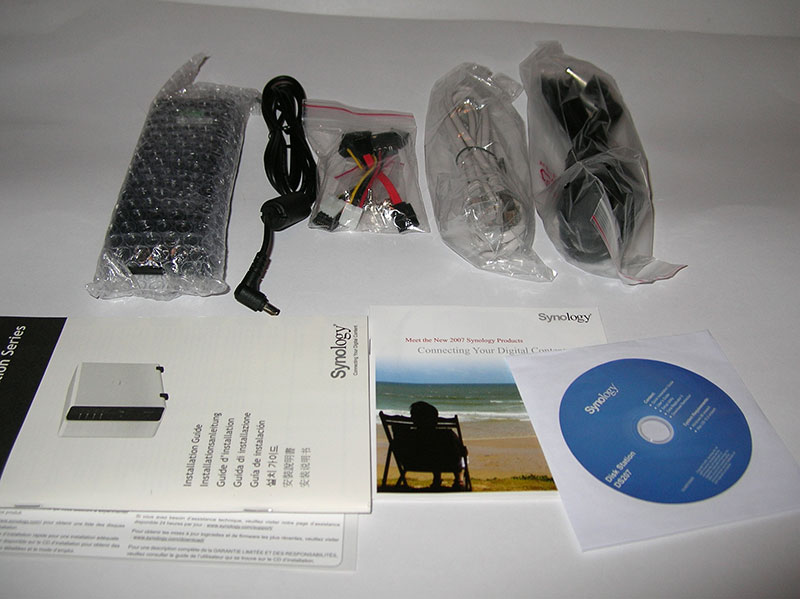
Opening up the box of accessories there are two SATA cables, as well as two power cables, the instruction books, a power adapter, and a driver CD. About what I would expect for a unit like this, though I will have to see how easy it is to install these little SATA and power cables as it will most likely be a tight fit.

Moving on to the unit itself it seems to be a very well constructed, very solid feeling construction. The outside of the unit is relatively plain; the bottom of the unit has a vent near the front as well as four non-slip rubber feet. Synology is printed on each side, the back of the unit has the cooling fan, two USB ports, an Ethernet jack, the DC-in jack, as well as a little reset button.

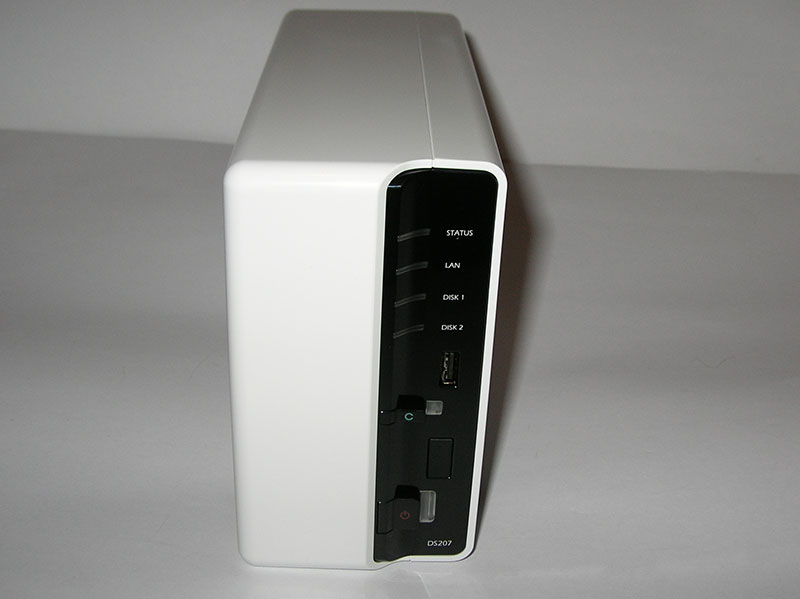
Flipping the unit around to get a look at the front going from top to bottom we can see four LED indicators to show you the status of the unit at a quick glance: Status, LAN, Disk 1, Disk 2.
Moving on down there is an e-SATA port, a button labeled "c" and then the power button.
A Closer Look
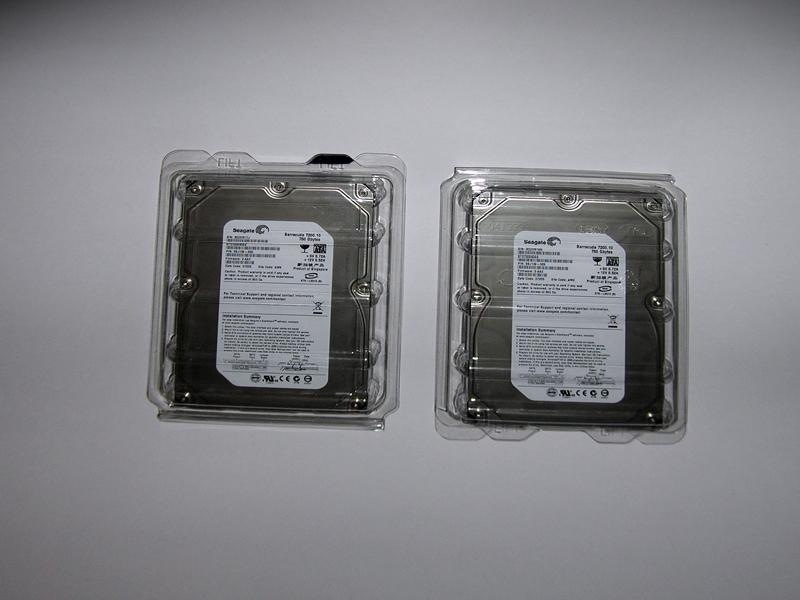
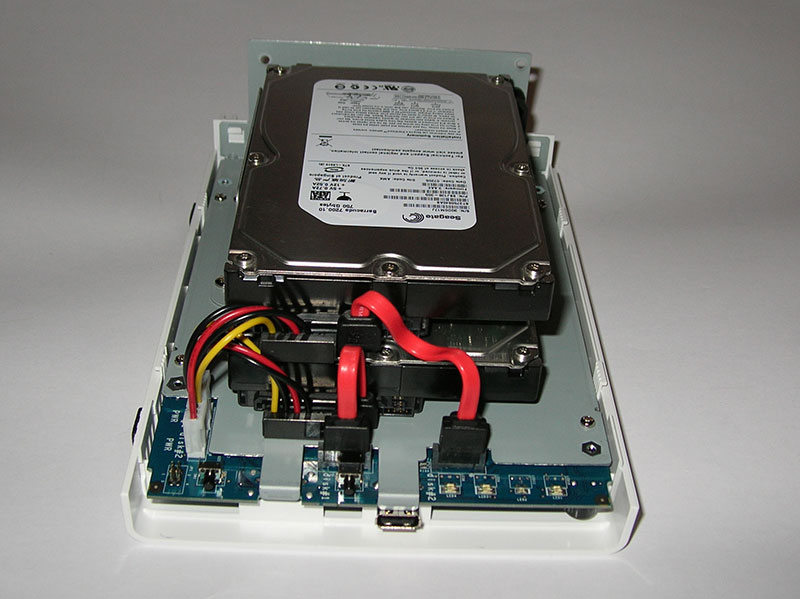
After having a look at the outside of the unit it was time to inspect the inside of this baby where my hard drives will be housed. This unit has a fairly unique way of opening. Initially I assume that each side would have come off with a drive on each side, but one side slides forward and then unlatches, the top, side, and bottom of the unit are all one piece. Leaving only one side of the unit with all the mounting hardware on it, in the form of two "L" shaped brackets so that the drives will mount one on top of the other. Near the front of the unit there are the two power adapters, in this case standard floppy connectors. Instead of 5V they supply 12V to the hard drives. At the front of the unit are also the two SATA connectors for the hard drives.


May 1st, 2024 17:25 EDT
change timezone
Latest GPU Drivers
New Forum Posts
- Alphacool CORE 1 CPU block - bulging with danger of splitting? (68)
- Old high quality PSU, or semi-old mid-quality PSU? (33)
- 7900 XTX Seriously lacking (96)
- Ejecting HDDs VS turning them offline (1)
- 2019 LTSC vs 2021 LTSC (1)
- Arctic MX-6 shelf life is just a couple months? (62)
- Need help with a persistent infection possible rootkit or other device. (3)
- Brother bought a house, found some old PC hardware.. (22)
- Aorus laptop 15p kd i7 11800h rtx 3060 (2)
- Need HELP, pic attached new build Gigabyte x670 Aorus Extreme new motherboard w new 7950x3d- power up STUCK on CPU LED RED,POST LEDS BLANK, no CODE (12)
Popular Reviews
- Ugreen NASync DXP4800 Plus Review
- Team Group T-Force Vulcan ECO DDR5-6000 32 GB CL38 Review
- HYTE THICC Q60 240 mm AIO Review
- Upcoming Hardware Launches 2023 (Updated Feb 2024)
- Montech Sky Two GX Review
- MOONDROP x Crinacle DUSK In-Ear Monitors Review - The Last 5%
- AMD Ryzen 7 7800X3D Review - The Best Gaming CPU
- Thermalright Phantom Spirit 120 EVO Review
- ASUS Radeon RX 7900 GRE TUF OC Review
- FiiO K19 Desktop DAC/Headphone Amplifier Review
Controversial News Posts
- Intel Statement on Stability Issues: "Motherboard Makers to Blame" (212)
- Windows 11 Now Officially Adware as Microsoft Embeds Ads in the Start Menu (157)
- Sony PlayStation 5 Pro Specifications Confirmed, Console Arrives Before Holidays (117)
- AMD's RDNA 4 GPUs Could Stick with 18 Gbps GDDR6 Memory (109)
- NVIDIA Points Intel Raptor Lake CPU Users to Get Help from Intel Amid System Instability Issues (106)
- AMD "Strix Halo" Zen 5 Mobile Processor Pictured: Chiplet-based, Uses 256-bit LPDDR5X (103)
- TechPowerUp Hiring: Reviewers Wanted for Motherboards, Laptops, Gaming Handhelds and Prebuilt Desktops (90)
- AMD Ryzen 9 7900X3D Now at a Mouth-watering $329 (87)