 13
13
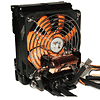
Thermaltake Silent Water II Review
Performance »Installation
When it comes to installing the Silent Water II, it's quite simple, and pretty much the same procedure for all platforms; whether it's S939, or 775 (not to mention the other supported platforms). The biggest hassle with mounting the water block on this unit is having to remove the motherboard from the case. However, this is the case with most water cooling systems, and many air coolers. Thermaltake provided a nice manual with instructions for every supported application. There are plenty of details and pictures to get you through the installation. One thing I did find with the manual was in the grammar - the English was a bit odd in some sentences. I don't know if this was through translation or if it's just supposed to be very direct. For example:Thermaltake ManualReplace the fan speed controller to one of the free PCI slots and secure it by screw included in bag.Perhaps I'm just really picky, but there were a few sentences like that...
For the test, we used an AMD Socket 939 setup. The first thing required to do was remove the motherboard from the tray and take the CPU cradle/backplate off. When removing the cradle, it's just a matter of removing two screws and the plate will come off. Some S939 systems use slightly different mounting methods for the cradles. For example, the following image that was taken from the Thermaltake Big Water 745 review.
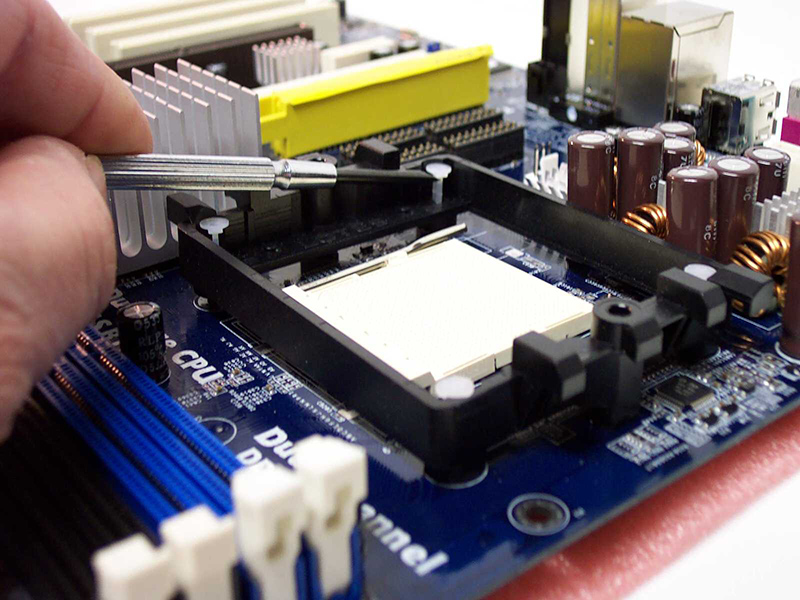

Both boards have the regular two holes that 939 motherboards have for mounting the cradle. However, the board above uses 4 pins to hold the cradle in place. This won't affect the mounting of the water block in any way.

Once the retention frame/cradle is removed, you can then mount the back bracket that comes with the kit. The bracket consists of three parts:
- Metal H-type Clip
- H-type Insulator pad
- H-type Cushion pad

These three parts are joined together to create the back plate. First the Metal H-type Clip, then the H-type Insulator pad is joined to it using pre-applied adhesive, and finally the H-type Cushion pad; which also uses a pre-applied adhesive to join it. The Cushion pad has adhesive on both sides of it. One is for adhering it to the other part of the backplate, and the other side to the motherboard. You have an option here to leave one of the protective films on the Cushion, so it won't stick to the motherboard. Do so if you wish to remove the block at a later date. Leaving the film on, will in no way affect the mounting of the block.

Once the backplate is together, you can then proceed on to mounting it to the motherboard. Depending on what system you have (S939, AM2, 775, etc), you decide what bolts you need. For the 939, it's two bolts, two washers, and two standoffs. If you don't use the adhesive to hold the bracket in place, just feed the bolts through the backplate, and then through the motherboard. After, slid a washer on each bolt, and thread the standoffs on till they're tight.
The water block also needs a H-Type clip attached to it. An Aluminum pad with two 10mm screws is used. The Aluminum pad is placed on top of the block along with the H-Type clip. The two are secured to the block by the 10mm screws.


Upon having the bolts securely in place and the block prepared, you can now mount the water block. To do so, it's just a matter of applying thermal paste and lining the block up with the bolts. Slid the block down as level as possible and once it makes contact, gently push down on it and put the thumb nuts on the bolts, securing them tightly. Don't over tighten them as it will bend the motherboard.

After the block is in place, and you have found a place to mount the radiator/pump unit, you can put the rest of your system back together.
May 10th, 2024 08:13 EDT
change timezone
Latest GPU Drivers
New Forum Posts
- Looking for recommendations to upgrade my ap201 (20)
- Noisy rx 6600 xt (9)
- What's your latest tech purchase? (20495)
- What are you playing? (20611)
- RM750x (2021) enough for my 5800X3D + 7900XT system? (15)
- RTX 4070 vs RTX 4070 Ti power scaling (10)
- Graphics card running at 8x 4.0 not 16x 4.0 (21)
- Any suggestion for hosting to test something ? (5)
- ALPHACOOL - ideas for IMPROVING products and NEW products (5)
- AM5 boot times improve RADICALLY with memory context restore enabled (30)
Popular Reviews
- CHERRY XTRFY M64 Pro Review
- Bykski CPU-XPR-C-I CPU Water Block Review - Amazing Value!
- Corsair iCUE Link RX120 RGB 120 mm Fan Review
- Corsair MP700 Pro SE 4 TB Review
- ThundeRobot ML903 NearLink Review
- Upcoming Hardware Launches 2023 (Updated Feb 2024)
- Finalmouse UltralightX Review
- AMD Ryzen 7 7800X3D Review - The Best Gaming CPU
- Sapphire Radeon RX 7700 XT Pure Review
- ASUS Radeon RX 7900 GRE TUF OC Review
Controversial News Posts
- Intel Statement on Stability Issues: "Motherboard Makers to Blame" (264)
- AMD to Redesign Ray Tracing Hardware on RDNA 4 (206)
- Windows 11 Now Officially Adware as Microsoft Embeds Ads in the Start Menu (169)
- NVIDIA to Only Launch the Flagship GeForce RTX 5090 in 2024, Rest of the Series in 2025 (144)
- Sony PlayStation 5 Pro Specifications Confirmed, Console Arrives Before Holidays (119)
- AMD's RDNA 4 GPUs Could Stick with 18 Gbps GDDR6 Memory (114)
- NVIDIA Points Intel Raptor Lake CPU Users to Get Help from Intel Amid System Instability Issues (106)
- AMD Ryzen 9 7900X3D Now at a Mouth-watering $329 (104)