
- Joined
- Jan 6, 2007
- Messages
- 2,555 (0.38/day)
- Location
- Illinois
| Processor | i7 2600k@4.6ghz |
|---|---|
| Motherboard | MSI z68ma-ed55 |
| Cooling | Silentx Extreem 120mm |
| Memory | 2x4gb XMS 7-8-7-20 1600 |
| Video Card(s) | HD6870 |
| Storage | 2x128gb Kingston Hyper-X (Raid0), 2x750gb RE3 (RAID1), 2x750gb RE3 (RAID1) |
| Display(s) | Soyo 24", Gateway 22" |
| Case | Fractal Design Arc Mini 6x120mm fans. |
| Audio Device(s) | Onboard |
| Power Supply | Zalman 750w |
| Software | Windows 7 |
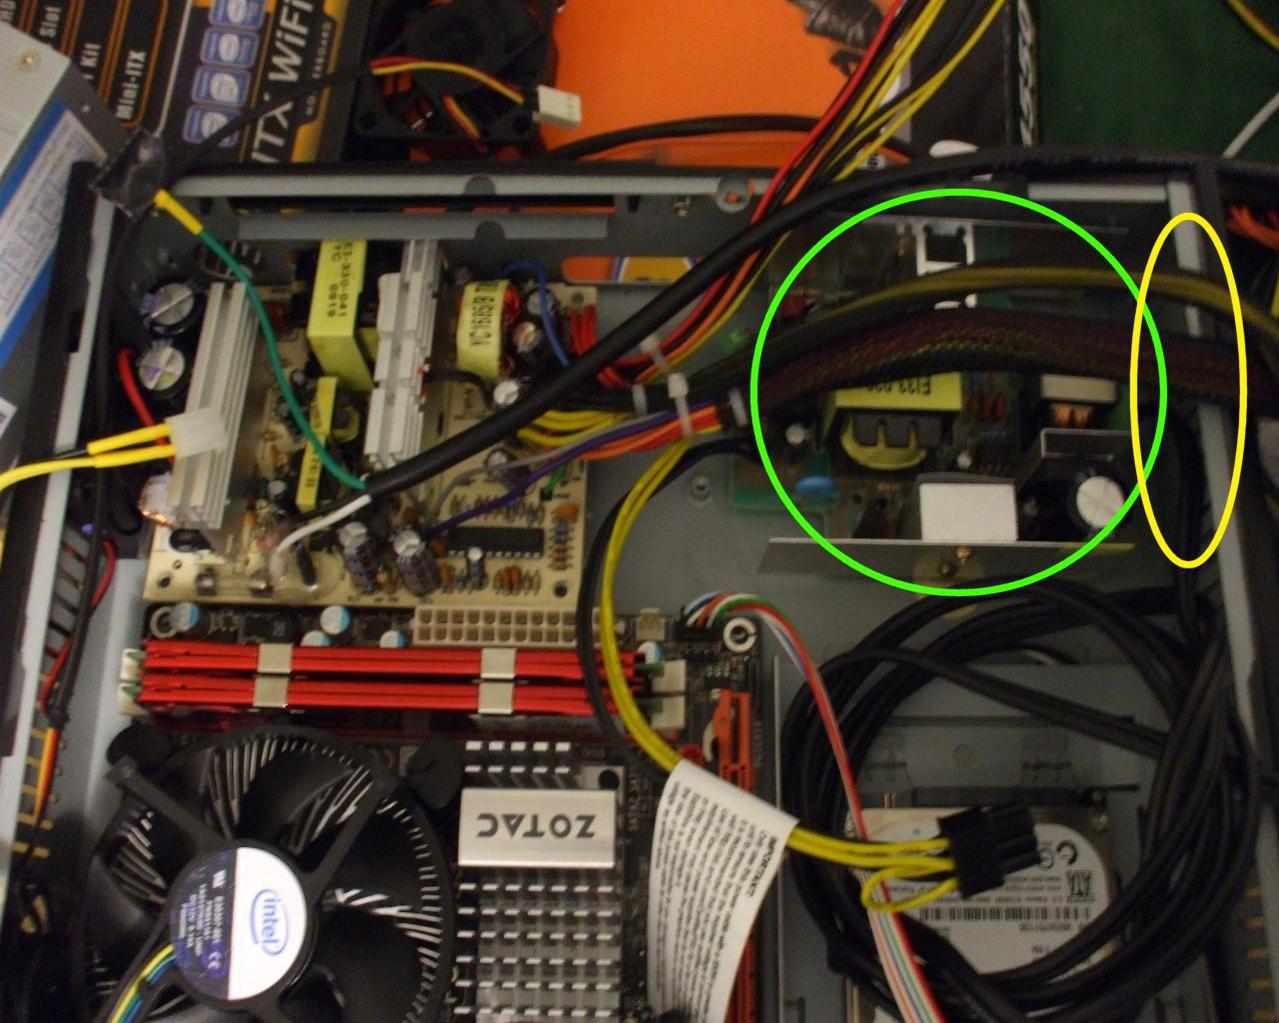
It's SO close.  I'll have to make new power/reset buttons, and alter the mounting of the front usb ports, but it might just cram in there with a bit of trimming. The transformer will clear the bottom of the optical bracket but I'll still have to get some shorter capacitors. Mouser has the ones I'll need. I could even fit the dedicated 12v power supply in there too (green) and still have enough room for a fan on the side instead of the bottom (yellow).
I'll have to make new power/reset buttons, and alter the mounting of the front usb ports, but it might just cram in there with a bit of trimming. The transformer will clear the bottom of the optical bracket but I'll still have to get some shorter capacitors. Mouser has the ones I'll need. I could even fit the dedicated 12v power supply in there too (green) and still have enough room for a fan on the side instead of the bottom (yellow).Attachments


Last edited:
 I managed to fit the Vector Travelmate adaptor just under the video card. I made a new heatsink that is shorter and puts the fins horizontal and parallel the airflow through the case. I have just just enough room for a small fan (probably 2) and the usb pcb just fits in that notch as if it was ment to be. Now to knock out the ATX supply, power/reset buttons, and LEDs.


