 16
16
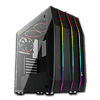
Aerocool Klaw Review
Assembly & Finished Looks »A Closer Look - Inside


To access the interior, simply remove the thumbscrews holding each panel in place. Aerocool has equipped the Klaw with a shroud to cover the PSU bay. Unlike the Tor, there is no acrylic layer on it, though, which is fine considering you have three RGB-equipped fans and the fancy front lighting elements anyways.


On the backside of the motherboard, you will find several openings for cable routing, but no grommets to hide the wires completely. Aerocool placed two metal 2.5" trays alongside the fan/RGB control PCB here. Interestingly enough, you can not only control these elements with the remote and button on top of the chassis, but also the embedded buttons on the PCB itself.


In the front, you will find two 3.5" drive trays underneath the shroud. While the whole cage can't be removed, you should still have enough room here to install a thin 240 or 280 mm radiator as there are plenty of mounting possibilities.


The PSU bay underneath the shroud is pretty straightforward. Above it are the seven basic expansion slots, and the previously mentioned 120 mm fan with a ring of embedded RGB LEDs.

Looking at the ceiling, there are two additional LED-equipped fans, set to push air out the top for a total of three units within the Klaw.


All the cables within the Aerocool Klaw are of the default variety with the exception of a 3-pin fan header and RGB LED connector combo cable from the PCB. It will allow you to control the RGB and fans with your motherboard, which makes the proprietary 5-pin connectors of the RGB fans alright.
Jun 30th, 2025 19:03 CDT
change timezone
Latest GPU Drivers
New Forum Posts
- Question about Intel Optane SSDs (87)
- Will you buy a RTX 5090? (582)
- Do you use Linux? (664)
- Remember Fermi? Well here's my EVGA GTX 480 that I picked up for just 19 Euros! (9)
- The TPU UK Clubhouse (26529)
- Can you guess Which game it is? (194)
- Help me choose the right PSU , Cooler Master vs Seasonic (53)
- HOW TO ADD NVMe M.2 SSD SUPPORT TO OLD MOTHERBOARDS WITH AWARD-Phoenix LEGACY SUPPORT? (2)
- Whats a fair asking price - MSI 4070 Super (4)
- HTPC Power Consumption Discussion, Upgrade vs Migration (18)
Popular Reviews
- Sapphire Radeon RX 9070 XT Nitro+ Review - Beating NVIDIA
- ASUS ROG Crosshair X870E Extreme Review
- Sapphire Radeon RX 9060 XT Pulse OC 16 GB Review - Samsung Memory Tested
- Lexar NQ780 4 TB Review
- AVerMedia CamStream 4K Review
- ASRock Phantom Gaming Z890 Riptide Wi-Fi Review
- AMD Ryzen 7 9800X3D Review - The Best Gaming Processor
- Upcoming Hardware Launches 2025 (Updated May 2025)
- NVIDIA GeForce RTX 5060 8 GB Review
- Intel Core Ultra 7 265K Review
TPU on YouTube
Controversial News Posts
- Intel's Core Ultra 7 265K and 265KF CPUs Dip Below $250 (288)
- NVIDIA Grabs Market Share, AMD Loses Ground, and Intel Disappears in Latest dGPU Update (204)
- Some Intel Nova Lake CPUs Rumored to Challenge AMD's 3D V-Cache in Desktop Gaming (140)
- Microsoft Partners with AMD for Next-gen Xbox Hardware (105)
- NVIDIA Launches GeForce RTX 5050 for Desktops and Laptops, Starts at $249 (104)
- Intel "Nova Lake‑S" Series: Seven SKUs, Up to 52 Cores and 150 W TDP (100)
- NVIDIA GeForce RTX 5080 SUPER Could Feature 24 GB Memory, Increased Power Limits (90)
- Reviewers Bemused by Restrictive Sampling of RX 9060 XT 8 GB Cards (88)