 23
23
Arctic Liquid Freezer II 280 A-RGB Review
Finished Looks »Installation

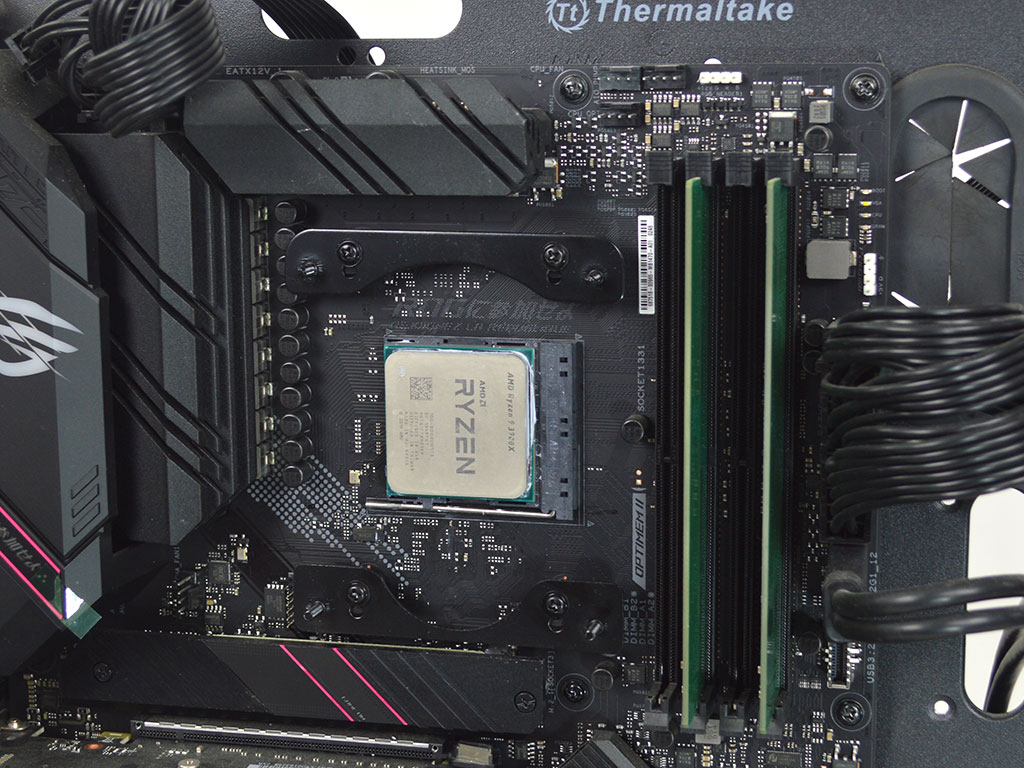

Installing the Arctic Liquid Freezer II 280 A-RGB is fairly straightforward on the AMD front. First, you will need to remove the mounting brackets from the motherboard, but keep the backplate. Next, secure the AMD mounting arms to the backplate by placing the AMD mounting screws through the bracket and plastic spacers. Once ready, secure that assembly to the motherboard by tightening the screws into the backplate. It should be noted that there are two sets of holes. For AMD Ryzen 3000 and 5000 series processors, the top holes on both brackets are for an offset installation that provides better cooling performance as the copper coldplate will better align with the processor's hot spots. For other AMD processors, using the bottom holes is preferable. At this point, you can apply the thermal paste.

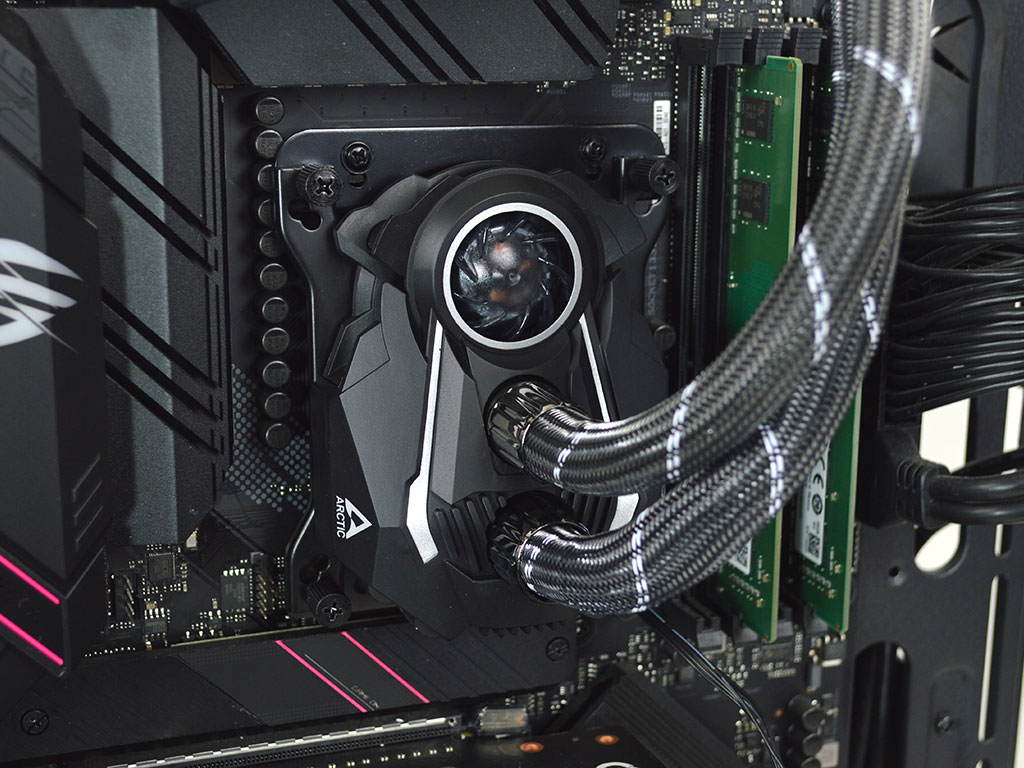
Next, you will need to prepare the pump by securing the mounting arms to it via the four included screws. With the mounting arms secured to the pump/block, you can slide it onto the motherboard brackets and secure it via the four thumb nuts.

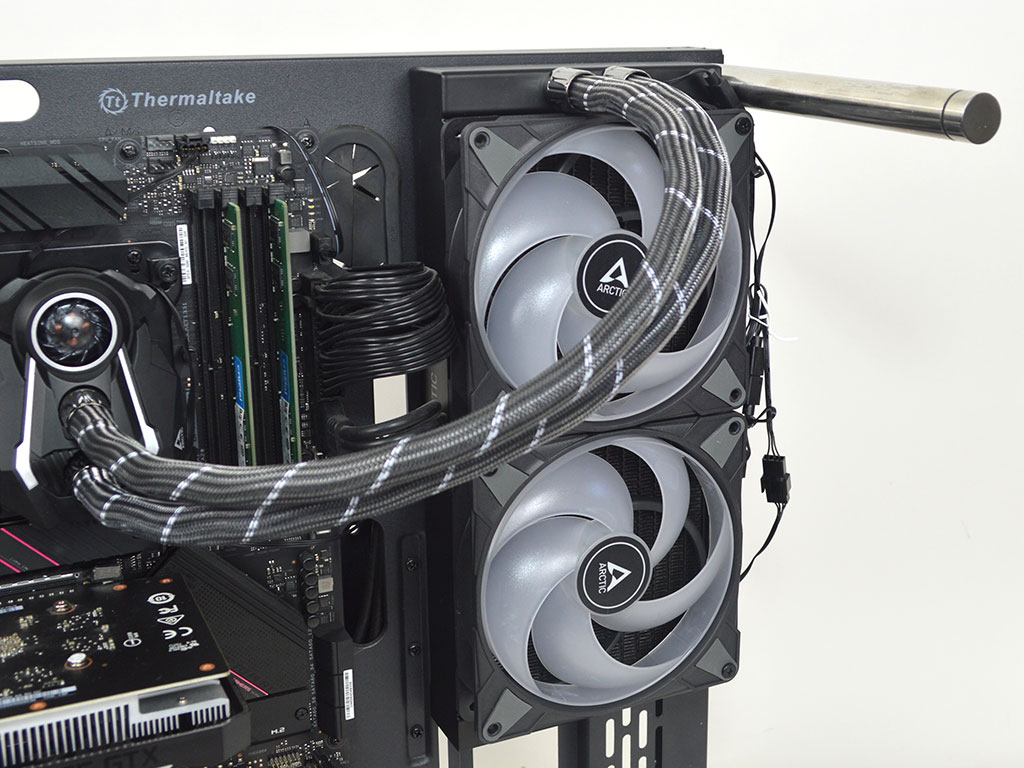

Now secure the radiator to the case. The fans are pre-installed, but since I had to take everything apart for the photos, I also have to reinstall the fans. I suggest leaving the fans as they are since everything is already cable-managed for you. Unfortunately, I butchered the cable management since I was in a rush.
Overall, the installation was more involved than I normally see for an AIO, but it is not difficult. Arctic could still implement minor improvements to better streamline the process. Also, it would be nice if an installation manual was included. Scanning the QR code to load it up is an option, but a physical copy would have been a nice inclusion for the installation procedure.
May 5th, 2024 16:20 EDT
change timezone
Latest GPU Drivers
New Forum Posts
- Announcement: VPN's no longer work right in Windows 10 or 11 or Servers (35)
- FINAL FANTASY XIV: Dawntrail Official Benchmark (82)
- Alphacool CORE 1 CPU block - bulging with danger of splitting? (100)
- Envinda RX 580 2048SP 8GB no image (6)
- not impressed - nvme vs ssd (8)
- [HELP] AMD GPU FINDING BIOS PROBLEM (6)
- Have you got pie today? (16327)
- Apparently Valve is giving refunds on Helldivers 2 regardless of hour count. Details inside. (49)
- WCG Daily Numbers (12507)
- Resolution problems in-game with Av receiver (windows 11) (7)
Popular Reviews
- Finalmouse UltralightX Review
- Meze Audio LIRIC 2nd Generation Closed-Back Headphones Review
- ASRock NUC BOX-155H (Intel Core Ultra 7 155H) Review
- Montech Sky Two GX Review
- Cougar Hotrod Royal Gaming Chair Review
- Upcoming Hardware Launches 2023 (Updated Feb 2024)
- AMD Ryzen 7 7800X3D Review - The Best Gaming CPU
- Alienware Pro Wireless Gaming Keyboard Review
- HYTE THICC Q60 240 mm AIO Review
- Logitech G Pro X Superlight 2 Review - Updated with 4000 Hz Tested
Controversial News Posts
- Intel Statement on Stability Issues: "Motherboard Makers to Blame" (240)
- Windows 11 Now Officially Adware as Microsoft Embeds Ads in the Start Menu (167)
- AMD to Redesign Ray Tracing Hardware on RDNA 4 (149)
- Sony PlayStation 5 Pro Specifications Confirmed, Console Arrives Before Holidays (117)
- AMD's RDNA 4 GPUs Could Stick with 18 Gbps GDDR6 Memory (114)
- NVIDIA Points Intel Raptor Lake CPU Users to Get Help from Intel Amid System Instability Issues (106)
- AMD Ryzen 9 7900X3D Now at a Mouth-watering $329 (104)
- AMD "Strix Halo" Zen 5 Mobile Processor Pictured: Chiplet-based, Uses 256-bit LPDDR5X (103)