 4
ASRock 4X4 BOX-AI350 (AMD Ryzen AI 7 350) Review
Test Systems »A look Inside
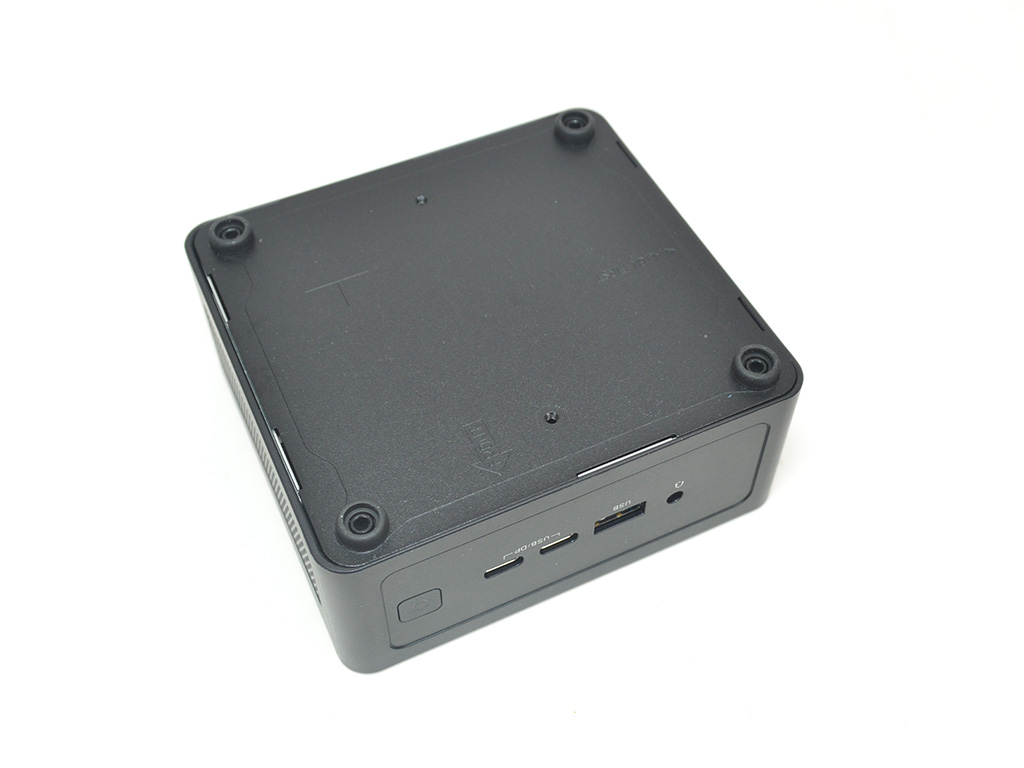

The system itself is well-built and easy to work on, making the initial setup or future upgrades quite easy to do. To start you need to unscrew the four screws on the bottom that also act as feet for the system. Once removed the bottom plate pops off giving you access to the system's interior. To improve performance the unit has built in thermal pads that transfer heat from the M.2 SSD(s) and system memory, which is a nice touch. ASRock utilized the 2.5-inch drive bay assembly to function as a makeshift heatsink, a novel approach that while not fancy certainly shows they are taking into account small details.


With the system open you will find the MediaTek / AMD RZ616 Wi-Fi module pre-installed and ready to go, you will need to remove it if you plan to do a complete disassembly. All that needs to be done is to remove the tape on the antenna wires and remove the screw holding the module in place. At this point you can just lift it up and move it to the side. Next remove the screws holding the mainboard to the chassis, at which point it will lift out easily enough.
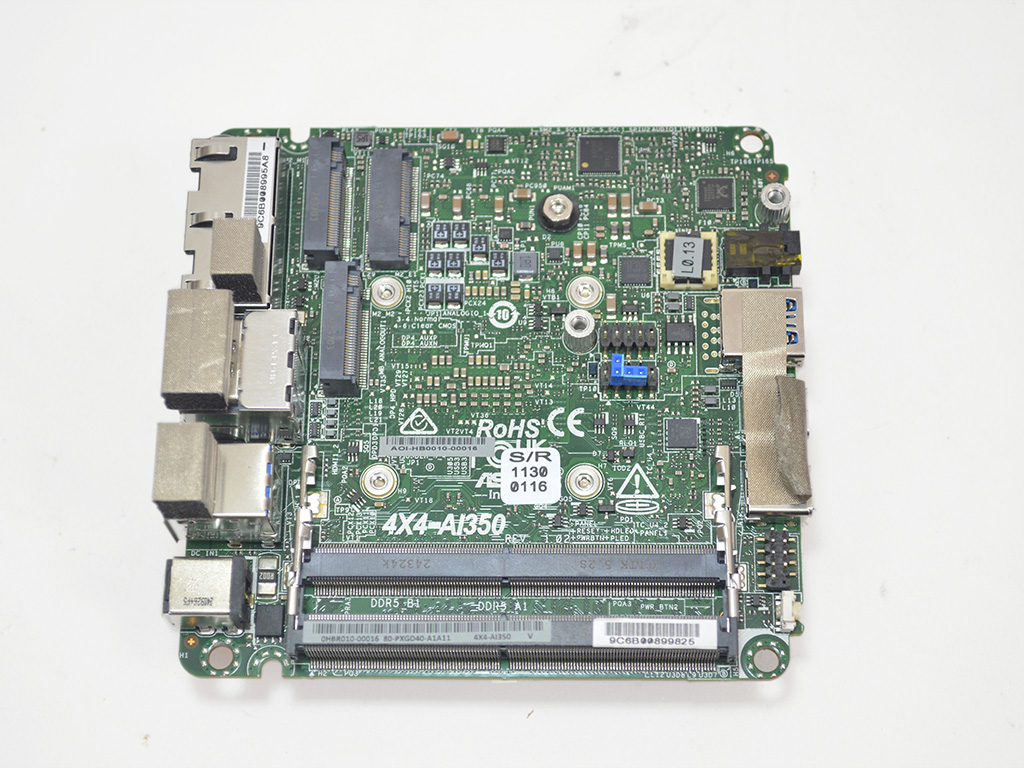
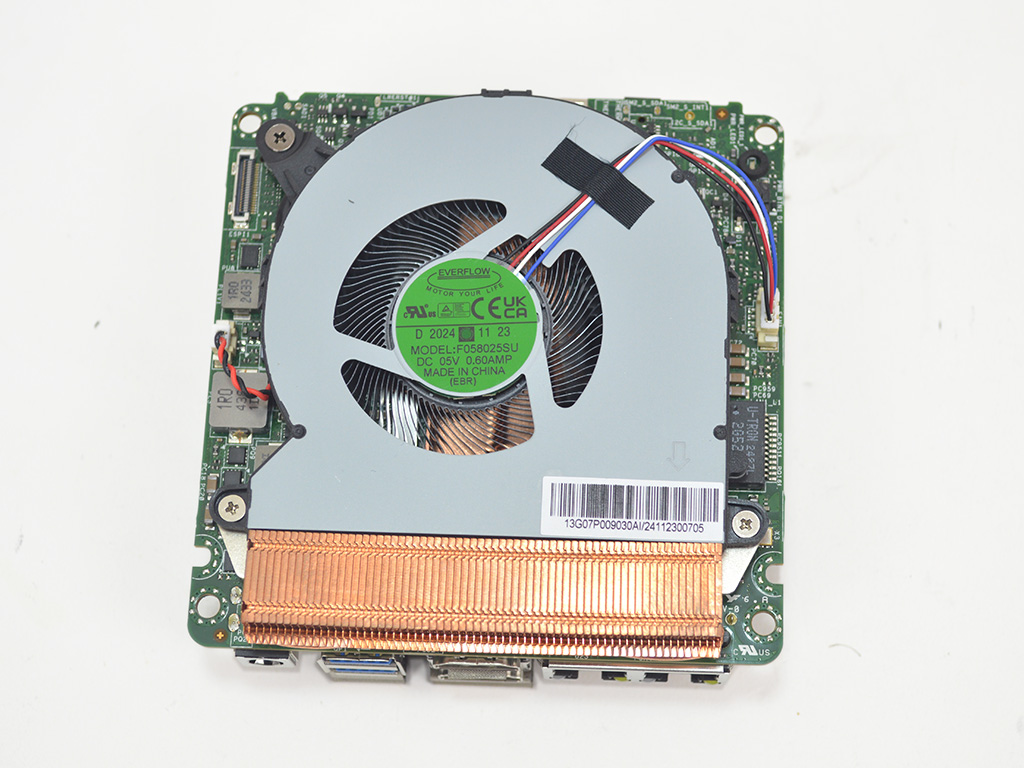
With the system completely taken apart you can see the AMD Ryzen AI 7 350 is covered by a rather hefty copper heatsink that is actively cooled with a F058025SU fan, made by Everflow. A plug in CMOS battery is also located slightly under the heatsink fan should you ever need to replace it.


With the system mostly back together I installed the 32 GB kit of Kingston Fury Impact DDR5 5600 MHz SODIMM memory and the KC3000 NVMe SSD. Once done remove the plastic film from the thermal pads and reinstall the bottom plate.
Nov 17th, 2026 19:21 CST
change timezone
Latest GPU Drivers
New Forum Posts
- Will zen 6 mobos have anything extra vs current ones? (49)
- Ryzen 7 8700G OC (9)
- Without Jensen, PC gaming will be (35)
- Honestly, do you care about GTA VI? (134)
- [testers wanted] Qsurfer My own QNAP Nas explorer/Search tool (7)
- Local LLM General Discussion (693)
- ProArt X870E-CREATOR WIFI - Bifurcation~Complication (14)
- Asus ProArt P14 (RTX Spark) linux so far (4)
- 9070 GRE 3.9ghz validation reached. (18)
- Help with fixing Overclock (7)
Popular Reviews
- Acemagic Retro X3 Review
- Upcoming Hardware Launches 2027 (Updated Nov 2026)
- AMD Zen 6 Technical Deep Dive
- ASUS ROG Strix B850-I Gaming Wi-Fi7 W Review
- Corsair HX1000i Shift Crystal Review
- Chieftec Iceberg PRO 360 DARK Review
- AMD Ryzen 7 9800X3D Review - The Best Gaming Processor
- Phantom Blade Zero Performance Benchmark Review - 35 GPUs Tested
- Montech King 95 3D PRO Review
- NZXT C1200 Platinum Review
TPU on YouTube
Controversial News Posts
- NVIDIA Co-Founder and CEO Jensen Huang Officially Resigns (461)
- Open Letter Asking NVIDIA to Reinstate Jensen Huang Passes 115,000 Signatures (184)
- OpenAI CEO Argues Home PCs Waste the World's Limited DRAM Supply (152)
- Report: Jensen Huang Eyes NVIDIA Comeback (137)
- NVIDIA Launches Investigation Into Jensen Huang's Relationship With Suspected Chinese Spy (136)
- Intel "Raptor Lake Next" 16-Core and 20-Core CPUs Surface (130)
- Legendary Game Studio BioWare Shuts Down Following EA Layoffs (104)
- Dell CEO Says the Memory Shortage Will Get Worse in 2027 (95)