 19
ASRock Z890 Taichi Aqua Review
Component Analysis »Board Layout

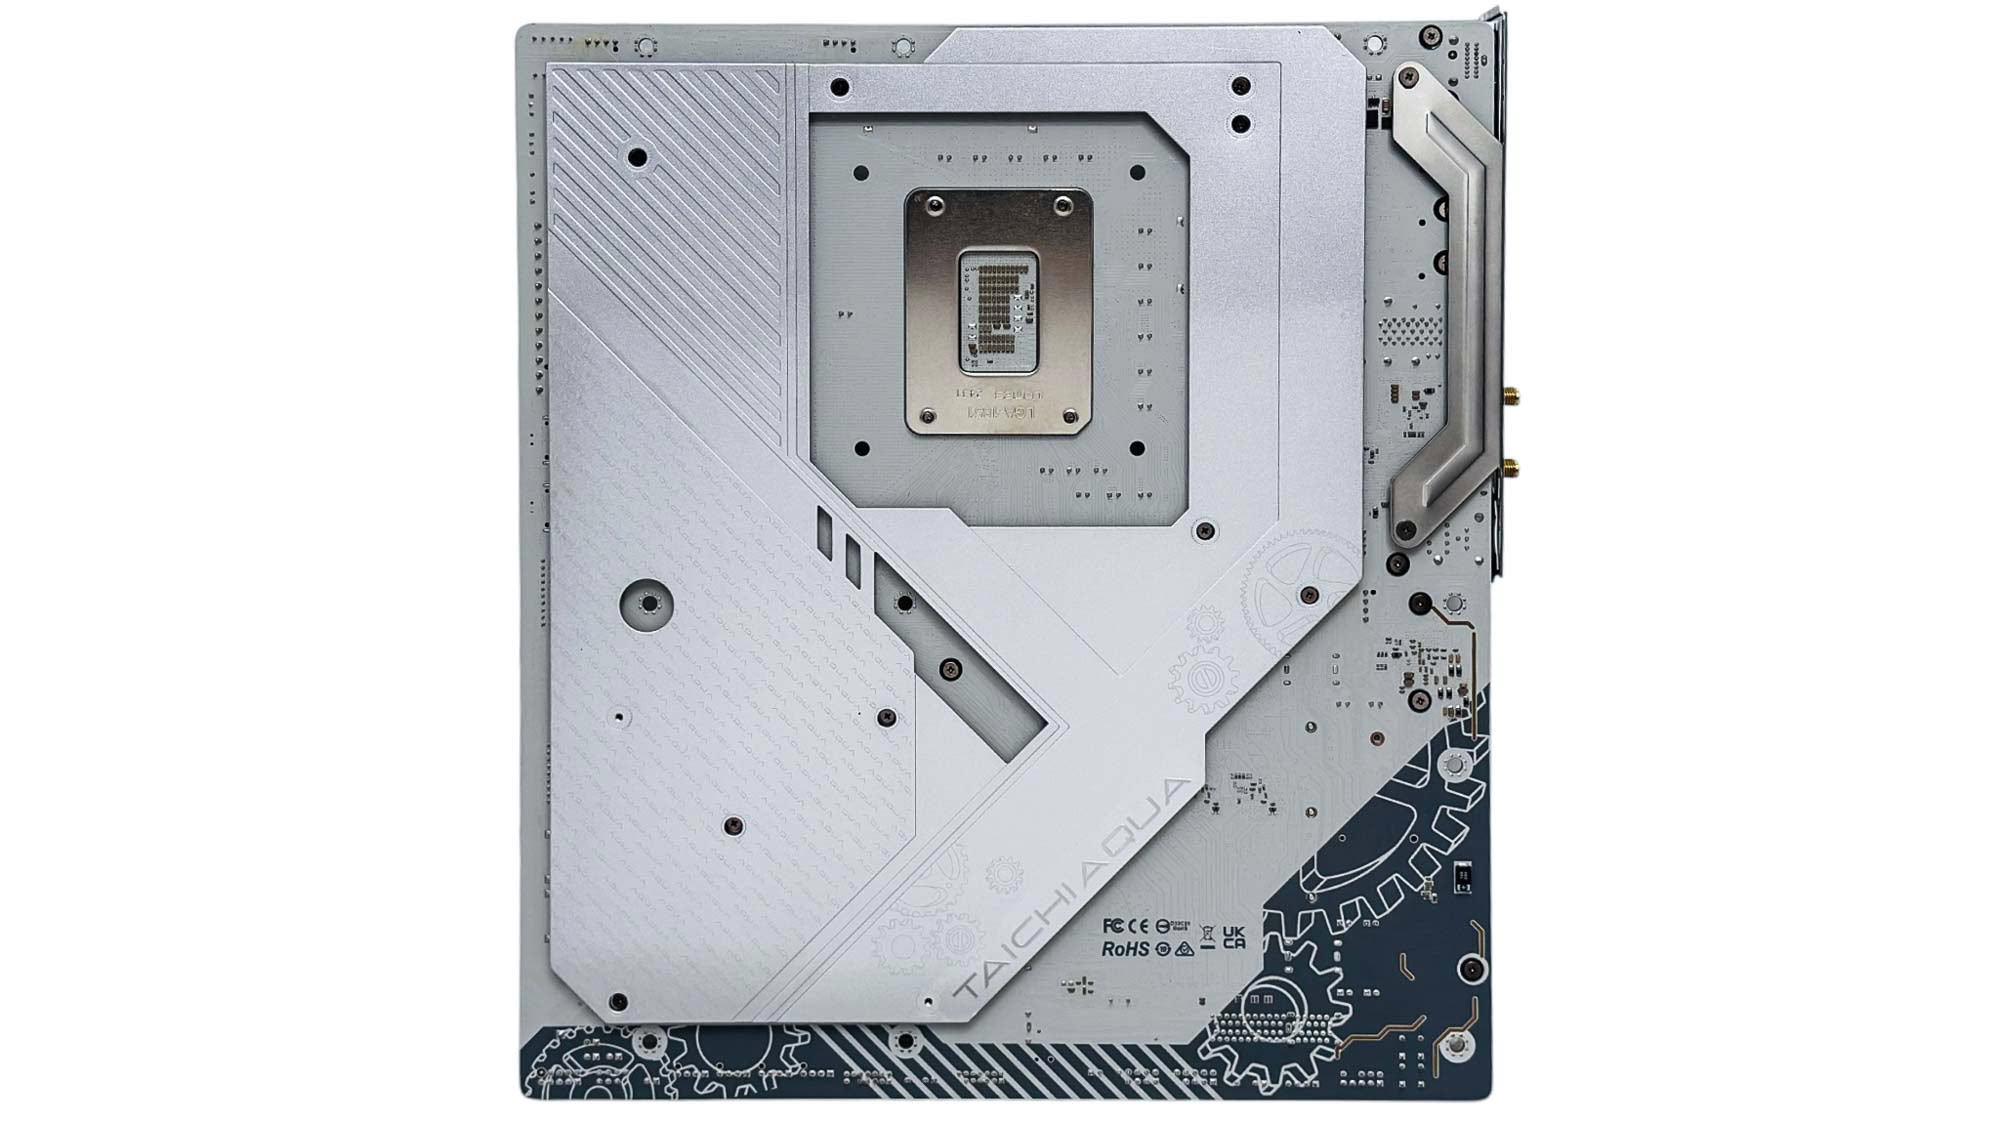
The Z890 Taichi Aqua is certainly a head-turner and comparisons should obviously be made to its Z690 predecessor. Here it's the VRMs and top M.2 port only that can be water-cooled, while the previous model swapped the included M.2 block for the CPU. As a result, you'll need your own CPU waterblock. The new board also comes under the Taichi brand and definitely takes design cues from other motherboards in ASRock's range, while using a large rear backplate.
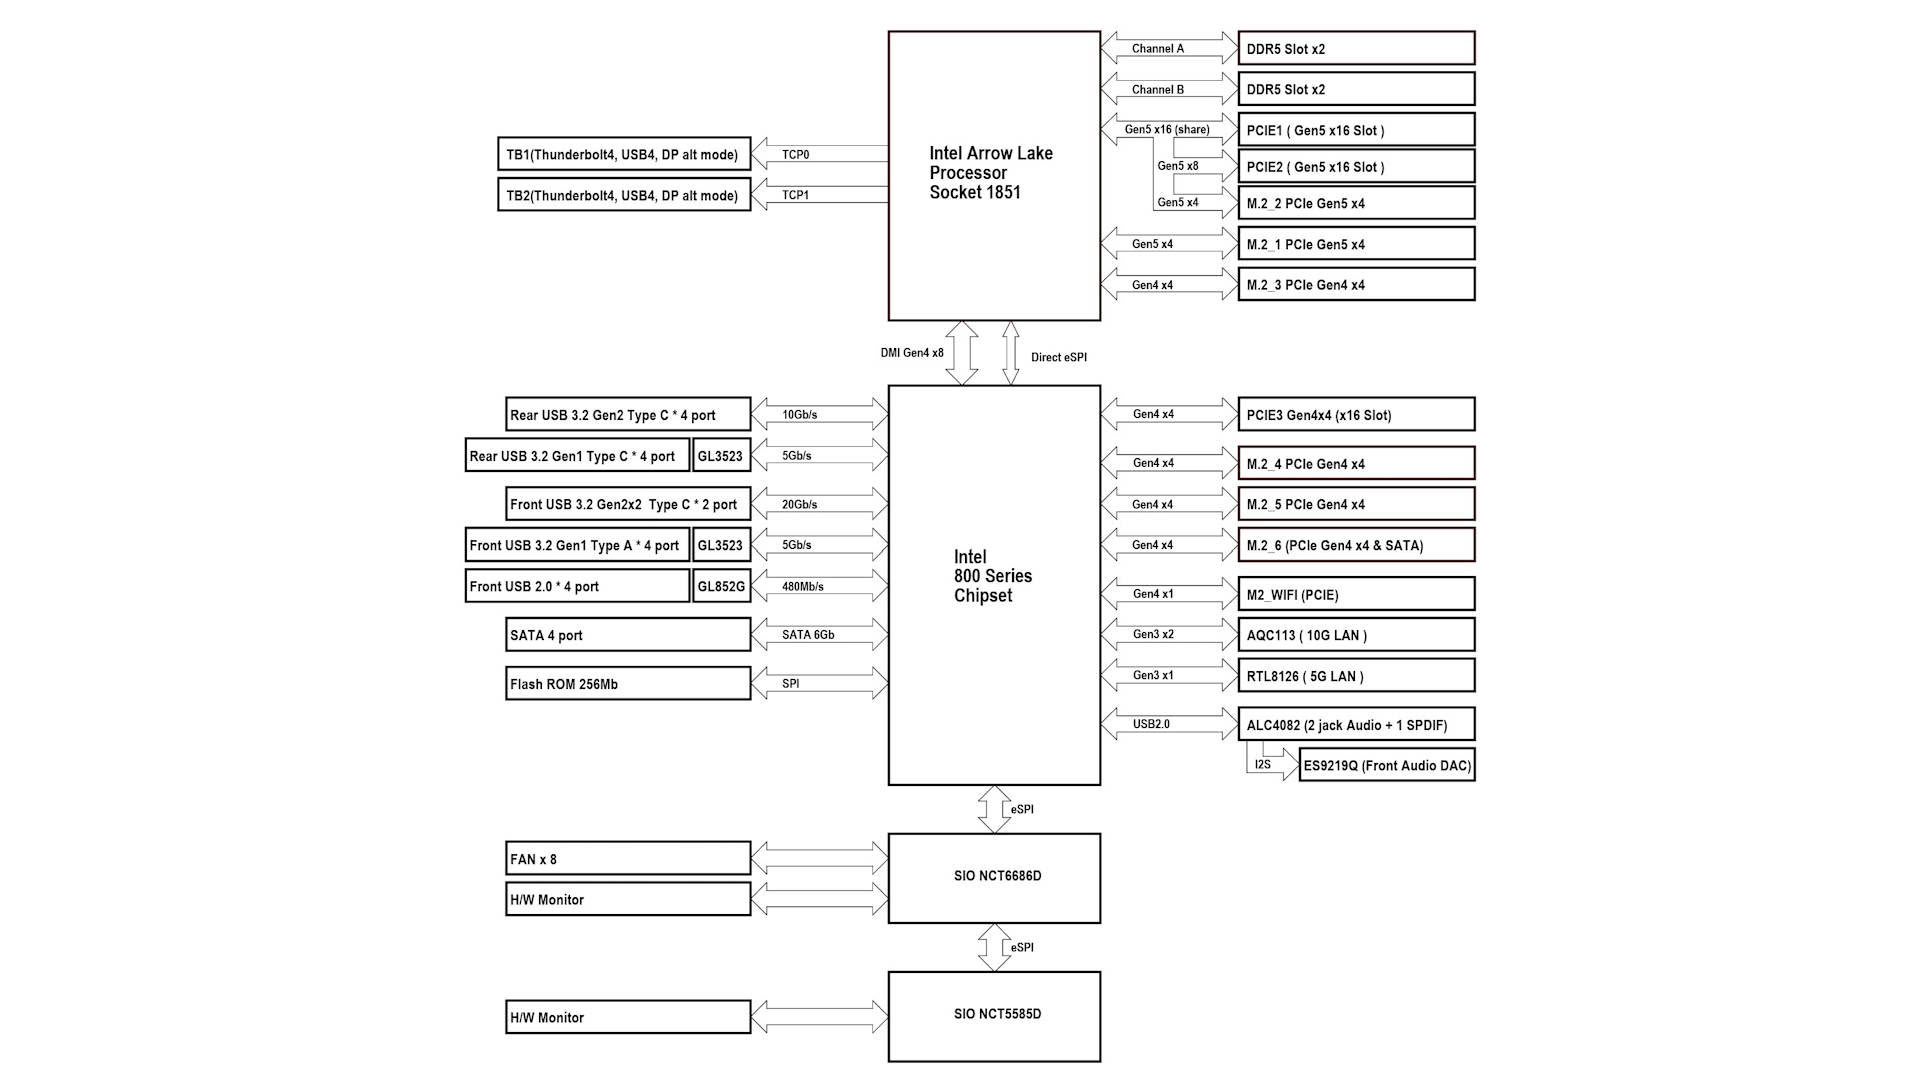

With two PCIe Gen 5 x16 slots and two PCIe Gen 5 M.2 ports, bandwidth sharing occurs between the two x16 Gen 5 PCIe slots, with eight lanes apiece if the second slot is used. The second PCIe Gen 5 M.2 port also shares the 16 lanes of the primary PCIe slot, seeing it again drop to eight lanes if this M.2 port is populated. Apart from this, the third PCIe x16 slot, which is Gen 4 and has four lanes, and the remaining single PCIe Gen 5 M.2 port and four Gen 4 M.2 ports all have dedicated lanes.

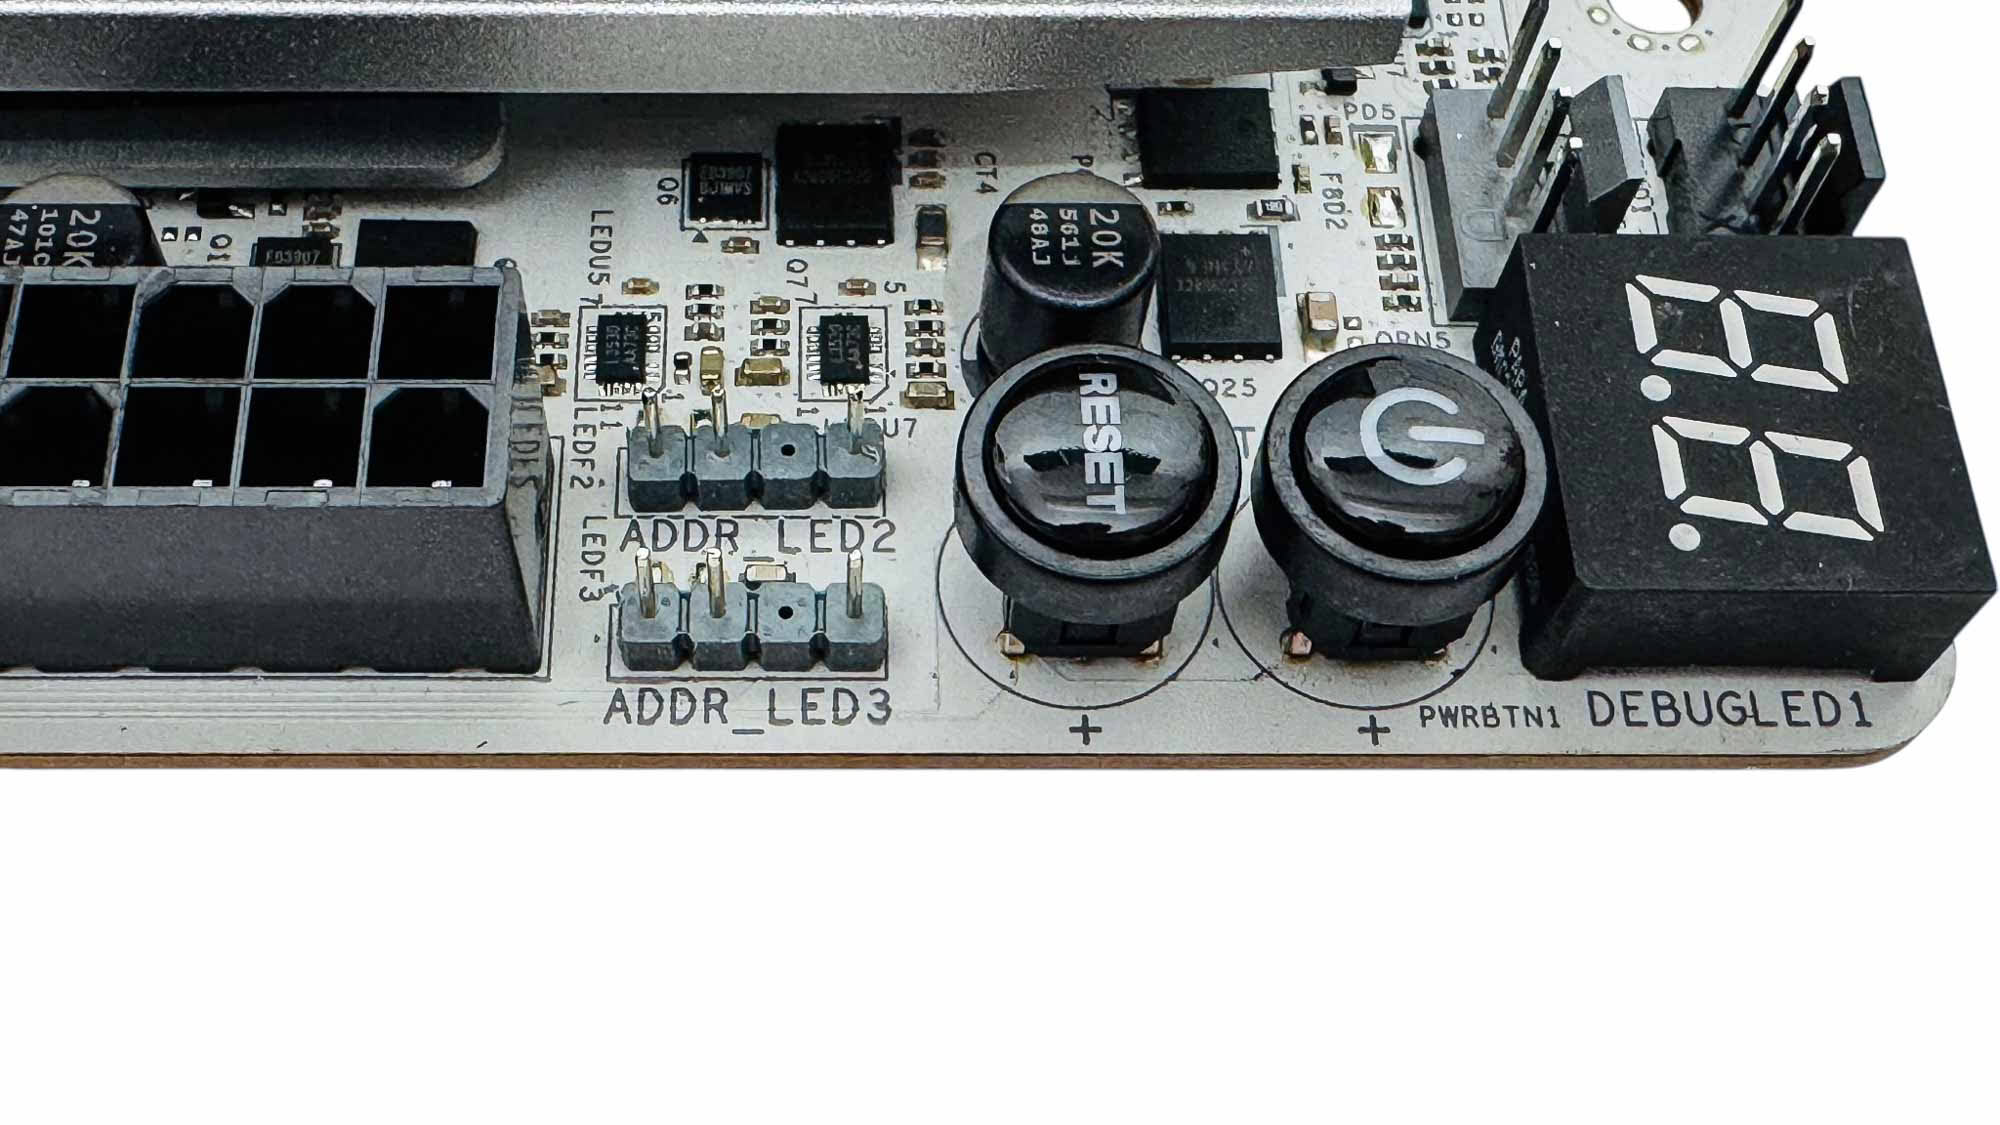
The top right corner has three of the eight fan headers, with 36 W/3 A available on all but the first CPU header. We also have two 3-pin ARGB headers, power and reset buttons plus an LED POST code display.


The two Type-C headers are both USB 3.2 Gen 2x2 20 Gbps, but lack additional power delivery, which is disappointing. As the board focuses so much on M.2 ports, it's not surprising to see just four SATA ports here, although the ASRock X870E Taichi had six.

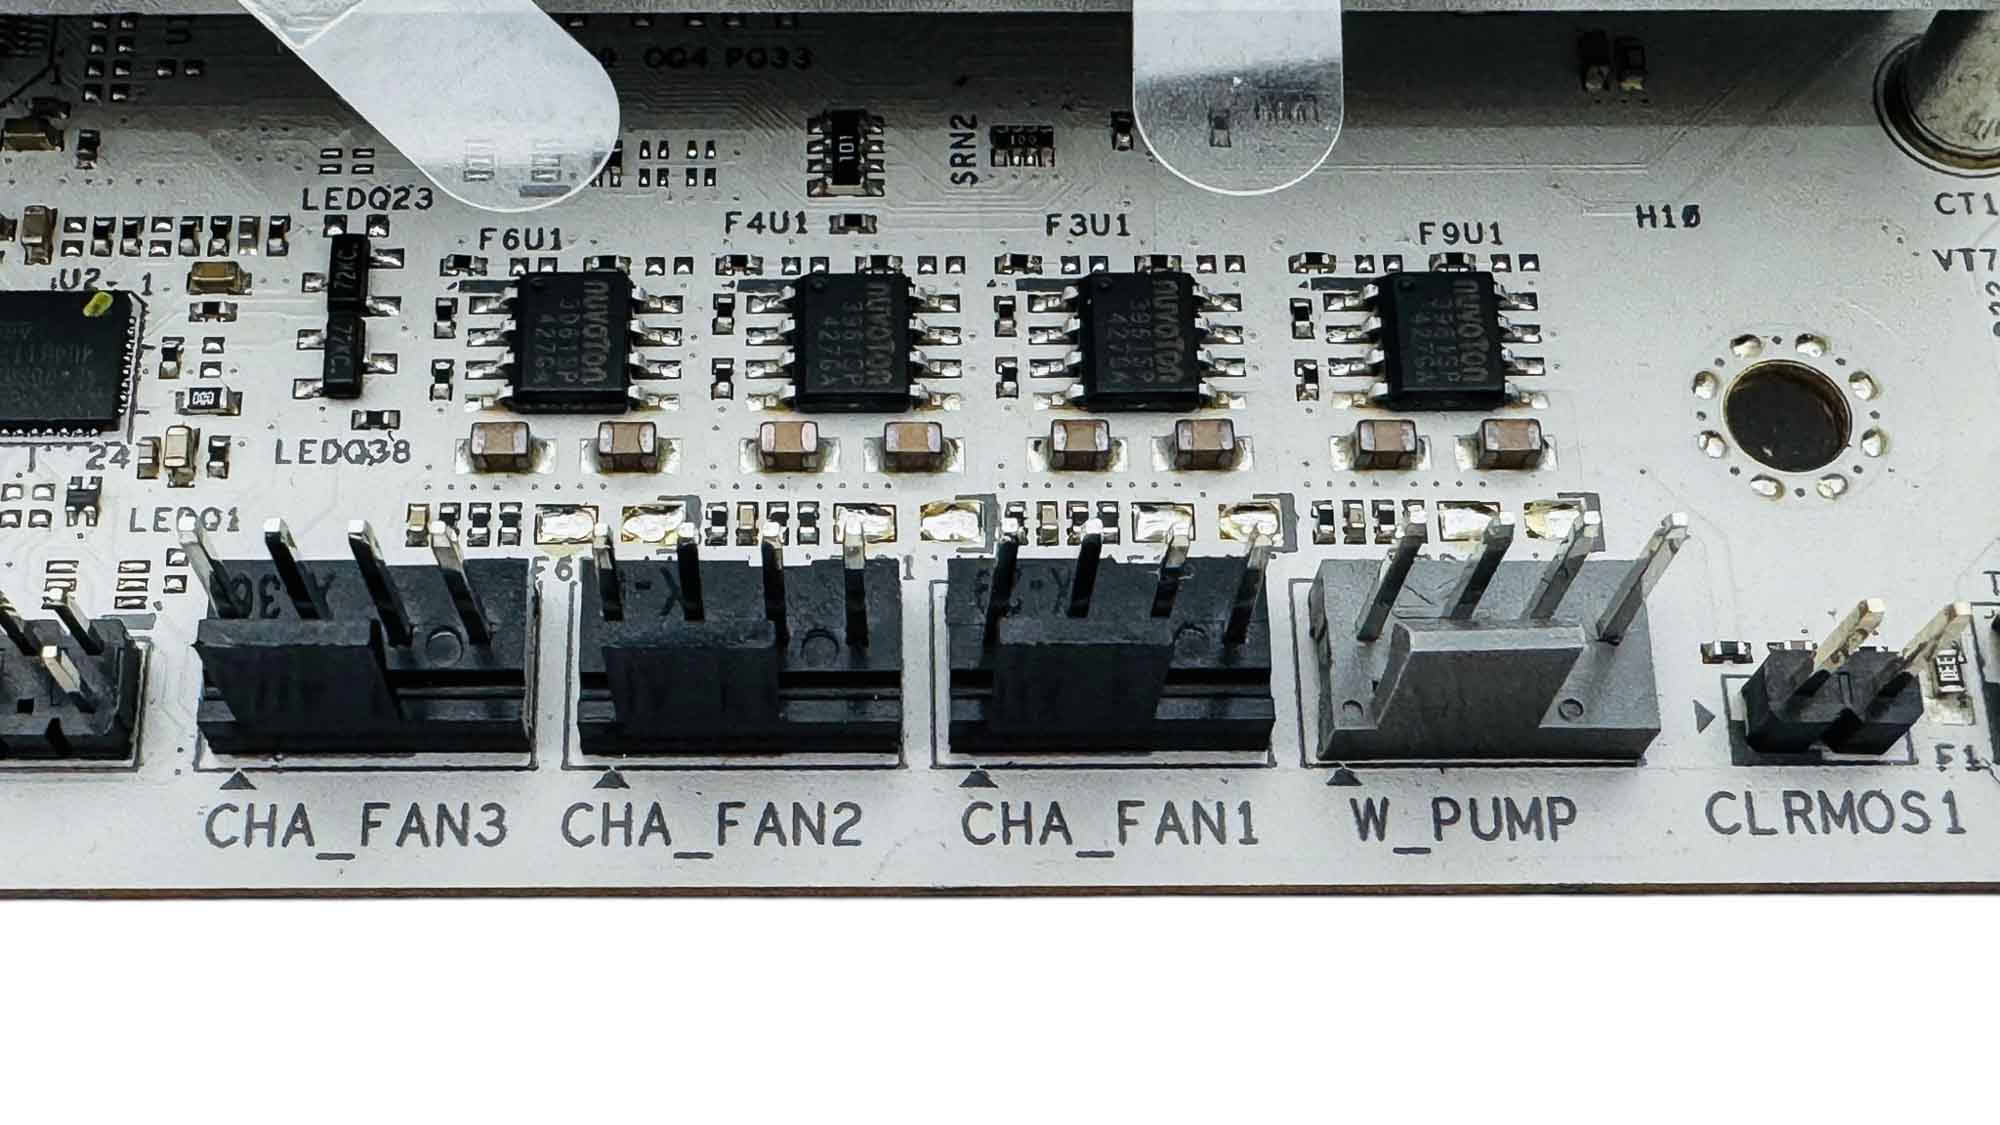
The three 2-pin thermistor probe headers are located in the bottom right corner of the PCB, along with an easily accessible CMOS battery, front panel header, and dedicated AIO pump header. An additional three fan headers sit next to this, bringing the total seen so far to seven, with the final header sitting next to the rear I/O panel.
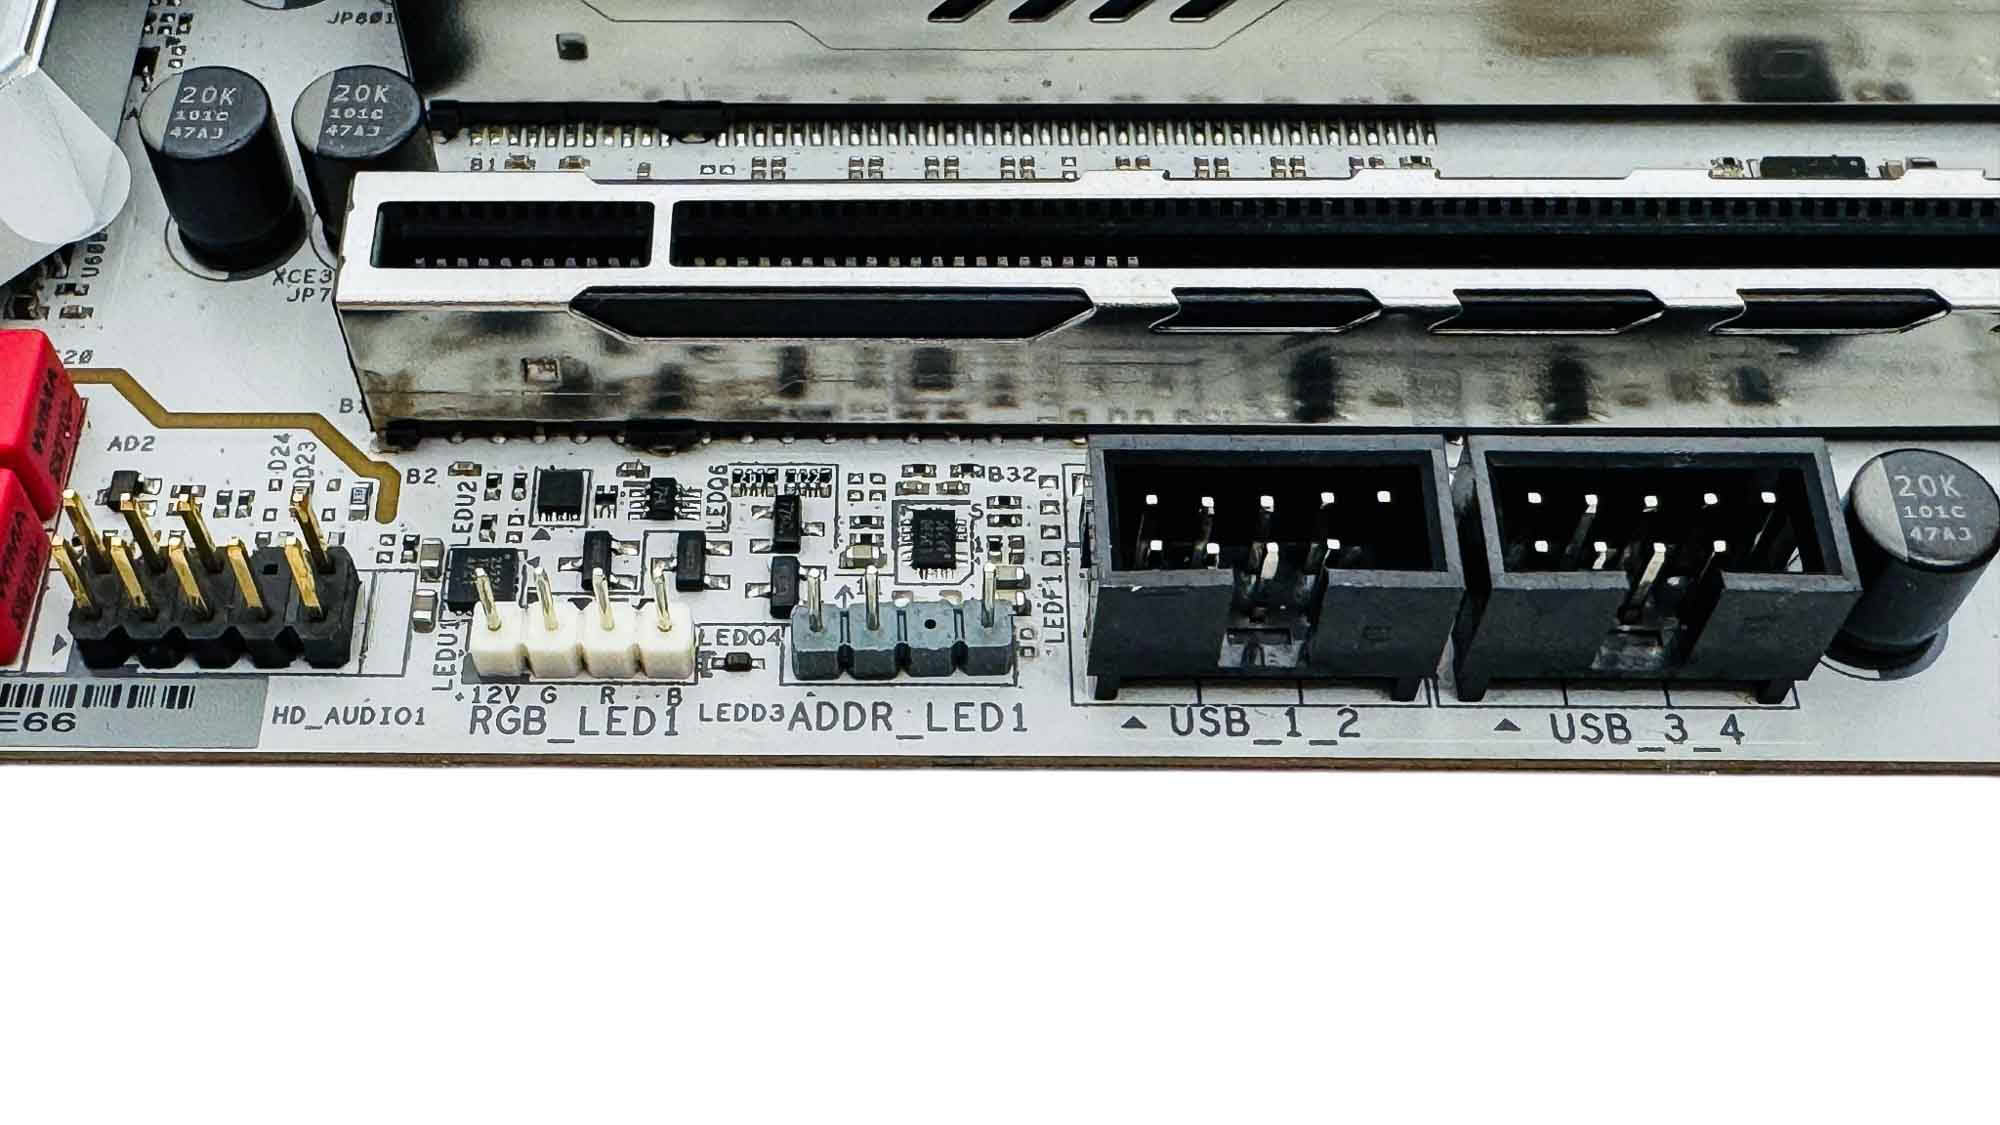
Finally, along the lower edge we have both 3-pin ARGB and 4-pin RGB headers, as well as two USB 2.0 headers beneath the PCIe Gen 4 x16 slot.
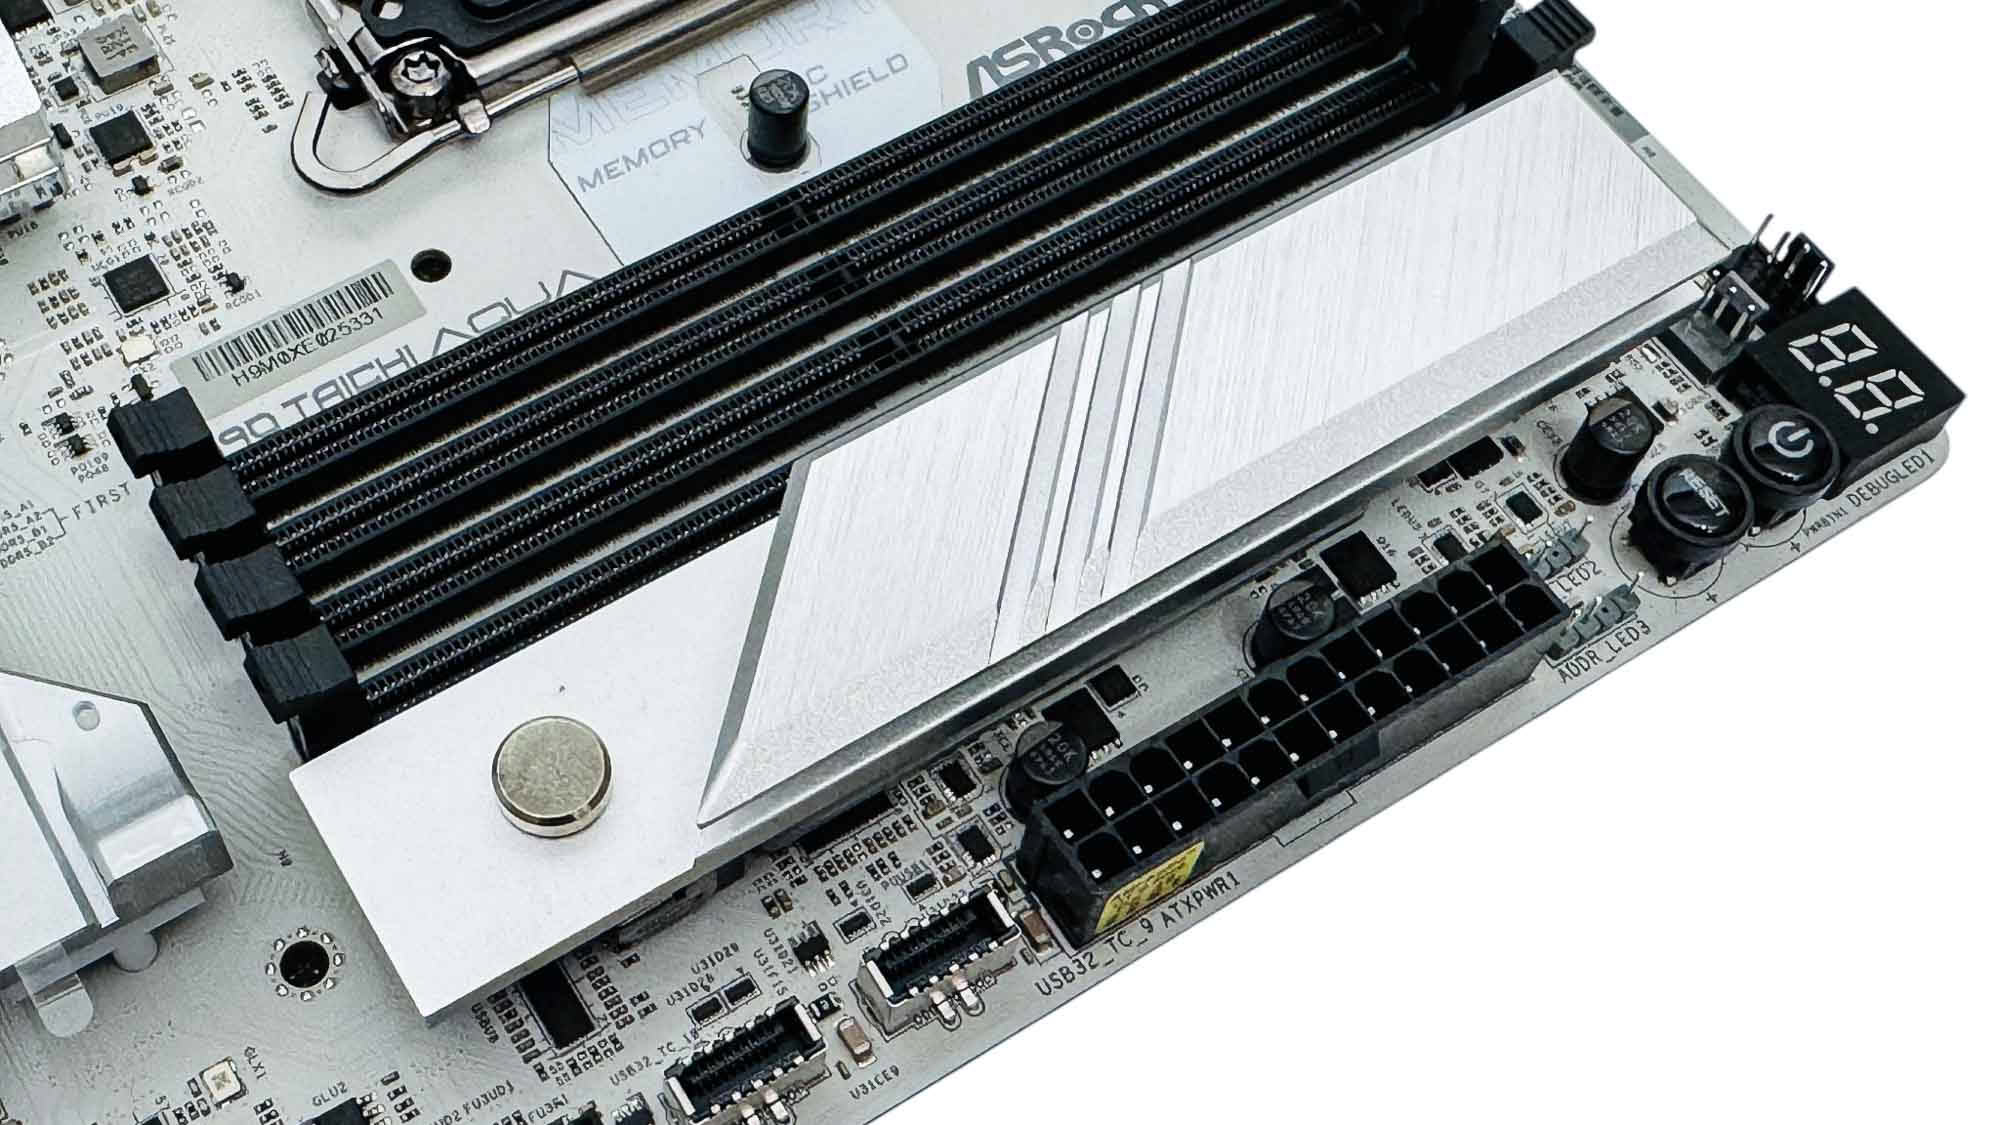
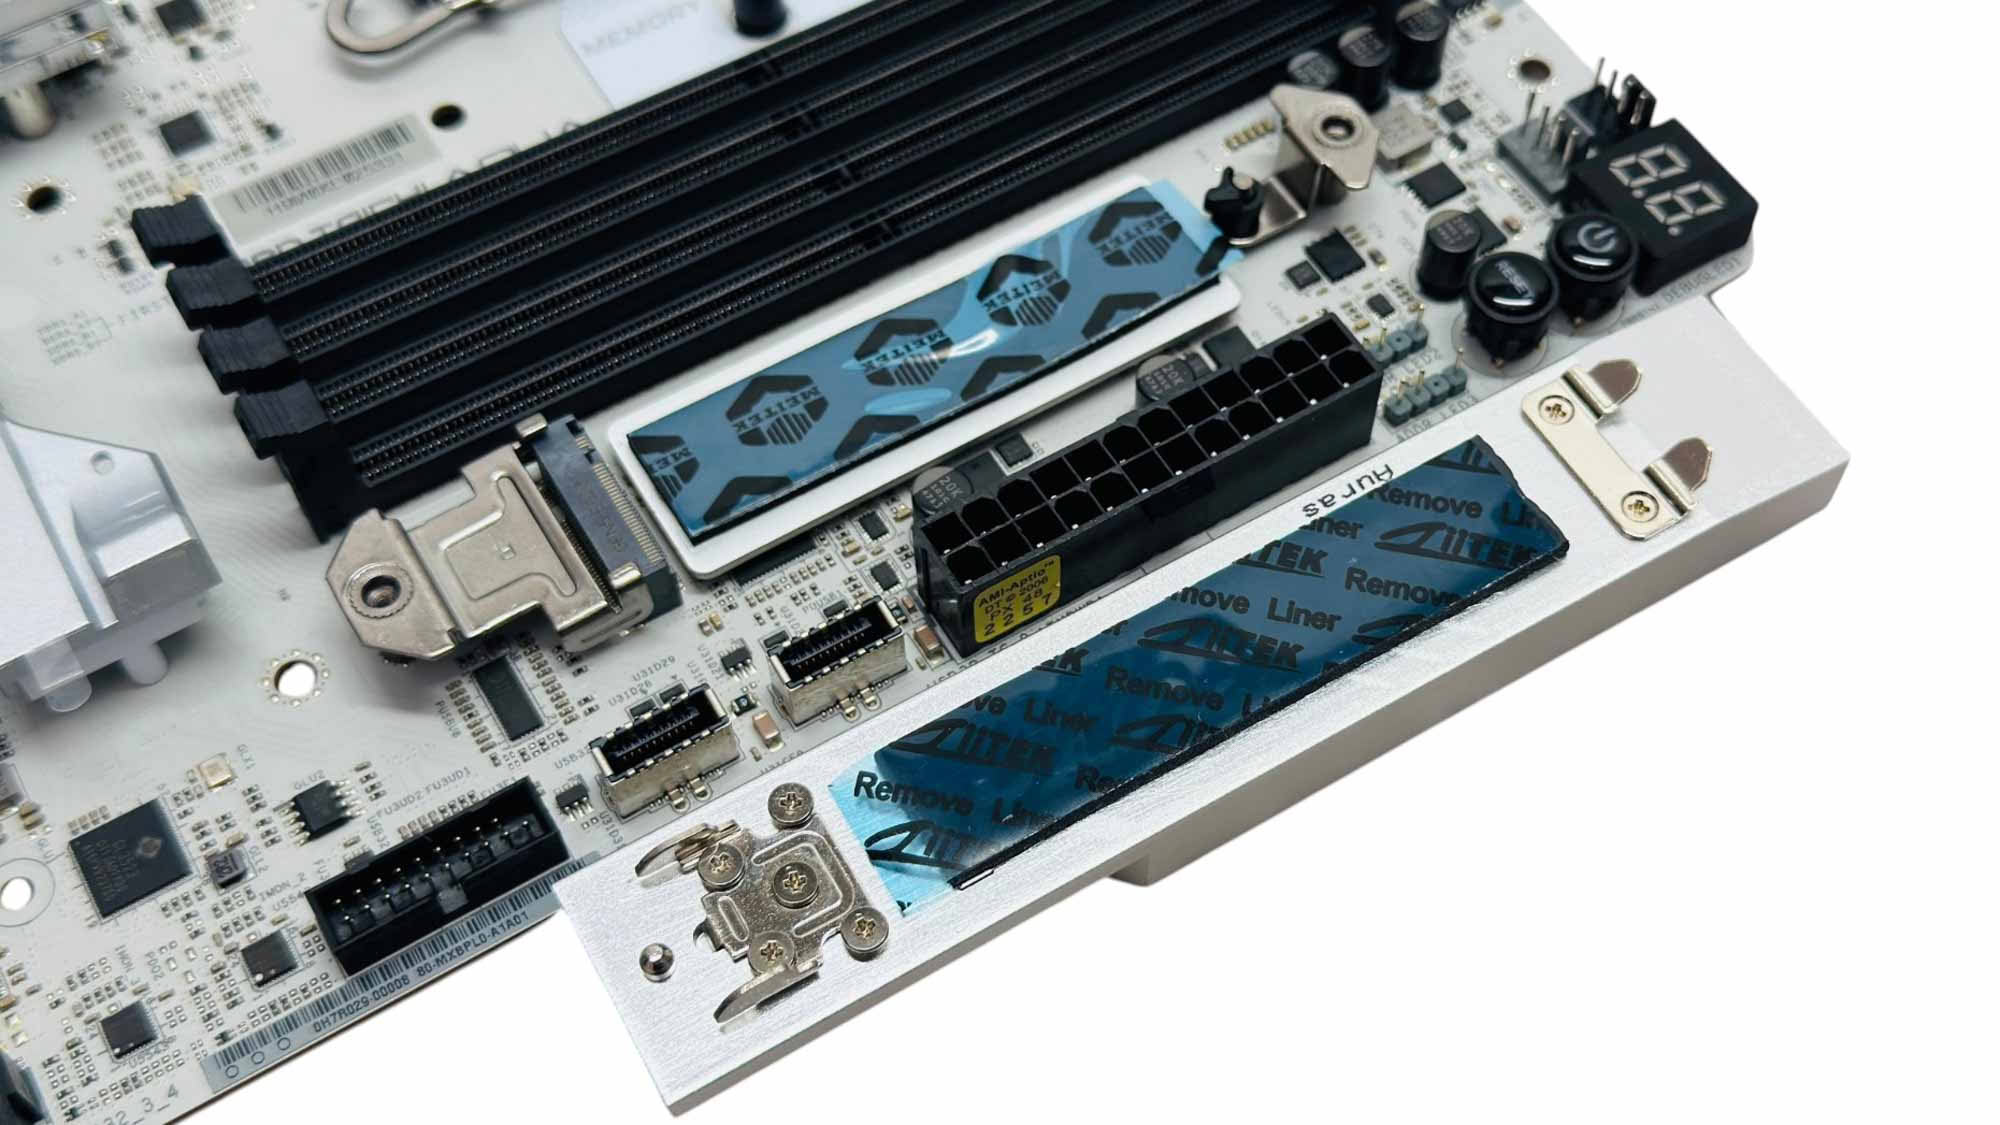
If there's a second PCIe Gen 5 M.2 port, this is usually located under a secondary heatsink and sits beneath the GPU. However, ASRock has located it beneath a heatsink next to the 24-pin ATX connector, so it's not only going to end up with better airflow, but is also accessible no matter what else you attach to the motherboard. The heatsink is tool-free and double-sided SSDs are cooled from both above and below.
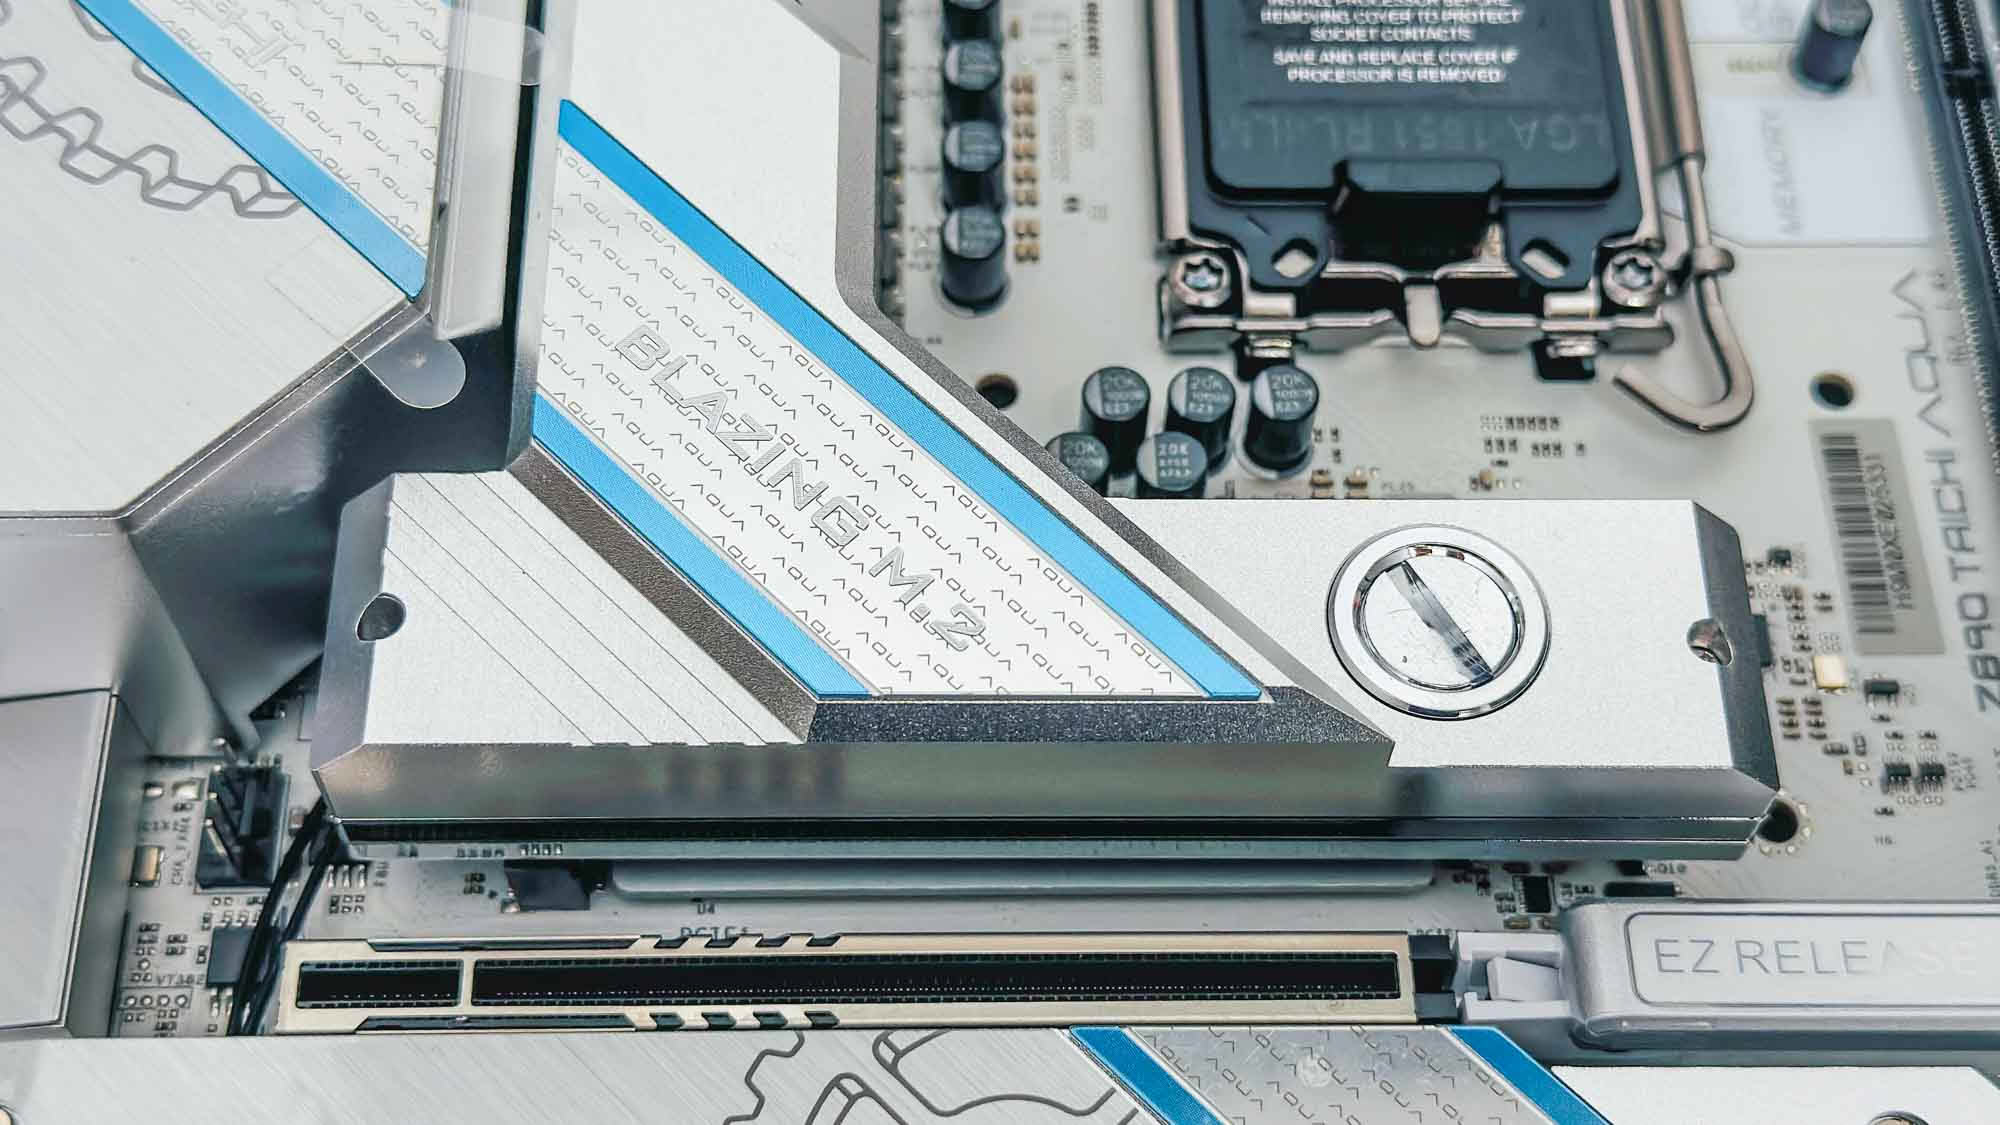

The primary PCIe Gen 5 M.2 port features a large heatsink manufactured by Alphacool, which doubles as a two-piece water block, with this end featuring a single G1/4" port. As you'd expect, SSDs are cooled above and below, although due to its weight and the fact it could have coolant running through it, the heatsink is secured with two screws rather than a tool-free mechanism.
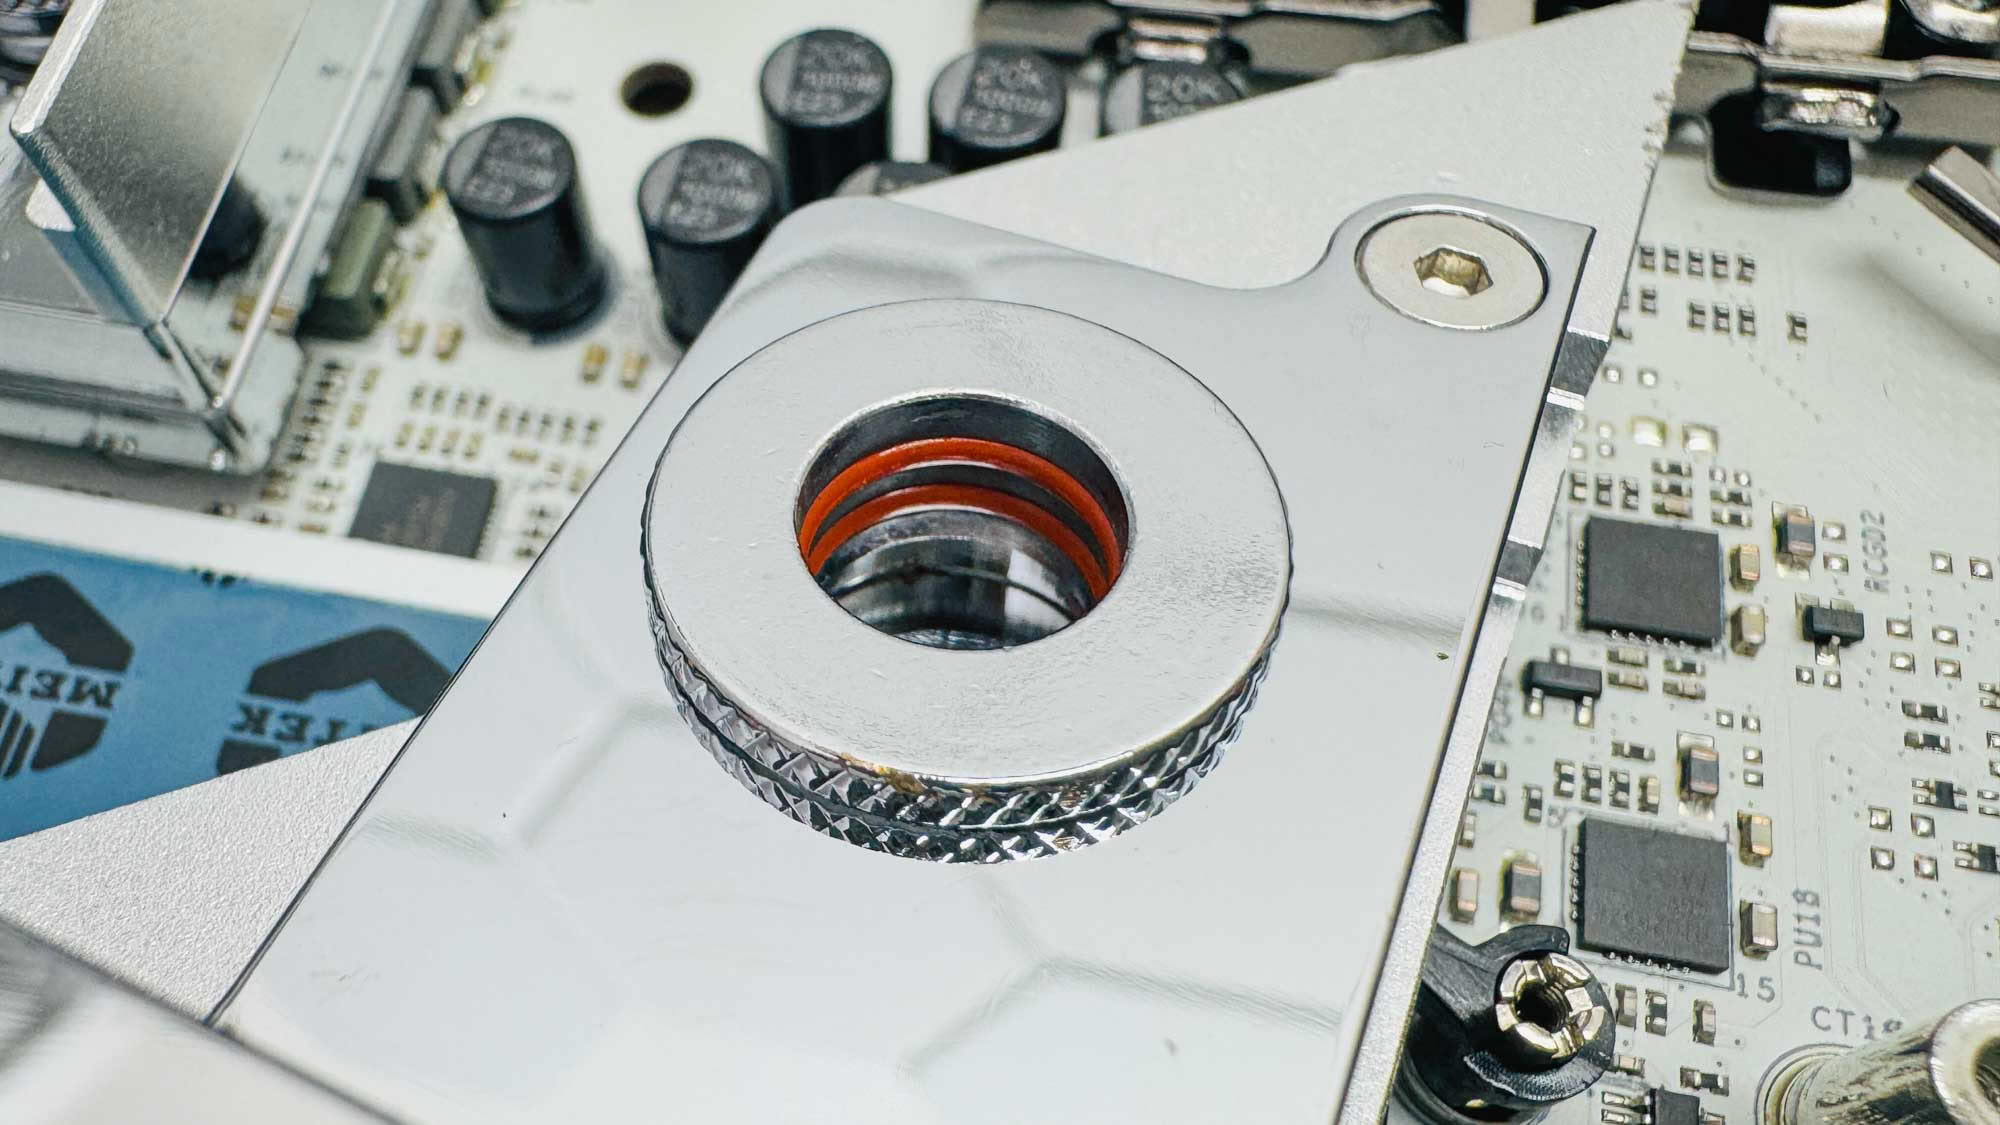
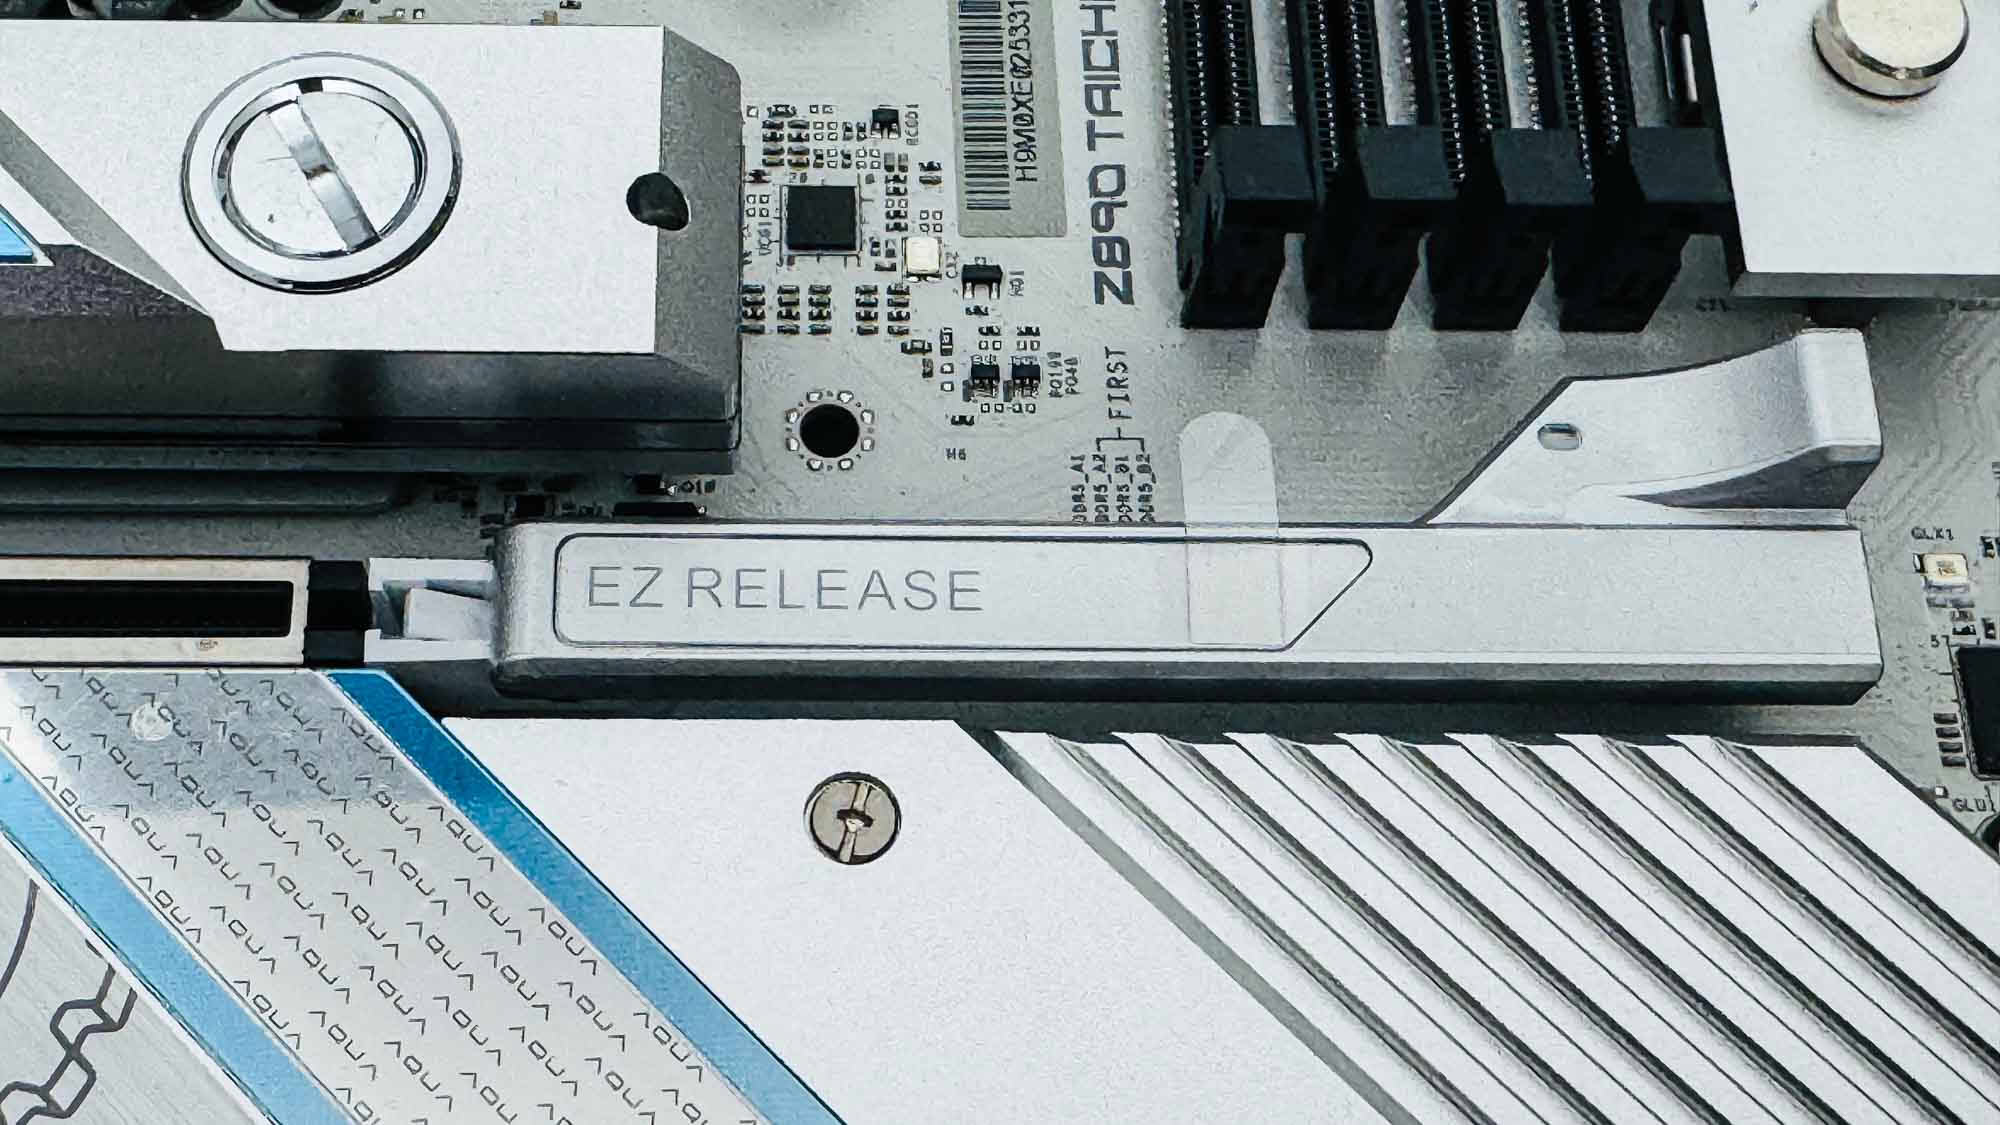
The two-piece water block links together using a push-fitting, with dual O-rings present on one side. With the additional two screws, it's a remarkably simple setup, but does mean you'll need to use quick-disconnect fittings, or drain your loop—at least this section of it—in order to get at the M.2 port. An alternative here would have been to ditch having coolant pass through this section and just have a thermal pad linking it to the water-cooled section above the VRMs instead, so you wouldn't experience so much hassle accessing the slot. Needless to say, you'll want to make sure both your SSD and this M.2 port are working before you add coolant and lock everything down. Next to this is ASRock's EZ-Release GPU release mechanism, which is simply an extending latch that opens the GPU retention mechanism. It's fiddlier than a button for sure, but does the job.
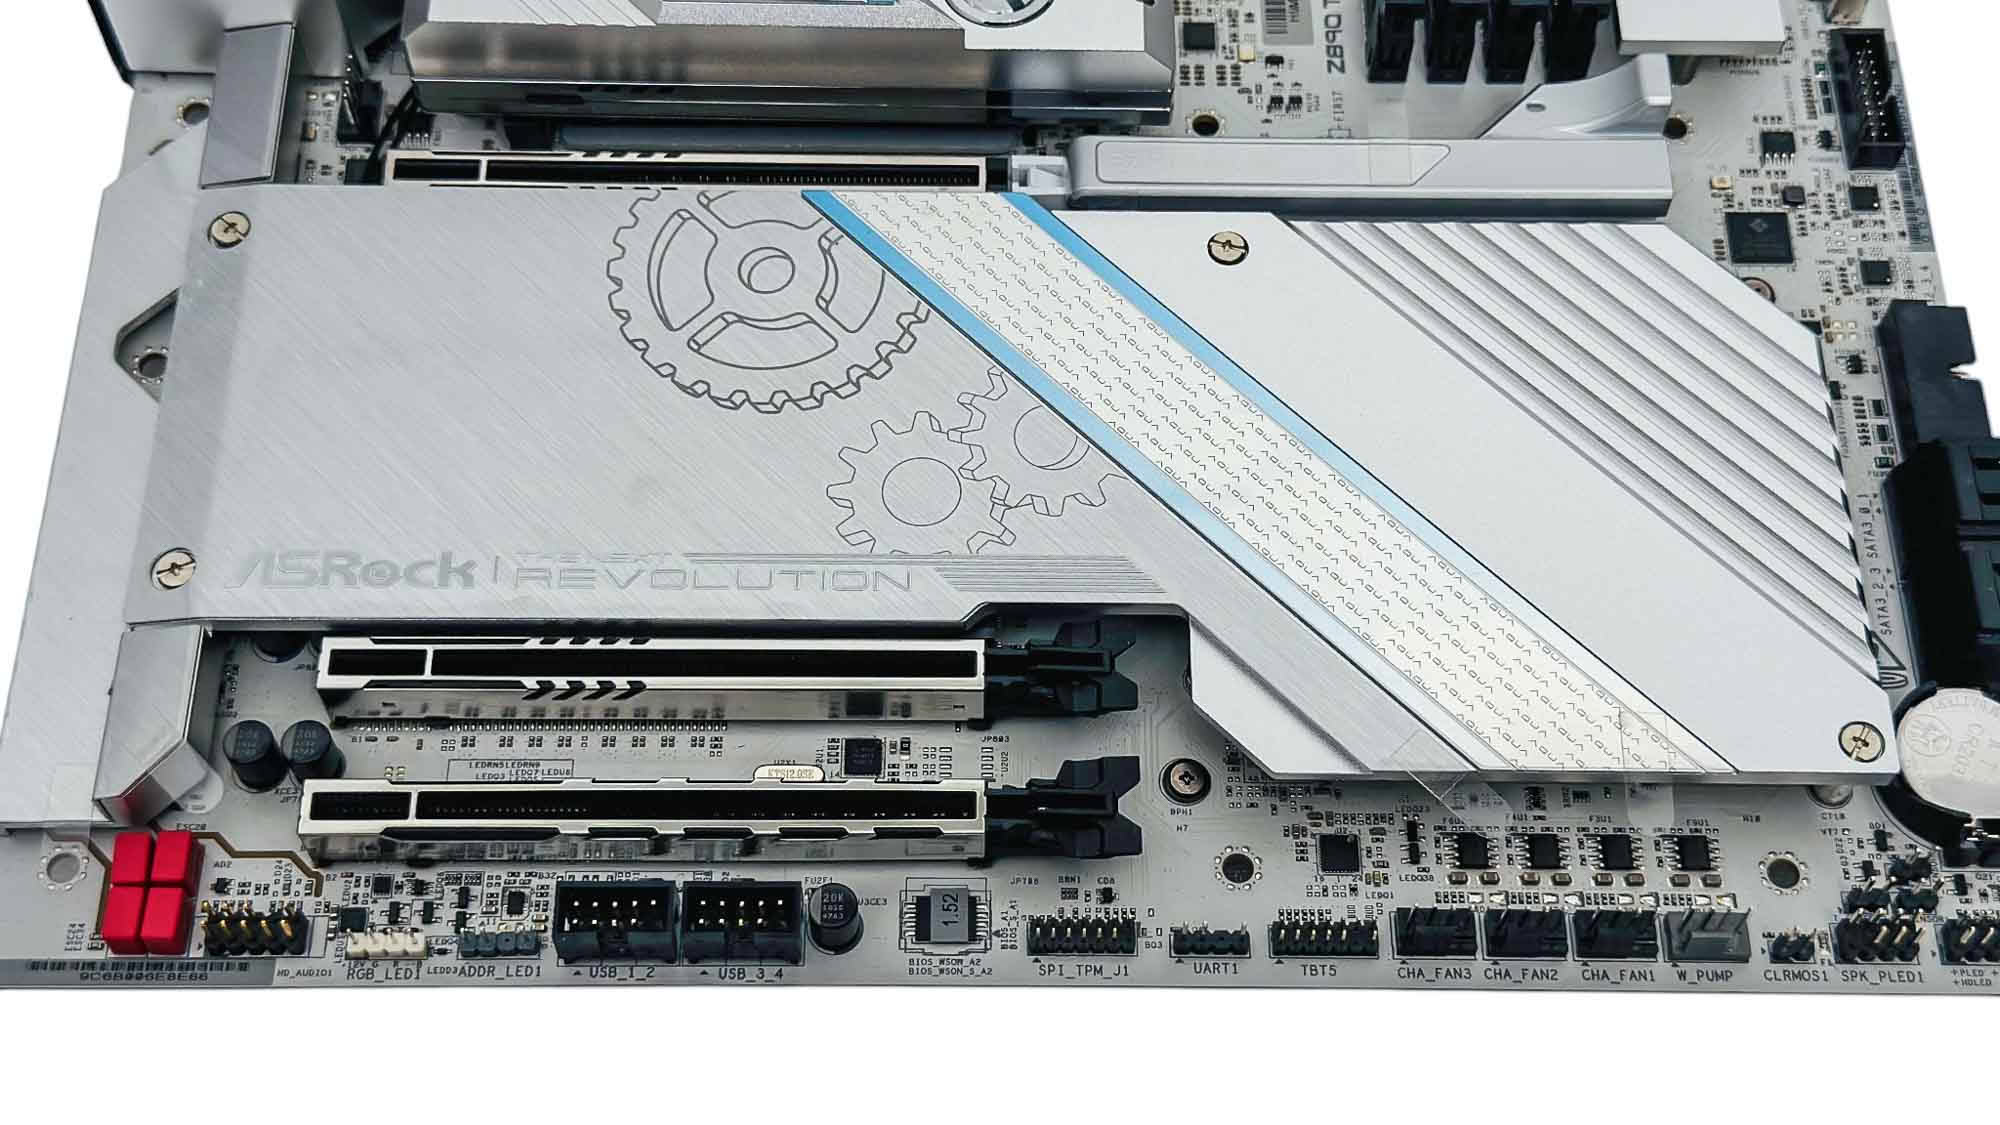
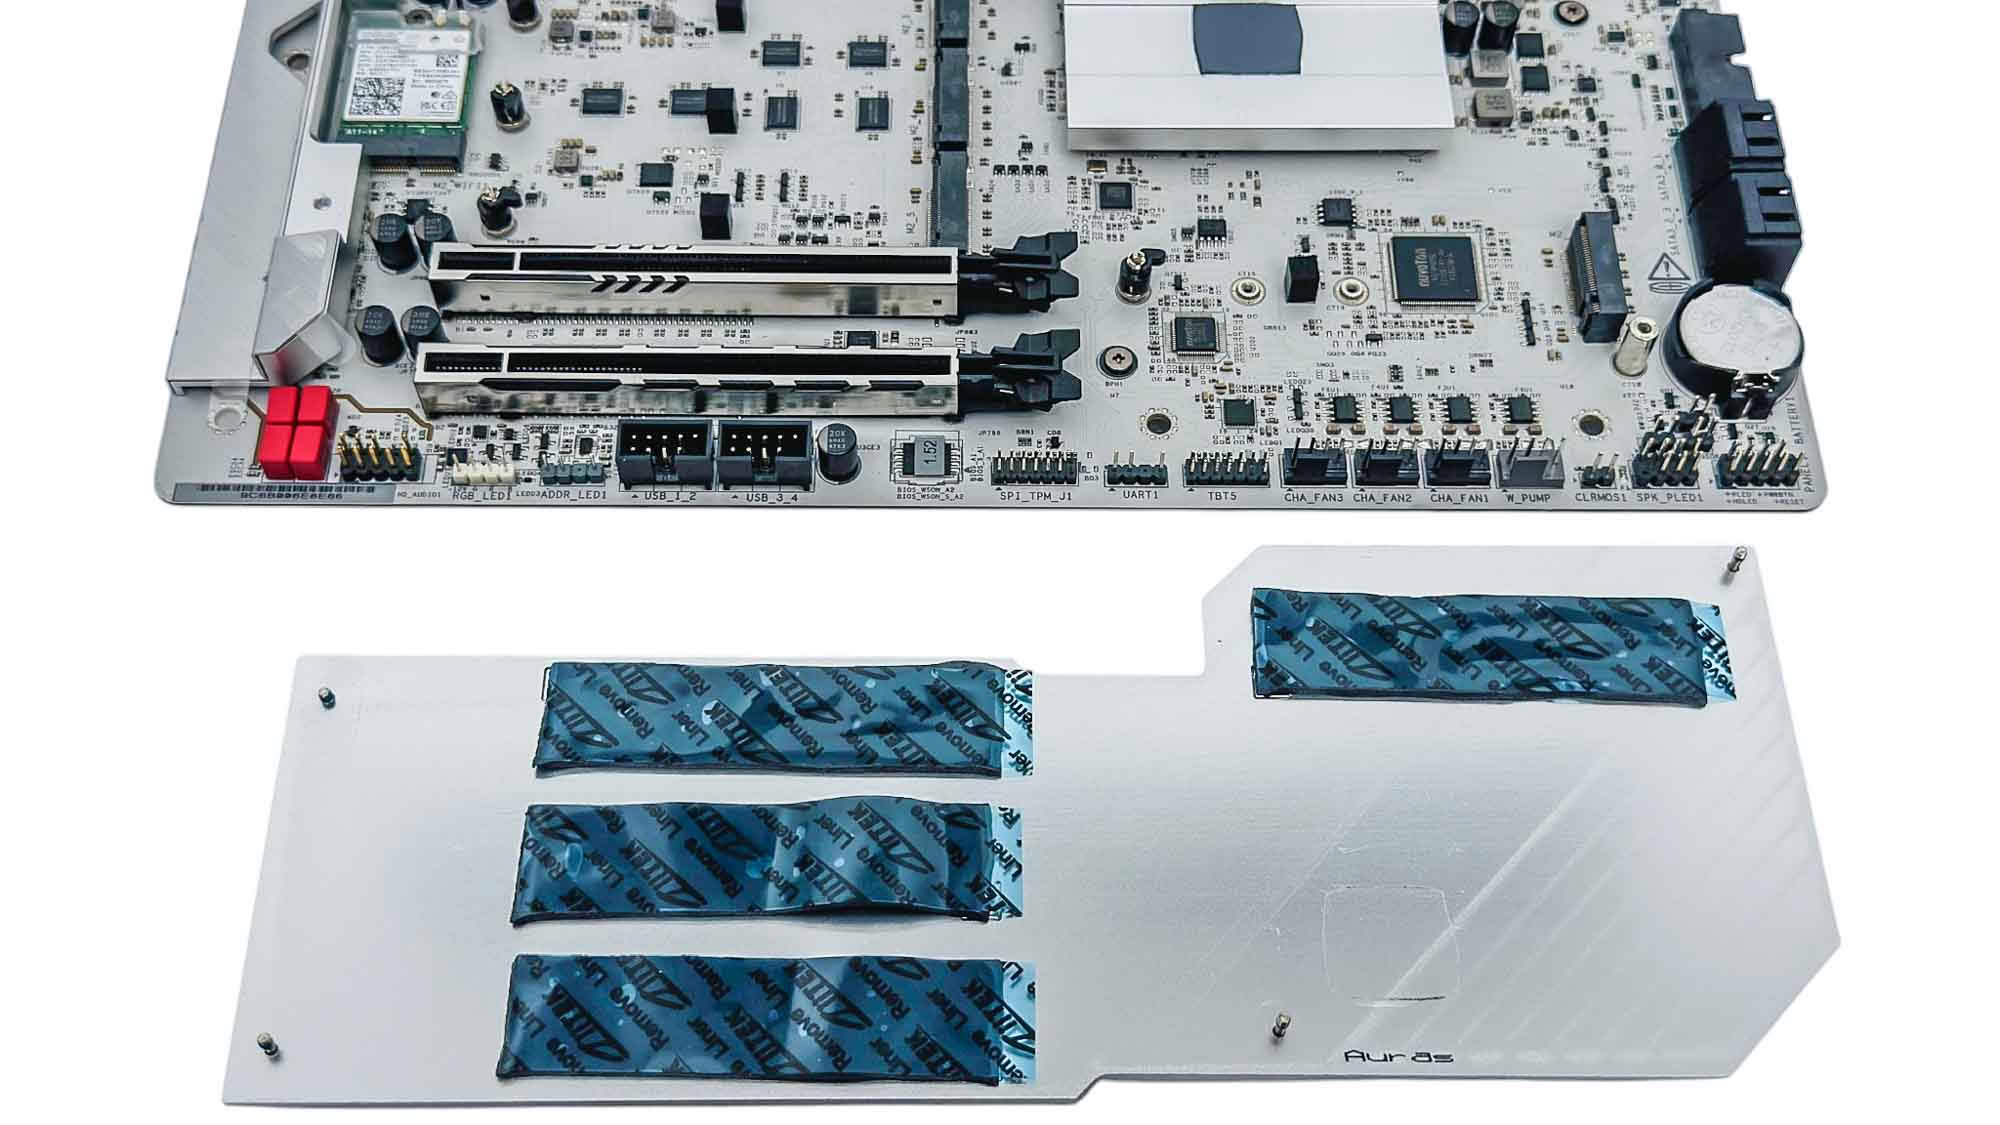
The lower M.2 heatsink cools four PCIe Gen 4 M.2 slots, all of which lack underside cooling, but that's overkill for Gen 4 SSDs anyway. This isn't tool-free, so you need to spend time aligning four screws to secure it. This will likely be blocked by your GPU as well.
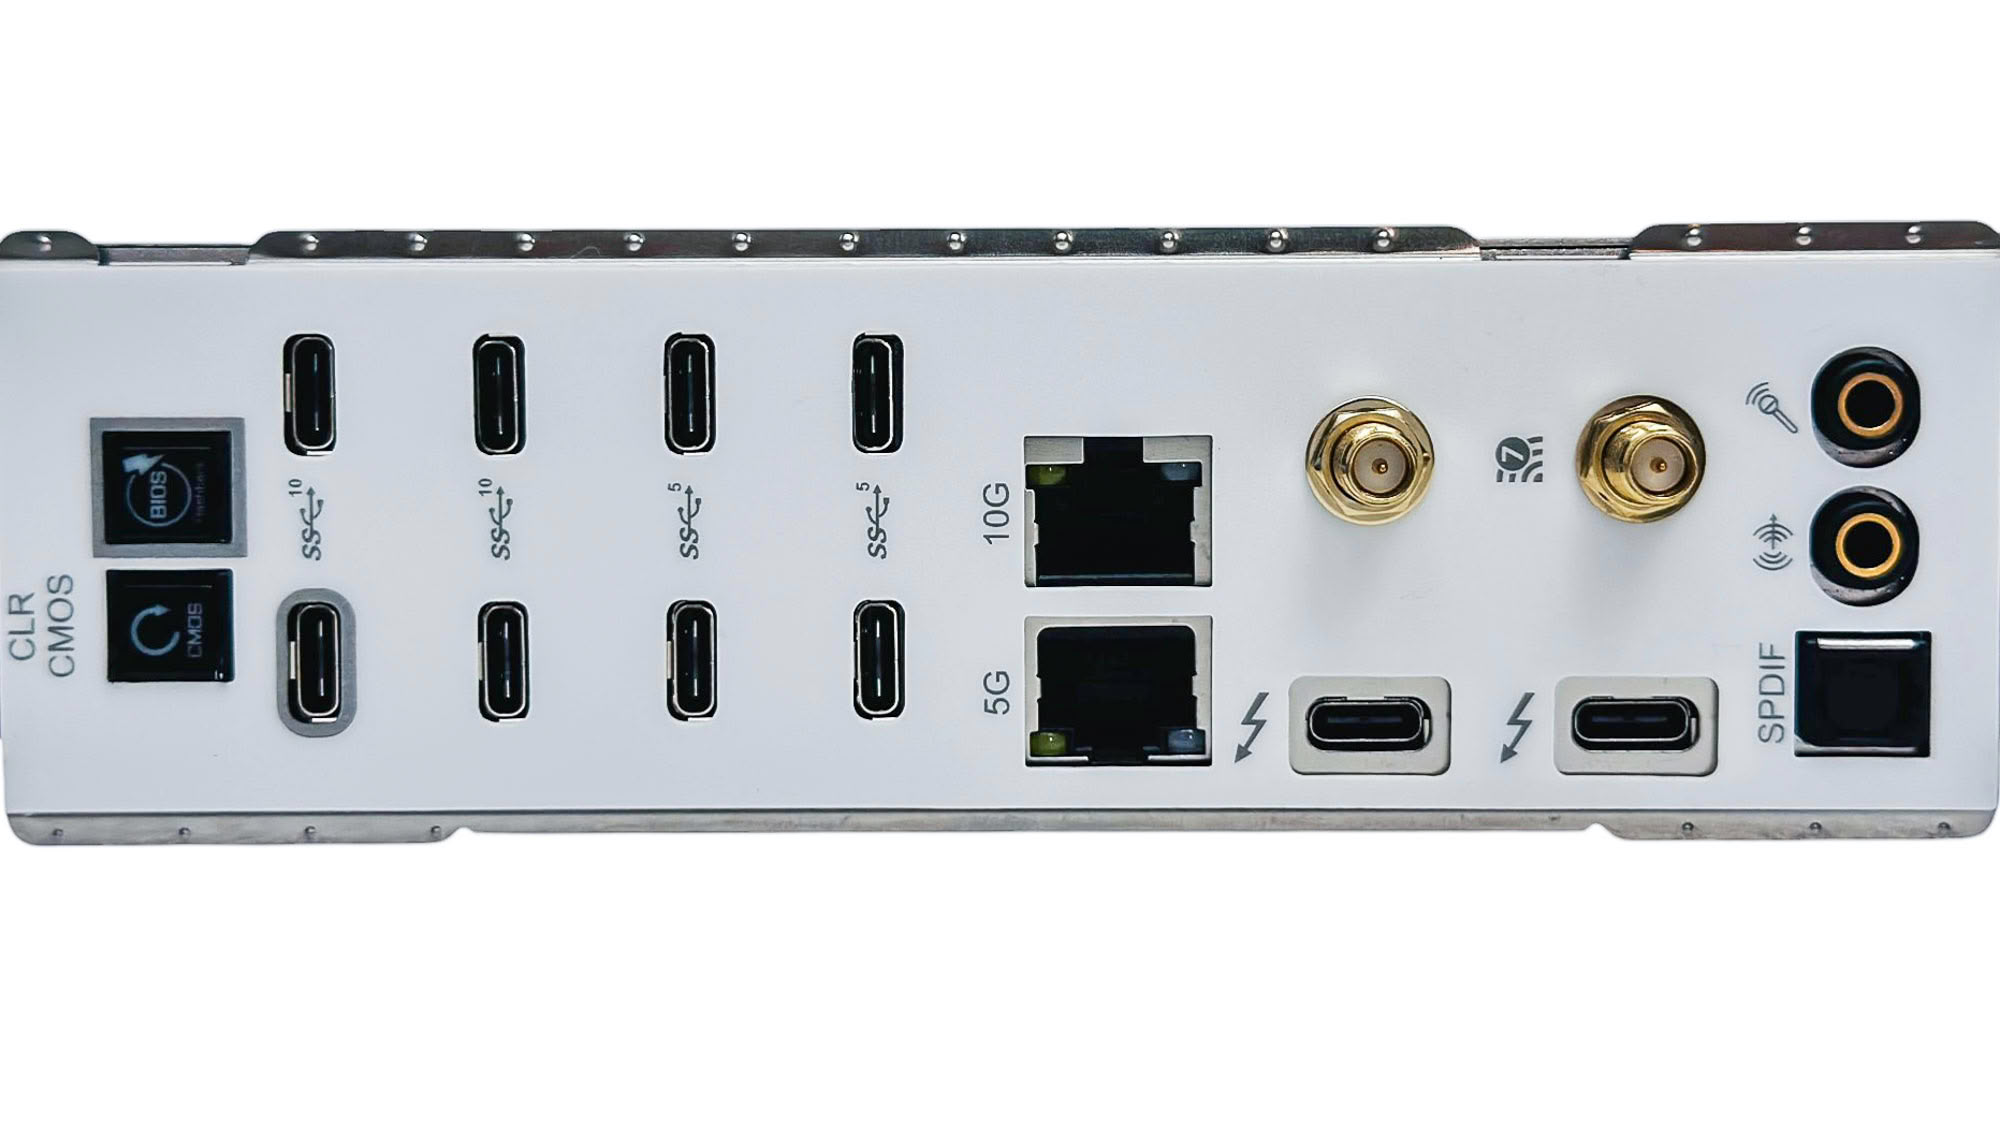
The rear I/O panel is literally a Type-C party, with ASRock ditching Type-A ports entirely. This is why there's a USB 2.0 PCI bracket in the box, so you don't need to automatically rush to buy a USB hub. However, with the board initially presenting a blank screen, the first step was to update the BIOS using flashback, which of course wasn't possible with a normal Type-A USB stick as the flashback port is literally one of the Type-C ports. Thankfully, it did accept an external SSD and Type-C cable, but you'll still need to use a compatible file system. There are four USB 3.2 Gen 2 10 Gbps Type-C ports, with four more in USB 3.0 and also two Thunderbolt 4 40 Gbps Type-C ports. With Type-A still being widely used, this does feel more like an attention-grabbing move rather than a practical one, at least if you don't intend to have to buy extra hardware in the form of hubs. As well as USB BIOS Flashback and CMOS clear buttons, there are both 5 Gbps and 10 Gbps Ethernet ports, dual Wi-Fi antenna ports, dual audio jacks, and optical output.
Nov 18th, 2026 13:50 PST
change timezone
Latest GPU Drivers
New Forum Posts
- Honestly, do you care about GTA VI? (145)
- What are you playing? (26234)
- Can i play GTA 6 now? (Joke) (6)
- Very unusual two gaming-pc scenarios. (12)
- Dell Workstation Owners Club (3513)
- Any other old-timers here planning to play WoW Forever? (151)
- Time to upgrade CPU and MOBO (33)
- The Filthy, Rotten, Nasty, Helpdesk-Nightmare picture clubhouse (2876)
- WarpCoreBench scores! (67)
- Acer Predator BiFrost Radeon RX 9070 OC (9)
Popular Reviews
- Acemagic Retro X3 Review
- Upcoming Hardware Launches 2027 (Updated Nov 2026)
- AMD Zen 6 Technical Deep Dive
- ASUS ROG Strix B850-I Gaming Wi-Fi7 W Review
- Corsair HX1000i Shift Crystal Review
- Biwin Black Opal NV7400 2 TB Review
- Chieftec Iceberg PRO 360 DARK Review
- AMD Ryzen 7 9800X3D Review - The Best Gaming Processor
- Pulsar Office Tour & First Look at P1 Dual-Sensor Mouse
- Phantom Blade Zero Performance Benchmark Review - 35 GPUs Tested
TPU on YouTube
Controversial News Posts
- NVIDIA Co-Founder and CEO Jensen Huang Officially Resigns (478)
- Report: Jensen Huang Eyes NVIDIA Comeback (187)
- Open Letter Asking NVIDIA to Reinstate Jensen Huang Passes 115,000 Signatures (184)
- OpenAI CEO Argues Home PCs Waste the World's Limited DRAM Supply (152)
- NVIDIA Launches Investigation Into Jensen Huang's Relationship With Suspected Chinese Spy (136)
- Intel "Raptor Lake Next" 16-Core and 20-Core CPUs Surface (130)
- Legendary Game Studio BioWare Shuts Down Following EA Layoffs (104)
- Dell CEO Says the Memory Shortage Will Get Worse in 2027 (95)