 16
16
Bitspower Summit EF-X CPU Waterblock Review
Liquid Flow Restriction »Installation

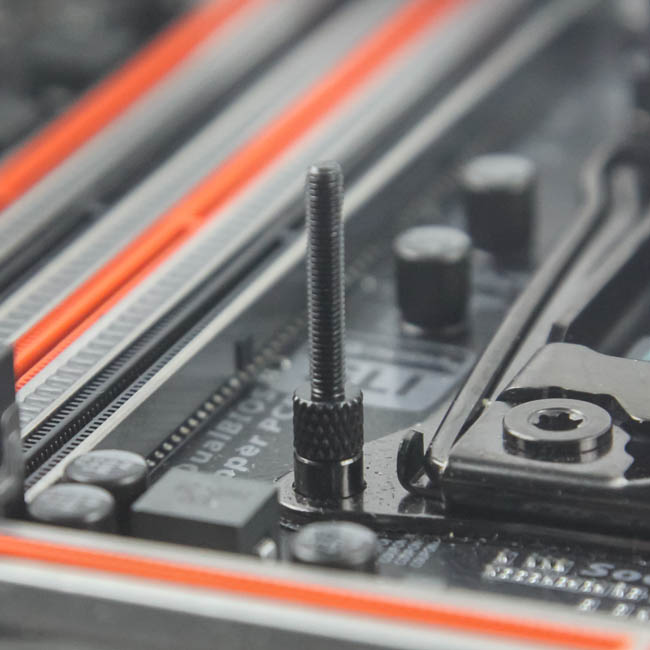
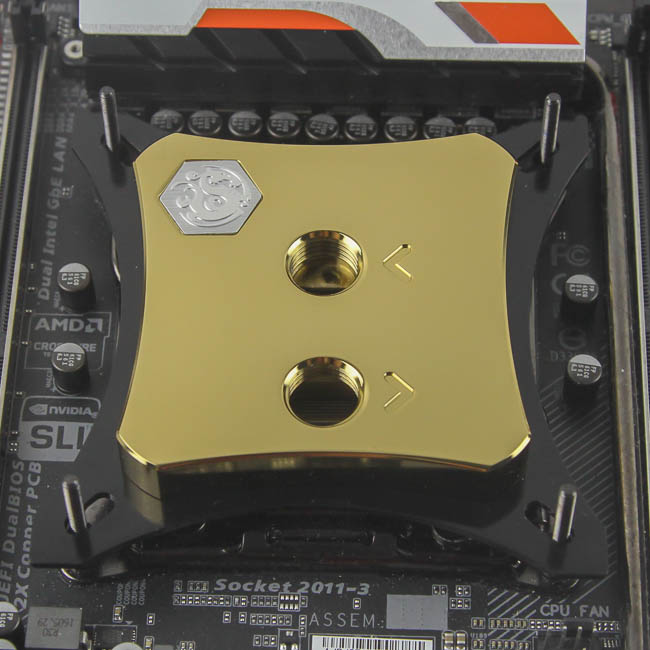
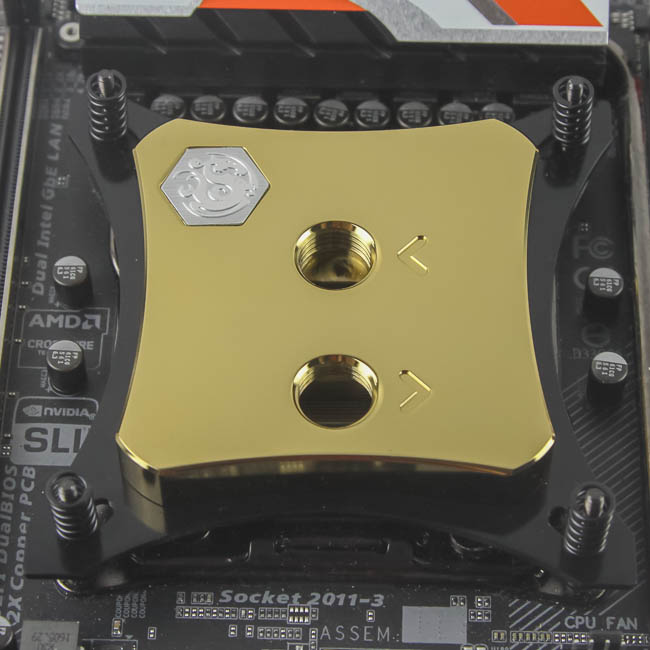

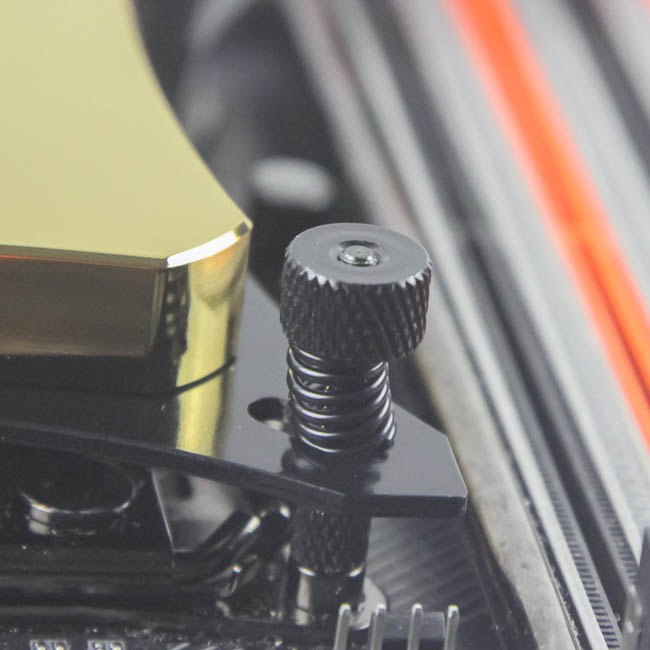
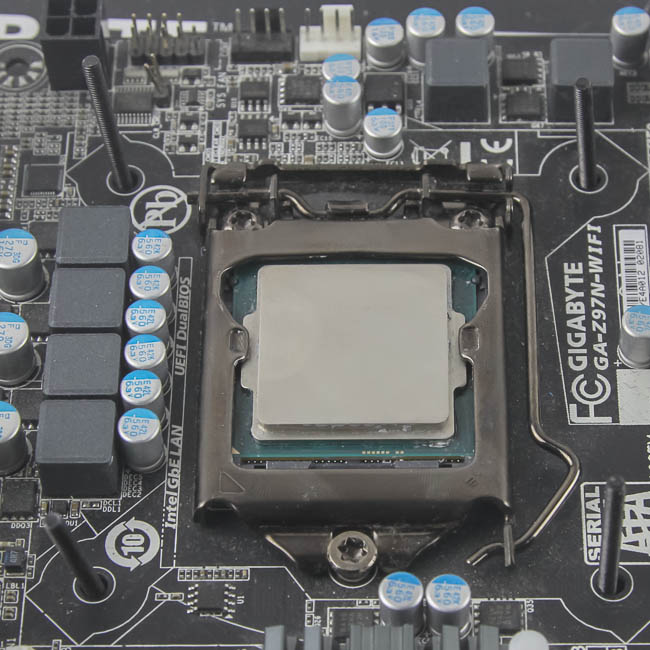
Installing a CPU waterblock is easiest on Intel LGA 2011(-3), owing to the built-in socket backplate. Simply screw the four LGA 2011(-3) mounting posts into the cooler's mounting holes around the socket, apply some thermal paste to the CPU IHS, and place the CPU block over the IHS, with the mounting posts holding it in place through the mounting bracket. Once done, place one spring, each, over the posts to then use the locking nuts to tighten the block in a diagonal manner, applying even pressure to the block for best mounting. Since the locking nuts are open, this is not a precise installation and involves some trial and error. Bitspower recommends having the locking nuts be level with the top of the mounting posts as seen in the final picture above, but this block was also designed with Intel socket 1151 in mind, and I found that going two more revolutions in per locking nut gave me better thermal paste spread for my particular CPU IHS and Gelid GC-Extreme paste. Since Bitspower does not provide any thermal paste, I will not cover the spread in more detail, and as always, I recommend removing the block and checking the paste's spread before trying again and finalizing it for your specific case. The CPU block's orientation, i.e. whether the ports are perpendicular or parallel to the RAM slots, also plays a small role, depending on the die structure of the CPU. In particular, having the ports be up-down is generally better with LGA 2011(-3) in my experience.

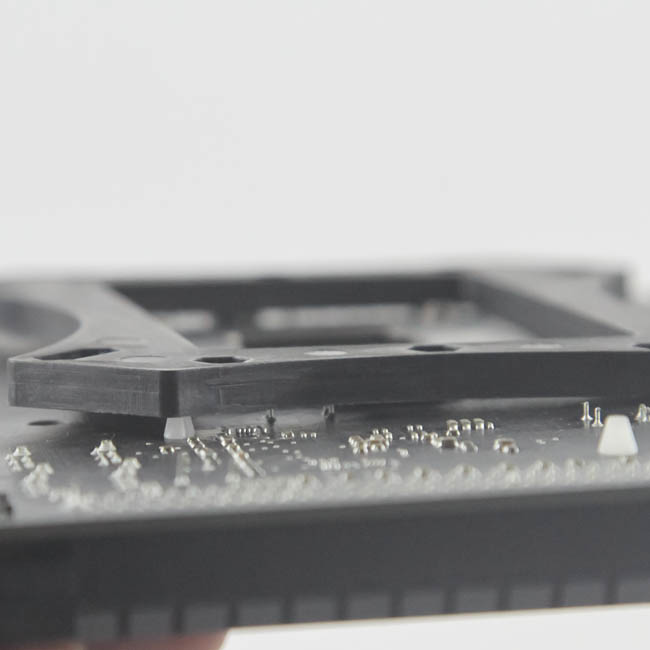


Things are a bit more complicated on LGA 115x as you have to use the provided backplate, and as I have come to find out, it is not universally compatible. With mITX and mATX motherboards getting more and more popular, the larger-than-average backplate provided does not account for any tall objects on the back of a motherboard - this includes M.2 slots, heatsink mounting for the PCH, or simply any solder peaks left over that are too tall. This led to the backplate not having a flush fit with the back of my demo motherboard here, although it was fine with the motherboard I actually use for thermal testing. Assuming it is fine for you too, you now have to navigate the four screws through the backplate and the holes in the motherboard PCB, flip over the whole assembly, place a plastic washer through each screw, and use the screw nuts to secure the screws in place. Once done, you would do the same as before - apply some TIM to the CPU IHS, place the block over it, place the springs, and lock them in place using the locking nuts. However, one of the screw nuts was not threaded correctly here as can be seen, and this meant that I could not install the block on a LGA 115x motherboard. I did try every single combination of nut and screw, but to no avail, and I do not have any other Bitspower CPU blocks here to see if the mounting was the same. I am shocked this went through any quality control checks as a block marketed for Kaby Lake processors thus is simply not capable of being used on one.
It is highly likely that this is a one-off manufacturing/QC error, but this means I will just test thermal performance on my LGA 2011-3 setup. Another thing to note is that you may well need a Phillips screwdriver for proper installation.
May 6th, 2024 03:39 EDT
change timezone
Latest GPU Drivers
New Forum Posts
- Browser Bechmark scores (97)
- Overheating/undervolt/setup issues (4)
- reinstalled kingdom come deliverance and getting very poor fps (2)
- MSI 5700XT rom flash issue (5)
- Only some humans can see refresh rates faster than others, I am one of those humans. (145)
- [HELP] AMD GPU FINDING BIOS PROBLEM (12)
- Adventure: Running 8/9th gen Coffee Lake CPUs on Z170 motherboard (ASUS Maximus VIII Ranger) (337)
- Apparently Valve is giving refunds on Helldivers 2 regardless of hour count. Details inside. (89)
- Strange system crashes out of nowhere, help (28)
- How to check flatness of CPUs and coolers - INK and OPTICAL INTERFERENCE methods (113)
Popular Reviews
- Finalmouse UltralightX Review
- ASRock NUC BOX-155H (Intel Core Ultra 7 155H) Review
- Meze Audio LIRIC 2nd Generation Closed-Back Headphones Review
- Cougar Hotrod Royal Gaming Chair Review
- Upcoming Hardware Launches 2023 (Updated Feb 2024)
- Montech Sky Two GX Review
- AMD Ryzen 7 7800X3D Review - The Best Gaming CPU
- HYTE THICC Q60 240 mm AIO Review
- ASUS Radeon RX 7900 GRE TUF OC Review
- Logitech G Pro X Superlight 2 Review - Updated with 4000 Hz Tested
Controversial News Posts
- Intel Statement on Stability Issues: "Motherboard Makers to Blame" (240)
- Windows 11 Now Officially Adware as Microsoft Embeds Ads in the Start Menu (167)
- AMD to Redesign Ray Tracing Hardware on RDNA 4 (156)
- Sony PlayStation 5 Pro Specifications Confirmed, Console Arrives Before Holidays (117)
- AMD's RDNA 4 GPUs Could Stick with 18 Gbps GDDR6 Memory (114)
- NVIDIA Points Intel Raptor Lake CPU Users to Get Help from Intel Amid System Instability Issues (106)
- AMD Ryzen 9 7900X3D Now at a Mouth-watering $329 (104)
- AMD "Strix Halo" Zen 5 Mobile Processor Pictured: Chiplet-based, Uses 256-bit LPDDR5X (103)