 9
9
Cooler Master Mastercase H500 Review
Value & Conclusion »Test System
| System Parts for Case Reviews | |
|---|---|
| Processor: | Intel Core i5-8600K |
| Motherboards: | ATX: MSI Z370 GAMING PRO CARBON AC MATX: Z370M GAMING PRO CARBON Mini-ITX: MSI Z370i GAMING PRO CARBON Provided by: MSI |
| Graphics Card: | Long: ASUS Radeon RX580 Short: HIS Radeon 5350 HD |
| Memory: | 16 GB XPG Dazzle DDR4 2800 MHz CL17-17-17 1.25 V 32 GB GB XPG SPECTRIX D40 3000 MHz. CL16-18-18 1.35 V 16 GB XPG GAMMIX D10 DDR4 2400 MHz CL16-16-16 1.20 V Provided by: ADATA |
| HDD: | Western Digital 320 GB 7200 RPM |
| SSD: | ADATA XPG SX850 256 GB ADATA Ultimate SU800 3D 256 GB ADATA Ultimate SU700 240 GB Provided by: ADATA |
| Power Supply: | Antec High Current Gamer 650 W Antec High Current Gamer 750 W Provided by: Antec |
| Cooling: | be quiet! Dark Rock 4 be quiet! Pure Slim be quiet! Shadow Rock 2 be quiet! Shadow Rock LP Provided by: be quiet! |
Assembly
Installing a motherboard inside the Mastercase H500 is done by traditional means, with the use of spacers and screws. There is loads of space alongside the top and front edges, which should make connecting everything possible.


Cooler Master has done away with the simple SSD trays found in the P variant and Cosmos C700P. Instead, you are now meant to use thin pins that are screwed into the drives. Once installed, you may simply push them into one of six available spots. This is a very convenient way of installing these, and the sandwiched location between motherboard tray and side panel means you should not have to worry about them coming loose during transport.


To install the 3.5" drives, simply pull any of the trays out and fill them with the storage device—no screws or tools needed.


Once filled, just push the tray into place and swing the front cover closed until it snaps into place on to the cage. This setup pretty much hides the whole drive from view, which makes the lack of a shroud in this area is quite alright.


Installing a power supply is done by traditional means as soon as you have removed the shroud. Simply screw it down and route the cables before putting the cover back on. As you can see, there is plenty of space, so you should not have to worry when utilizing longer PSUs of higher capacity.

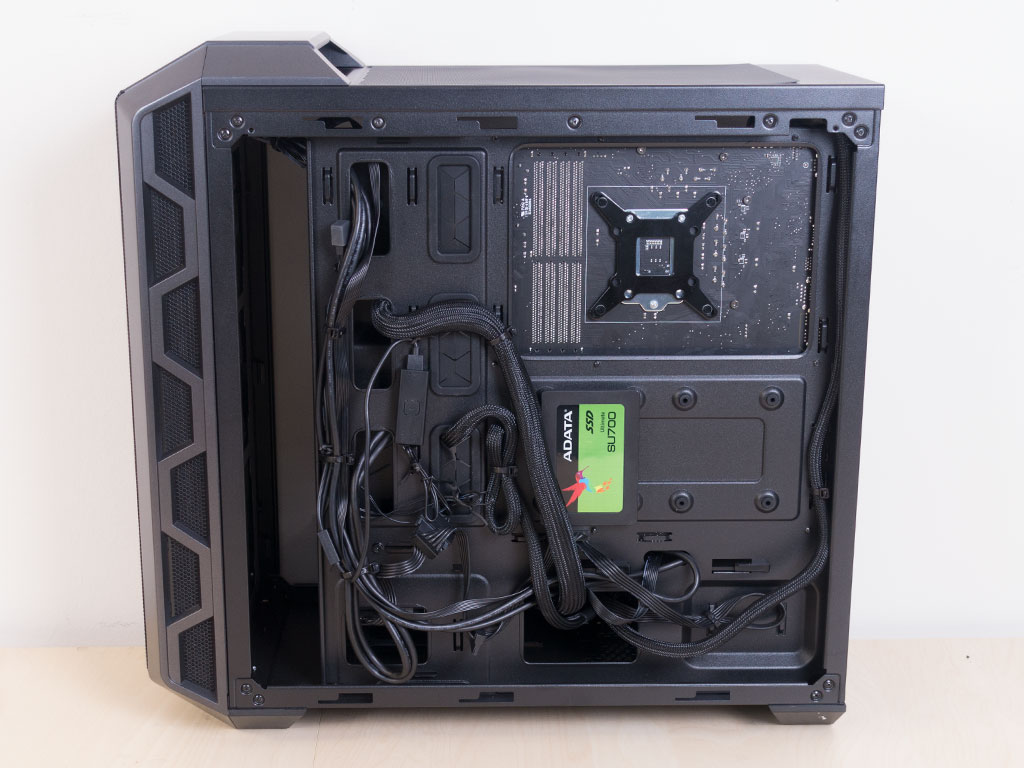
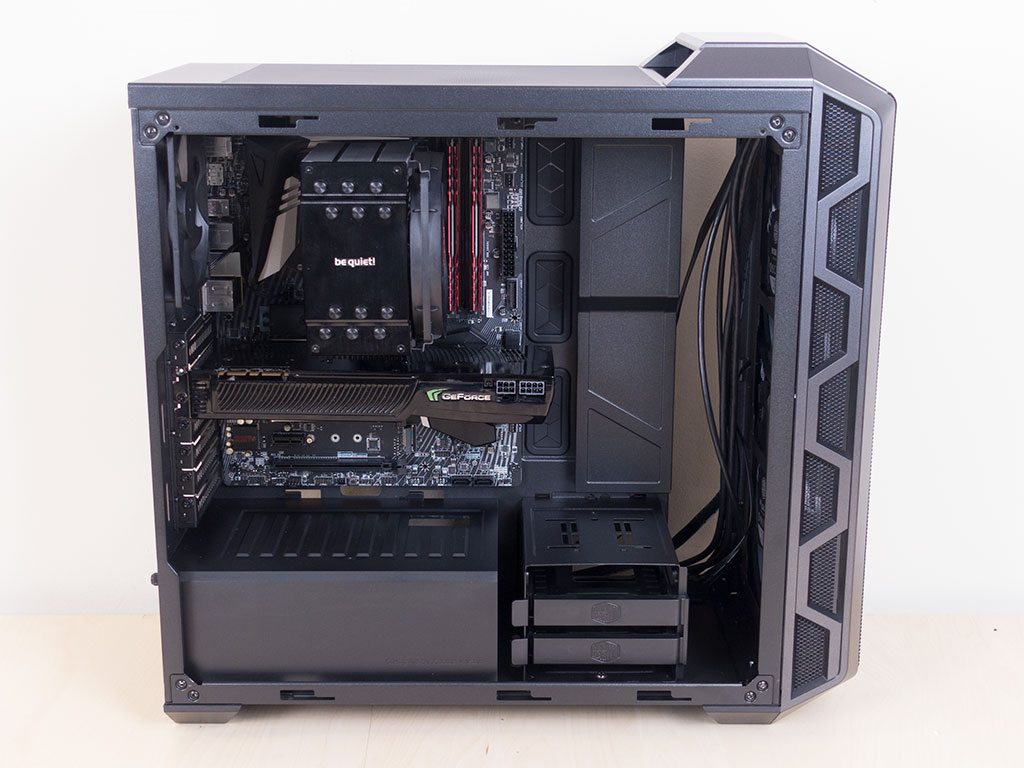
With everything installed, the Cooler Master Mastercase H500 makes an incredibly clean impression. The interior of the case essentially has no visible cables with the exception of the necessary GPU PCIe leads. In the rear, everything can be secured quite well due to the numerous cable hooks. As you can see, I have installed the in-line RGB controller in a way that at least allows me to press the button easily once the side panel is removed. Cooler Master mentions that you can opt to re-purpose the reset button to switch through the RGB LEDs as well.
Finished Looks


With the included RGB controller, you are able to manually switch between five color options alongside some animations. As the fan uses a standard 4-pin connector for the lighting effects, it should be universally compatible with motherboards that offer software control. I feel like Cooler Master has missed an opportunity to use aRGB, but considering none of the classic H-Series enclosures offer that type of lightning, I was not really expecting it. You will have to spring for a fancy version to get that feature.


In the rear, everything is where you would expect it to be, and thanks to the very light tint on the glass panel, you are clearly able to show nicely off your hardware to curious onlookers.
Jun 14th, 2024 00:11 EDT
change timezone
Latest GPU Drivers
New Forum Posts
- PhysXs (0)
- Should i upgrade my cpu (rtx 4070) ? (4)
- Which new games will you be buying? (327)
- RX 570 8GB runs only on PCIe x2 (17)
- Post your Speedometer 3.0 Score (44)
- Good Bronze 750w PSU (66)
- Amazing moderator acknowledgement (7)
- What do you mostly use your desktop PC for? (Pick your top 3!) (74)
- Insyde software announces AI BIOS! (42)
- PDF editor recommendation? (5)
Popular Reviews
- VAXEE Outset AX Wireless (4K) Review
- Pulsar Xlite V3 eS Review
- Aune AR5000 Headphones + S17 Pro Headphones Amplifier Review
- Upcoming Hardware Launches 2024 (Updated May 2024)
- Intel Lunar Lake Technical Deep Dive - So many Revolutions in One Chip
- AMD Ryzen 7 7800X3D Review - The Best Gaming CPU
- Quick Look: Final UX2000 Wireless Noise Canceling Headphones
- NZXT H6 Flow RGB Review
- Pulsar Xlite V3 Review
- Thermal Grizzly KryoSheet Review - Tested on RX 7900 XTX with 475 W
Controversial News Posts
- Possible Specs of NVIDIA GeForce "Blackwell" GPU Lineup Leaked (131)
- NVIDIA RTX 5090 "Blackwell" Founders Edition to Implement the "RTX 4090 Ti" Cinderblock Design (118)
- Nightmare Fuel for Intel: Arm CEO Predicts Arm will Take Over 50% Windows PC Market-share by 2029 (105)
- AMD Zen 5 Storms into Gaming Desktops with Ryzen 9000 "Granite Ridge" Processors (100)
- Biden Administration to Revive Trump-Era Tariffs on China-made GPUs and Motherboards (95)
- ASRock Innovates First AMD Radeon RX 7000 Graphics Card with 12V-2x6 Power Connector (94)
- AMD Ryzen 9000 Zen 5 Single Thread Performance at 5.80 GHz Found 19% Over Zen 4 (92)
- AMD Outs Ryzen 5000XT Processors for Socket AM4, an 8-year Old Socket (84)