 10
Cooler Master MasterFrame 360 Panorama Review
A Closer Look - Inside »A Closer Look - Outside
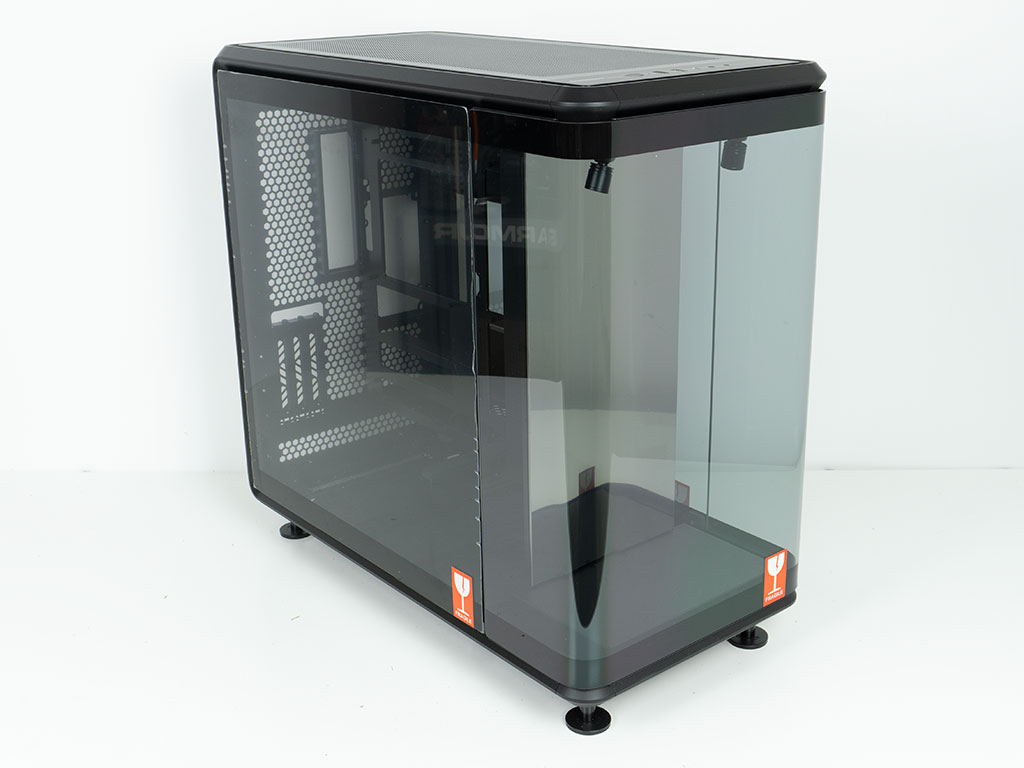
Out of the box, the MasterFrame 360 Panorama is quite a wide and large mid-tower chassis. It is constructed using Cooler Masters's frame system, defined by spines that form the exterior dimensions of a case, with panels secured by screws and magnets. As such you will find soft corners and edges but otherwise straight lines and 90° angles dictating the overall shape and design of the enclosure.
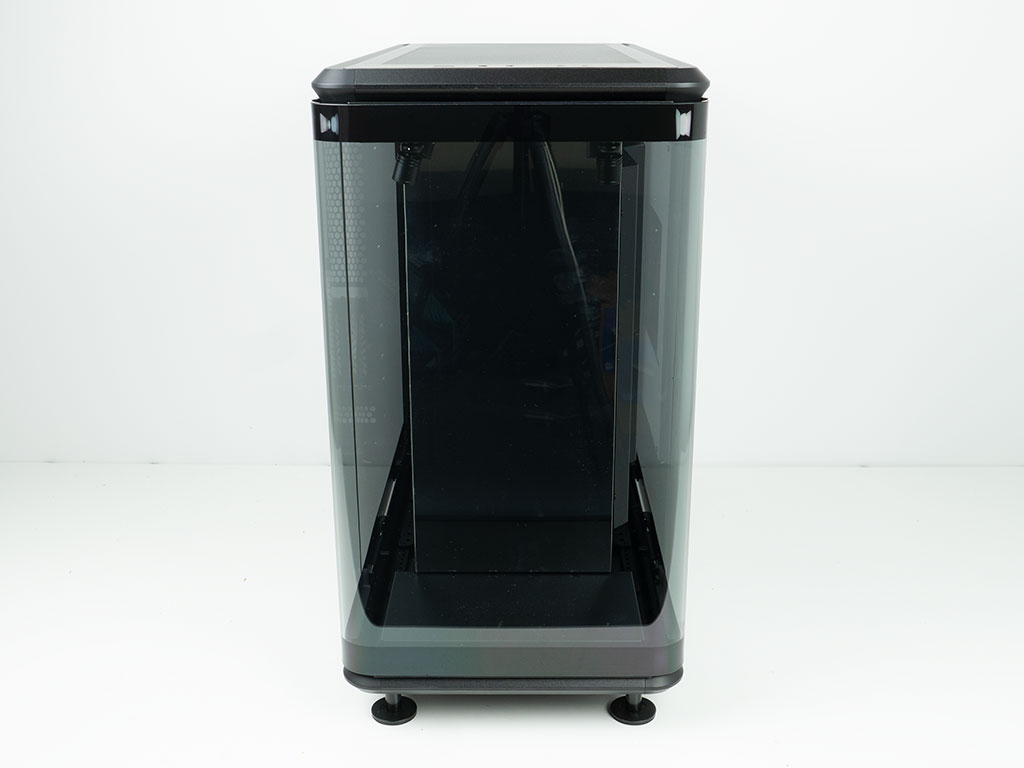
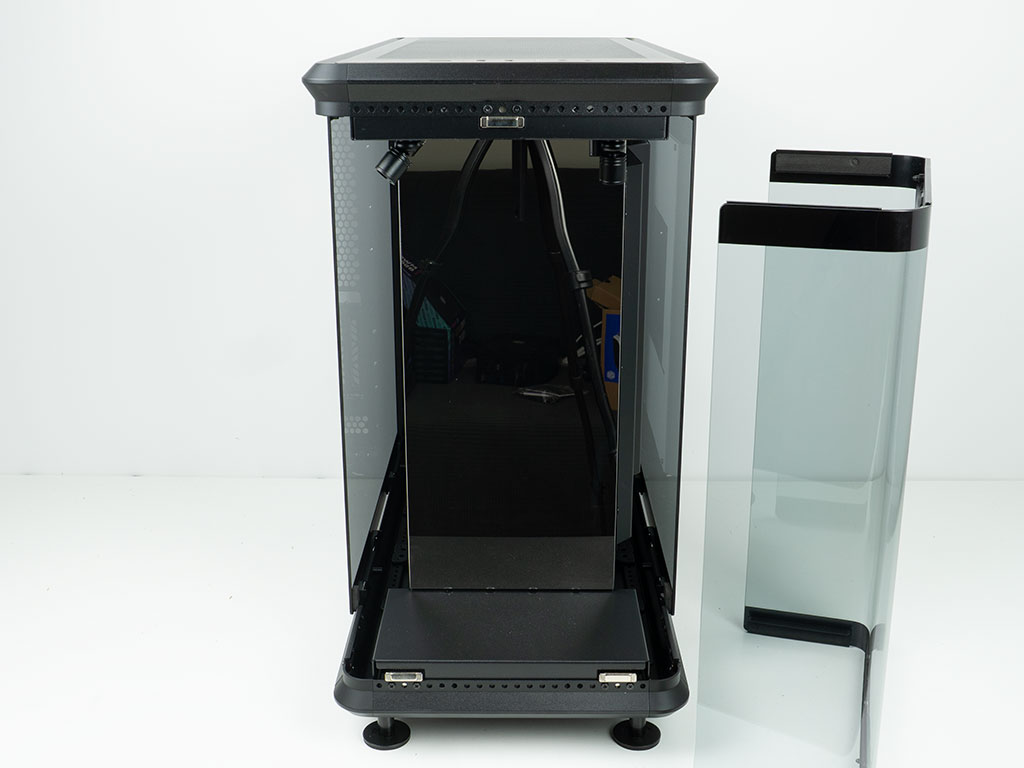
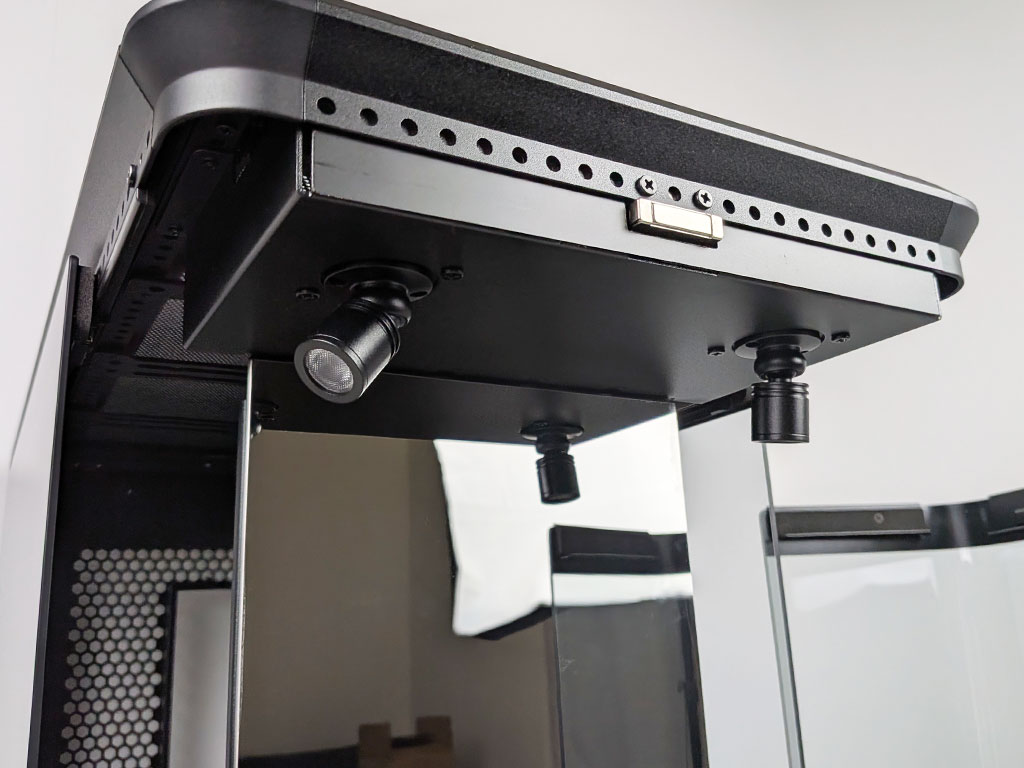
The front of the case is clearly the main USP of the MasterFrame 360 series. The Panorama variant includes a glass panel around the stage area in the front. It is made of a single piece of glass with two nice bends in it, held in place by sufficiently strong magnets which are screwed into the frame element of the enclosure. The backdrop of the stage portion is a mirror, which ships with a clear plastic protective layer to ensure it doesn't get scratched. In the ceiling you will find two RGB stage lights, which you can angle to perfectly light up whatever collectible you decide to place on this stage. Yes the case is on a stage with studio lights visible in the mirror, and has a stage of its own - we are meta that way, apparently.
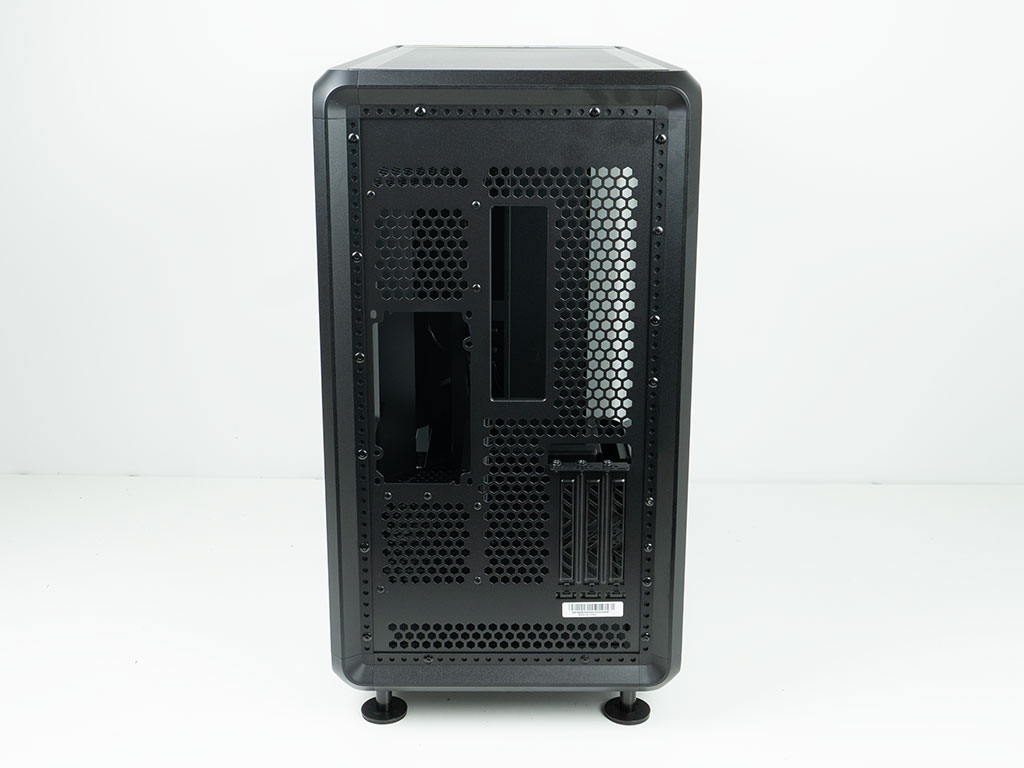
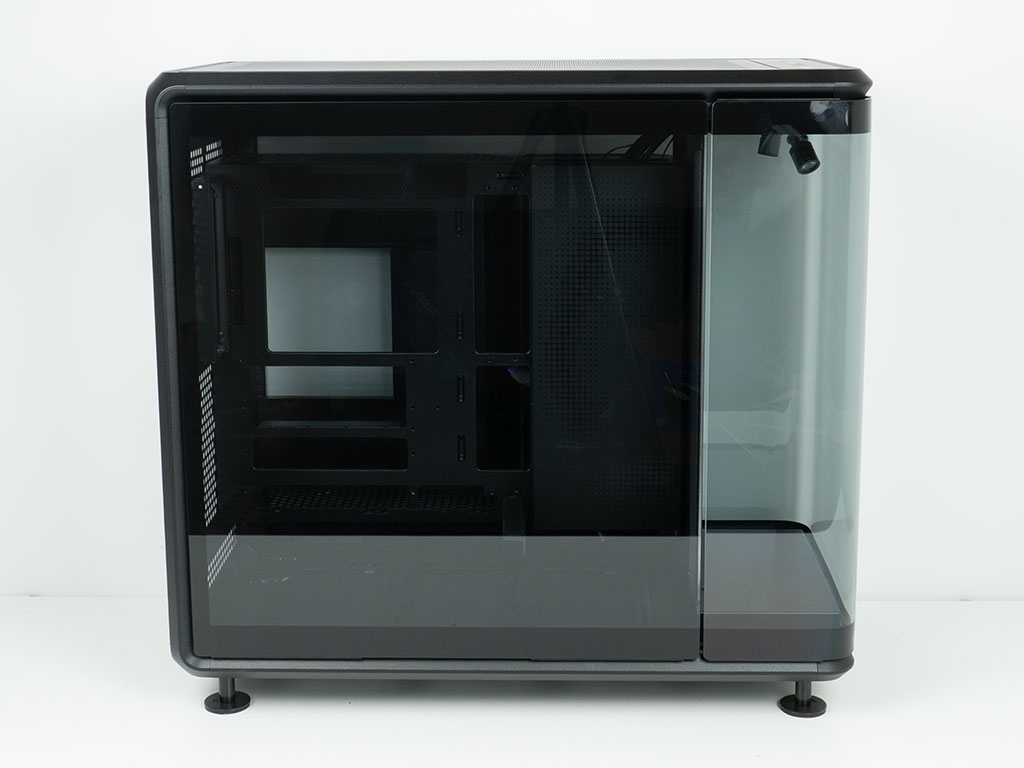
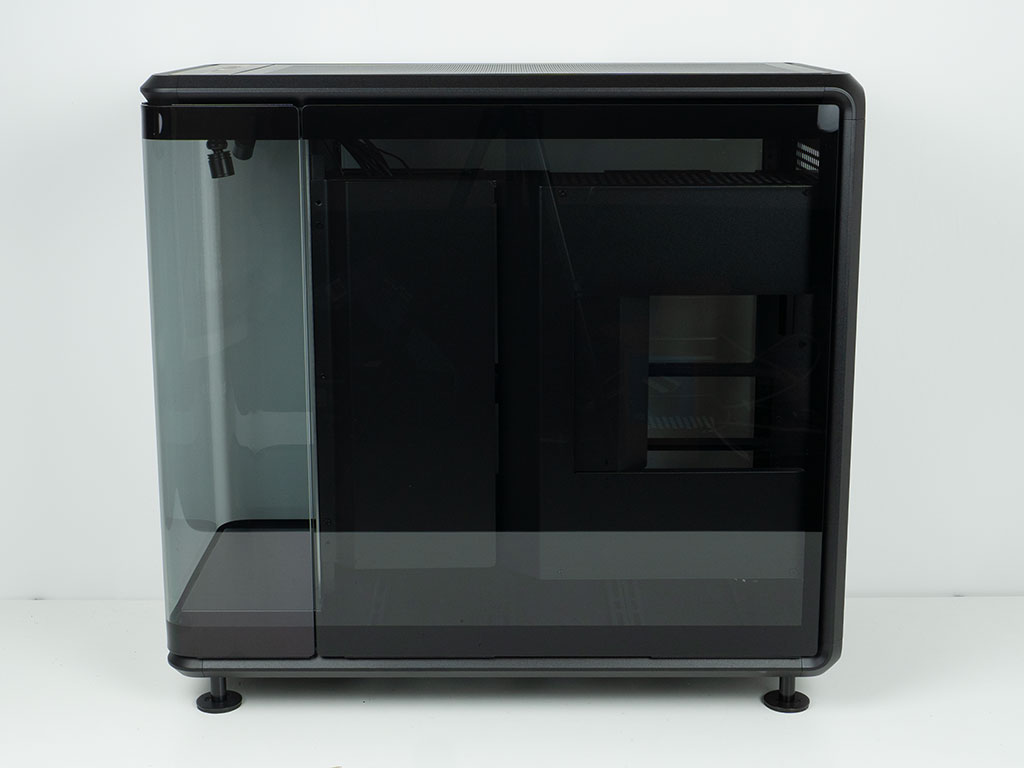
In the rear, we can see that Cooler Master has secured a single metal panel with cutouts that clearly make the MasterFrame 350 a dual-chamber case. That said, this one is hovering at mid-height, as we will see once we dive into the interior. Both side panels are also made of glass and are likewise secured using multiple strong magnets, which work surprisingly well. You may notice slight scratches on the main side panel. This is because the inner cable/storage cover is not secured properly during shipping. I do hope Cooler Master will at least tape it down, so it won't come loose like it did in our sample.
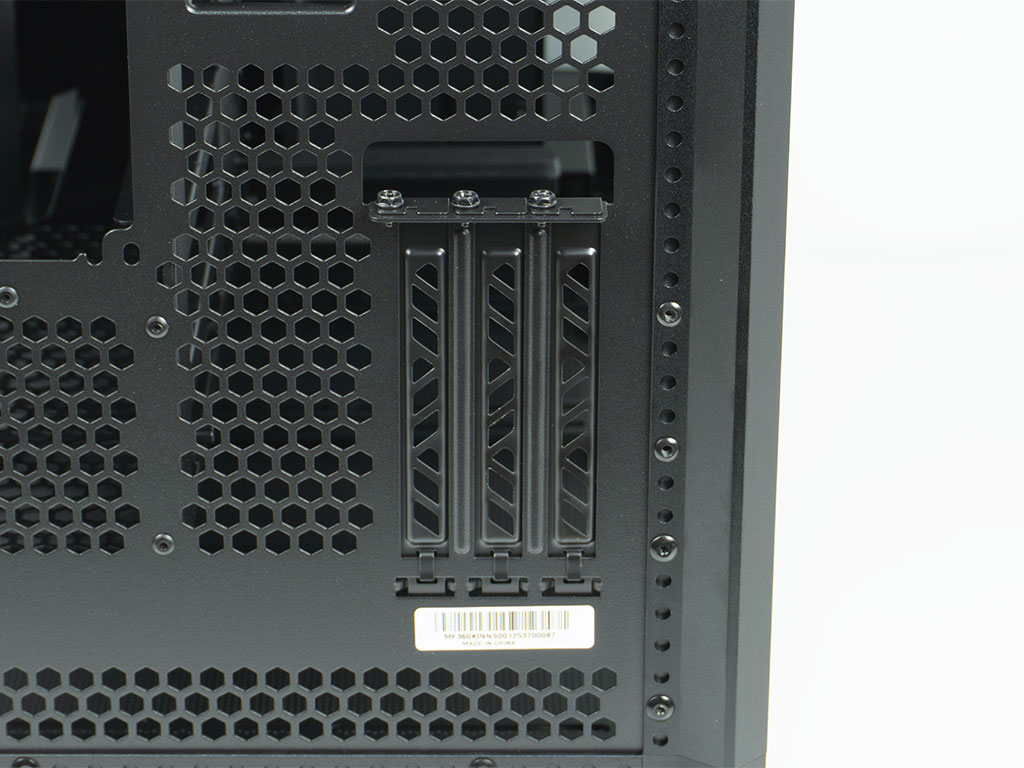
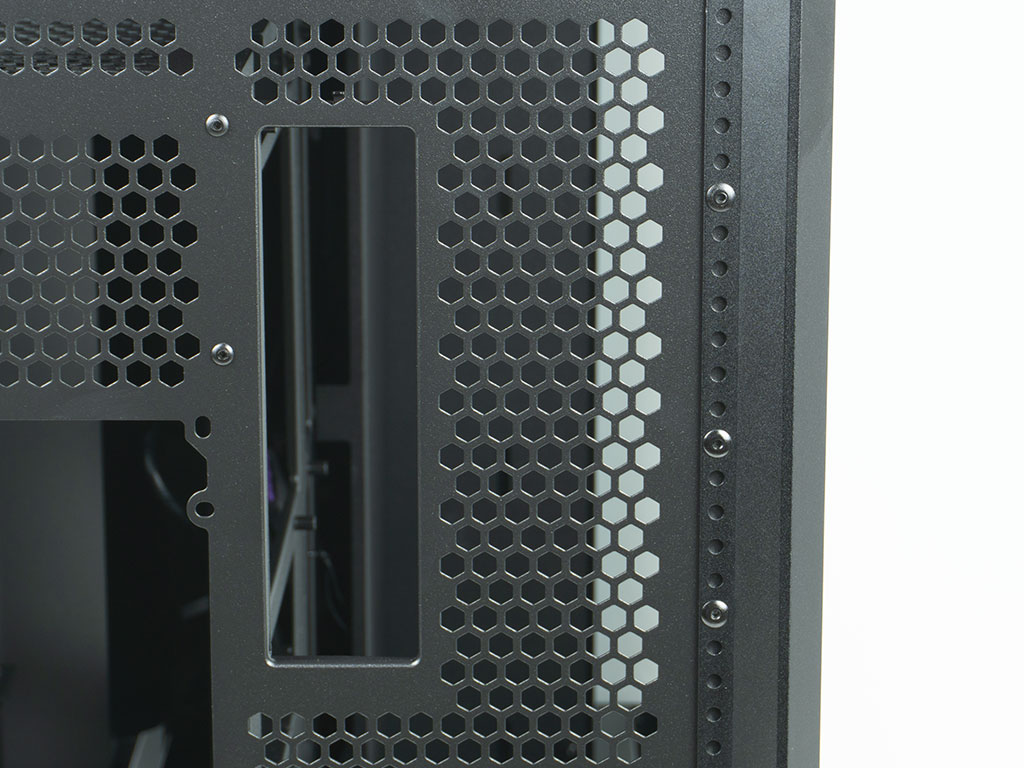
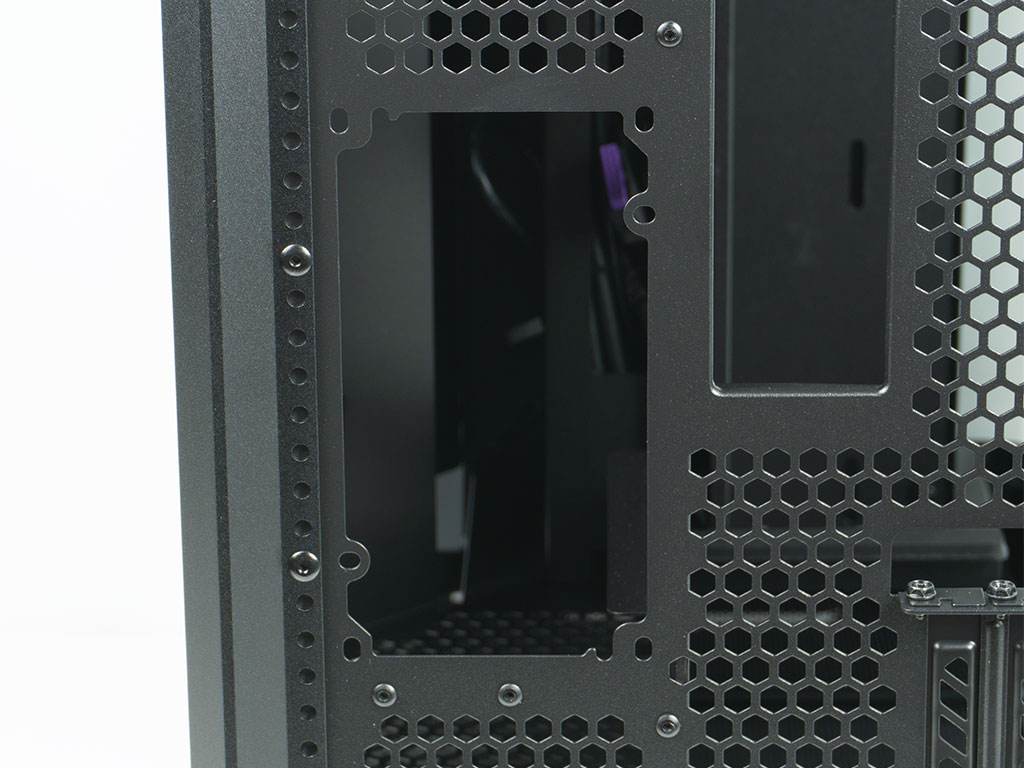
Even though the MasterFrame 360 is quite wide, Cooler Master has explicitly geared it towards showing off your components. On one hand that is the reason it ships with glass all around, but it's also why it ships with three vertical expansion slots. There is a bit of room to the right of these, so those of you with 3.5 slot thick GPUs won't have any issues either. That said, the closer your GPU is to the glass the warmer it will get. Above that, there is simply a cutout for the motherboard backplate. Cooler Master has wisely placed the PSU bay at mid-height behind the motherboard tray. This avoids blocking any access to any headers and plugs when employing a BTF equipped motherboard.
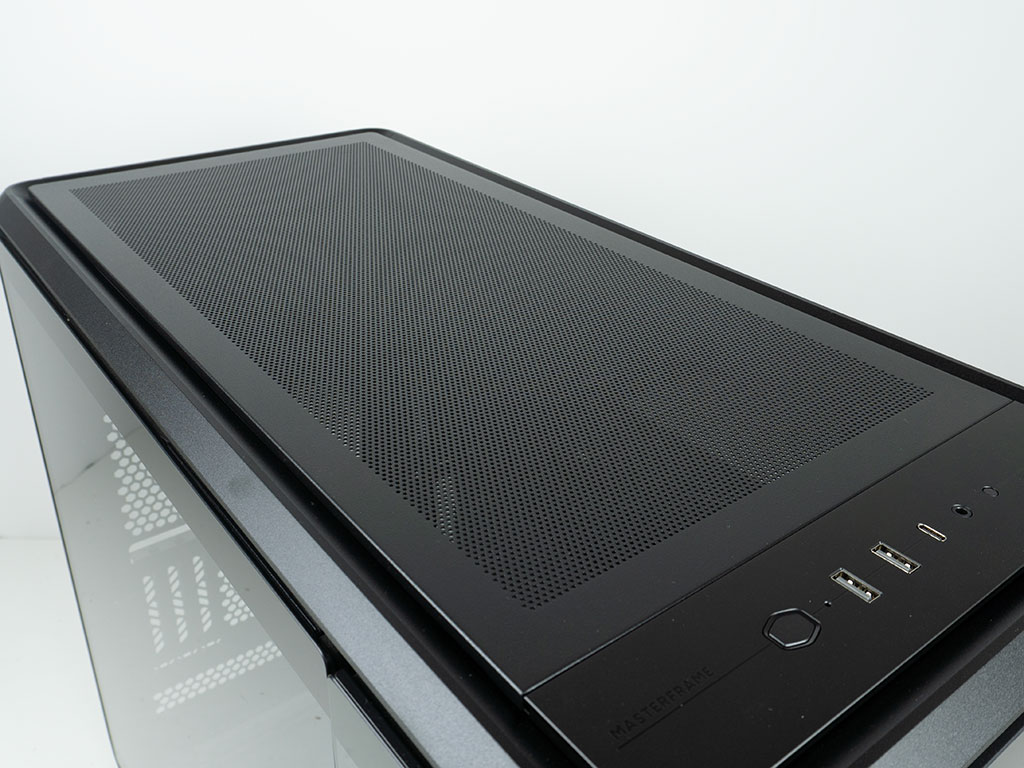
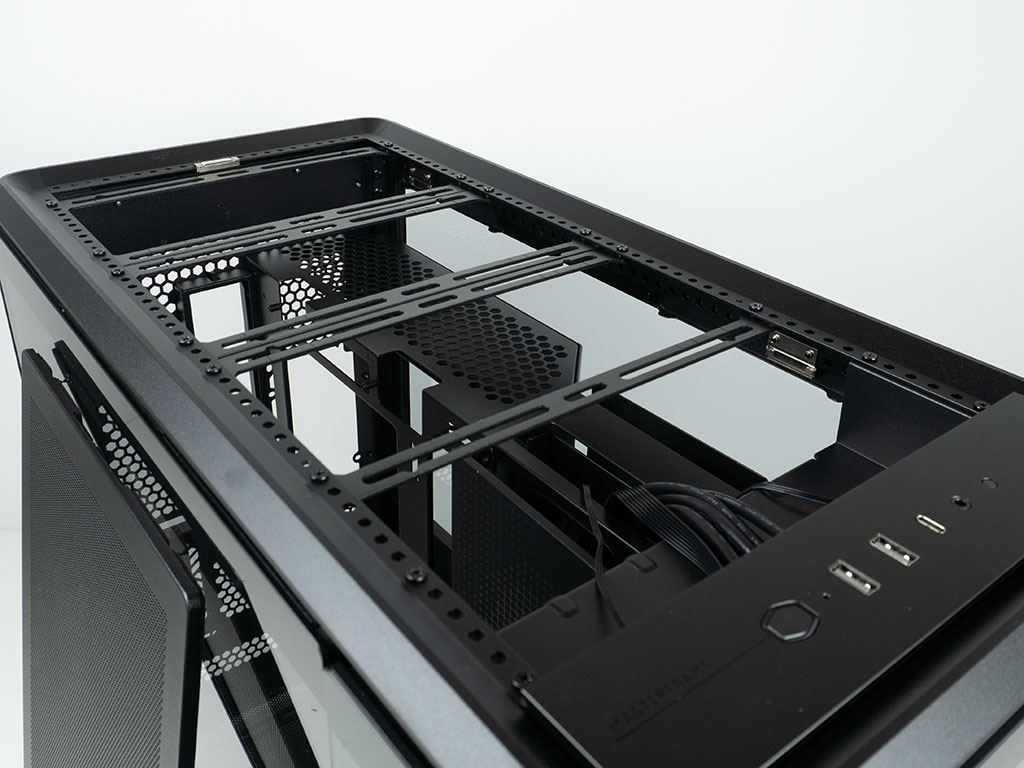
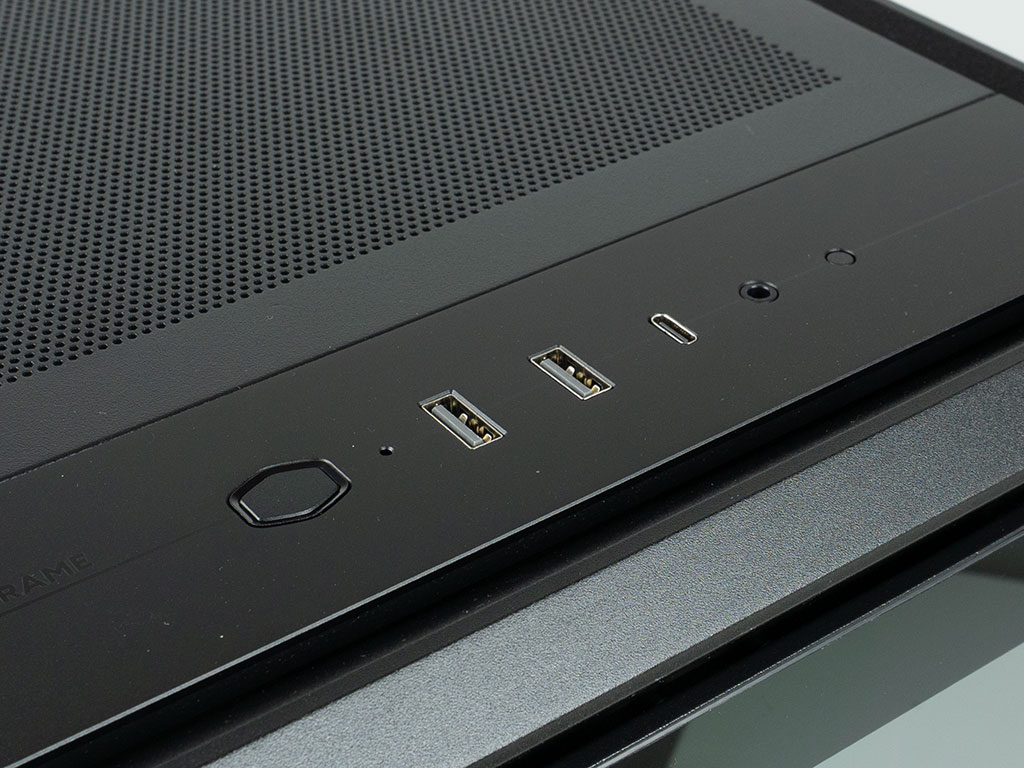
The top cover is made of metal and is equipped with a fairly fine mesh vent, which also acts as a basic dust filter. It is also attached well using magnets, so accessing the area underneath of it is easy. Here the foundational element of the frame comes into play well, as the MasterFrame can hold up to six 120 mm fans. While you are limited to just two if you go with bigger cooling units, the wide body of the chassis means that you can go well beyond 140 mm with room for a pair of 180 or 200 mm variants. This is also due to how you can simply move the crossbars to the needed location to provide a mounting surface for all these different sizes. Out of the box the MasterFrame 360 Panorama is set up for 120 mm based cooling. For those wanting to use a radiator, you can opt for a unit of up to 360 mm in size. Also at the top, you will find the I/O panel which consists of a power button shaped in the brands diamond, with the usual pair of USB-A alongside a single USB-C and audio combo port. All the USB ports are gray instead of black, which is a nice bit of attention to color. At the opposite end of these ports, you will also find a small reset button.
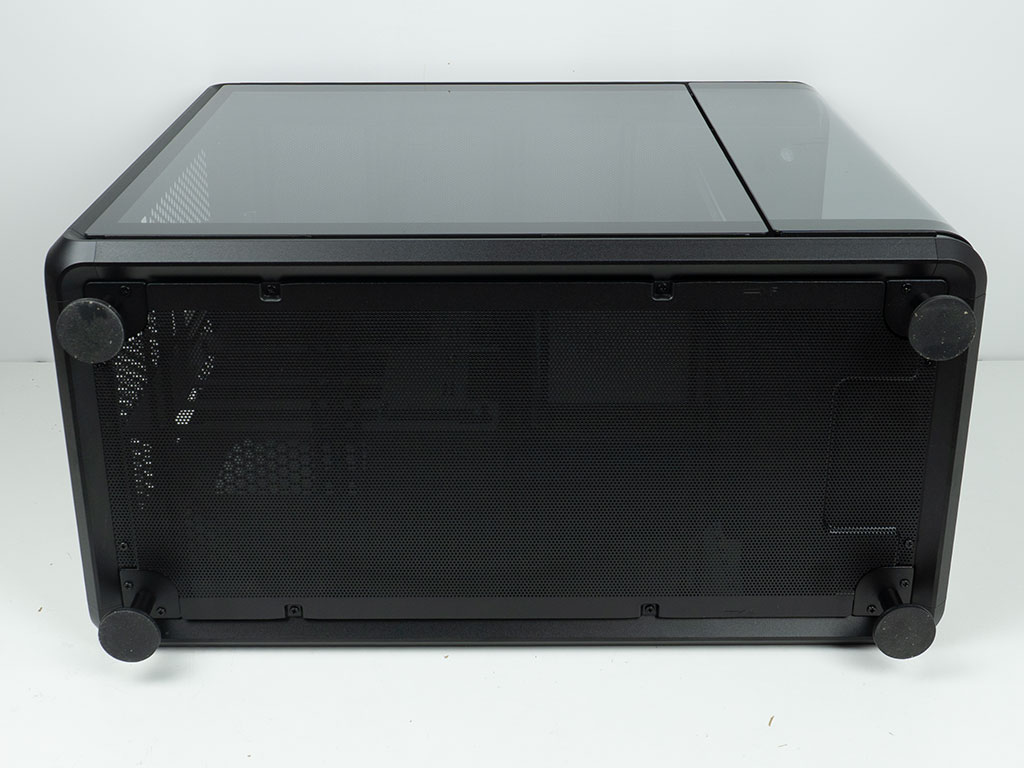
Tipping the case over, the underside is protected by a screwed on vented metal panel. That means any cooling in the floor will get unobstructed access to fresh air, especially thanks to the tall, sturdy feet which are also made of metal. But, Cooler Master could have easily designed this to have a pull-out dust filter, which could be removed from the side of the case. As it is now, you will have to tip over the whole, bulky system to clean this part of chassis.
Nov 21st, 2026 04:41 PST
change timezone
Latest GPU Drivers
New Forum Posts
- WarpCoreBench scores! (88)
- What's your latest tech Freebie? (86)
- TPU's Nostalgic Hardware Club (22179)
- [Poll] 12V-2x6 Connector Protection: What Are You Using? (WireView / Ampinel / Equalizer / Other / Nothing) (50)
- UPS what one to get? (1)
- Anthrophics IPO (28)
- RX 9000 series GPU Owners Club (2252)
- Windows 11 General Discussion (7743)
- Without Jensen, PC gaming will be (52)
- Zen 3 IF/IMC degradation (242)
Popular Reviews
- Microsoft Surface Laptop Ultra Review - The Next-gen Arm Laptop
- Ugreen NASync DXP4800 GT Review
- Corsair RM1200e (Second Generation) Review
- Pulsar Office Tour & First Look at P1 Dual-Sensor Mouse
- Upcoming Hardware Launches 2027 (Updated Nov 2026)
- Acemagic Retro X3 Review
- Biwin Black Opal NV7400 2 TB Review
- AMD Ryzen 7 9800X3D Review - The Best Gaming Processor
- AMD Zen 6 Technical Deep Dive
- Chieftec Iceberg PRO 360 DARK Review
TPU on YouTube
Controversial News Posts
- NVIDIA Co-Founder and CEO Jensen Huang Officially Resigns (491)
- Report: Jensen Huang Eyes NVIDIA Comeback (257)
- Open Letter Asking NVIDIA to Reinstate Jensen Huang Passes 115,000 Signatures (184)
- OpenAI CEO Argues Home PCs Waste the World's Limited DRAM Supply (152)
- NVIDIA Launches Investigation Into Jensen Huang's Relationship With Suspected Chinese Spy (136)
- Intel "Raptor Lake Next" 16-Core and 20-Core CPUs Surface (130)
- Legendary Game Studio BioWare Shuts Down Following EA Layoffs (104)
- NVIDIA GeForce RTX 50-Series Scheduled for up to $500 Price Hike This Week (89)