 27
27
Corsair Carbide 400R Review
Value & Conclusion »Assembly

Installing the mainboard is an easy task. Simply screw it down with the parts provided. As you can see, there is plenty of space for even the largest CPU coolers and graphics cards, while all the cables can be routed through one of the openings in the mainboard tray.


Installing a 3.5 inch hard drive is a simple matter of snapping the tray unto it and sliding it into the desired slot. With a 2.5 inch one, you have to remove one metal pin and are then able to screw the drive unto the tray, which can then be pushed into the bay just the same.


Once ready, just slide the trays back into the case until they snap into place. These hold rather well, so you won't have to worry about the drives during transportation.
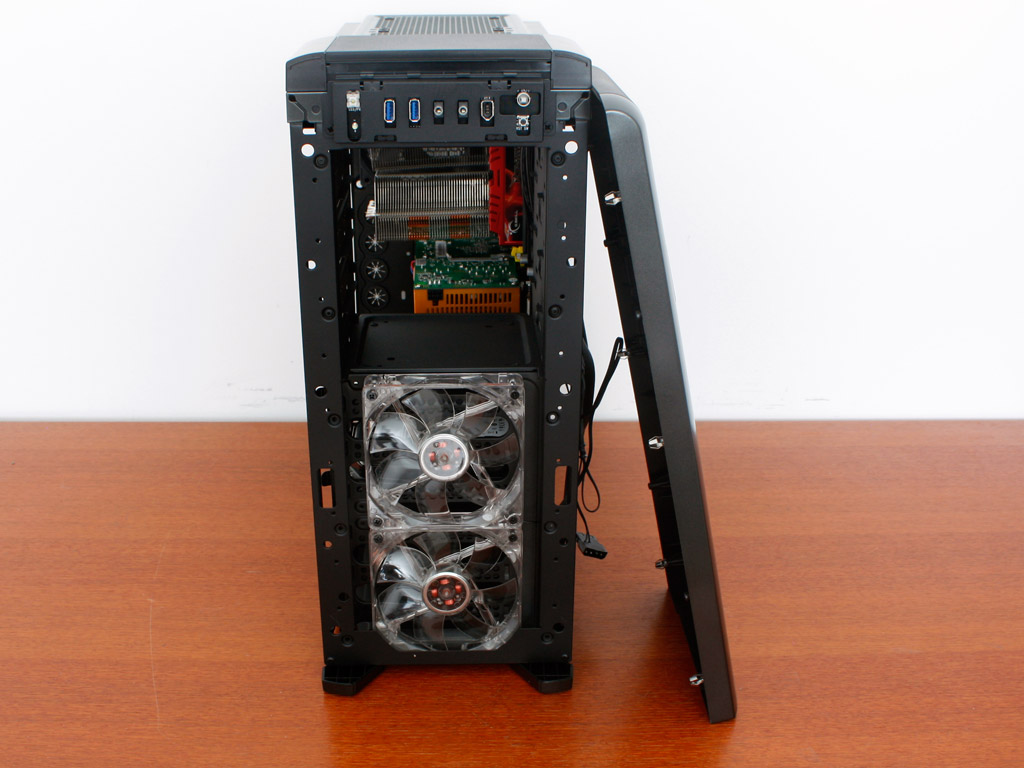


To gain access to the front drive bay covers, one has to remove the entire front. This also reveals the two 120 mm fans. These are completely clear and have white LEDs built into them. Once the bay is accessible, just slide the drive in until the plastic lock snaps into place. We have seen similar locks in the 650D and 600T. While this one is not constructed as elaborate, it does the job just fine as well. You will not need to use any screws under normal circumstances.

Last but not least, installing the power supply proved blissfully uneventful. It fits perfectly and is held in place by the four black screws provided.


Once everything is connected, you can see that the cable management still works like a charm, even though there are less openings in the Carbide 400R compared to its more expensive brethren. All the mess is contained behind the mainboard tray.
Finished Looks


Once the panels have been placed back on the chassis, the case makes an excellent impression. The two white LED fans can clearly be seen once turned on. While design is purely subjective, I for one am not too keen on the round edges and round openings for the fans as it collides with the straight lines and edgy extrusion elements of the side panels.


Turning the case around you can still access everything easily here as well and you can also see all the parts within the system clearly through the opening in the side panel. Thanks to the extrusion you are still able to install fans here even though I used a Super Mega CPU cooler, which turns out to be rather tall and tends to collide with installed side panel fans under normal circumstances.
Jun 1st, 2024 06:53 EDT
change timezone
Latest GPU Drivers
New Forum Posts
- what are these partitions and can they be removed? (5)
- Enabling HDR Win 11 LG GN600-B (4)
- computer shuts down during gaming and doesn't turn back on unless i do a power cycle (2)
- Gigabyte am5 motherboard ddr5 not posting when rebooting (48)
- Where are the drives supposed to go? (39)
- FX AMD Radeon RX 580 2048SP BIOS ROM required ?? Please help me (11)
- Z890/X870 feature dreamlist (23)
- What's your latest tech purchase? (20707)
- How do you get games for PC? (0)
- Core counting (48)
Popular Reviews
- ID-Cooling FX360 PRO Review - Shots Fired @ Arctic
- SilverStone KL07E Review
- NuPhy Air96 V2 Low Profile Wireless Mechanical Keyboard Review
- Senua’s Saga: Hellblade II: DLSS vs. FSR vs. XeSS Comparison Review
- Upcoming Hardware Launches 2024 (Updated May 2024)
- Montech Titan Gold 1000 W Review
- Waizowl OGM Cloud Review
- Elysian Acoustic Labs Pilgrim In-Ear Monitors Review
- Ghost of Tsushima Performance Benchmark Review - 35 GPUs Tested
- Senua's Saga: Hellblade II Performance Benchmark Review
Controversial News Posts
- AMD to Redesign Ray Tracing Hardware on RDNA 4 (227)
- NVIDIA to Only Launch the Flagship GeForce RTX 5090 in 2024, Rest of the Series in 2025 (154)
- AMD Hits Highest-Ever x86 CPU Market Share in Q1 2024 Across Desktop and Server (140)
- AMD RDNA 5 a "Clean Sheet" Graphics Architecture, RDNA 4 Merely Corrects a Bug Over RDNA 3 (139)
- NVIDIA RTX 5090 "Blackwell" Founders Edition to Implement the "RTX 4090 Ti" Cinderblock Design (115)
- Core Configurations of Intel Core Ultra 200 "Arrow Lake-S" Desktop Processors Surface (101)
- Biden Administration to Revive Trump-Era Tariffs on China-made GPUs and Motherboards (95)
- NVIDIA Testing GeForce RTX 50 Series "Blackwell" GPU Designs Ranging from 250 W to 600 W (84)