 3
darkFlash DY460 Review
A Closer Look - Inside »A Closer Look - Outside
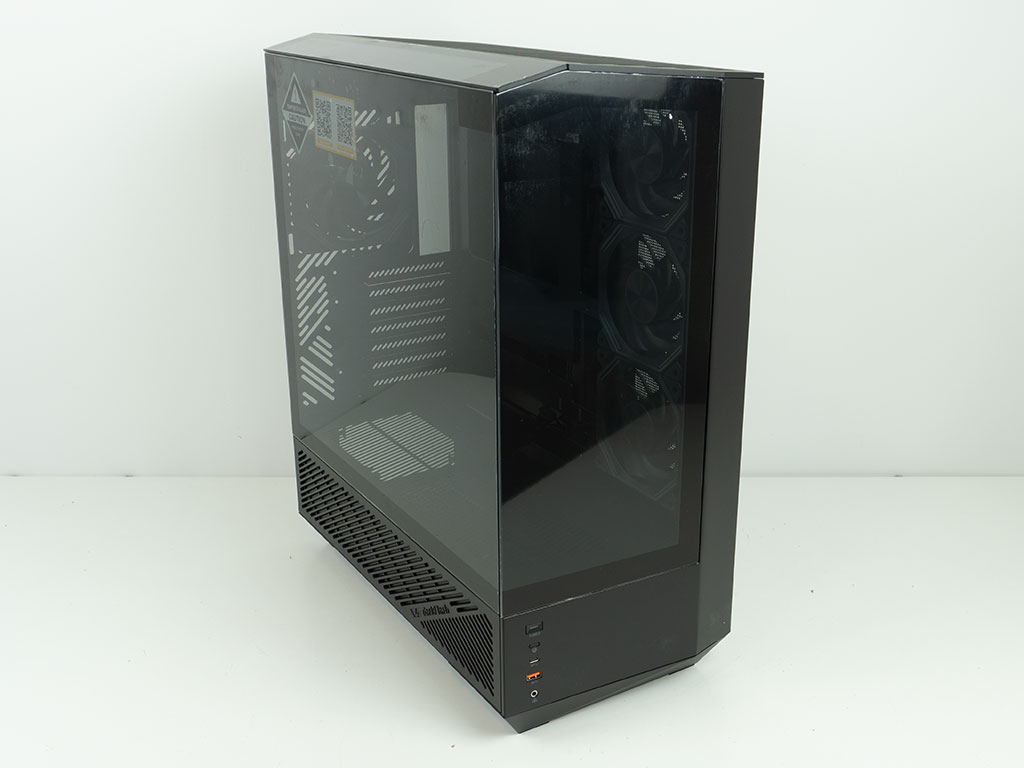
Out of the box, the darkFlash DY460 has a very similar design as the DY470, but is noticeably slimmer and taller. To achieve this, darkFlash had to also change the interior of the chassis to a more traditionally modern layout.
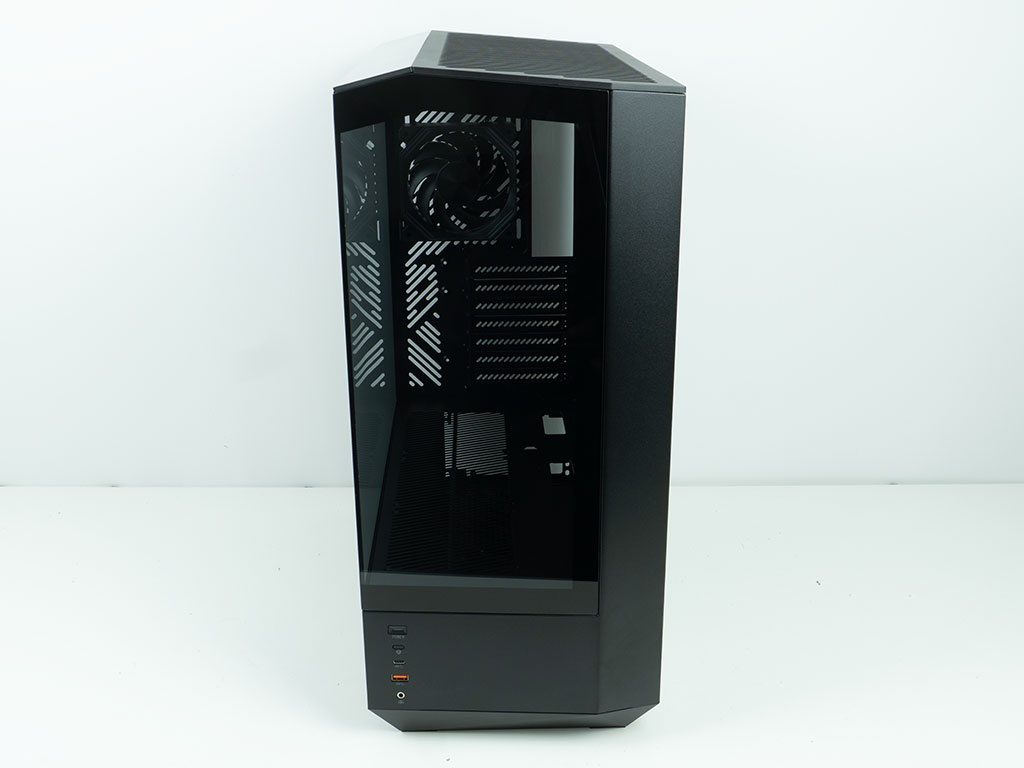
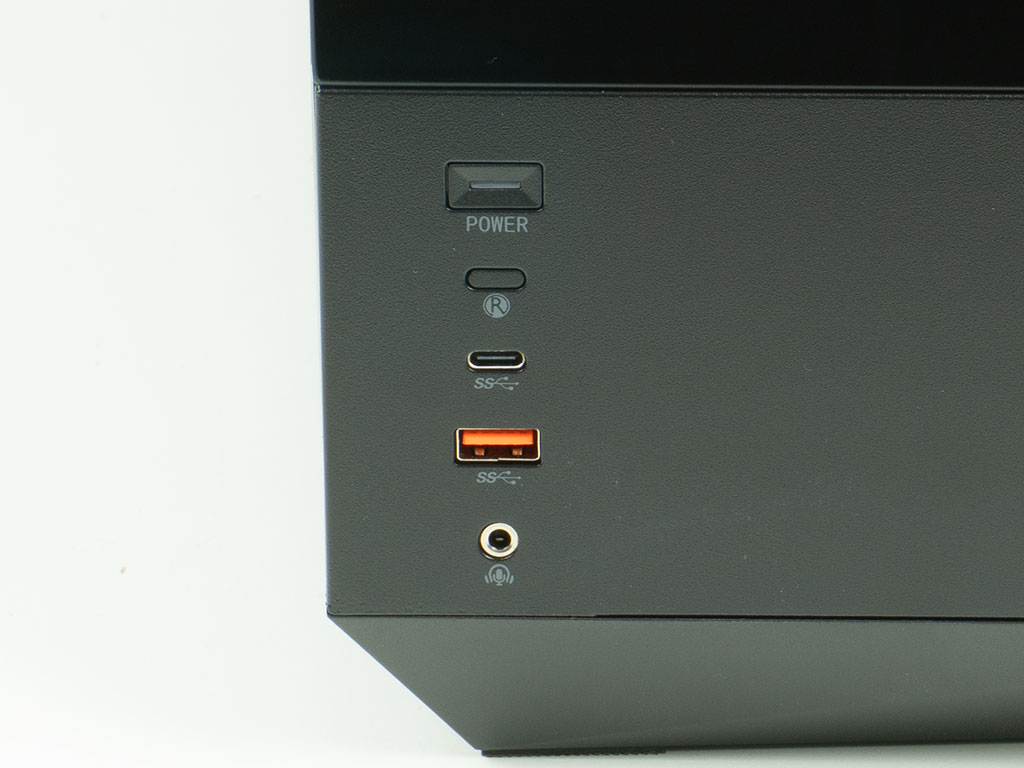
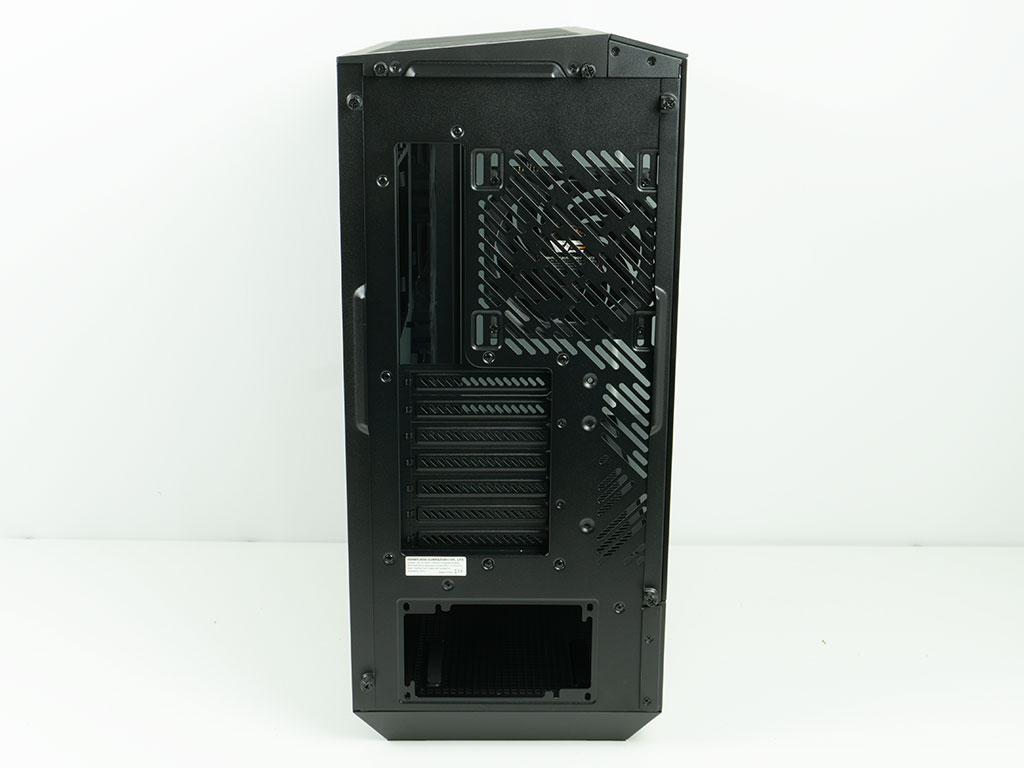
Looking at the front, that translates into a section at the bottom which is now made of solid metal. In fact, it is really nice to see that the solid portion of the front is made of one singular metal panel, with a clean bend to achieve the shape instead of relying on a plastic mold. While the I/O covers all the needed bases, darkFlash only includes a single USB-A 3.0 connector in their signature orange. Here we would have loved to see two to take full advantage of the motherboard header. In the rear of the DY460, it becomes apparent that the major change in layout revolves around the PSU bay, which now is located in the usual position at the bottom of the chassis, while the DY470 sports a dual-chamber design, with the bay next to the motherboard tray.
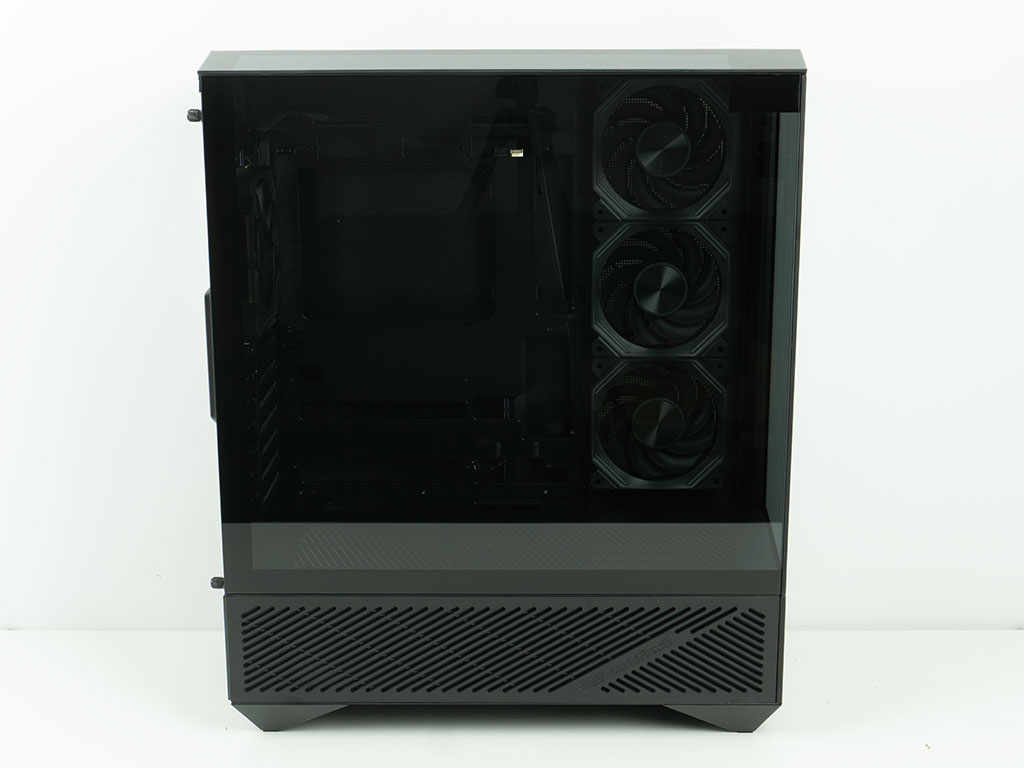
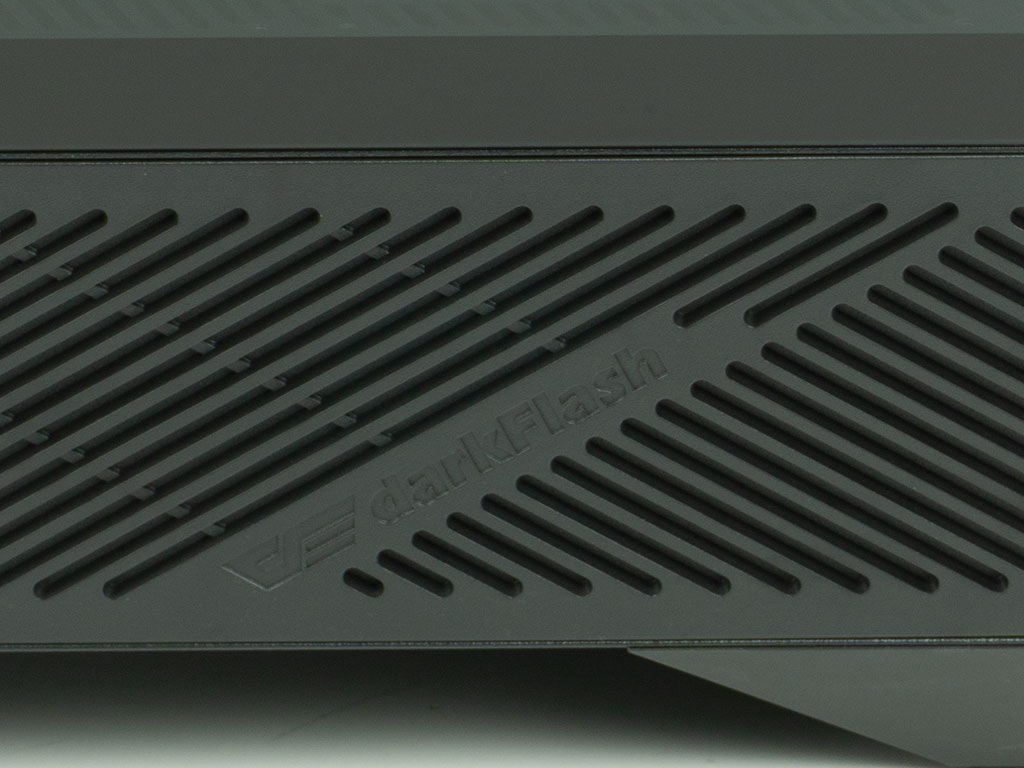
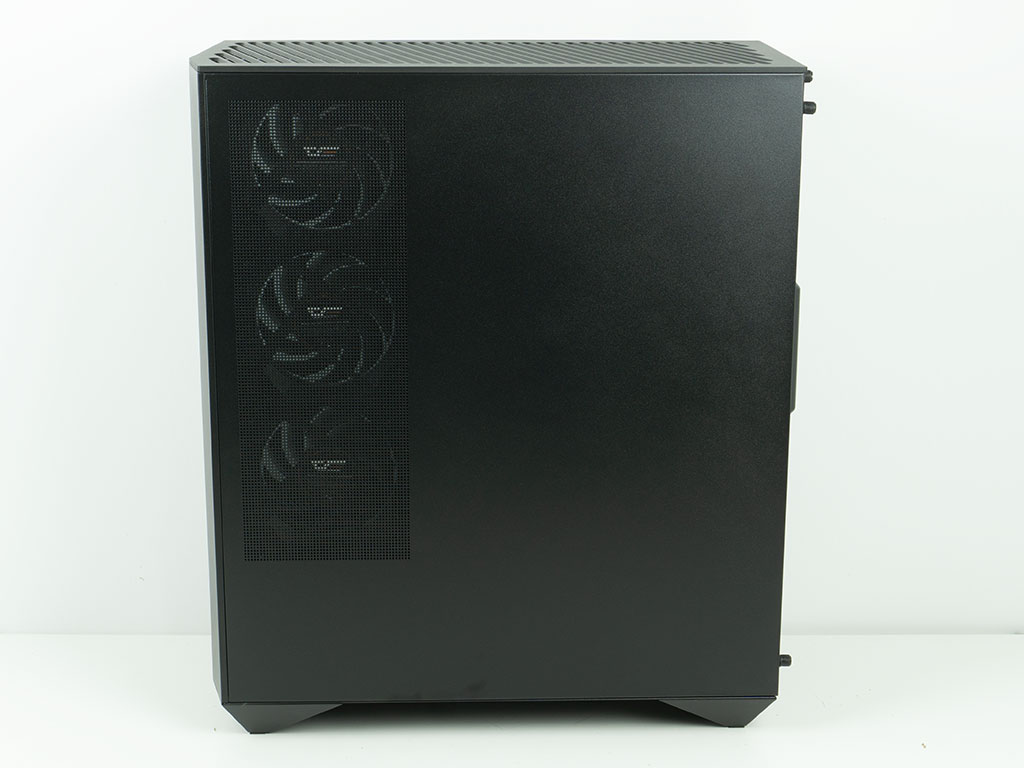
The main side of the chassis is now also split into a portion that reveals the area above the shroud using a clear glass panel that joins with other panels at the top and front. The bottom section is below the horizontal divider hiding away the PSU and storage bays. Here, darkFlash added a bit of visual flair with a unique-looking vent and the branding embossed at an angle. To achieve this level of detail, darkFlash had to rely on a plastic mold for this panel. On the opposite side, there is a metal panel with a vented section to allow the pre-installed intake fans to pull cool air into the chassis.
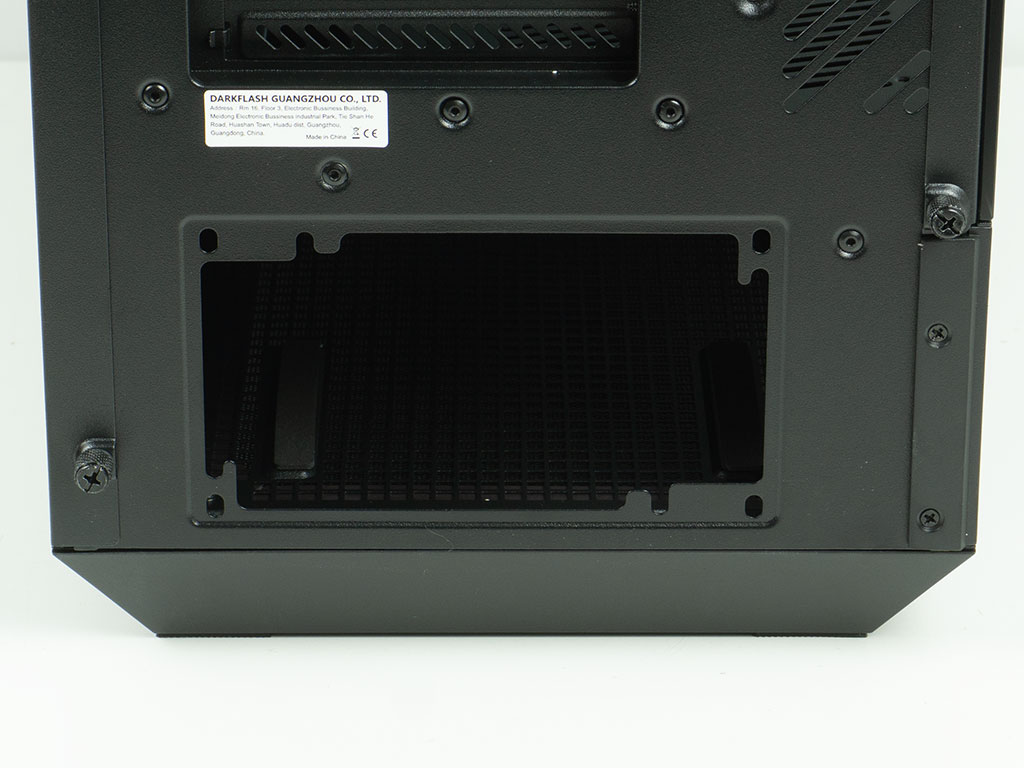
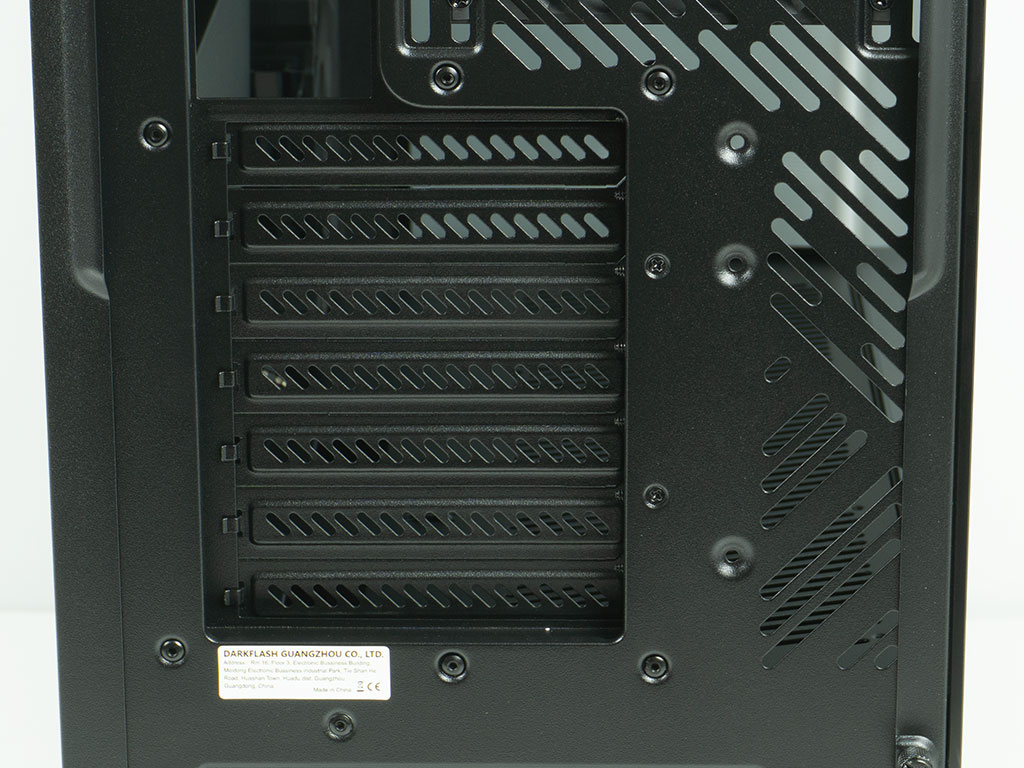
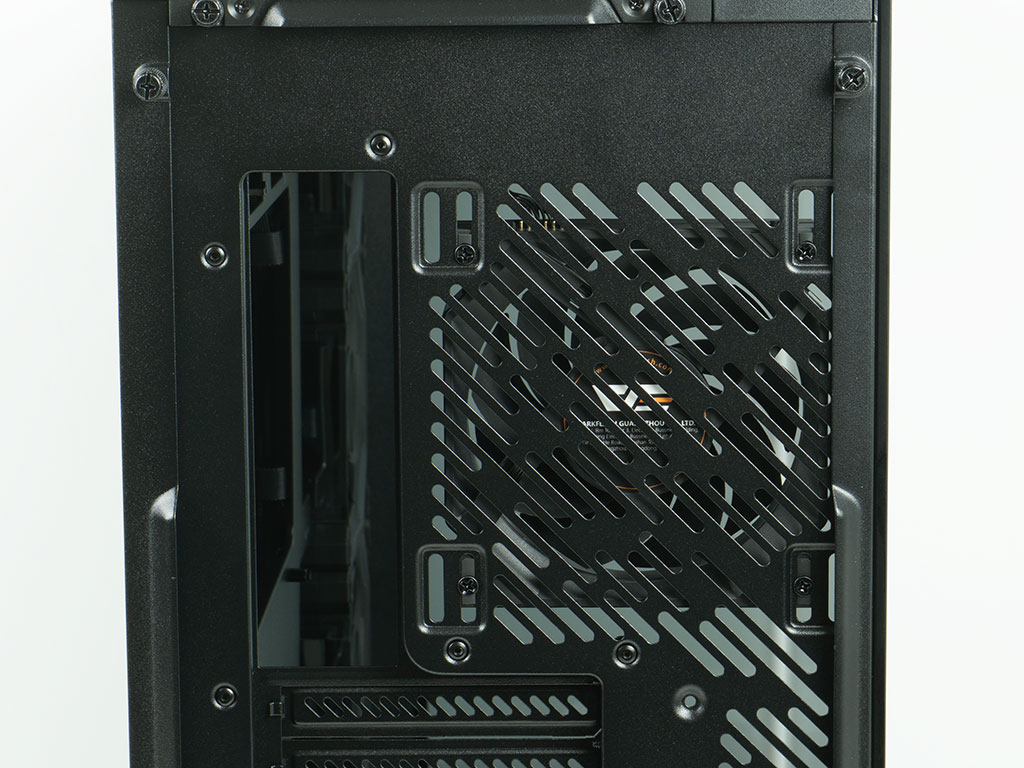
At the rear—even though the chassis is slimmer than its predecessor—there is still ample room left and right of the PSU, should you want to store cables for cable management there. Above that are the seven bridge-less expansion bays, each protected by a reusable metal cover. In the very top you will find a pre-installed 120 mm fan, set to push air out the back of the chassis. Alternatively, you may install a 140 mm unit here instead or go for a radiator of up to 140 mm in size.
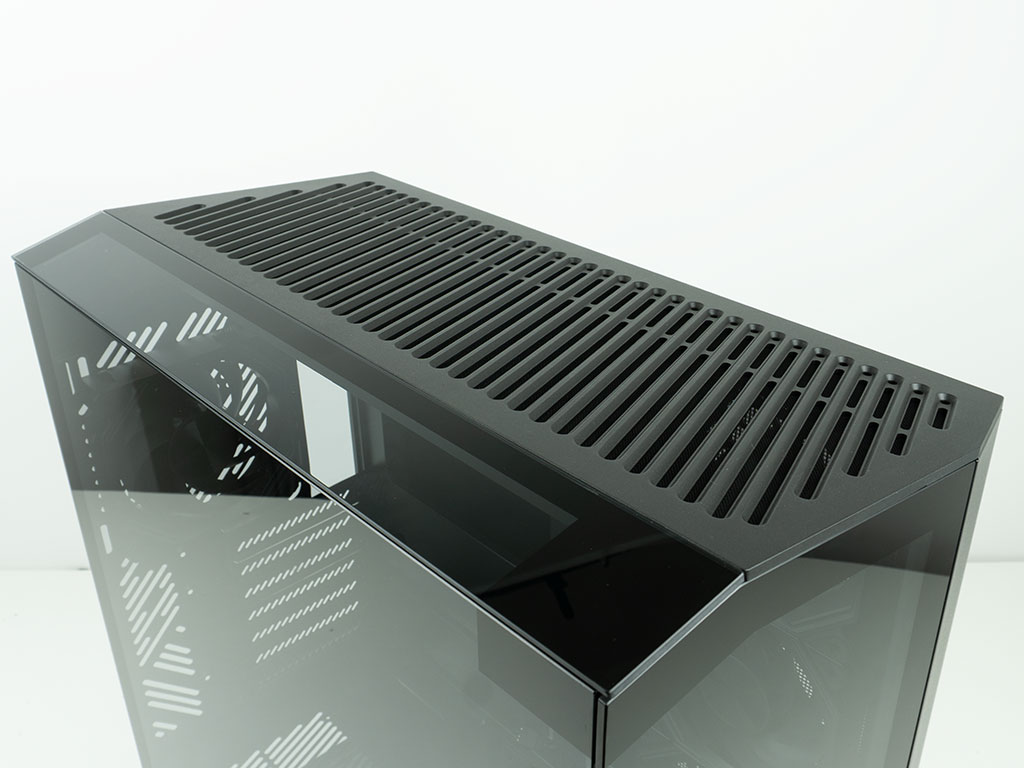
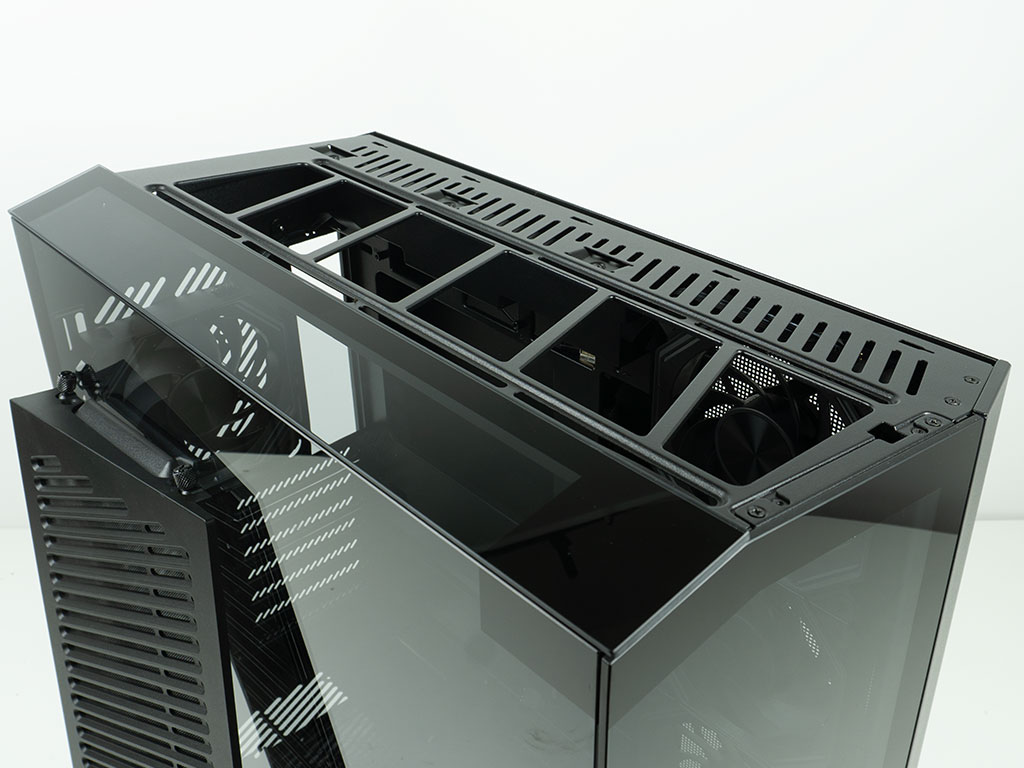
At the top, you will find that portion of glass butting up against the main panel, just like in the DY470. At an angle, the top cover is also made of plastic with the same design as the cover across the bottom of the enclosure's side. At the top, you may install three 120 mm fans, or an AIO of the same combined size. Due to the angled top cover, it will also be angled away slightly from the motherboard, which is both a visual and functional USP of the DY460.
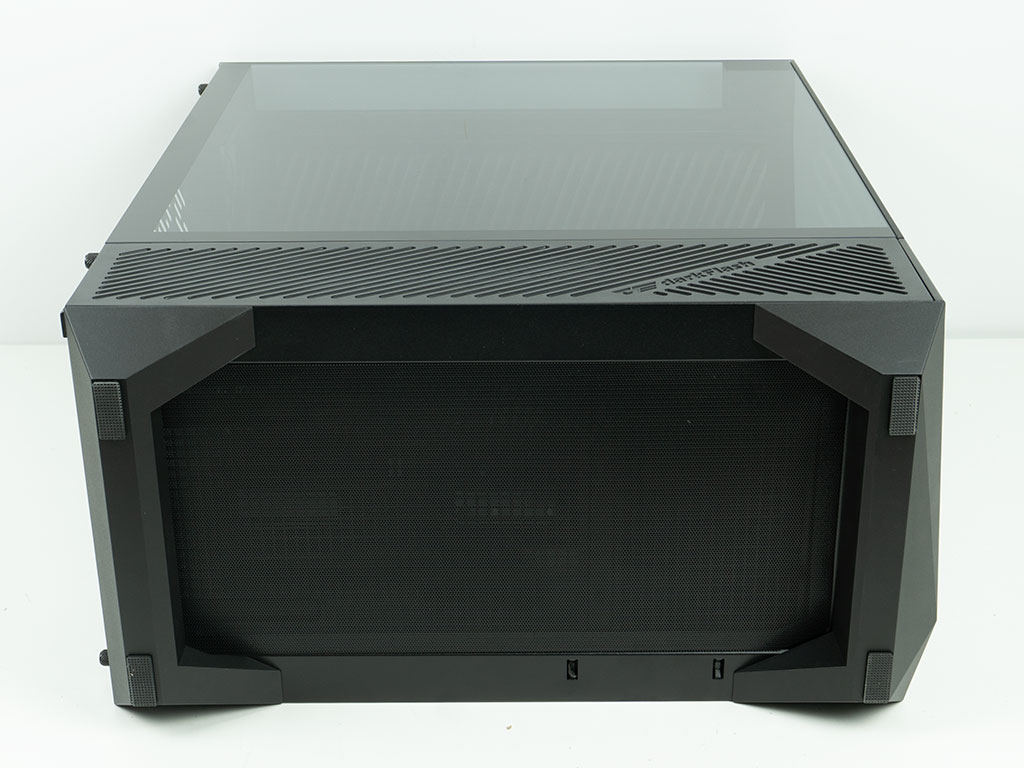
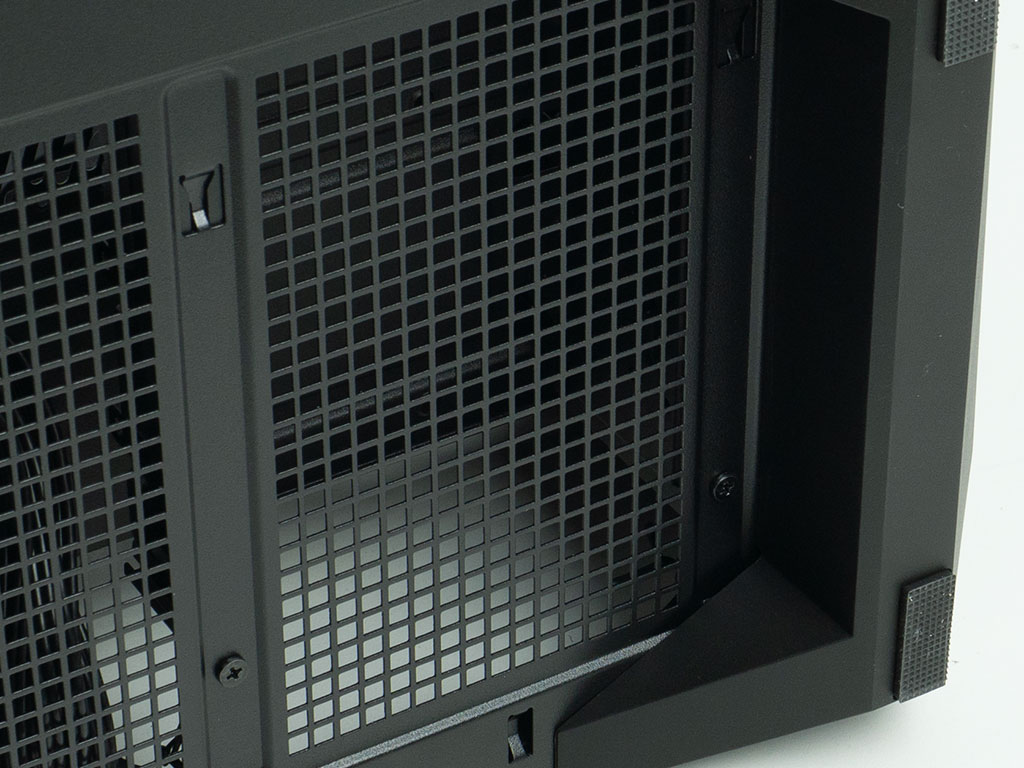
While there is still a full coverage dust filter on the underside of the chassis, its implementation on the DY460 is a downgrade when compared to the DY470. It now is simply a magnetic metal mesh cover, so you are forced to tip over your whole system if you want to remove it. That feels odd, as darkFlash already successfully solved how to implement a fine mesh pull-out cover with the predecessor of this chassis. Another issue is that the two screws holding the HDD cage in place on the floor of the chassis are covered with that magnetic mesh filter. While this is, strictly speaking, still functional, this is the least user-friendly implementation possible.
Nov 20th, 2026 13:35 PST
change timezone
Latest GPU Drivers
New Forum Posts
- Honestly, do you care about GTA VI? (206)
- WarpCoreBench scores! (80)
- GTA VI (20)
- Anthrophics IPO (25)
- GeekMagic Ultra Smart WiFi Weather Station (8)
- Very unusual two gaming-pc scenarios. (35)
- Can i play GTA 6 now? (Joke) (14)
- How to prevent OLED burn damage due to PC freezes or power outtages? (47)
- Zen 3 IF/IMC degradation (239)
- The Final Upgrade for Legacy AiO's (10)
Popular Reviews
- AMD Zen 6 Technical Deep Dive
- Ugreen NASync DXP4800 GT Review
- Microsoft Surface Laptop Ultra Review - The Next-gen Arm Laptop
- Corsair RM1200e (Second Generation) Review
- Acemagic Retro X3 Review
- Upcoming Hardware Launches 2027 (Updated Nov 2026)
- Pulsar Office Tour & First Look at P1 Dual-Sensor Mouse
- Biwin Black Opal NV7400 2 TB Review
- AMD Ryzen 7 9800X3D Memory Performance Scaling
- AMD Ryzen 7 9800X3D Review - The Best Gaming Processor
TPU on YouTube
Controversial News Posts
- NVIDIA Co-Founder and CEO Jensen Huang Officially Resigns (490)
- Report: Jensen Huang Eyes NVIDIA Comeback (254)
- Open Letter Asking NVIDIA to Reinstate Jensen Huang Passes 115,000 Signatures (184)
- OpenAI CEO Argues Home PCs Waste the World's Limited DRAM Supply (152)
- NVIDIA Launches Investigation Into Jensen Huang's Relationship With Suspected Chinese Spy (136)
- Intel "Raptor Lake Next" 16-Core and 20-Core CPUs Surface (130)
- Legendary Game Studio BioWare Shuts Down Following EA Layoffs (104)
- Dell CEO Says the Memory Shortage Will Get Worse in 2027 (95)