 14
14
DimasTech Bench Table V2.5 Review
Value & Conclusion »Installation


Filling the rig with components is nothing out of the ordinary. Dimastech has supplied so many thumb screws, that you can use them virtually everywhere possible. On the left we have a black SATA DVD drive, while the right 3.5 bay holds the 30 GB OCZ SOLID 2 SSD. In the rear we have installed the Jersey Power 550W Modular PSU, one of which will power each rig from now on.

The Asus P7P55D-E Pro looks really spiffy on the metallic grey arch with its blue connectors. There is nothing out of the ordinary required to install the board unto the Benchtable. Once again, the thumb screws are used to secure the board to the spacers. The one issue I had here is the size of the screws, which are just a tad too large to use them comfortably around the electronic components of the board.

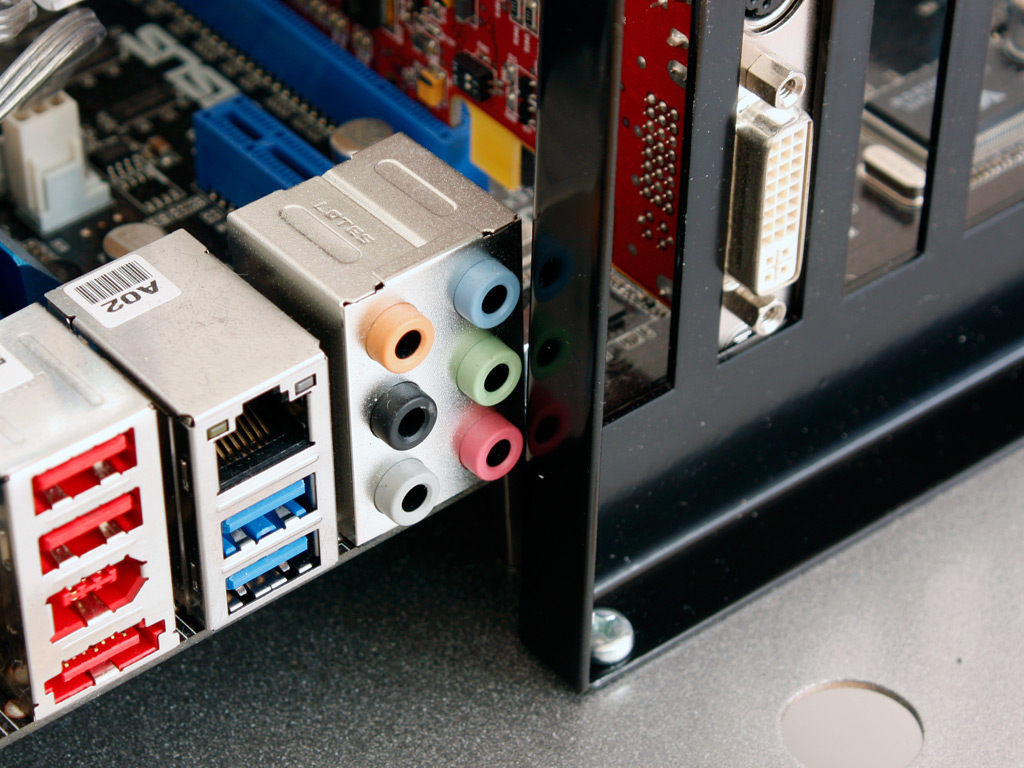
Upon wanting to secure the flooring to the arch, I ran into a rather substantial problem. The fine threaded thumb screws, which are the only screws that fit the thread of the holes, are too short to hold the two parts together. I could not get the threads to grip. as the screw shaft is to short and won't reach. Luckily I have a substantial stash of screws and managed to find four that had the same thread but were about twice as long. The second issue is the close call between the mainboard rear connectivity and the expansion slot bracket. While most of you would most likely not use the audio connectivity on a bench table, some may, and that is too close for comfort.
Finished Looks

Once everything was assembled, the Dimastech Benchtable V2.5 made a really good impression. I love the metallic grey, which is a great step up from the white ones I had been using until now. I loved my two Benchtable Easy V2s and I have been relying heavily on them for the past year, but I really look forward to using the new V2.5, especially for the front mounted USB 2.0 and the new buttons along with the new color.


Last but not least, I also installed the flexible fan mount. By trying to do so, I broke one of them as you can see in the image above. This is certainly my own fault, especially since I was told numerous times, that I should treat the threading carefully - which I obviously did not. But then the question arises, why not use a double threaded pin instead of something like this. Simply make a threaded hole - just like on the end facing the fan has, and screw in a pin which has threads going one way on one end and in the opposite direction on the other end - problem solved. This thing is way too fragile and there is bound to be a lot of RMA and issues about it.
May 7th, 2024 18:28 EDT
change timezone
Latest GPU Drivers
New Forum Posts
- What's your latest tech purchase? (20472)
- Urgent: PC wont turn on with PSU connected to MOBO (5)
- Battery swap for cyberpower UPS (63)
- 1GHZ less than I should be getting (3)
- Arkane Austin and Redfall: what happened? (48)
- Only some humans can see refresh rates faster than others, I am one of those humans. (212)
- What are you playing? (20597)
- not impressed - nvme vs ssd (36)
- Share your AIDA 64 cache and memory benchmark here (2929)
- Arc OC'ing, anyone? (2)
Popular Reviews
- Finalmouse UltralightX Review
- Corsair iCUE Link RX120 RGB 120 mm Fan Review
- CHERRY XTRFY M64 Pro Review
- Cougar Hotrod Royal Gaming Chair Review
- Meze Audio LIRIC 2nd Generation Closed-Back Headphones Review
- Upcoming Hardware Launches 2023 (Updated Feb 2024)
- ASRock NUC BOX-155H (Intel Core Ultra 7 155H) Review
- AMD Ryzen 7 7800X3D Review - The Best Gaming CPU
- ASUS Radeon RX 7900 GRE TUF OC Review
- Logitech G Pro X Superlight 2 Review - Updated with 4000 Hz Tested
Controversial News Posts
- Intel Statement on Stability Issues: "Motherboard Makers to Blame" (254)
- AMD to Redesign Ray Tracing Hardware on RDNA 4 (200)
- Windows 11 Now Officially Adware as Microsoft Embeds Ads in the Start Menu (167)
- NVIDIA to Only Launch the Flagship GeForce RTX 5090 in 2024, Rest of the Series in 2025 (129)
- Sony PlayStation 5 Pro Specifications Confirmed, Console Arrives Before Holidays (119)
- AMD's RDNA 4 GPUs Could Stick with 18 Gbps GDDR6 Memory (114)
- NVIDIA Points Intel Raptor Lake CPU Users to Get Help from Intel Amid System Instability Issues (106)
- AMD Ryzen 9 7900X3D Now at a Mouth-watering $329 (104)