 26
26
Fractal Design Define 7 Nano Review
Assembly & Finished Looks »A Closer Look - Inside
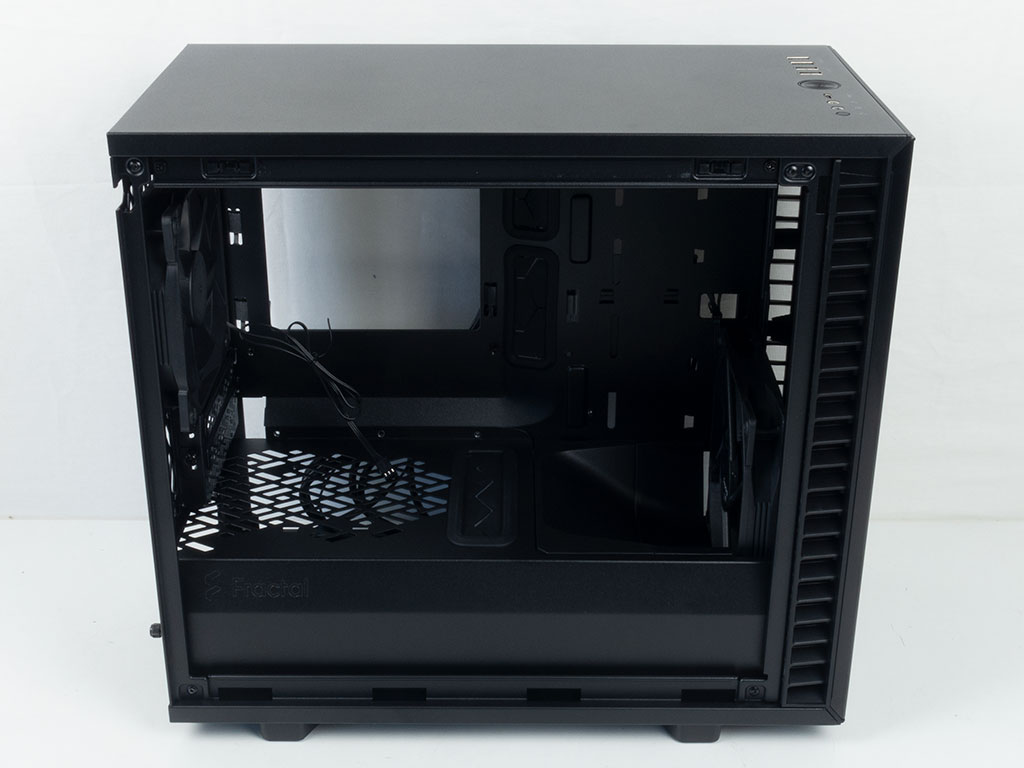
The solid side panel and solid top cover come lined with a sound dampening material, which we have seen in every chassis of this series thus far. For access to the interior, simply pull the tab of each panel off the Define 7 Nano. Fractal includes a metal shroud on the bottom that may also be used to place a single SSD tray here if you like to show off your solid-state drives. That said, Fractal offers a total of three positions, but only supplies two trays. Fractal does market the fact that the chassis can hold four such drives total with three being possible out of the box. That makes it sound like you can buy an individual tray easily from retailers, but as far as we know, there is no such official SKU. Towards the front, there are two plastic covers that form an air duct which directs the flow from the front across the top.
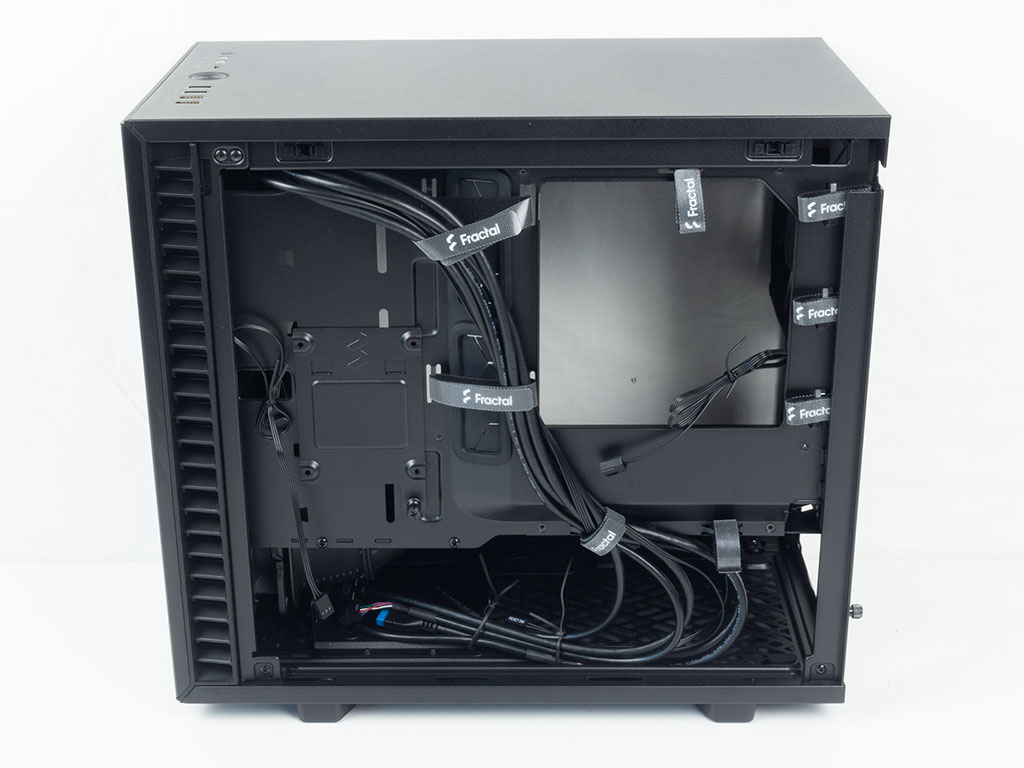


On the opposite side, the Define 7 Nano has a bit of a different layout than the Compact or traditional variant as there simply isn't a lot of room to work with. There are eight basic, but long enough Velcro strips around the cutout for the CPU cooler backplate, which should help in keeping things tidy. Towards the front, Fractal ships the Define 7 Nano with a single 2.5" tray. but you may rotate it at which point it will fit that second one which is included as part of the accessories.


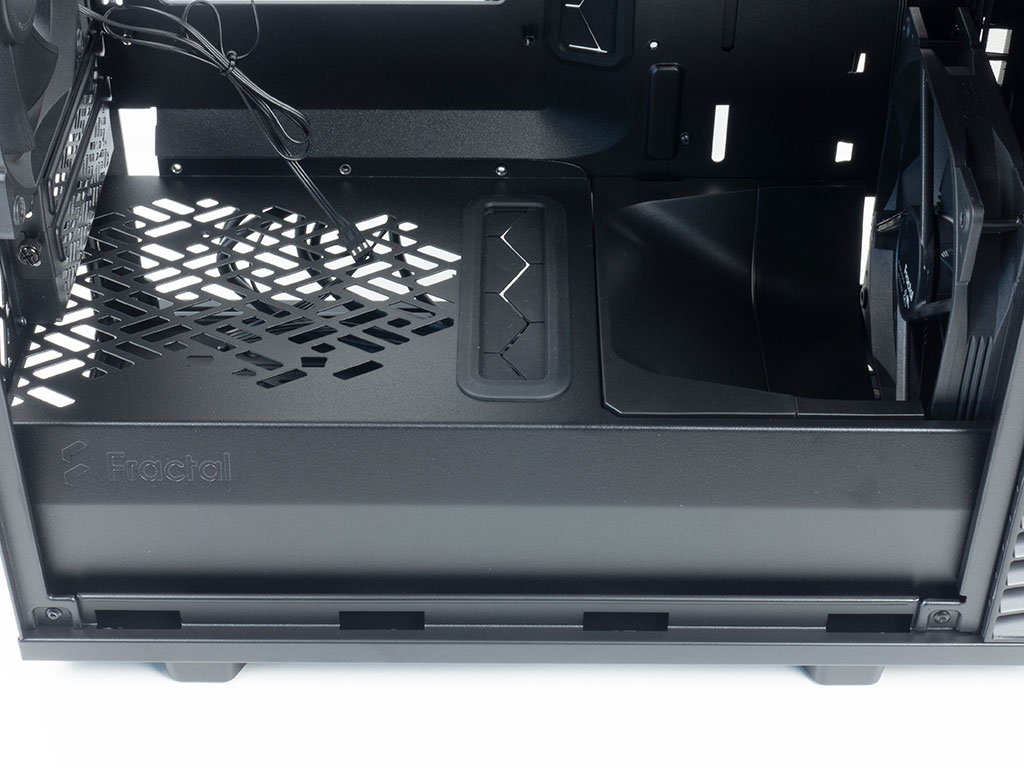
In the front, underneath the wind tunnel shaped plastic, there is a hard drive cage which may hold one 2.5" and one 3.5" unit. This one has been completely redesigned and as a result is much simpler than any of the bigger case versions. There are no more individual tray and you have to go as far as to remove the bottom dust filter to get to the four screws holding it in place so that you may finally install a drive in it. This new approach feels too simple for a case with this DNA and a genuine step in the wrong direction.

Above that is the area dedicated to air intake, with the 140 mm fan perfectly aligned with the two-piece air duct. Alternatively, you may install or liquid cooling of up to 280 mm in size here. Considering, that this is the only location for such a well sized AIO, you need to be aware that this will limit your GPU to roughly around 280 mm (331 mm - 50 mm AIO thickness) length, which is rather short in comparison to what other ITX enclosures offer.


The PSU bay is a bit on the compact side, if you consider the air duct. You may remove those element and the hard drive tray, which then gives you up to 200 mm of room. Above that, the two expansion slots in the main compartment are easy to access because of thumb screws, with the aforementioned 120 mm exhaust fan in the very top of the Define 7 Nano.

In the ceiling you may place two fans, either 120 or 140 mm in size. However, the motherboard is right up against the ceiling, so realistically speaking 140 mm will rarely fit as most modern ITX boards sport a fairly large heatsink and lots of connectors at the top edge of the board. Fractal Design should have really provides that little bit of extra height to make the most of this area.


Last but not least, all the cables within the Fractal Define 7 Nano are of the default variety and sleeved black.
Jun 17th, 2024 13:53 EDT
change timezone
Latest GPU Drivers
New Forum Posts
- Why doesn't every house have solar installed? (92)
- I see no future in consumer level Windows even for an enthusiastic casual who does no work related stuff. (12)
- Where is the future of PC monitors going? (9)
- Sony VAIO PCV-RX1 no life on the PC (11)
- Xeon Owners Club (8743)
- Opinions on AI (278)
- new tv/display what one? what to avoid? (44)
- TPU's Nostalgic Hardware Club (18596)
- Asus monitor, DP 120Hz audible crackle and pop and screen fuzz. (2)
- Random Shutdown During Game play | MSI Codex R 32G 2tb (6)
Popular Reviews
- Team Group T-Force G70 Pro 2 TB Review
- Pulsar Xlite V3 eS Review
- Aune AR5000 Headphones + S17 Pro Headphones Amplifier Review
- Upcoming Hardware Launches 2024 (Updated May 2024)
- AMD Ryzen 7 7800X3D Review - The Best Gaming CPU
- Intel Lunar Lake Technical Deep Dive - So many Revolutions in One Chip
- Sapphire RX 7900 GRE Nitro+ Review
- NZXT H6 Flow RGB Review
- VAXEE Outset AX Wireless (4K) Review
- ASUS Radeon RX 7900 GRE TUF OC Review
Controversial News Posts
- Possible Specs of NVIDIA GeForce "Blackwell" GPU Lineup Leaked (136)
- AMD Ryzen 9000 Zen 5 Single Thread Performance at 5.80 GHz Found 19% Over Zen 4 (122)
- AMD Outs Ryzen 5000XT Processors for Socket AM4, an 8-year Old Socket (120)
- NVIDIA RTX 5090 "Blackwell" Founders Edition to Implement the "RTX 4090 Ti" Cinderblock Design (118)
- AMD Says Ryzen 9000 Series Won't Beat 7000X3D Series at Gaming (106)
- Nightmare Fuel for Intel: Arm CEO Predicts Arm will Take Over 50% Windows PC Market-share by 2029 (105)
- AMD Zen 5 Storms into Gaming Desktops with Ryzen 9000 "Granite Ridge" Processors (100)
- ASUS Enhances Customer Support Following Gamers Nexus Investigation (96)