 16
16
Gigabyte GA-X79-UD5 Intel LGA 2011 Review
Board Software »BIOS Walkthrough
| BIOS Options | ||
|---|---|---|
| Clocks | Range | Step Size |
| CPU BCLK: | 80 MHz ... 133.33 MHz | 0.01 MHz |
| Memory Dividers: | x10.67 (1067 MHz), x13.33 (1333 MHz), x16 (1600 MHz ), x18.66 (1866 MHz), x21.33 (2133 MHz ), x24 (2400 MHz), x26.66 (2666 MHz), x32 (3200 MHz) | |
| Voltages | Range | Step Size |
| CPU Vcore: | 0.800 V... 1.700 V | 0.005 V |
| DRAM Voltage: | 1.100 V... 1.990 V | 0.005 V |
| CPU VSA: | 0.800 V... 1.600 V | 0.010 V |
| CPU VTT: | 0.715 V... 1.610 V | 0.005 V |
| PCH Voltage: | 0.825 V... 1.510 V | 0.005 V |


The Gigabyte UEFI BIOS is something completely new for Gigabyte, having left the AWARD BIOS behind, and introducing their first foray into UEFI with a fully licensed AMI BIOS. This completely new take on BIOS design greets us with a picture of the board itself once the board is powered up and the POST process has completed, with several buttons along the bottom that lead into other areas. Of course, mouse support is included, and you can navigate between areas by clicking on the appropriate area, with the active areas highlighting with blue once the cursor hovers over them. The menus that pop up when clicking between sections are actually quite in depth, and offer far more functionality than we've seen from other UEFI BIOS implementations. Pretty much most of the critical options are available, as seen in the screens above.


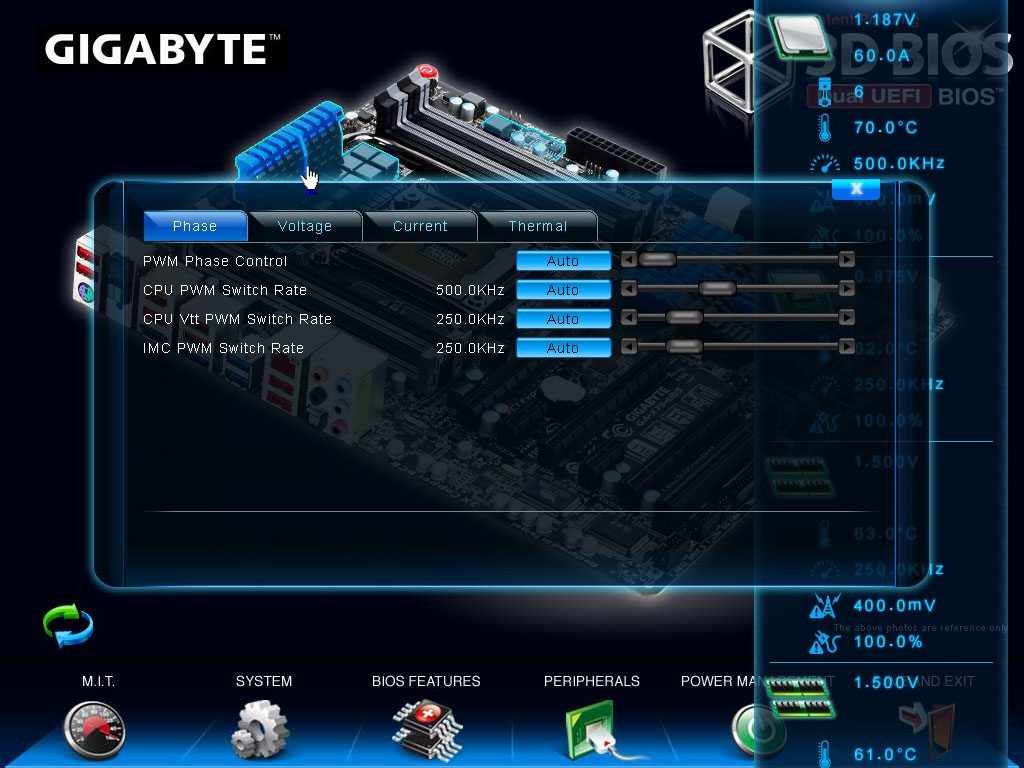
There are even menus to enable or disable devices, drive controller setup, and every other really critical option is all accessible via the graphical interface. Of course, it does take a bit of navigation to get from section to section, and perhaps the click path could be a bit better optimized, but considering this is Gigabyte's first foray into AMI BIOSes, we were pretty impressed.


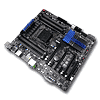
Even clocks and voltages can be set, and as you can see by the first image above, there are even monitoring panels that pop up when in the voltage and clock sections, which help make deciphering the menus easier, as the new interface can be a bit overwhelming at first. We really like the new styling, one that is most definitely unique to Gigabyte.
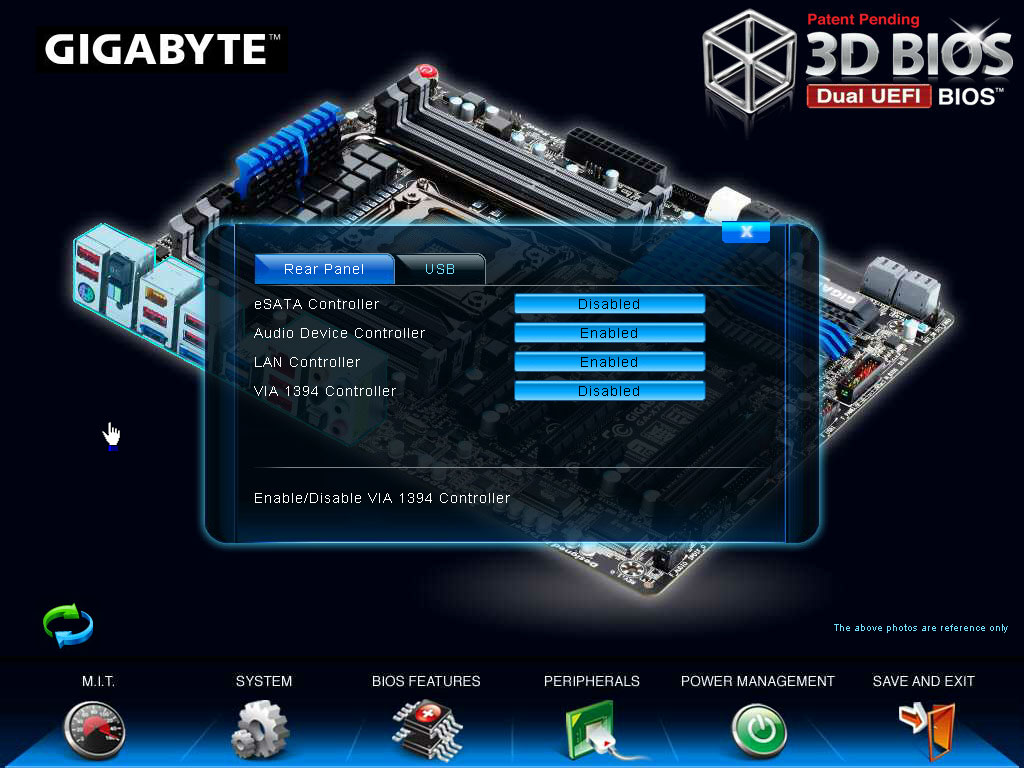
Of course, the graphical interface isn't the only way to adjust settings in the GA-X79-UD5's BIOS, and a quick press of "F1" will have an "old-style" interface pop up that will be quite familiar to most users, as seen in the second image above. The page that pops up has all the regular "Motherboard Intelligent Tweaker" options we are used to seeing from Gigabyte, although due to the complex nature of the GA-X79-UD5's VRM, we are presented with a fair bit more to tweak. As always, the "Current Status" page leads us to a page that shows the current installed CPU and memory, and what settings they are currently running, as you can see in the third image above.


Entering the "Advanced Frequency Settings" heading leads to a page that provides access to clock and multiplier adjustments. The BLCK adjustments available are kind of limited, only scaling between 80 MHz and 133 MHz, but an option below allows the BCLK divider to be chosen, making the actual clock vary in a greater degree. There is also a listing for the PCIe clock, a nice treat that shows how the PCIe clock scales when the BCLK is adjusted.
Although the BCLK can be adjusted a lot more with the Intel X79 Express platform, the PCIe clock is still tied to the BCLK, and the dividers provided merely adjust the ratio between the two, from 1:1 to 1:0.8. or 1:0.6.
The memory settings page, seen in the second image above, follow the format seen in the older AWARD-style BIOSes that Gigabyte used on other products, although when set to "Expert" mode, timings can be adjusted per channel. The available timing adjustments are pretty in-depth, seen in the third and fourth image above, although there are perhaps a couple of options that we would have like to have seen added. There were a couple of timings that didn't offer the actual settings our XMP v1.3 DIMMs were qualified for, so there is definitely room for improvement here, but again, as a first foray into an AMI UEFI BIOS, we are pretty happy with what's offered.


The "Advanced Voltage Settings" tab leads into the sub-menu seen in the first image above. We have four options total, one for the VRM adjustments, one for CPU voltage control, another for DRAM voltages, and finally, one for chipset voltage. The VRM adjustment page contains settings for the VRM itself, including LLC and OCP limits, frequency of the VRM itself, as well as a few other options, all shown in the second and third images above.


The three images above show the three voltage setting pages that we haven't talked about yet, one for the CPU, one for thememory, and the third for the chipset voltage options. There's not a lot to say about these pages, other than that all the needed options when overclocking are provided. Perhaps all of the options could have been compressed into one single page, improving the click-flow. They'd even all fit in one page and still all be visible, so this is one area that we feel could be improved, although the way it is laid out currently does make a lot of sense, too.

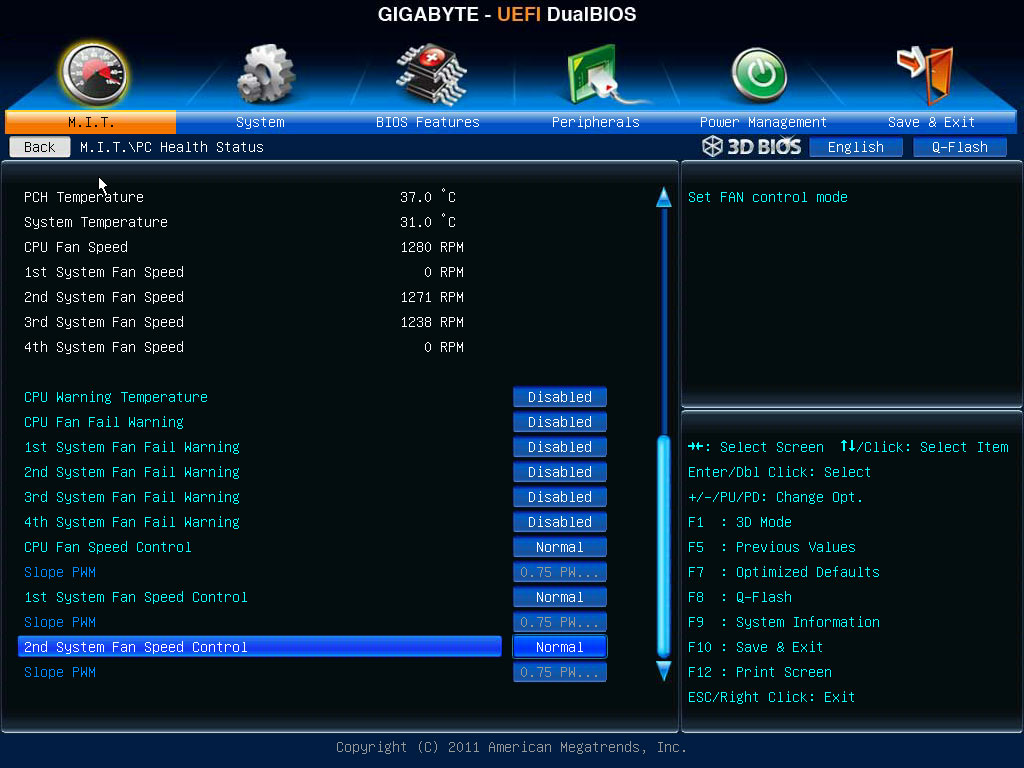

There are two more heading under the "M.I.B." section, one for "PC Health Settings", and the last labeled "Miscellaneous Settings". The Health Settings page leads to monitoring data and SmartFan adjustments, shown in the first two images above. The "Miscellaneous" page, shown in the third image above, contains just one setting, but even that single setting was removed and placed elsewhere with the updated "F7" BIOS. The fact that this page remains now with the "F7" BIOS, even with no options inside, highlights that there are definite improvements to be had here that Gigabyte could easily implement. We hope to see those changes take place soon with an updated BIOS.


Now that we've looked at every page under the "M.I.B." tab, the "System" tab leads us to a very normal page, containing settings for date and time, as well as a heading that leads us to a section that lists information for the internal ATA ports, shown in the second image above. A purely informational page, the ATA Port Information page lists all of the devices plugged into the ports connected to the Intel X79 Express chipset.

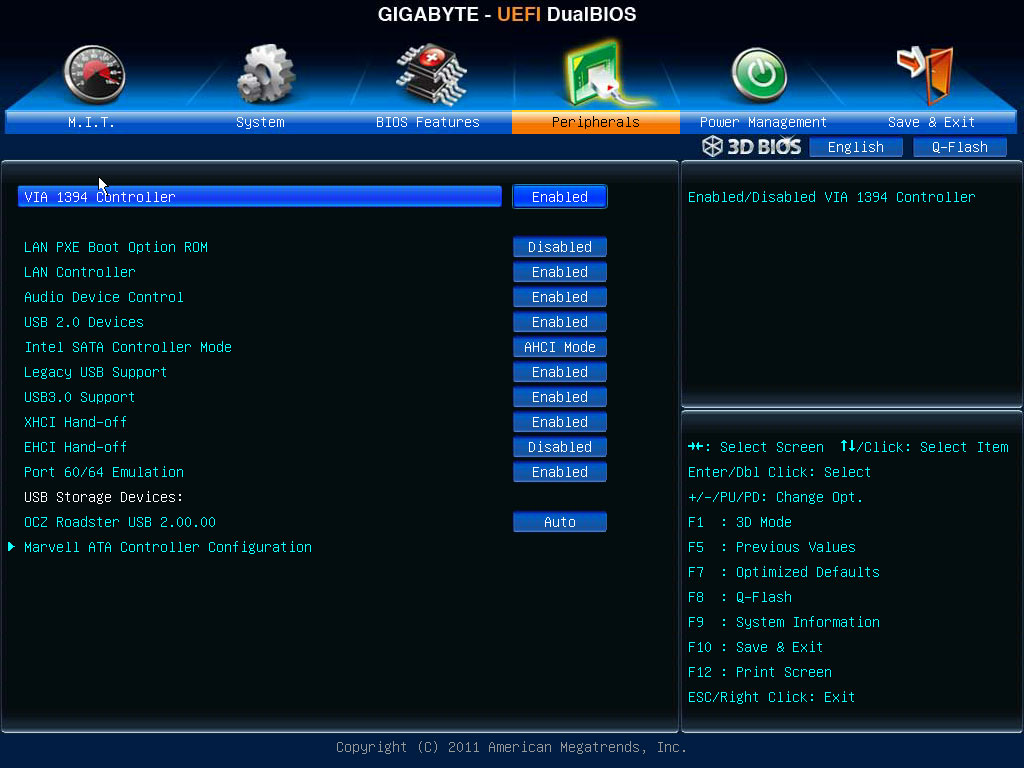

The next tab up is called "BIOS Features", and contains settings for boot options as well as a few CPU-specific options, such as Virtualization and NX-bit. The second and third images above show the "Peripherals" tab, which contains settings for all the onboard devices. There is also an option at the bottom of the page that lists settings for the onboard Marvell drive controllers, pictured in the third image above. In this page you can configure the mode the controls work in, RAID, IDE, or ACHI, or you can disable the controller entirely, if you do not plan to use the ports that connect to it.


The last two pages are the "Power Management" page, which contains all the power-related settings that relate to board boot-up and wake settings, and the "Exit" page, which also provides a place to store profiles, as well as giving the option to boot from other installed drives directly, rather than the chosen primary boot device.
There is also a button visible at all times when in the standard BIOS layout on the top right, labeled "Q-Flash". This item will allow you to flash the BIOS to another version via a provided utility that makes the process very simple. All you need to do is place the BIOS on a FAT32-formatted USB drive, boot with the drive connected, and then point the Q-Flash utility to it, and it will take care of the rest. It's worth noting that if the board boots and recognizes that the BIOS on the primary ROM is newer than the one of the back-up ROM, it will automatically flash the newer BIOS to the backup ROM.
We are left pretty impressed with Gigabyte's first foray into an AMI UEFI BIOS implementation. There are a few issues we found with the click-flow that could be optimized, but overall, the BIOS itself is very functional, and boots far faster than previous AWARD implementations. Gigabyte did recently make some waves in the industry with their recall of older BIOSes, which at first were taken as a recall of the boards themselves, after a user published video online of a Gigabyte Intel X79 Express-based product failing. We did subject our board to similar conditions as presented in the video and found no problems with our own board sample, using a previously released BIOS. We also undertook the same tests using the new "F7" BIOS, and found that the power consumed by our sample actually INCREASED with the new BIOS, rather than being lower as expected, and this alone alleviated any concerns we might have had about the board's VRM design. We tried to push our board to the point of failure, and were pleased to find our board rock-solid, no matter what BIOS version we used. It's perfectly natural for a whole new BIOS designs to have a few bugs, but in the end, we really like Gigabyte's AMI UEFI BIOS, and cannot wait to see how it evolves over time.
May 7th, 2024 04:53 EDT
change timezone
Latest GPU Drivers
New Forum Posts
- GPU Hot Spot Temperature 105 Celsius, fans at 3000 RPM, while GPU Temperature is max 70 Celsius (41)
- The Official Thermal Interface Material thread (1171)
- Intel Core "Special Edition" Owners' Club (32)
- What are you playing? (20591)
- Throttle STOP Program Function (0)
- What's your latest tech purchase? (20452)
- Only some humans can see refresh rates faster than others, I am one of those humans. (204)
- Overheating/undervolt/setup issues (9)
- Gigabyte Aorus Elite AX V2 rev 1.1 BIOS update "AMD AGESA V2 1.2.0.B" (6)
- Cybersecurity - OSINT Software for Linux (3)
Popular Reviews
- Finalmouse UltralightX Review
- Corsair iCUE Link RX120 RGB 120 mm Fan Review
- Cougar Hotrod Royal Gaming Chair Review
- Meze Audio LIRIC 2nd Generation Closed-Back Headphones Review
- Upcoming Hardware Launches 2023 (Updated Feb 2024)
- ASRock NUC BOX-155H (Intel Core Ultra 7 155H) Review
- AMD Ryzen 7 7800X3D Review - The Best Gaming CPU
- ASUS Radeon RX 7900 GRE TUF OC Review
- Montech Sky Two GX Review
- HYTE THICC Q60 240 mm AIO Review
Controversial News Posts
- Intel Statement on Stability Issues: "Motherboard Makers to Blame" (249)
- AMD to Redesign Ray Tracing Hardware on RDNA 4 (176)
- Windows 11 Now Officially Adware as Microsoft Embeds Ads in the Start Menu (167)
- Sony PlayStation 5 Pro Specifications Confirmed, Console Arrives Before Holidays (118)
- AMD's RDNA 4 GPUs Could Stick with 18 Gbps GDDR6 Memory (114)
- NVIDIA to Only Launch the Flagship GeForce RTX 5090 in 2024, Rest of the Series in 2025 (111)
- NVIDIA Points Intel Raptor Lake CPU Users to Get Help from Intel Amid System Instability Issues (106)
- AMD Ryzen 9 7900X3D Now at a Mouth-watering $329 (104)