 12
12
InWin 309 Review
Value & Conclusion »Test System
| System Parts for Case Reviews | |
|---|---|
| Processor: | Intel Core i7-8600K |
| Motherboards: | ATX: MSI Z370 GAMING PRO CARBON AC MATX: Z370M GAMING PRO CARBON Mini-ITX: MSI Z370i GAMING PRO CARBON Provided by: MSI |
| Graphics Card: | Long: ASUS Radeon RX580 Short: HIS Radeon 5350 HD |
| Memory: | 16 GB XPG Dazzle DDR4 2800 MHz CL17-17-17 1.25 V 32 GB GB XPG SPECTRIX D40 3000 MHz. CL16-18-18 1.35 V 16 GB XPG GAMMIX D10 DDR4 2400 MHz CL16-16-16 1.20 V Provided by: ADATA |
| HDD: | Western Digital 320 GB 7200 RPM |
| SSD: | ADATA XPG SX850 256 GB ADATA Ultimate SU800 3D 256 GB ADATA Ultimate SU700 240 GB Provided by: ADATA |
| Power Supply: | Antec HCG High Current Gamer 650 W 80Plus Gold Antec HCG High Current Gamer 850 W 80Plus Bronze Provided by: Antec |
| Cooling: | be quiet! Dark Rock 4 be quiet! Dark Rock Slim be quiet! Shadow Rock LP Provided by: be quiet! |
Assembly

Installing an ATX board is done with the use of spacers and screws. Things are really tight at the top and bottom, and you lose access to the two openings below the CPU cooler cutout on the motherboard tray. While it is good that you can use an ATX board if you like, this further cements an mATX unit as the best choice for the InWin 309.


The HDD plates are extremely simple but sturdy and functional. Simply screw the 2.5" or 3.5" drive into place and pop the plates back into the right spot to secure it with the attached thumb screw.

I was surprised to see that the PSU is meant to be installed with the fan facing the interior of the chassis. While this is not a negative as the EGO fan blows into the PSU, basically doubling up active cooling for the unit, InWin includes this elaborate air vent on the solid side panel. At least including two sets of mounting holes in the back would give the user the ultimate flexibility, while a simple magnetic dust filter on the panel interior would be sufficient in keeping things clean.


With everything installed, the InWin 309 doesn't make the cleanest impression due to the simple openings and lack of grommets. I had to route all the cables on the bottom edge of the motherboard across to connect them. That said, if you are installing cooling on the floor, it will hide that mess. In the rear, I bunched up most of the PSU cables in the top compartment, while the IO leads run down the front of the chassis. Naturally, this isn't a big deal as it will be covered by the solid side panel.
Finished Looks


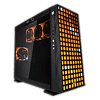
Once the system is turned on, a blue power LED underneath the square button let's you know that it is up and running. The InWin EGO fans look awesome with their silicone rings diffusing all the lighting really nicely. You can see the fans shining through the side and rear of the chassis as well.


I have to admit that I wasn't sold on the InWin 309 until I turned it on. For $250 dollars, the chassis offers very little in regards to internal features. While you can install all your parts and get a fully functional and capable modern system, that kind of budget gets you some seriously elaborate enclosures when compared to the interior of the InWin 309.
But, boy oh boy, once I turned it on, all that was forgotten. The 144 aRGB panel is immensely fun to look at and play around with. You can essentially consider it a really low res 8x18 pixel display. Loads of visual presets built right into the front offer not just cool visuals but lots of actual functionality. A visually focused example is the "sky" preset, which allows you to show off a really low res version of the morning, evening, or night sky. Then, there are the twinkle, bounce, and time tunnels visuals with their own animations. The night light preset is for all those who leave their system on overnight, as it illuminates their immediate surroundings softly.
The functional presets are even cooler, though. With the music setting, the built-in microphone triggers a corresponding rising and dropping bar, while the ECG panel mimics a heart beat with sounds. Even the candle preset, although visual, moves around based on ambient nose.
Then there is the hour glass that actually rotates, fills and continues to do so, while the clock displays your system time. All this is further supported by the embedded LEDs in the four EGO fans which light up in the same color and animations, taking what you see outside on the InWin 309 into the interior.
GLOW2 Software


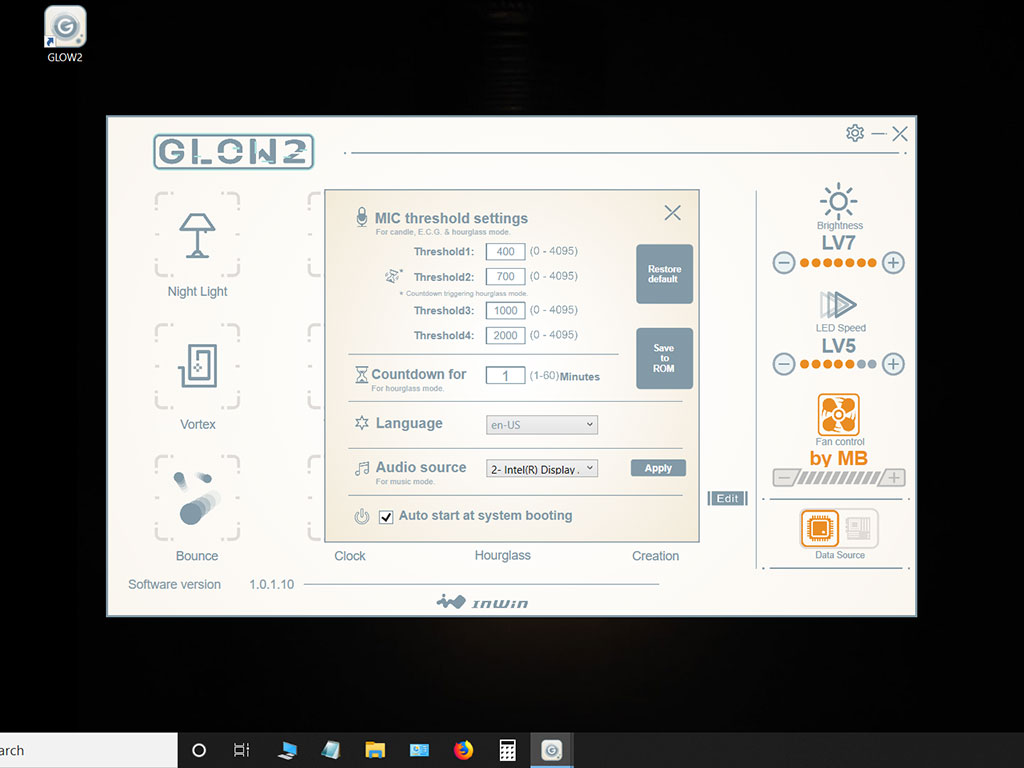
InWin offers their own software interface called GLOW2 on their website for the chassis. While the presets above can sometimes trigger different hues, with the RGB header attached to the motherboard, the 144 LEDs light up according to your settings in the board software. The same goes for the fans which can either be controlled by the GLOW2 app or directly though the PWM header of your board. On top of all the presets, you may create your own images for the front of the chassis, which is really cool as well. Last but not least, the settings allow you to adjust the sensitivity of the built-in microphone or time the hour glass holds before it flips.

So, just for fun, I played with the 8x18 pixel display and recreated something you guys may be familiar with. Thanks to the embedded battery, everything you have saved to the ROM won't be lost even without external power. As someone with a day job in software development (yes, who would have thought!), I have a whole bunch of ideas of where InWin could take this in future versions.
May 8th, 2024 14:31 EDT
change timezone
Latest GPU Drivers
New Forum Posts
- Last game you purchased? (266)
- not impressed - nvme vs ssd (63)
- POLL: Can you see the difference past 60fps (gaming/other) (51)
- PSU making a clicking sound, PC wont turn on (26)
- Epic Games launcher's ridiculous CPU usage (23)
- Does anyone here overclock their video cards? Is it really worth it? (67)
- Your way of cooling your PC? (31)
- Only some humans can see refresh rates faster than others, I am one of those humans. (224)
- Urgent: PC wont turn on with PSU connected to MOBO (25)
- What are you playing? (20600)
Popular Reviews
- CHERRY XTRFY M64 Pro Review
- Corsair iCUE Link RX120 RGB 120 mm Fan Review
- Finalmouse UltralightX Review
- Upcoming Hardware Launches 2023 (Updated Feb 2024)
- Cougar Hotrod Royal Gaming Chair Review
- Bykski CPU-XPR-C-I CPU Water Block Review - Amazing Value!
- Meze Audio LIRIC 2nd Generation Closed-Back Headphones Review
- AMD Ryzen 7 7800X3D Review - The Best Gaming CPU
- ASRock NUC BOX-155H (Intel Core Ultra 7 155H) Review
- ASUS Radeon RX 7900 GRE TUF OC Review
Controversial News Posts
- Intel Statement on Stability Issues: "Motherboard Makers to Blame" (261)
- AMD to Redesign Ray Tracing Hardware on RDNA 4 (205)
- Windows 11 Now Officially Adware as Microsoft Embeds Ads in the Start Menu (167)
- NVIDIA to Only Launch the Flagship GeForce RTX 5090 in 2024, Rest of the Series in 2025 (142)
- Sony PlayStation 5 Pro Specifications Confirmed, Console Arrives Before Holidays (119)
- AMD's RDNA 4 GPUs Could Stick with 18 Gbps GDDR6 Memory (114)
- NVIDIA Points Intel Raptor Lake CPU Users to Get Help from Intel Amid System Instability Issues (106)
- AMD Ryzen 9 7900X3D Now at a Mouth-watering $329 (104)