 6
Lian Li HydroShift II LCD-S 360TL Review
Finished Looks »Installation
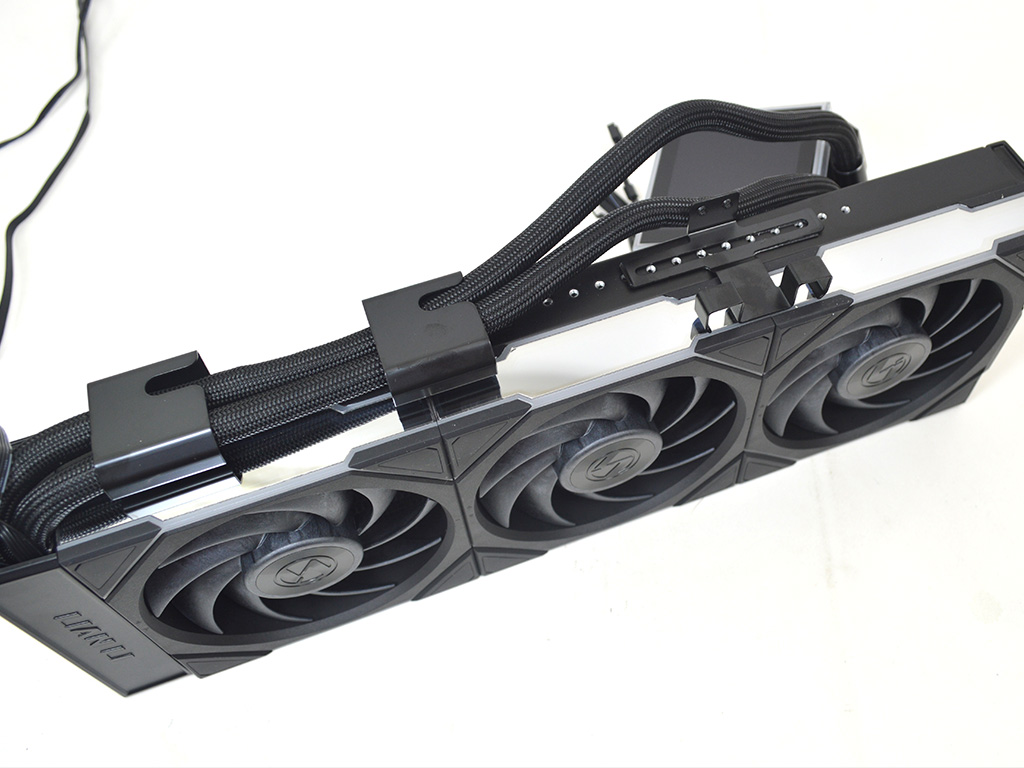
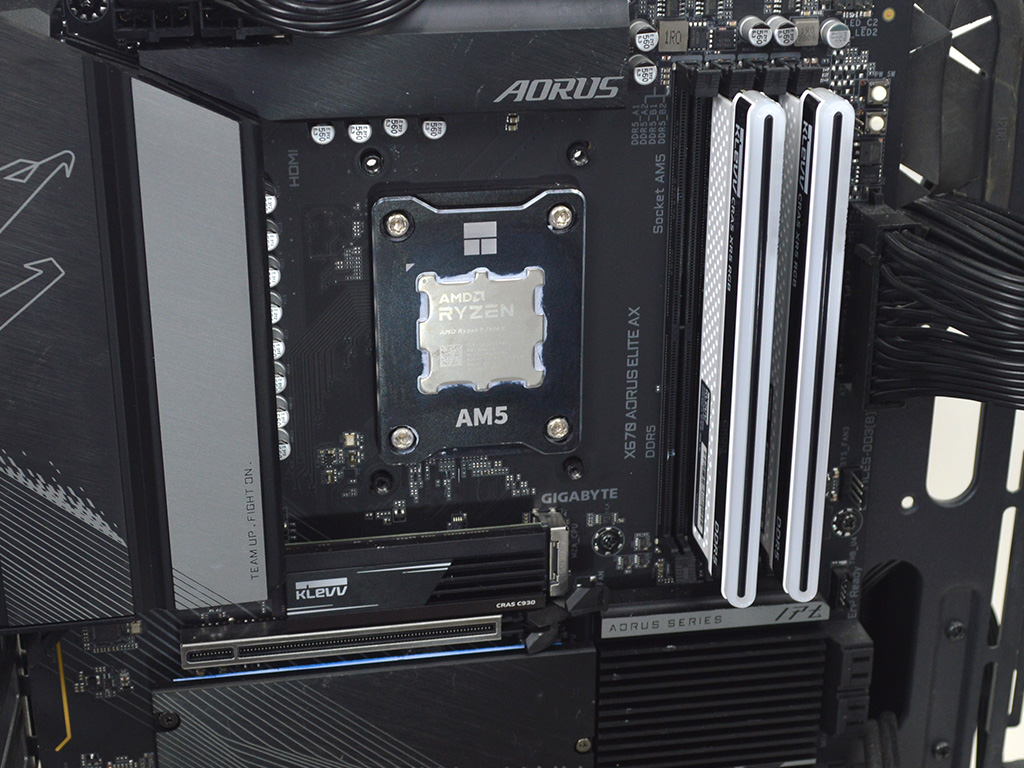
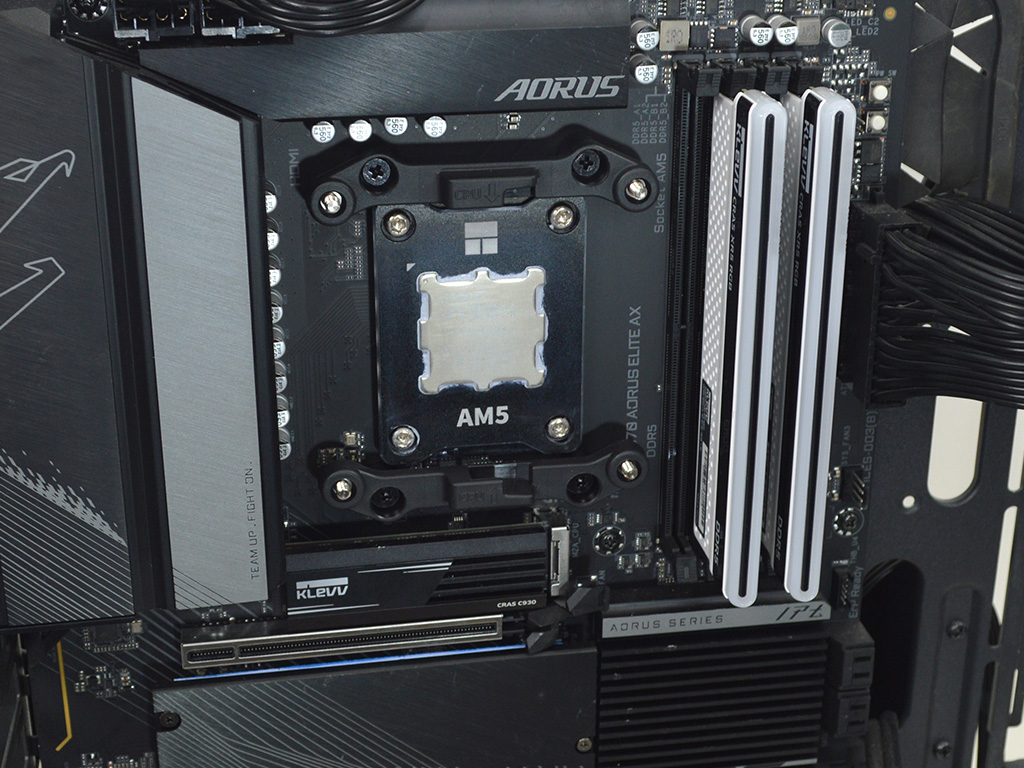
To install the cooler the first step is to take note of the tubing and make any adjustments you need to regarding the brackets. Then on AMD's AM5 Socket you will need to remove the motherboard's default brackets. Then secure the provided brackets with the provided screws.
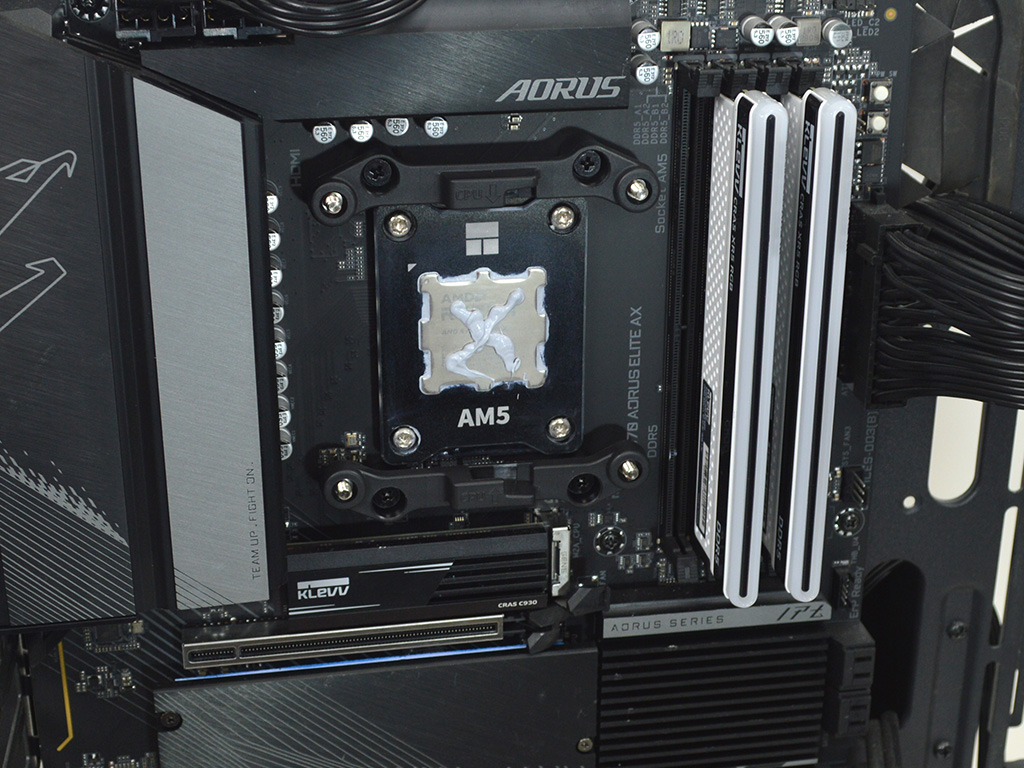
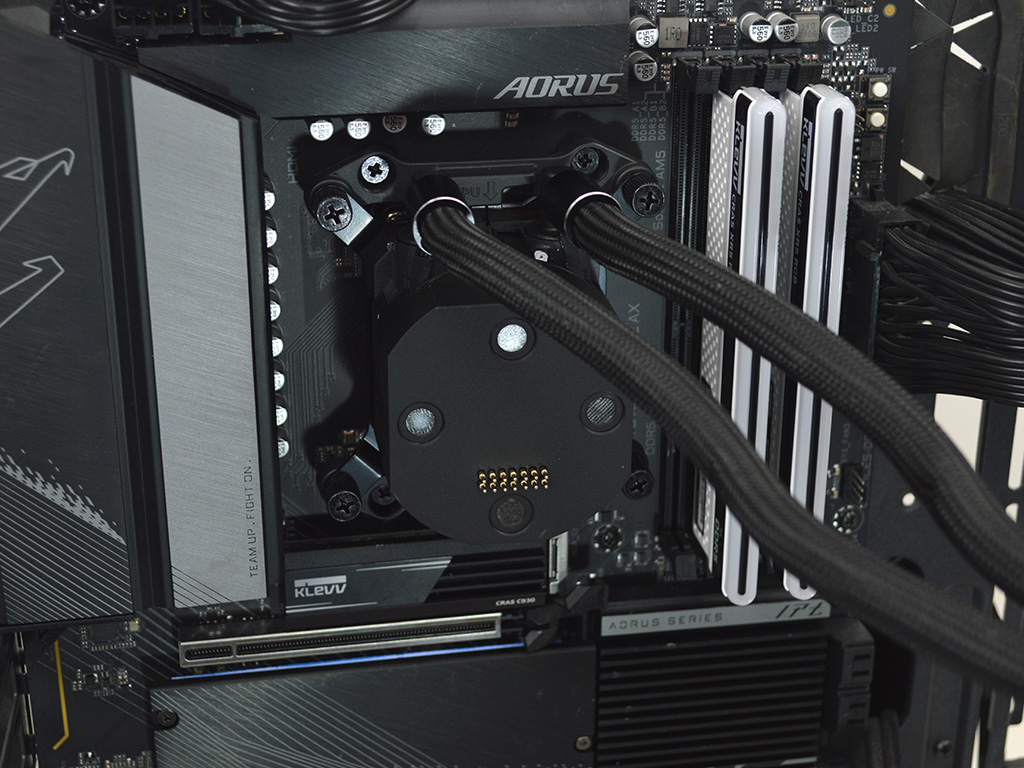

While I didn't spread the thermal paste ahead of time for the photo, I highly recommend doing so before mounting the pump. The way the pump sits in the mounting brackets causes it to slide to the left before you tighten it down, which can push the thermal paste in one direction and create hot spots. So, spread it first. Align the correct tabs on the pump with the cutouts in the bracket, then slide the pump to the left before securing it with the proper nuts. Once the pump is installed, you can slide the IPS display onto it. For performance testing, I used Arctic's MX-6 paste as usual.
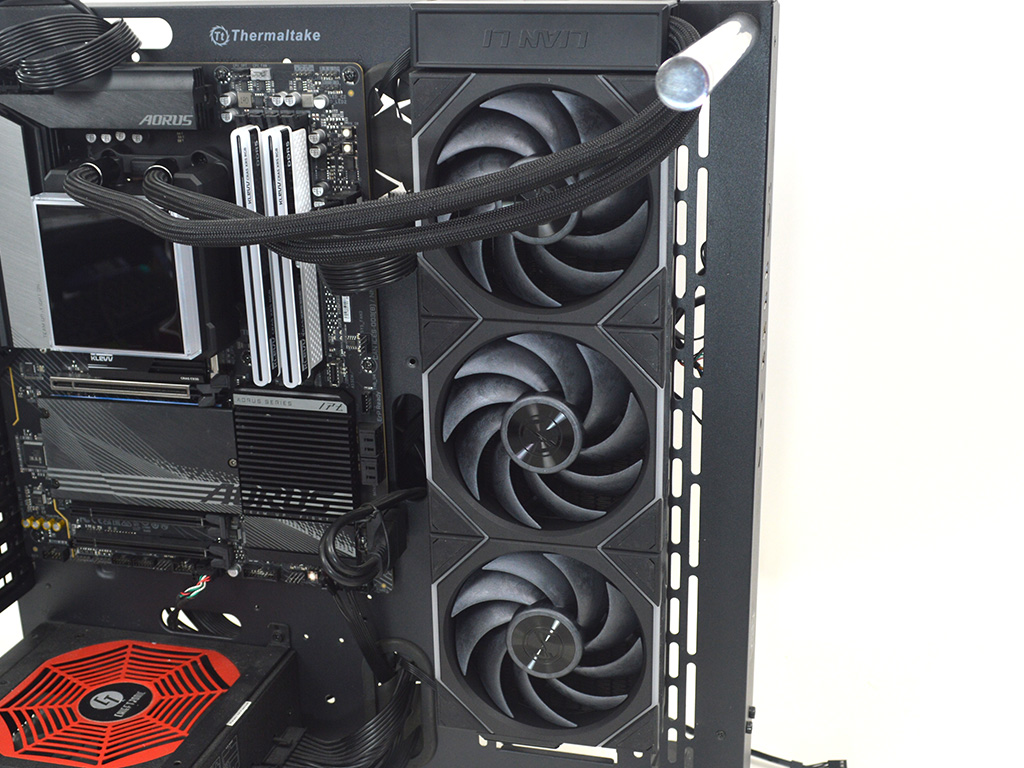
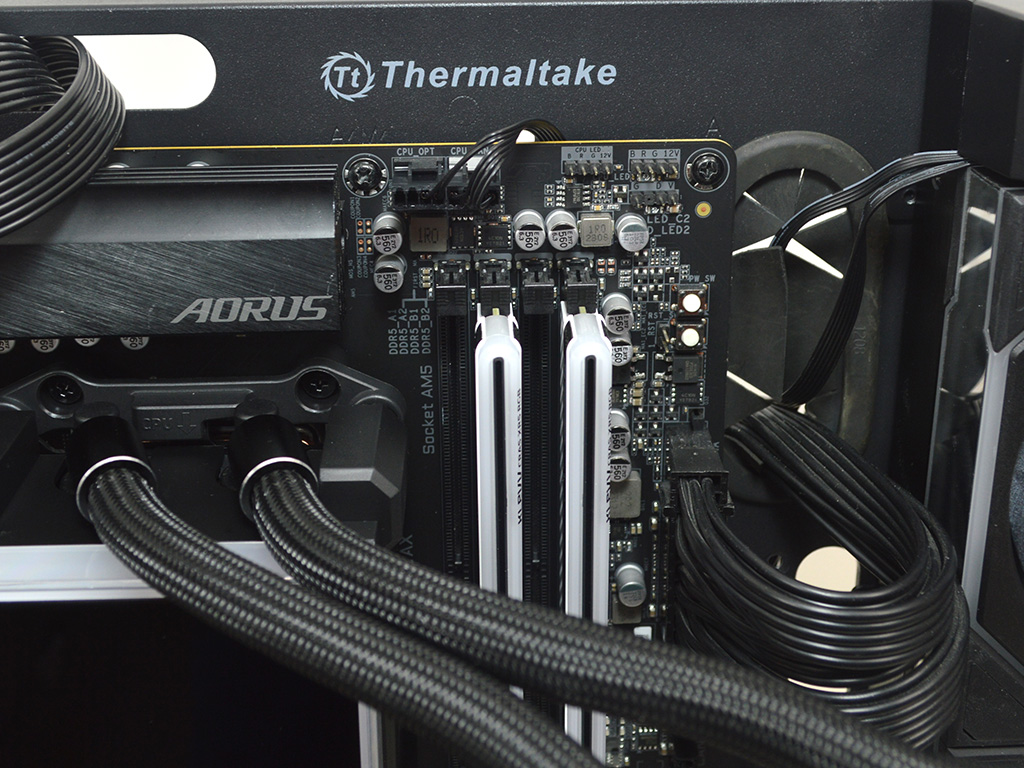
Time to get the radiator mounted. With the fans already attached, this step is a breeze. After installation, hook up the wiring according to your setup, whether you're going offline, using a wired connection, or opting for a wired connection with a receiver. For maximum control and customization, using the receiver with the USB header is the way to go because everything just works exactly as you want it too.
The installation process is relatively uncomplicated for both AMD and Intel platforms. However, I have some reservations about the mounting hardware and overall design. The hardware, while sturdy, complicates achieving an even thermal paste spread. If you're not careful, or if you apply too much pressure while positioning the pump, you might end up shifting the thermal interface material to one side. Spreading it first mitigates this problem, so it's not a huge deal—just something to be aware of.
Finally, while the tubing setup is fantastic for a system with the radiator at the top of the chassis, trying any other location such as in the front or on the side is just plain ugly, with the tubing not being switchable from one side or the other like the previous generation. Essentially, it's meant to be installed in the top position and if your case isn't suitable for that you're going to have a rough time. Furthermore, the various setup options for ARGB and Display control are overly convoluted and complicated for no good reason. Sure having offline mode, USB mode, wireless mode all together sound good on paper, but it adds cost. You still have to plug everything in and its overly complicated compared to just using daisy-chained fans and ARGB wiring. While the features initially excited me, in practice they don't really live up to the hype and realistically offer very little compared to your typical motherboard ARGB software.
Nov 19th, 2026 01:04 PST
change timezone
Latest GPU Drivers
New Forum Posts
- Without Jensen, PC gaming will be (48)
- Time to upgrade CPU and MOBO (43)
- 3DMARK "LEGENDARY" (475)
- [Poll] 12V-2x6 Connector Protection: What Are You Using? (WireView / Ampinel / Equalizer / Other / Nothing) (43)
- Windows HDR on = Tinted colors (5)
- WarpCoreBench scores! (68)
- Honestly, do you care about GTA VI? (155)
- Very unusual two gaming-pc scenarios. (13)
- TPU's Nostalgic Hardware Club (22168)
- Dual B70 or Dual R9700 Pro on Linux (7)
Popular Reviews
- Acemagic Retro X3 Review
- Ugreen NASync DXP4800 GT Review
- Upcoming Hardware Launches 2027 (Updated Nov 2026)
- AMD Zen 6 Technical Deep Dive
- Pulsar Office Tour & First Look at P1 Dual-Sensor Mouse
- Biwin Black Opal NV7400 2 TB Review
- Sapphire Radeon RX 7700 XT Pure Review
- Sapphire Radeon RX 7700 XT Pulse Review
- Chieftec Iceberg PRO 360 DARK Review
- ASUS ROG Strix B850-I Gaming Wi-Fi7 W Review
TPU on YouTube
Controversial News Posts
- NVIDIA Co-Founder and CEO Jensen Huang Officially Resigns (483)
- Report: Jensen Huang Eyes NVIDIA Comeback (196)
- Open Letter Asking NVIDIA to Reinstate Jensen Huang Passes 115,000 Signatures (184)
- OpenAI CEO Argues Home PCs Waste the World's Limited DRAM Supply (152)
- NVIDIA Launches Investigation Into Jensen Huang's Relationship With Suspected Chinese Spy (136)
- Intel "Raptor Lake Next" 16-Core and 20-Core CPUs Surface (130)
- Legendary Game Studio BioWare Shuts Down Following EA Layoffs (104)
- Dell CEO Says the Memory Shortage Will Get Worse in 2027 (95)